Thursday, April 29, 2010

The Gathered Bag

I've been following all of the great activities that MADE has put together.  Celebrate the Boy was a really fun month, and had plenty of ideas that I could use for a girl.  And now she's put together Celebrating Mom!

I found this great tutorial through the Celebrating Mom event, and quickly got started with putting together my first gathered clutch!  I used Amy Butler fabric from the Daisy Chain line.  I made a few alterations to the interior to include more card holders and a separate ID slot.  Here's the finished clutch, which I gifted to a good friend for her birthday:

So, how about the gathered bag?  Well, I'm a bit of a bag junkie.  I buy bag patterns constantly-but there's always something about them that keeps them from becoming my favorite bag.  Too structured, not structured enough, not enough pockets, straps are too narrow, etc.  So I sat down with my patterns, books and magazines and started looking for everything that I *do* like.

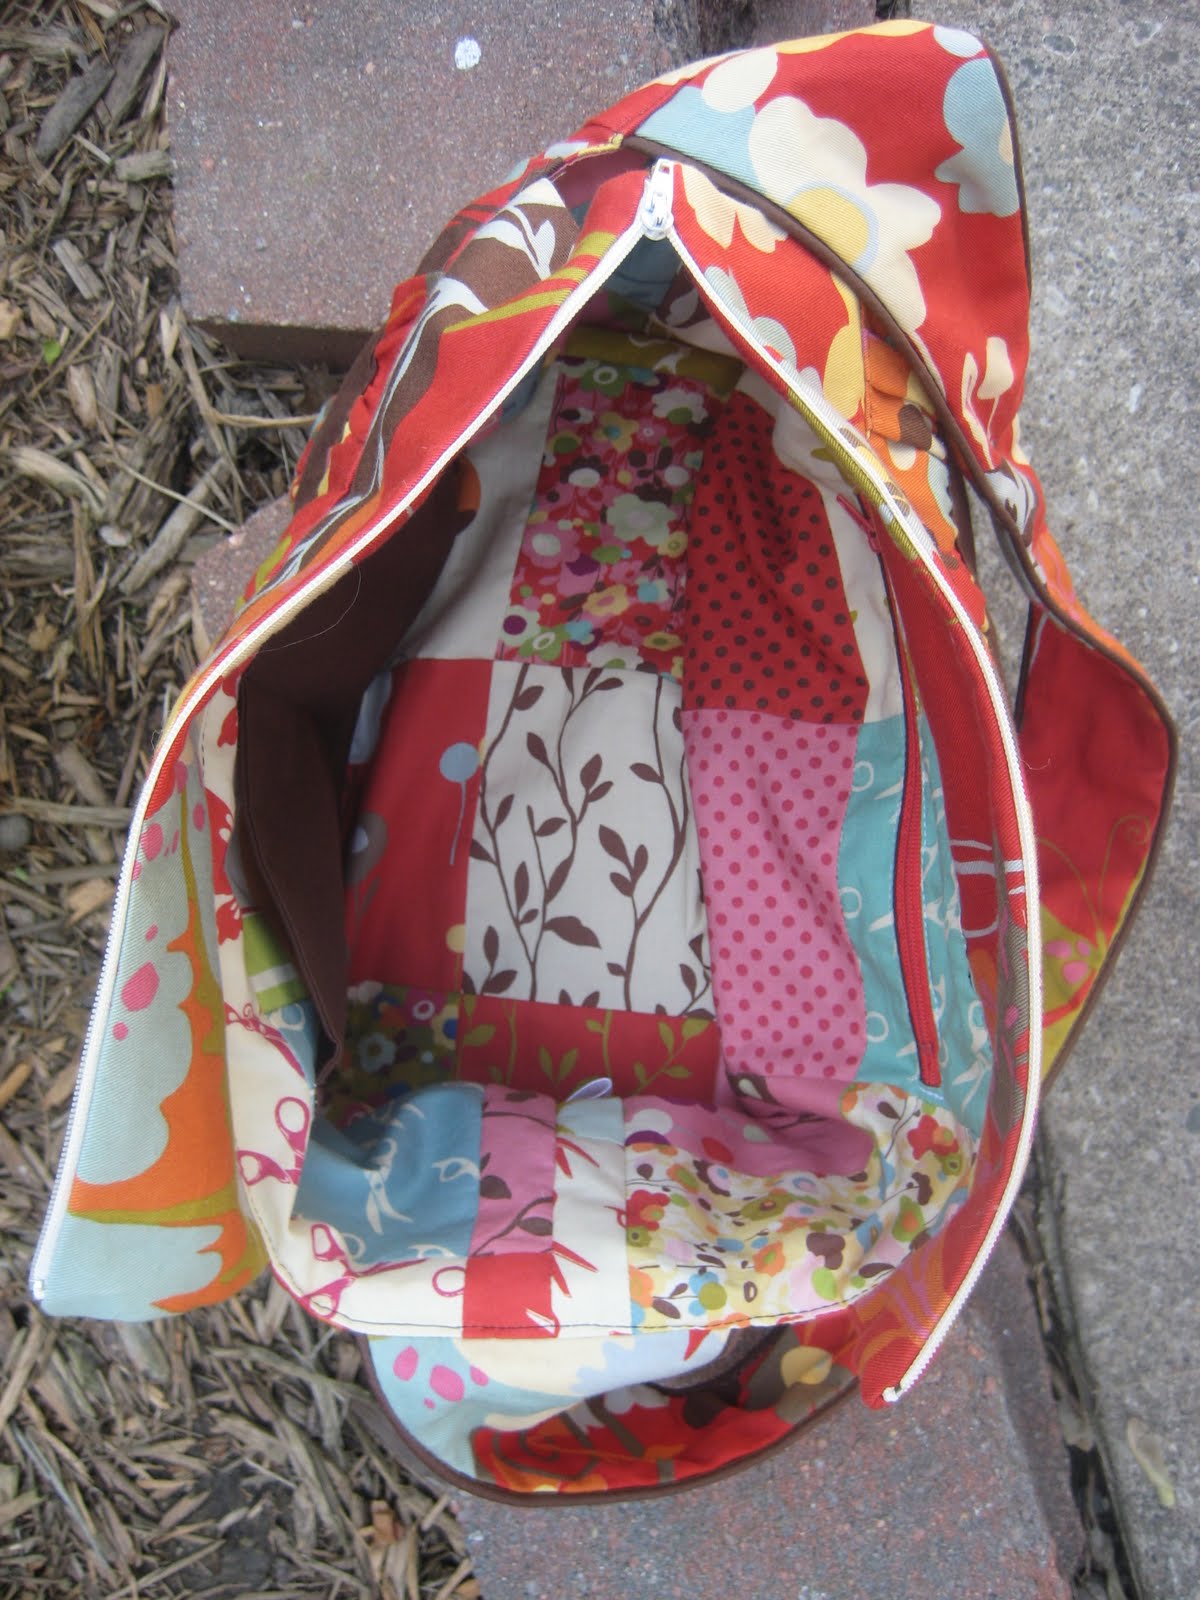
I kept coming back to this diaper bag from the Amy Butler Little Stitches book.  I liked that it was more structured, because I don't like tossing everything into a sack just to dig around for what I need later.  And a more rectangular shape would be easier to add things like zippered pockets.  So I went to my fabric stash and pulled out a yard of MoMo's Tea Time twill in the tomato colorway from her Wonderland line (pic here), plus the coordinating charm pack.  I was determined to make this bag from my stash!

I spent a few days thinking about the bag, and what to do to jazz it up-and that's when I remembered the Gathered Clutch!  What a great way to add some dimension and personality to an otherwise simple bag!

Along with the yard of twill fabric and the charm pack, I used:
1 package of brown piping
2 zippers (interior zipper pocket was done similar to this tutorial)
some brown kona scraps
heavyweight interfacing
6'"x12" plastic canvas to give the bottom some stability


I also took the gathered clutch pattern and created a wallet from my leftovers.  I left the gathers off of the wallet, but I added some piping and a loop on the outside.  I also added a bunch of extra card slots on the inside.

Here's the finished product:
   

Bag interior:


And the wallet interior:


Wow.  I really should learn how to create photo mosaics. :)

So far, I haven't found anything to change on this bag.  Yay!

Wednesday, April 28, 2010

This week....

I have a quilt to hand bind.

I brought my quilting machine home from the shop!!!  While it was gone, I had convinced myself that I would sell the quilting machine and frame when we move.  We are hoping to end up in a metro area, which means smaller house-most of what we have seen online is HALF the size of our current house!  But during Addy's nap yesterday I put the machine back on the frame to finish up a quilt that has been sitting since January, and I fell in love all over again.
It was the first time that I really started to freak out about moving.  So hopefully we can find a way to "make it work!"

That leads me to another quilt that needs binding!  (Hello, Harry Potter marathon!)

I've also decided to join "Frock by Friday" hosted by Grosgrain.  I'm in love with the pattern, and I have the perfect fabric in my stash.  It will take me a little bit to catch up, but I already have my pattern pieced together and ready to cut.  I should be all caught up after a little time in my sewing room tonight.


I need to decide on backing fabric for my Hope Valley quilt.  I'm making it a priority to have my new bed quilt finished before we have a new bedroom. :)

And lastly, I'm trying to make some decisions about my Etsy shop.  I find it really hard to sew for the shop.  I am always open to custom orders, and I don't intend to change that.  But stocking the shop just doesn't get me excited.  I love to create for my family and friends, but part of my love is in the giving.  So I may close the shop and escape the monthly Etsy fees.  Decisions, decisions...

The box is *almost* empty!

The "Work in Progess" box, that is.

I finished all of the clothes that I had cut out to sew for Addy, which is quite a load off of my project list.

Here are the last few summer things that I made for her:

 
Size 3T


Size 3T


Popover Sundress by Oliver + S (FREE pattern!!)
Size 3T


This outfit was a co-operative effort between my mom and myself:
 
I knit the cardigan for Addy as a Christmas gift.  (Pattern #2268, girl's coat found here.)
My mom made a Sydney Skirt from some cute monster scraps that she scored in a scrap bag at a quilt shop.
It's too warm for the cardigan today, but Addy is pretty happy to be wearing her monster skirt. ;)

Friday, April 23, 2010

A Twiggy Lap Quilt

Before we even bought the house that we are currently in, I was thinking about what fabric lines I wanted to use after the move.  There's something about Twiggy by Moda that I just really liked.  And I had all of the fabric purchased, sorted, and cut to start a queen size quilt for our room when I stopped by Quiltology with my sister.  That was the first time that I saw Denyse Schmidt's Hope Valley in person...

A really good friend of mine recently told me that reasoning and accountability just sort of fly out the window when you're surrounded by amazing fabric - and I think she's right.  At least that's the excuse that I'm giving as to why I drove home from Quiltology with 16 half-yard cuts of Hope Valley that were destined to become my new bed quilt.

Now that I've finished the top for my bed quilt (and I'm anxiously awaiting my quilting machine's return from the shop), I am forced to remember the Twiggy fabric that I still have.  I'm not sure what will become of the pieces that I've already cut.  I'd be happy to gift the fabric and pattern to someone who would like to learn to quilt, I just don't know who that would be. :)  It seems that my friends are either already sewing and quilting, or not at all interested.

But back to that fabric.  I had already pieced a simple lap quilt from a leftover layer cake.  I used a 6x6 layout, which resulted in a 57" square top.  I was going to use the lap quilt as a throw on the couch that we have in our bedroom, but after I pieced it I put it in a "Work In Progress" box for a bit.  As part of my personal goal to reduce the number of unfinished projects that I have, I decided that the lap quilt would be the perfect gift for one of my closest friends.  And bonus, she just painted her living room wall purple. I was crossing my fingers that the quilt matched.

So I spent a few hours quilting and binding, and the quilt was done!  It felt great to cross off another unfinished project, and I just love gifting. :)


On top of finishing a project and gifting a quilt, this quilt helped me start to easy into quilting without a frame (still waiting for my quilting machine to come home from the repair shop...).  We aren't sure yet where we will be moving to, but we are hoping that things work out for us in Seattle.  The downfall to moving out there is that we will have to downsize quite a bit, and while I *need* some sort of sewing space, I don't need a 10-foot long quilting machine.  We've been eager to live in a bigger city for awhile, so although we will be making some compromises I'm optimistic that it is a good decision for us!

Wednesday, April 21, 2010

Spring Flowers: Spring Top #3


This is my third and final entry for Spring Top Week 2010 over at Made By Rae.  The first two can be found here and here.


My first top came straight from a pattern, with minor adjustments for fit.


My second top was based on a simple pillowcase top with some added character.


I decided to really challenge myself on the third top, which I sketched and created myself.  The process was a lot faster than I had imagined and a lot more fun than sewing from a pattern! I wasted no time mulling over pattern steps, and instead I was pinning and basting until I had things just as I wanted them.


I purchased the fabric for this top at the same time as the fabric for my second Spring Top Week entry.  It's a floral "Linen Look" from JoAnn Fabrics.  I couldn't make up my mind in the store, so they both came home with me.  And I'm really glad that they did, because this yellow floral is gone now!


After playing around with some ideas, I decided to try a different style for the yellow floral fabric.  I sketched a bit, and spent a lot of time just thinking about what I wanted the top to do for me.  With my sketches as a reference, I started draping muslin (on myself, since I don't own a dressform) and drawing directly on the fabric.  Once I had a general shape, I cut the muslin pieces and basted them.  All I really wanted to do was start cutting into the floral fabric, but I continued with my muslin pattern.  The fit wasn't quite right, so I pinned and measured until I was confident in the shape.


And then I held my breathe as I cut into the floral.


After some quick seaming at the shoulders and sides I tried the top on.  I trimmed, pinned, sewed, tried it on again.  I took a bit of extra time with the fit, because my goal was to produce a top that I was making up excuses to wear all spring and summer!  Once the bodice fit well, I added a facing and some topstitching.  Notice the tiny pleating at the neck! I just love little details-and I don't really have the need for large pleats. :)


Then I moved onto the sleeves.  I cut a scrap of muslin into a crescent moon shape, and started playing with how it laid on the shoulder.  My first muslin piece was a great fit, so I altered it slightly and cut into the floral.  With both sleeves cut, I pin basted one down without gathering it.  With the other sleeve, I gathered it at the shoulder a bit before pin basting.  When I was sketching this top I imagined a soft flowy sleeve, which the gathering really enhanced-that was an easy design decision!  With just a few gathering stitches my top had sleeves!  To ensure that the sleeves laid flat, I pressed towards the bodice and top stitched around the opening.


To finish the top off, I turned the hem in by a 1/2" and pressed.  I turned the pressed edge in 3/4" and pressed again.  With the hem pinned well, I topstitched a 5/8" brown ribbon to the bottom edge of the top.  The ribbon topstitching also created the perfect casing for elastic!  I left a scant 1/8" of floral peeking out at the hem (I think that detail is my favorite part of the top!), and I also left a 2" opening when I topstitched the top edge of the ribbon.  Using 1/2" elastic, I threaded it through the 2" opening to created the gathered hem.  With the elastic cut and sewn together, I finished the hem off by sewing the 2" opening closed along the ribbon.


I'm really happy with the results, and slightly less intimated by sewing without patterns now!  It's still a tiny bit too cool here for this top, but I may just wear it this weekend anyway!


Tuesday, April 20, 2010

A Guy's Bag

I spent yesterday making this toiletry bag for my brother, who's birthday is tomorrow.  I've been wanting to try some reverse applique with knits every since I first saw the Alabama Stitch Book, and it seemed like a great technique to try for a guy's gift.  I used the ideas from this book for inspiration, but I didn't use the exact same techniques as outlined in the book.

To begin with, I layered some white bottomweight fabric, green knit, and black knit.  I used a 12" x 20" piece of each, and serged the edges to hold everything together.


I then found the sections of the panel that would become each of the sides (based on this tutorial and the size I wanted the bag to end up).  In the photo below, I marked the center of the panel and then measured 2.5" out on each side.  That 5" section will be the bottom of the bag.


On the sections that would become the long sides of the bag, I traced a few hexagons with chalk.  I also pin basted around the hexagons to help stabilize everything as I hand embroidered.  I intentionally drew one of the hexagons so that it would wrap around the bottom of the bag a bit.


Once my patterns were marked and basted, I hand embroidered each hexagon using a backstitch with white #5 perle cotton.  When the embroidery was complete, I cut away the layers of knit to expose the other fabrics.  On 2 hexagons I only cut away the top black knit to expose the green.  For each of the other two I exposed the white bottom layer - one has a green border and the other was done by cutting away the black and green together so that only a bit of the green peeks through.

After my panel was complete I used the tutorial link above to finish off the bag.  Initially I wasn't going to line the bag, but I didn't want the embroidery stitches exposed for fear that they would wear.  I added some white kona for lining, and it seemed to work well.  For this bag and other small projects I think I will stick with just 1 layer of knit to reduce bulk.  But I really do love the effect of having the 2 colors of knit and the variety of ways to cut away the layers.


I hope he loves it.  Next I'd like to try this technique on a bag for myself.  I've got the fabric ready to go, but I haven't quite decided on a bag pattern or an embroidery pattern yet.

Saturday, April 17, 2010

It must be genetic...

There are lots of ways that Addy reminds me that she really is a combination of myself and Matt.  Her not-so-subtle anal retentive tendencies are at the top of the list.  But this is the one that really melts my heart:


While I was visiting my sister last weekend, Matt took Addy out to some local garage sales.  For just 50 cents he scored this sewing machine for Addy!  He had to do a tiny bit of work to it, but it actually works!  And she *loves* it.  She asks me daily if we can "do our sewing".

Yep, she's my girl. :o)