Monday, August 3, 2015

Star Tablerunner and Cloth Napkin Tutorial!

This tutorial was originally posted on the Benartex blog last week.

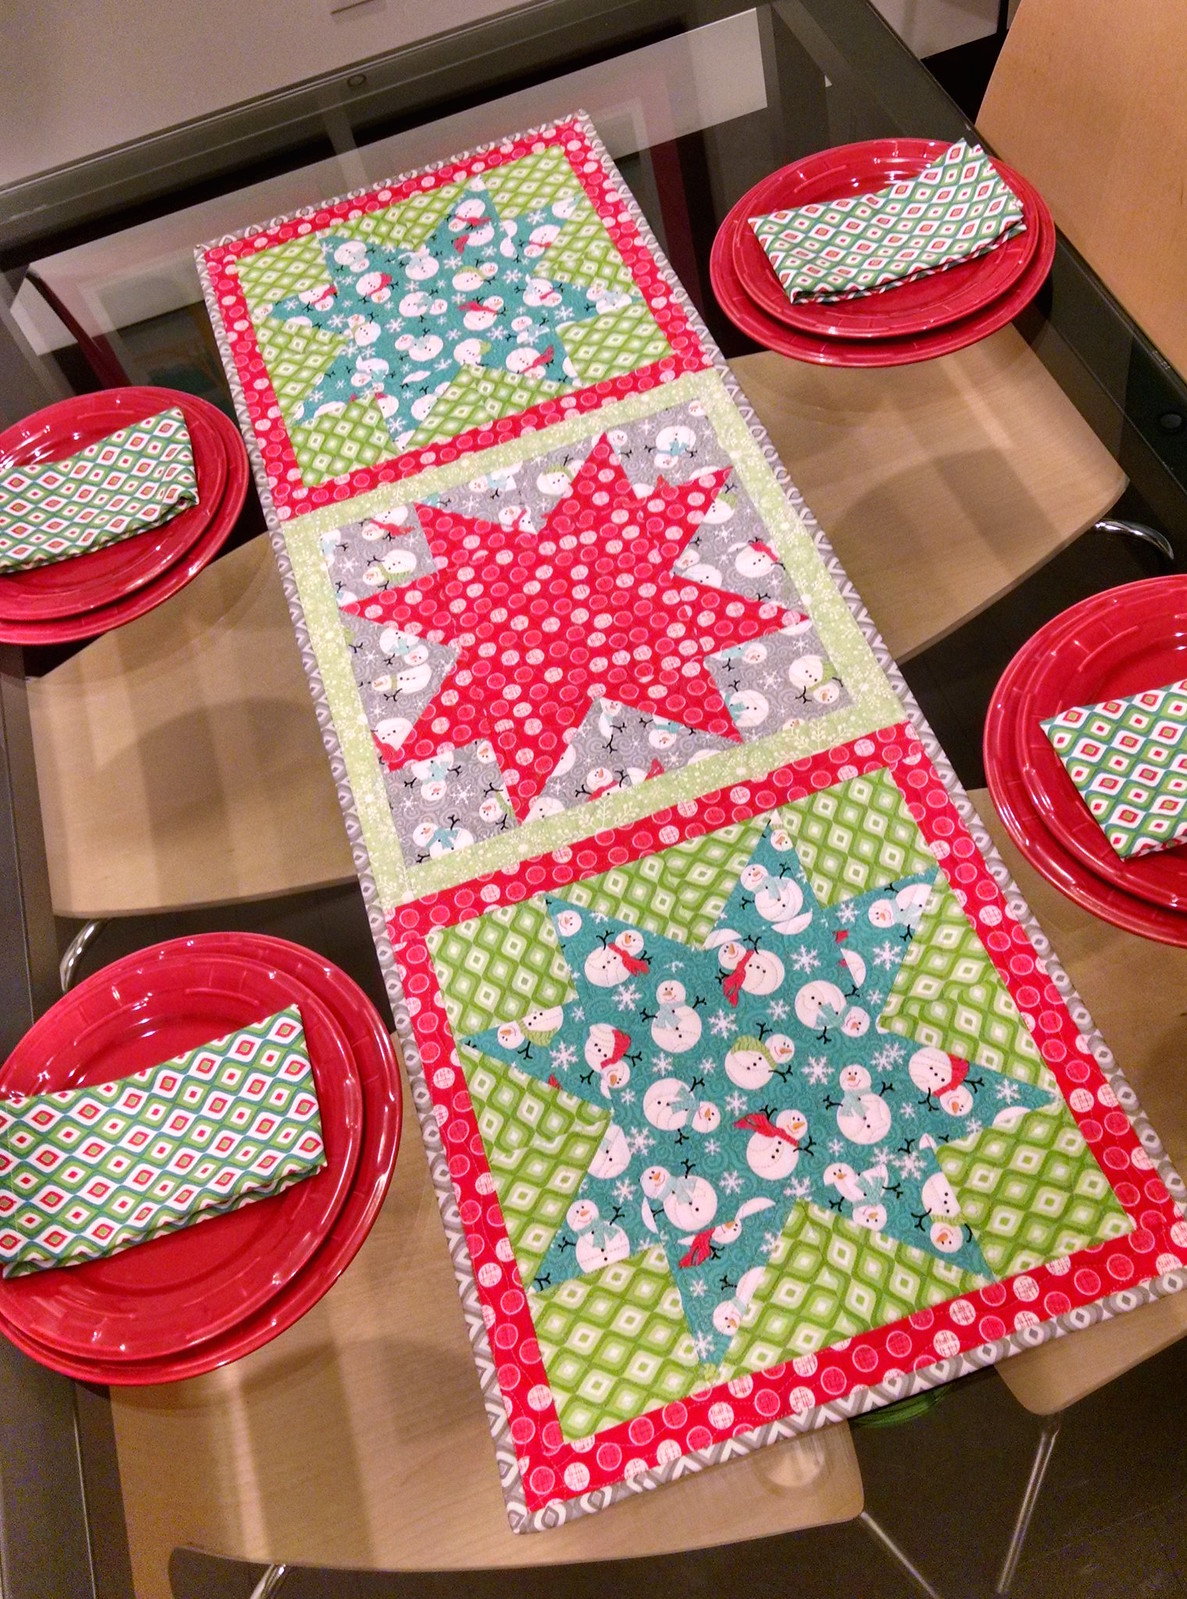
Today I'm going to share a tutorial for a cloth napkin and tablerunner set using the adorable Frosty Forest fabric line by Cherry Guidry.

Christmas In July Tutorial for Benartex

Let's get started!

Here are the prints that I used for this project:

1 yard of Jubilee Geo Multi
1 yard Jubilee Geo Grey
1/8 yard Frosty Snowflake Green
1/2 yard Dot Jubilee Red
1/4 yard Jubilee Geo Green
1/4 yard Snowman Swirl Grey
1/4 yard Snowman Swirl Turquoise

You will also need 18" x 50" of batting if you choose to quilt your table runner.

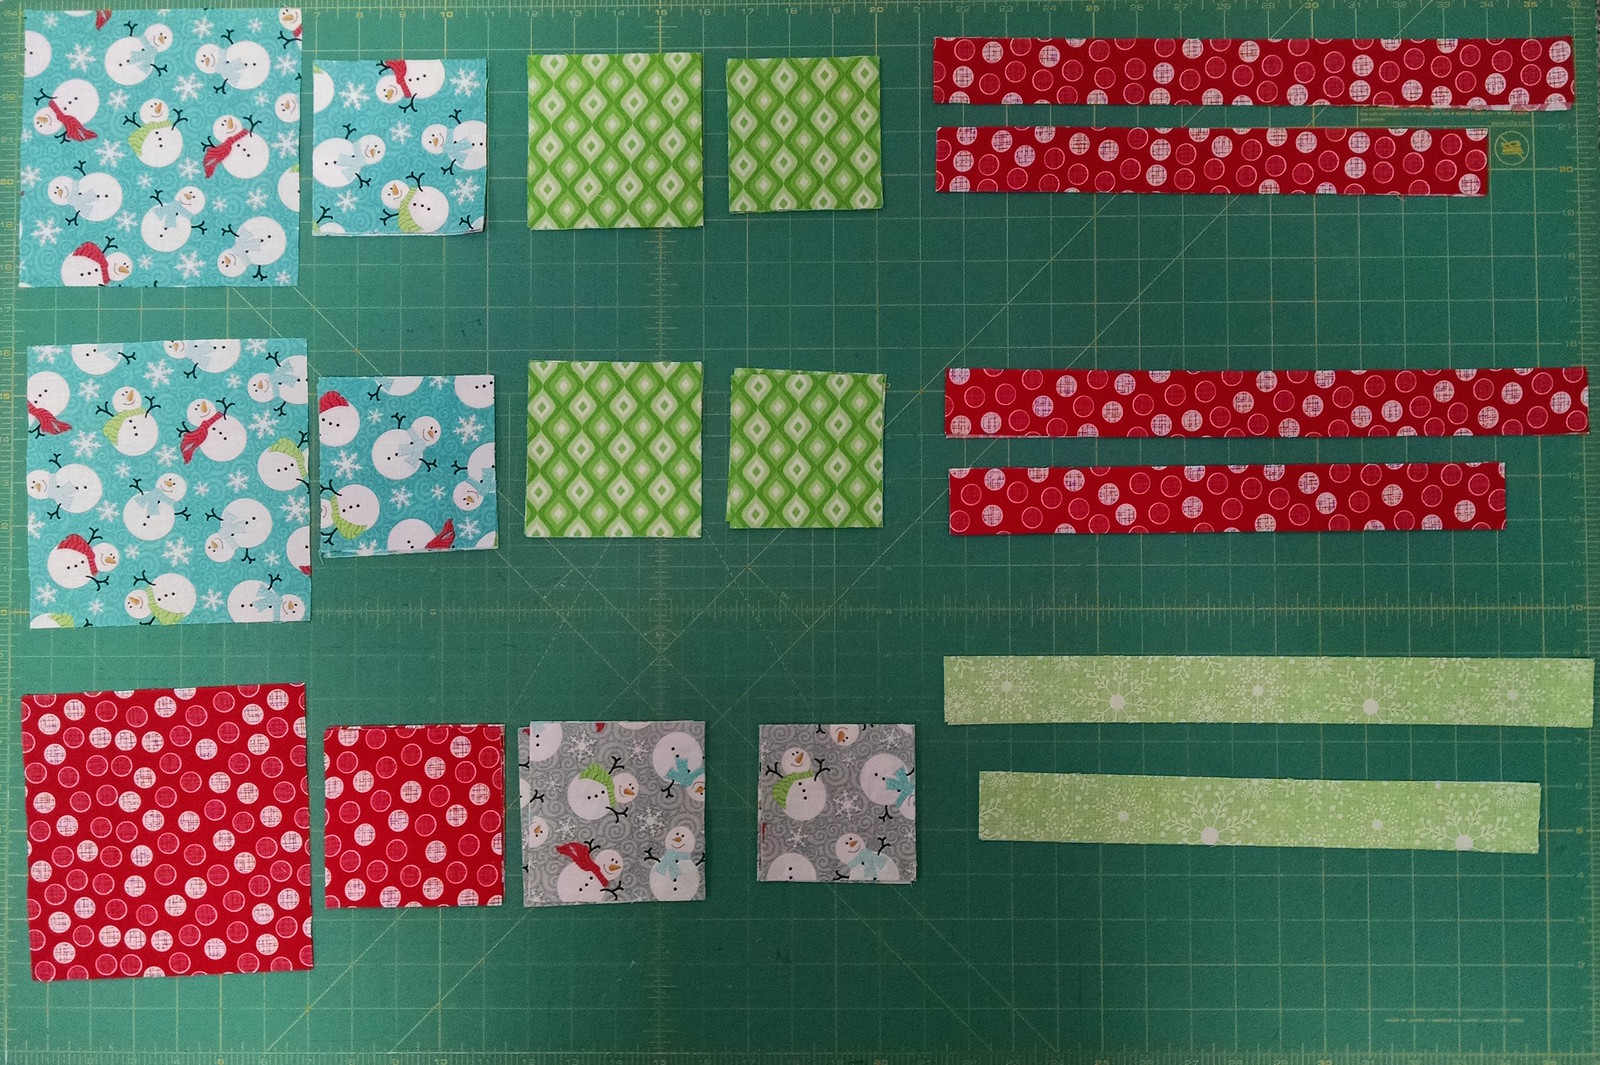
Cut the following pieces from your fabrics:
From Jubilee Geo Multi:
4 squares at 17" x 17"

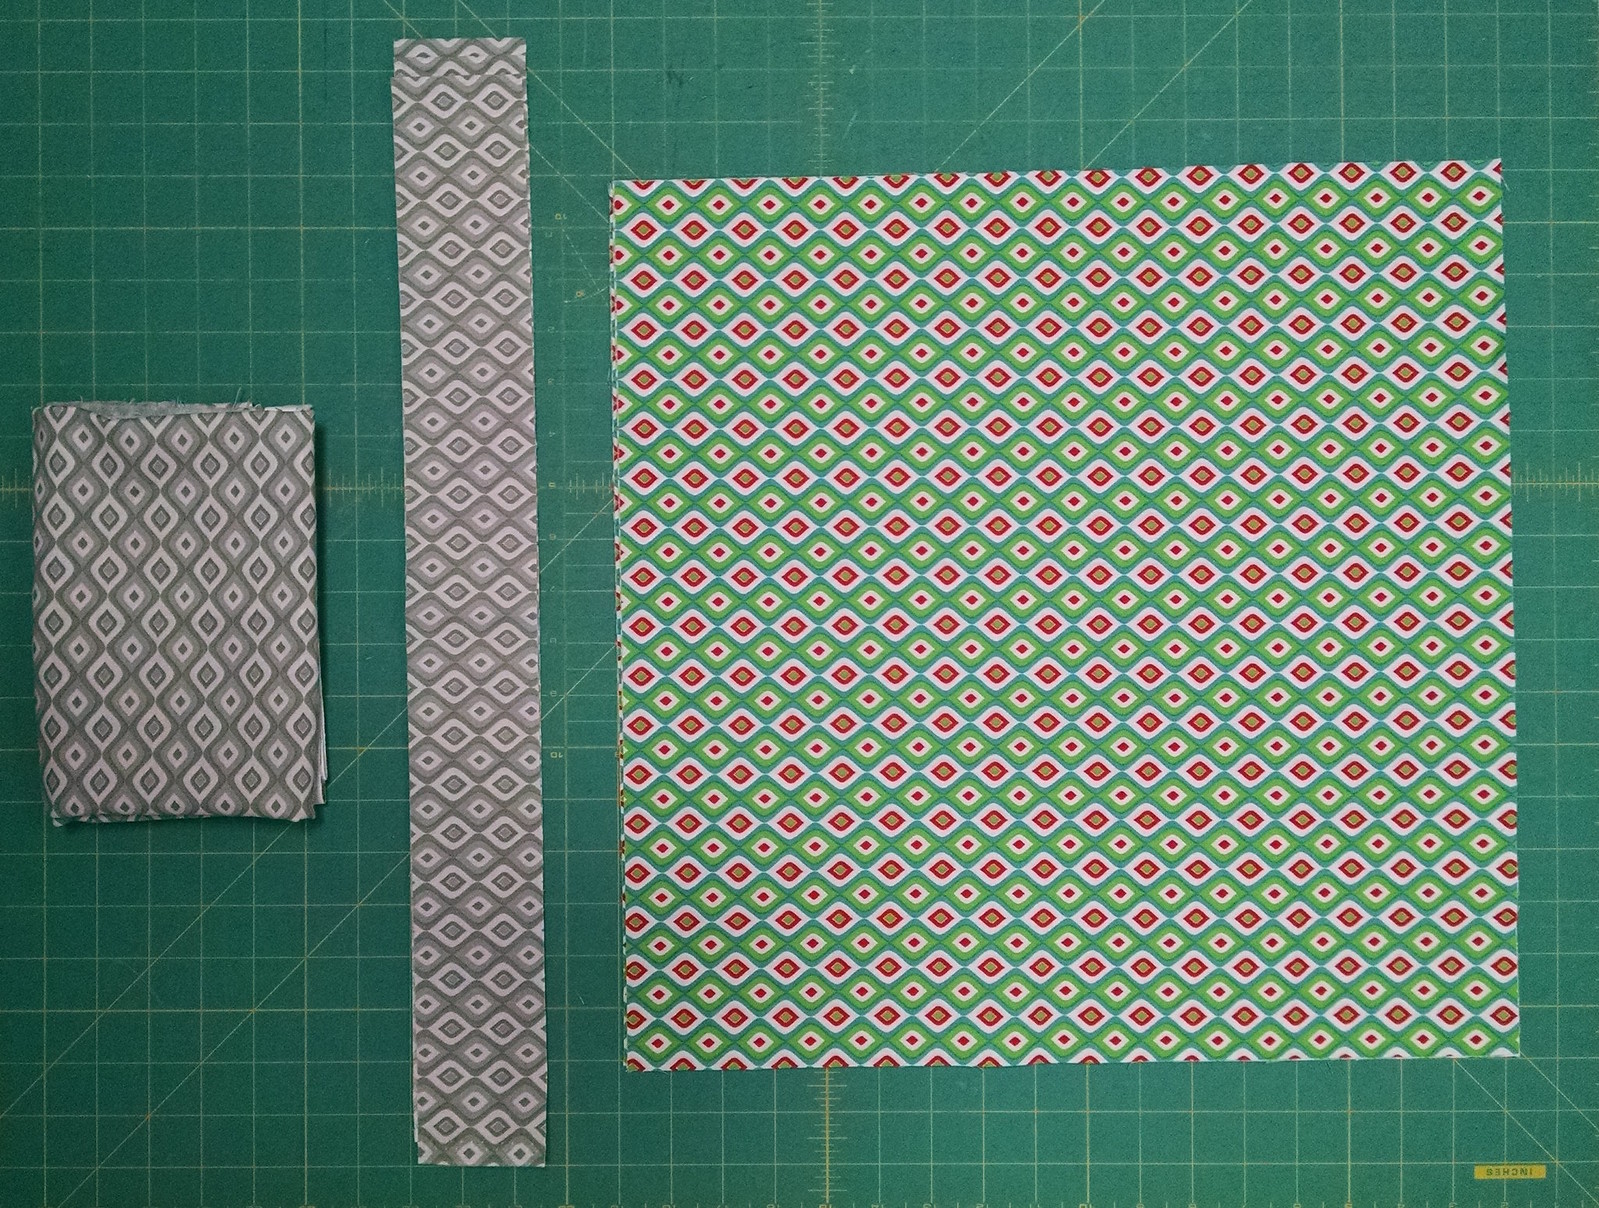
From Jubilee Geo Grey:
cut 3 binding strips at 2 1/2" x WOF
(Save remaining fabric for backing)

From Frosty Snowflake Green:
2 strips at 1 1/2" x 12 1/2"
2 strips at 1 1/2" x 14 1/2"

From Dot Jubilee Red:
4 strips at 1 1/2" x 12 1/2"
4 strips at 1 1/2" x 14 1/2"
1 square at 6 1/2" x 6 1/2"
4 squares at 4" x 4"

From Jubilee Geo Green:
8 squares at 3 1/2" x 3 1/2"
8 squares at 4" x 4"

From Snowman Swirl Grey:
4 squares at 3 1/2" x 3 1/2"
4 squares at 4" x 4"

From Snowman Swirl Turquoise:
2 squares at 6 1/2" x 6 1/2"
8 squares at 4" x 4"

Here are the different size pieces for the table runner:

Christmas In July Tutorial for Benartex

The backing fabric (folded on left), binding strips and napkin fabric:

Christmas In July Tutorial for Benartex

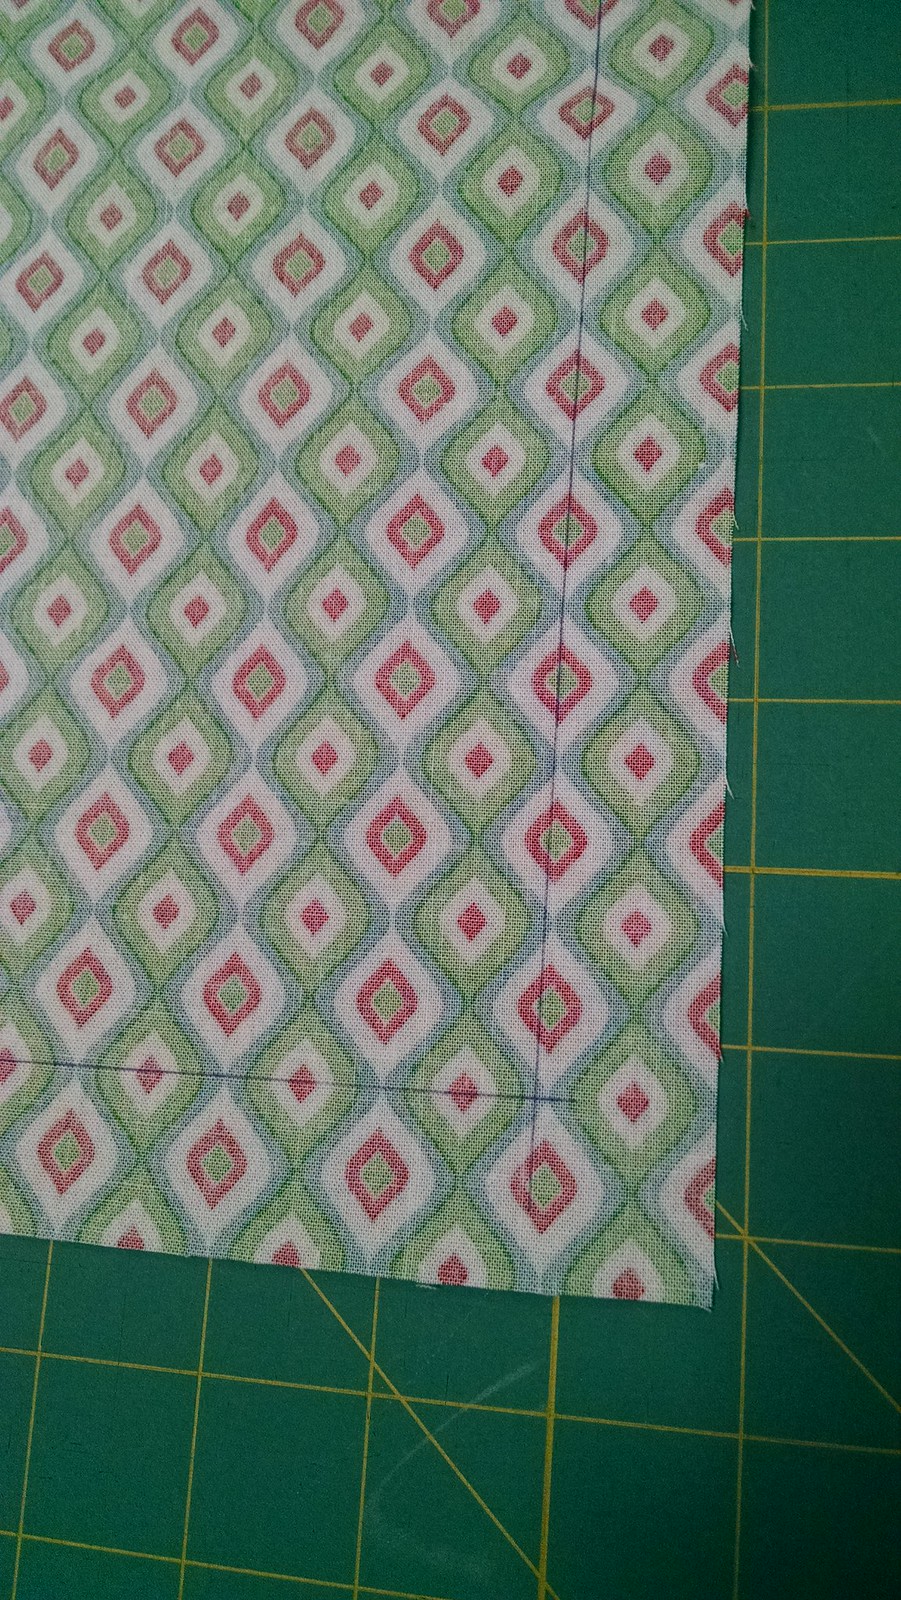
To finish the edges of the napkins, draw a line 1" from each edge of the napkin square on the wrong side of the fabric. Use a pencil or a pen that does not disappear or set with heat:

Christmas In July Tutorial for Benartex

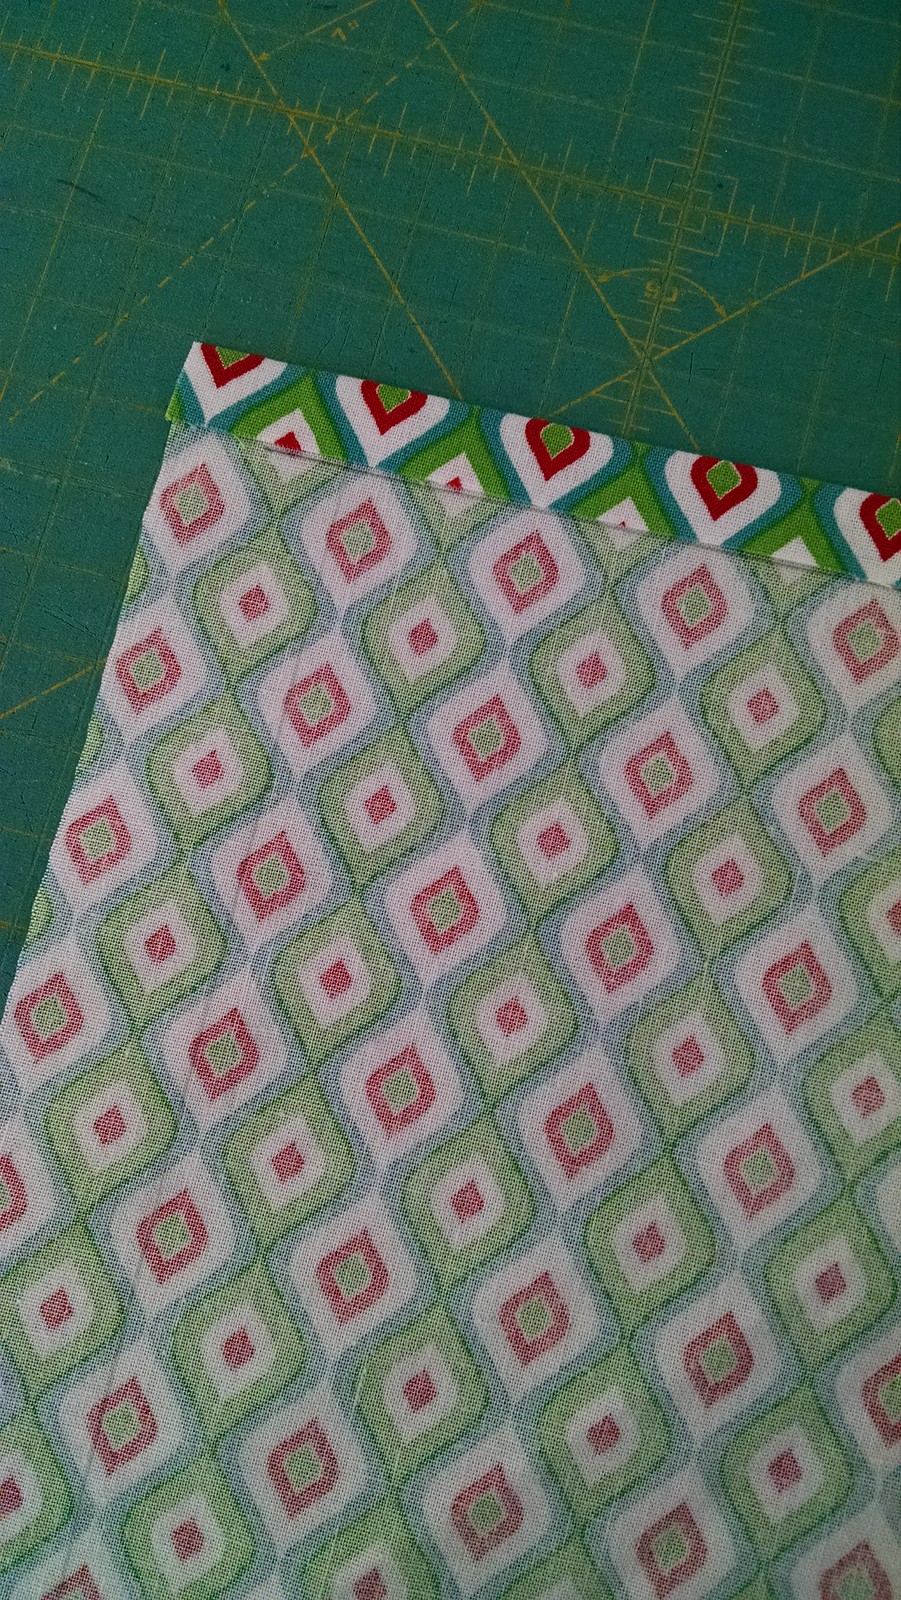
Next, fold each edge in to the drawn line. This should create a 1/2" fold (first edge is shown folded below, repeat with all 4 edges):

Christmas In July Tutorial for Benartex

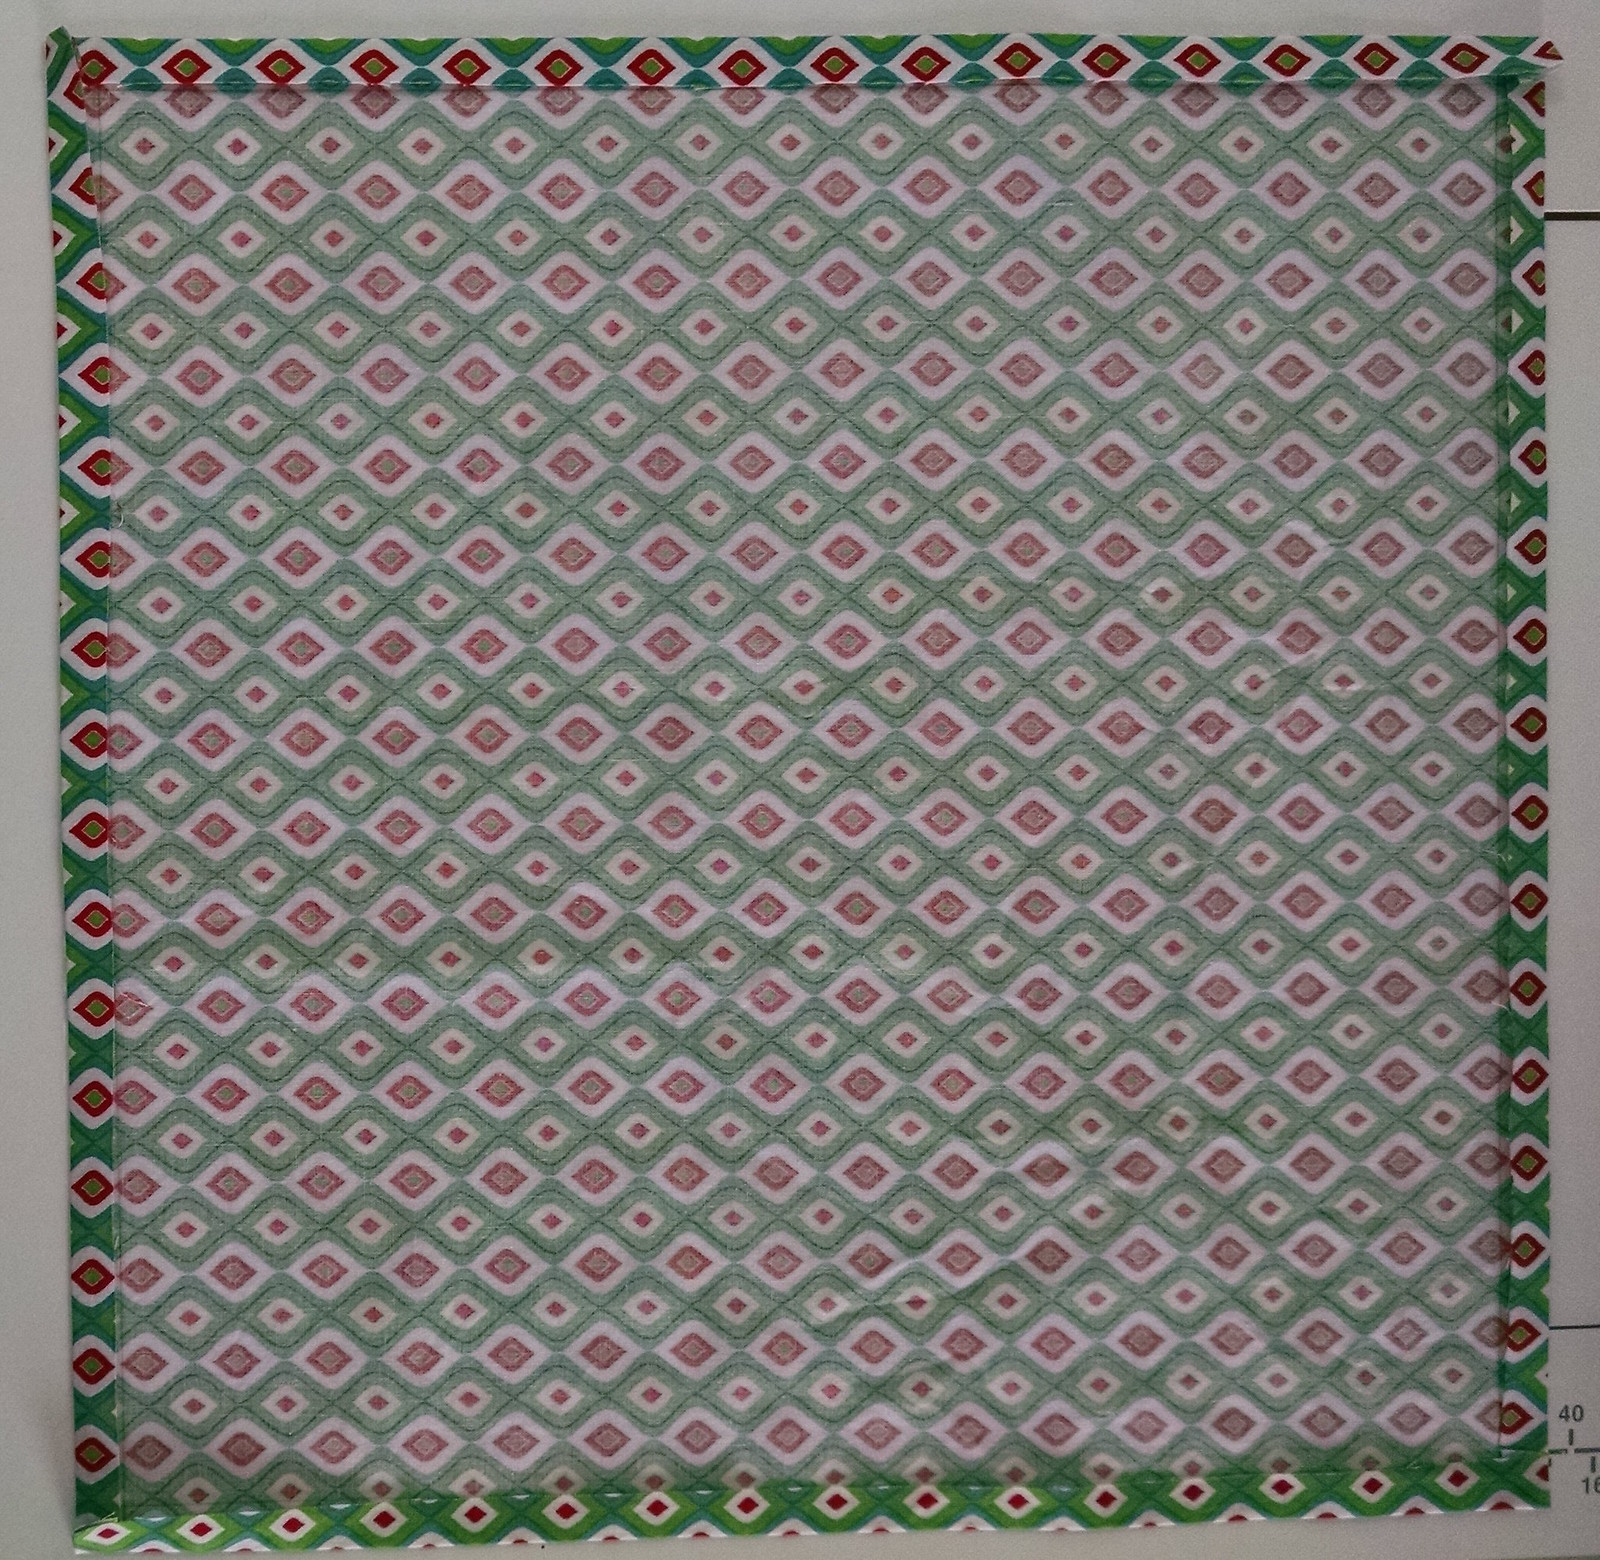
Once all 4 edges are folded into the lines, fold in again by 1/2" on all 4 edges:

Christmas In July Tutorial for Benartex

I like to pin the corners in place:

Christmas In July Tutorial for Benartex

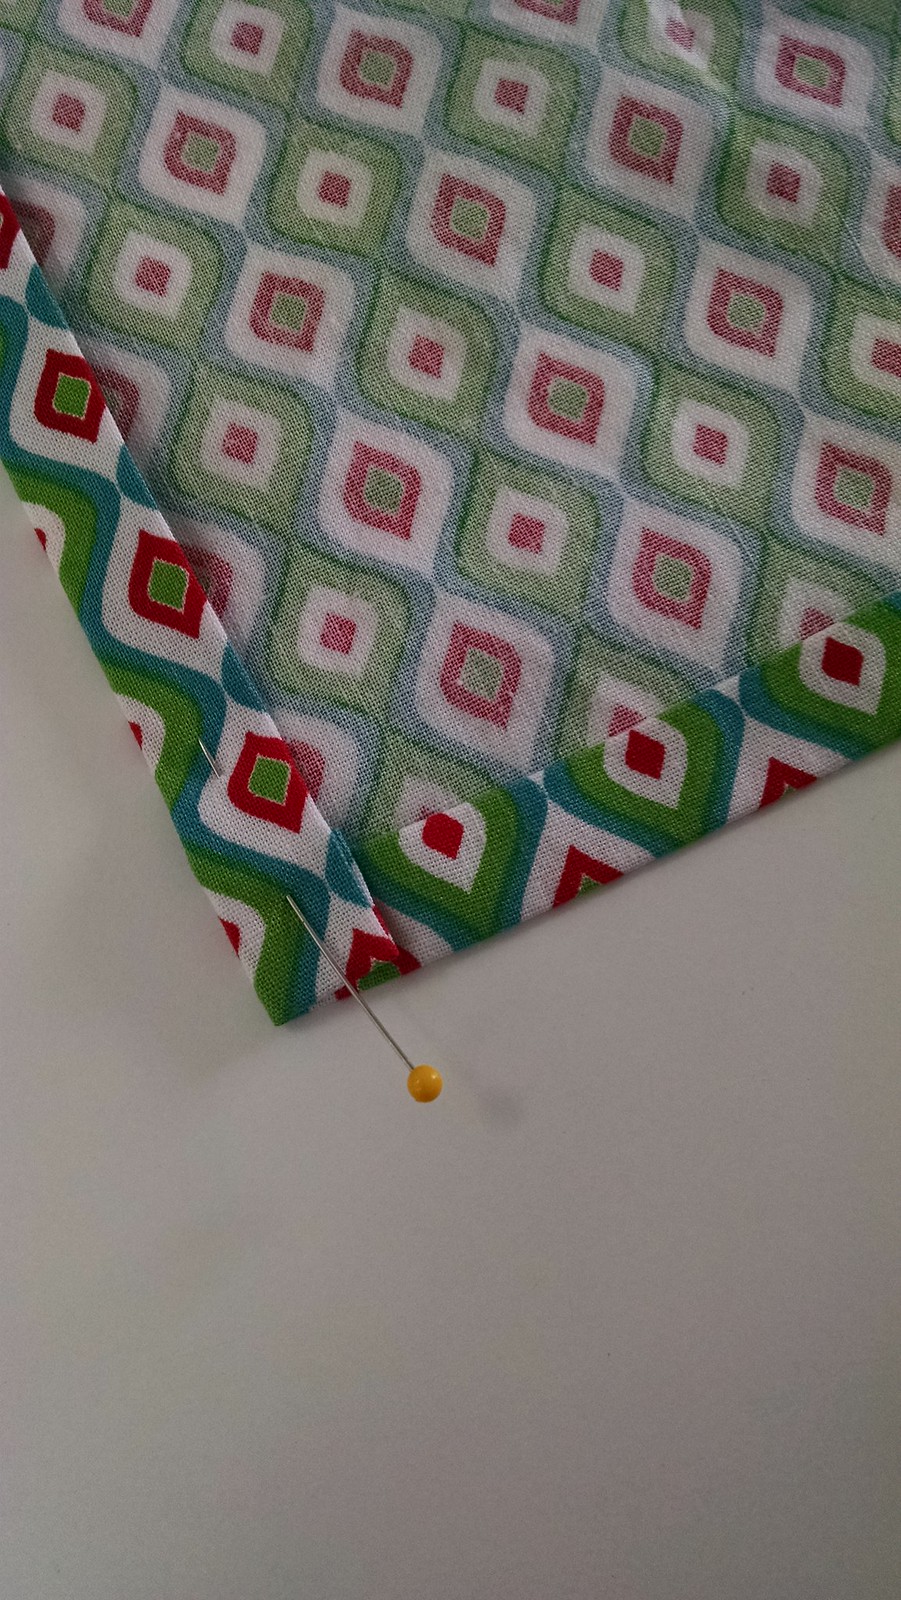
Now stitch down all of the folded edges, being sure to catch the corners in the stitching:

Christmas In July Tutorial for Benartex

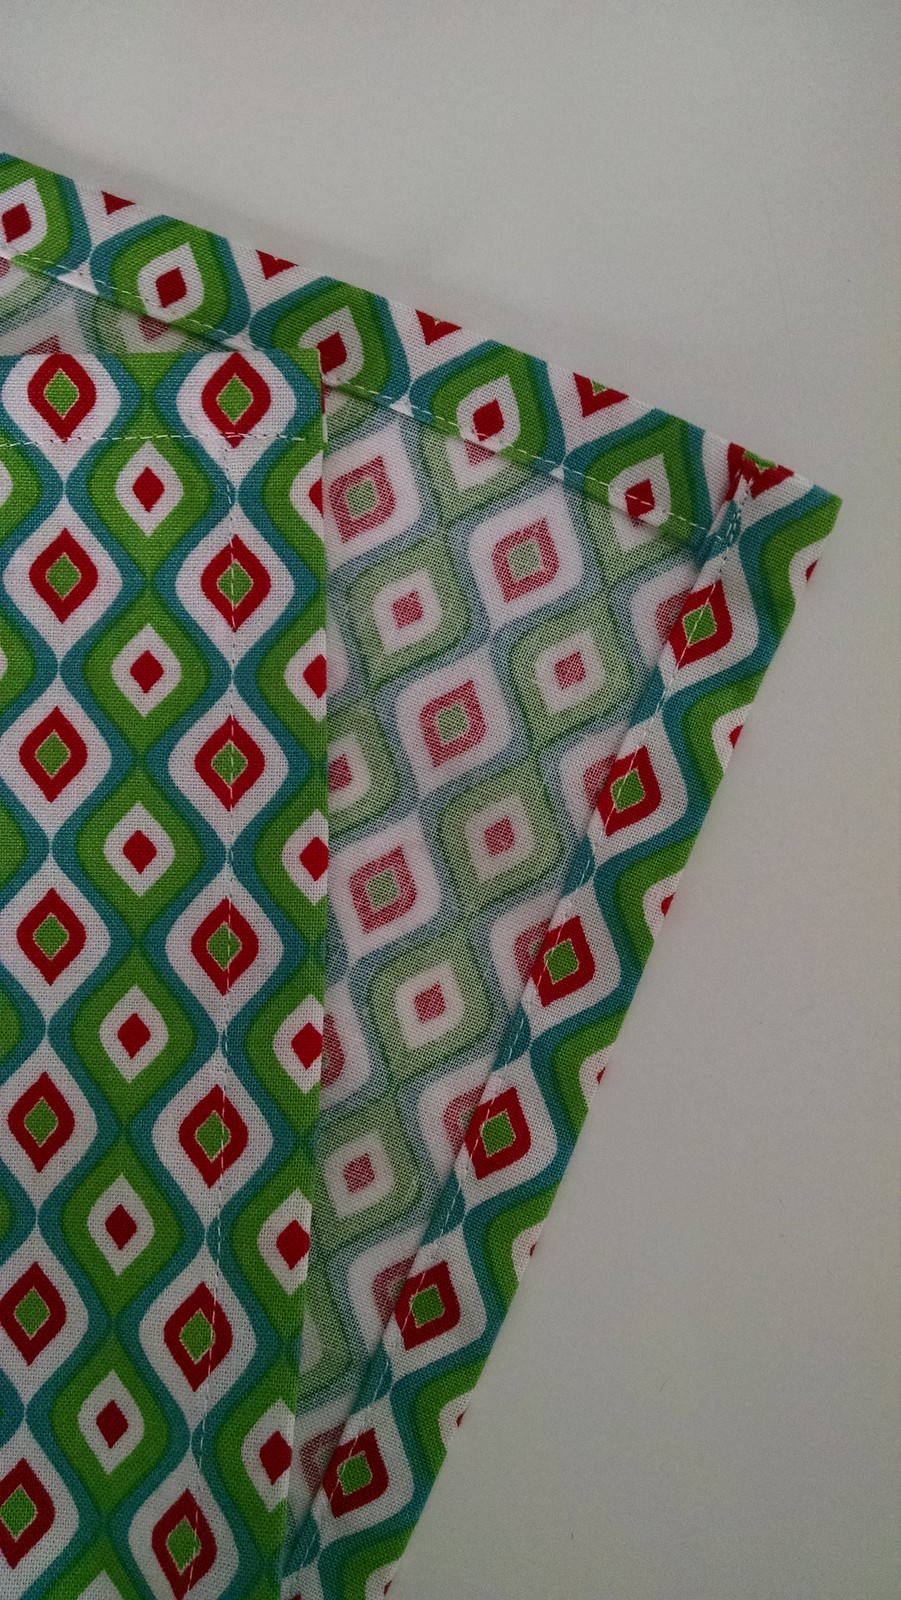
Repeat to create all 4 napkins!


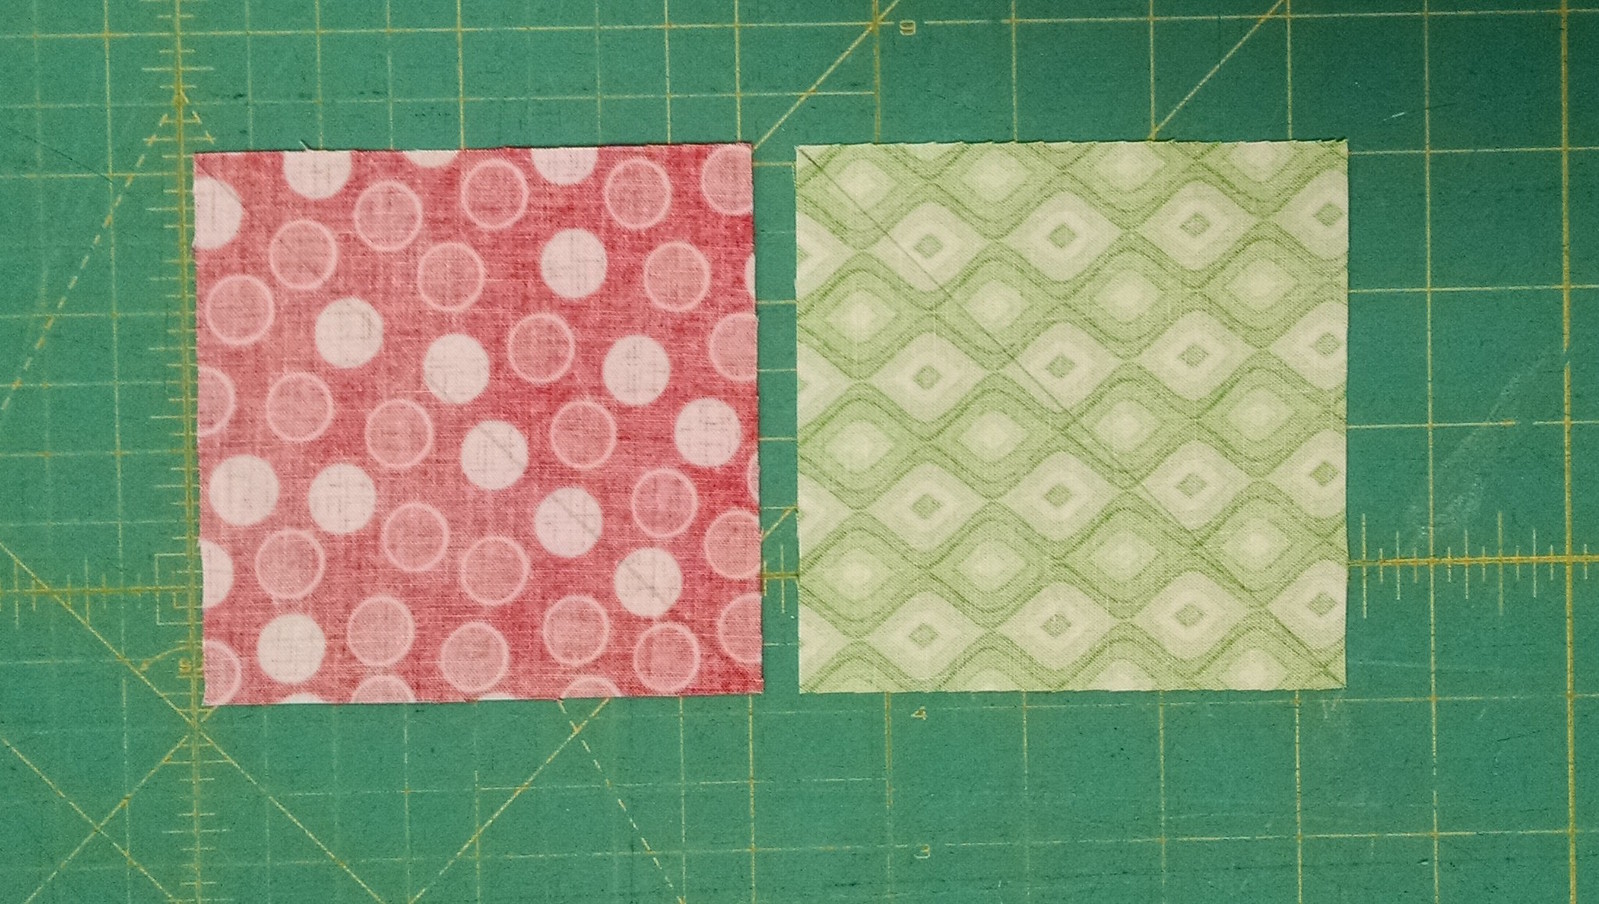
To make the table runner, begin by drawing a diagonal line on the back of each Dot Jubilee Red 4" x 4" square and each Jubilee Geo Green 4" x 4" square:

Christmas In July Tutorial for Benartex

Next pair each red 4" x 4" square with a Grey Snowman Swirl 4" x 4" square.
Pair each green 4" x 4" square with a Turquoise Snowman Swirl 4" x 4" square.
Stitch 1/4" from the both sides of the drawn line. Repeat for all of the paired squares:

Christmas In July Tutorial for Benartex

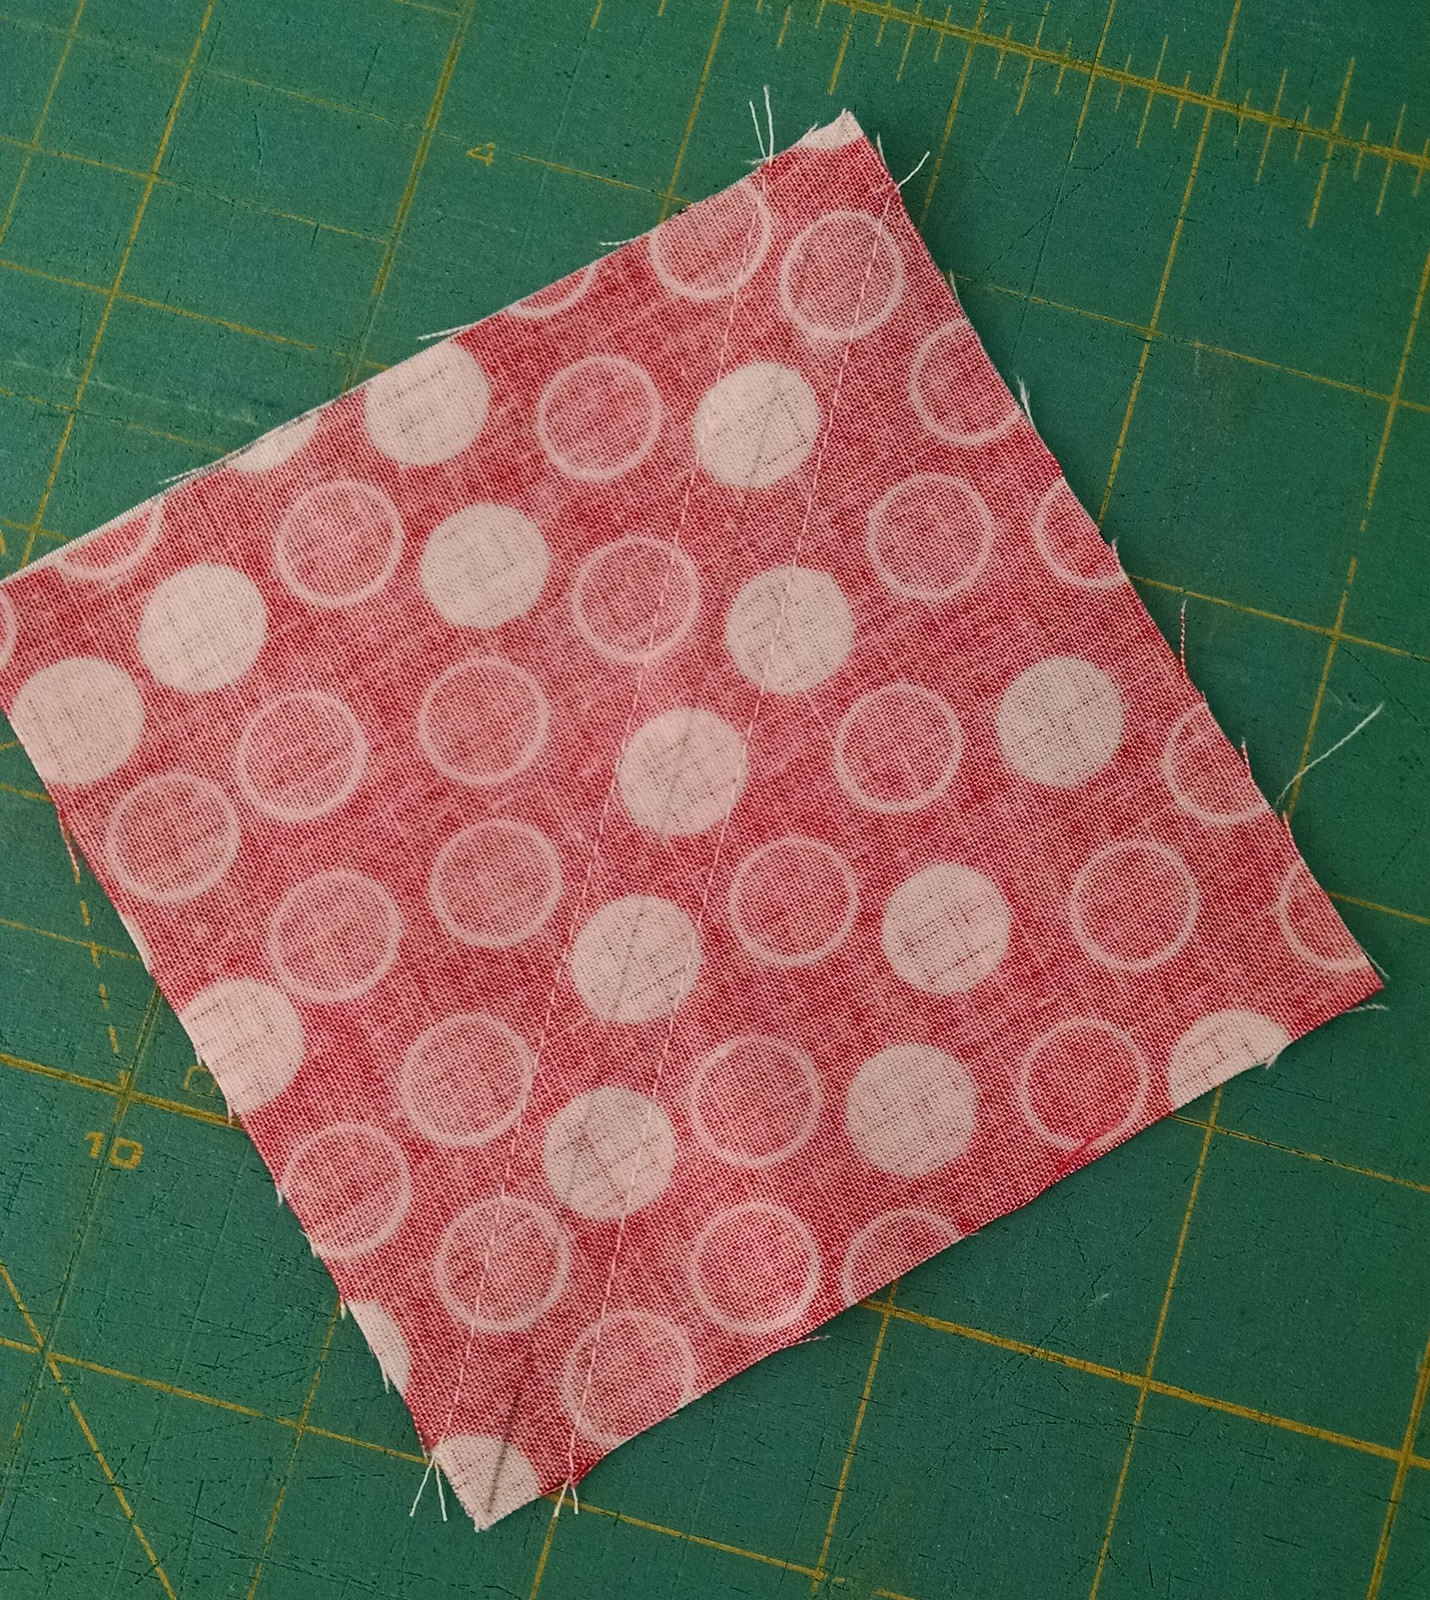
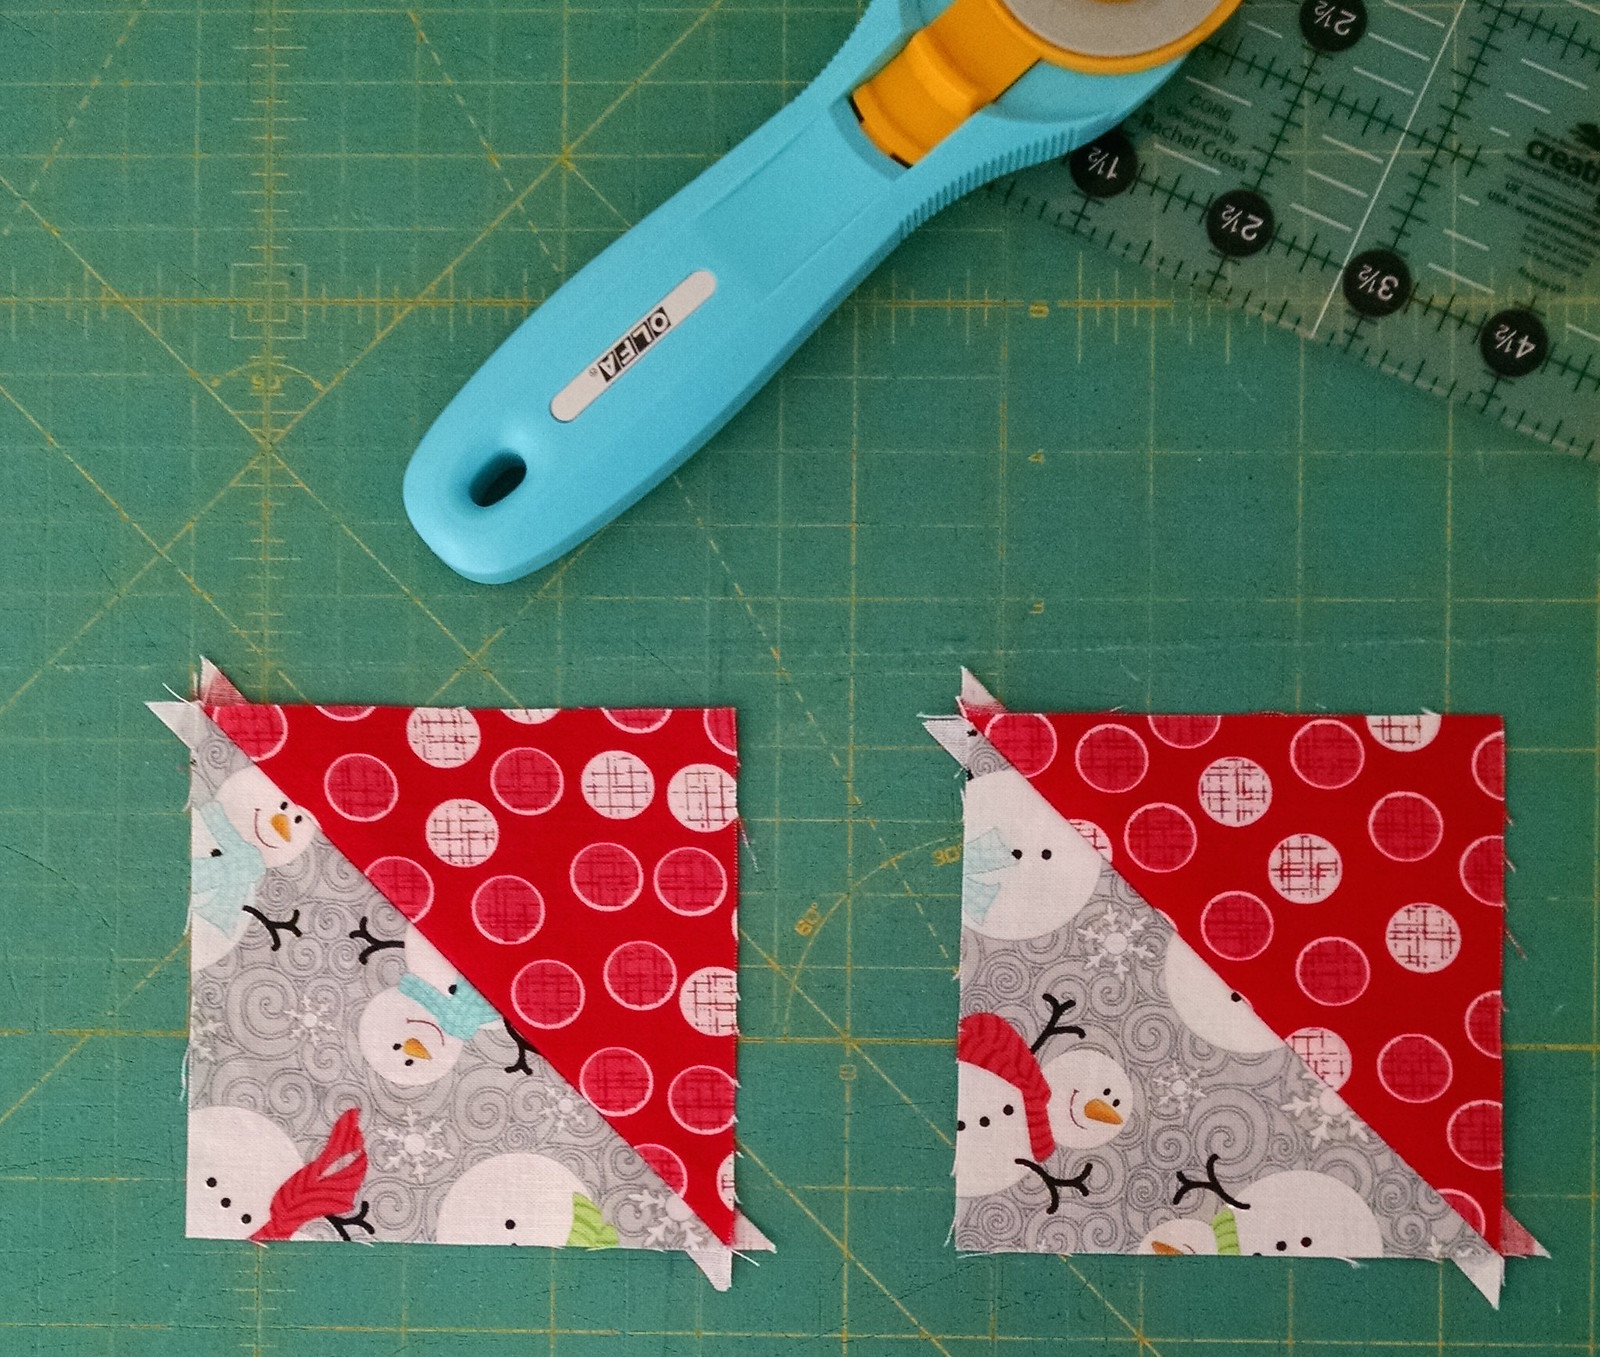
Trim the squares apart on the drawn lines:

Christmas In July Tutorial for Benartex

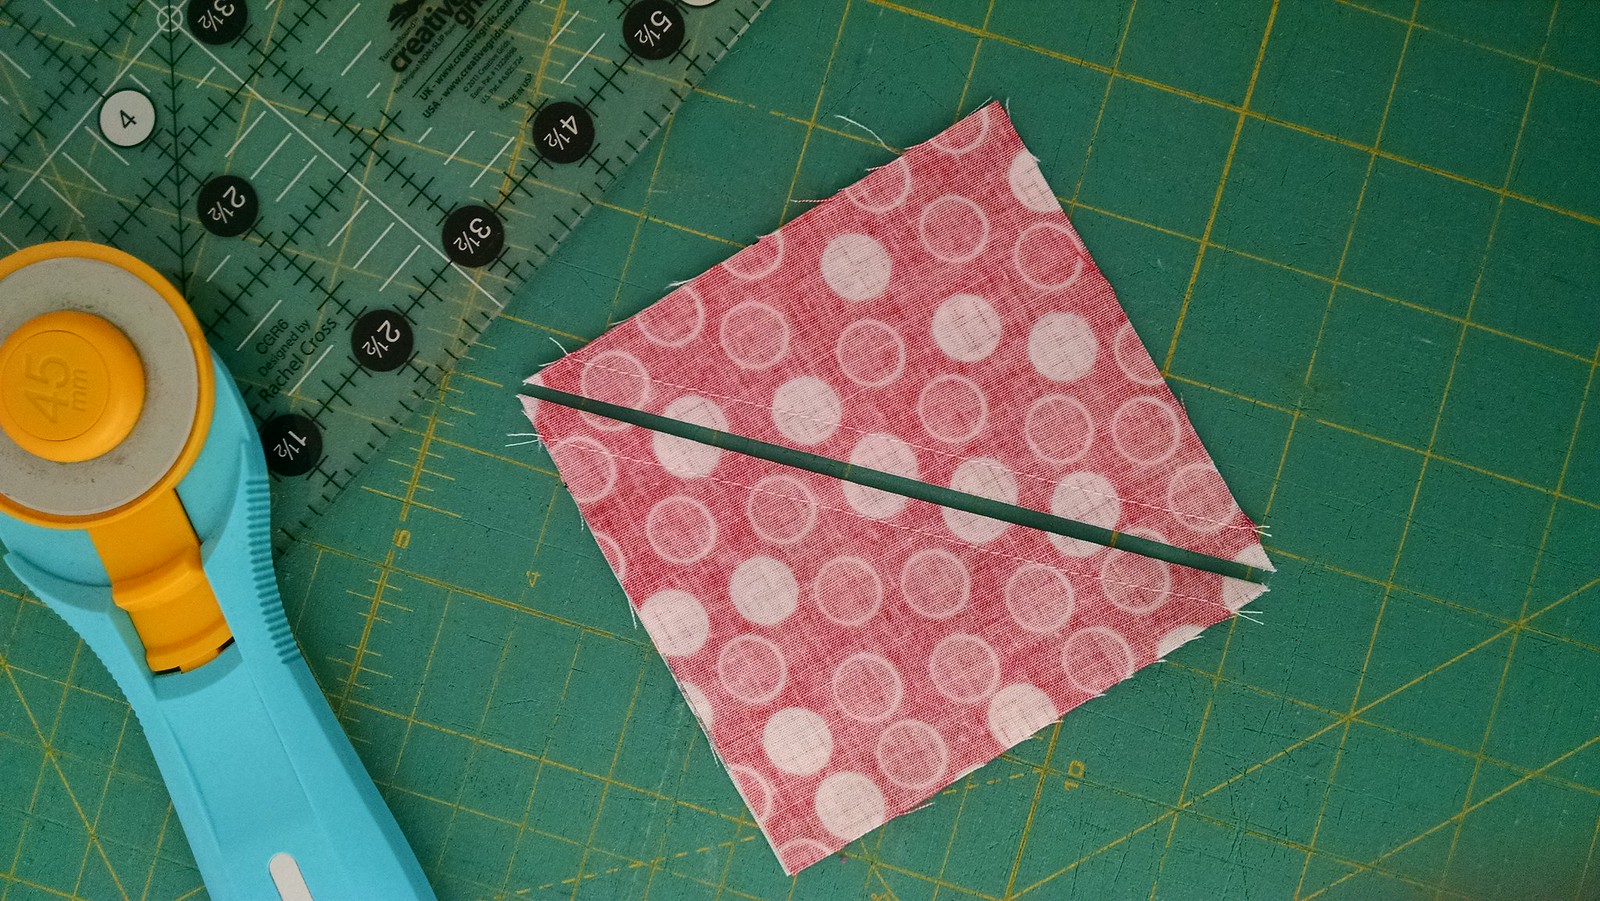
Press your seams (you can choose to press open or to one side):

Christmas In July Tutorial for Benartex

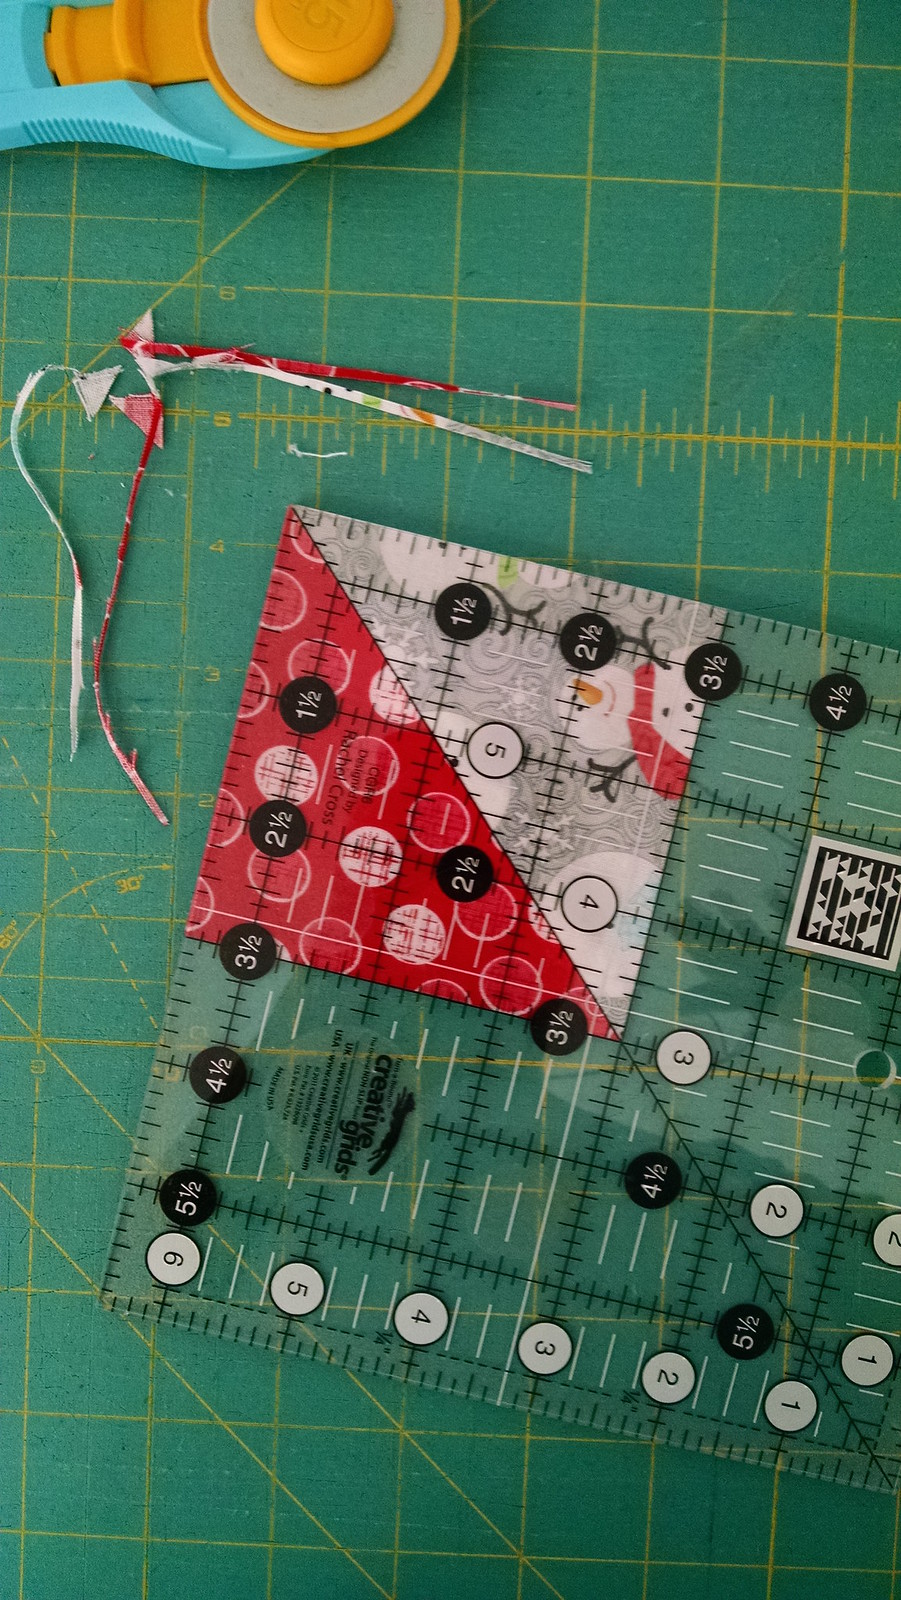
Now square up all of these half square triangles to 3 1/2" x 3 1/2". I like to use a 6 1/2" square ruler and line up the diagonal line of the ruler with the seam line of each half square triangle:

Christmas In July Tutorial for Benartex

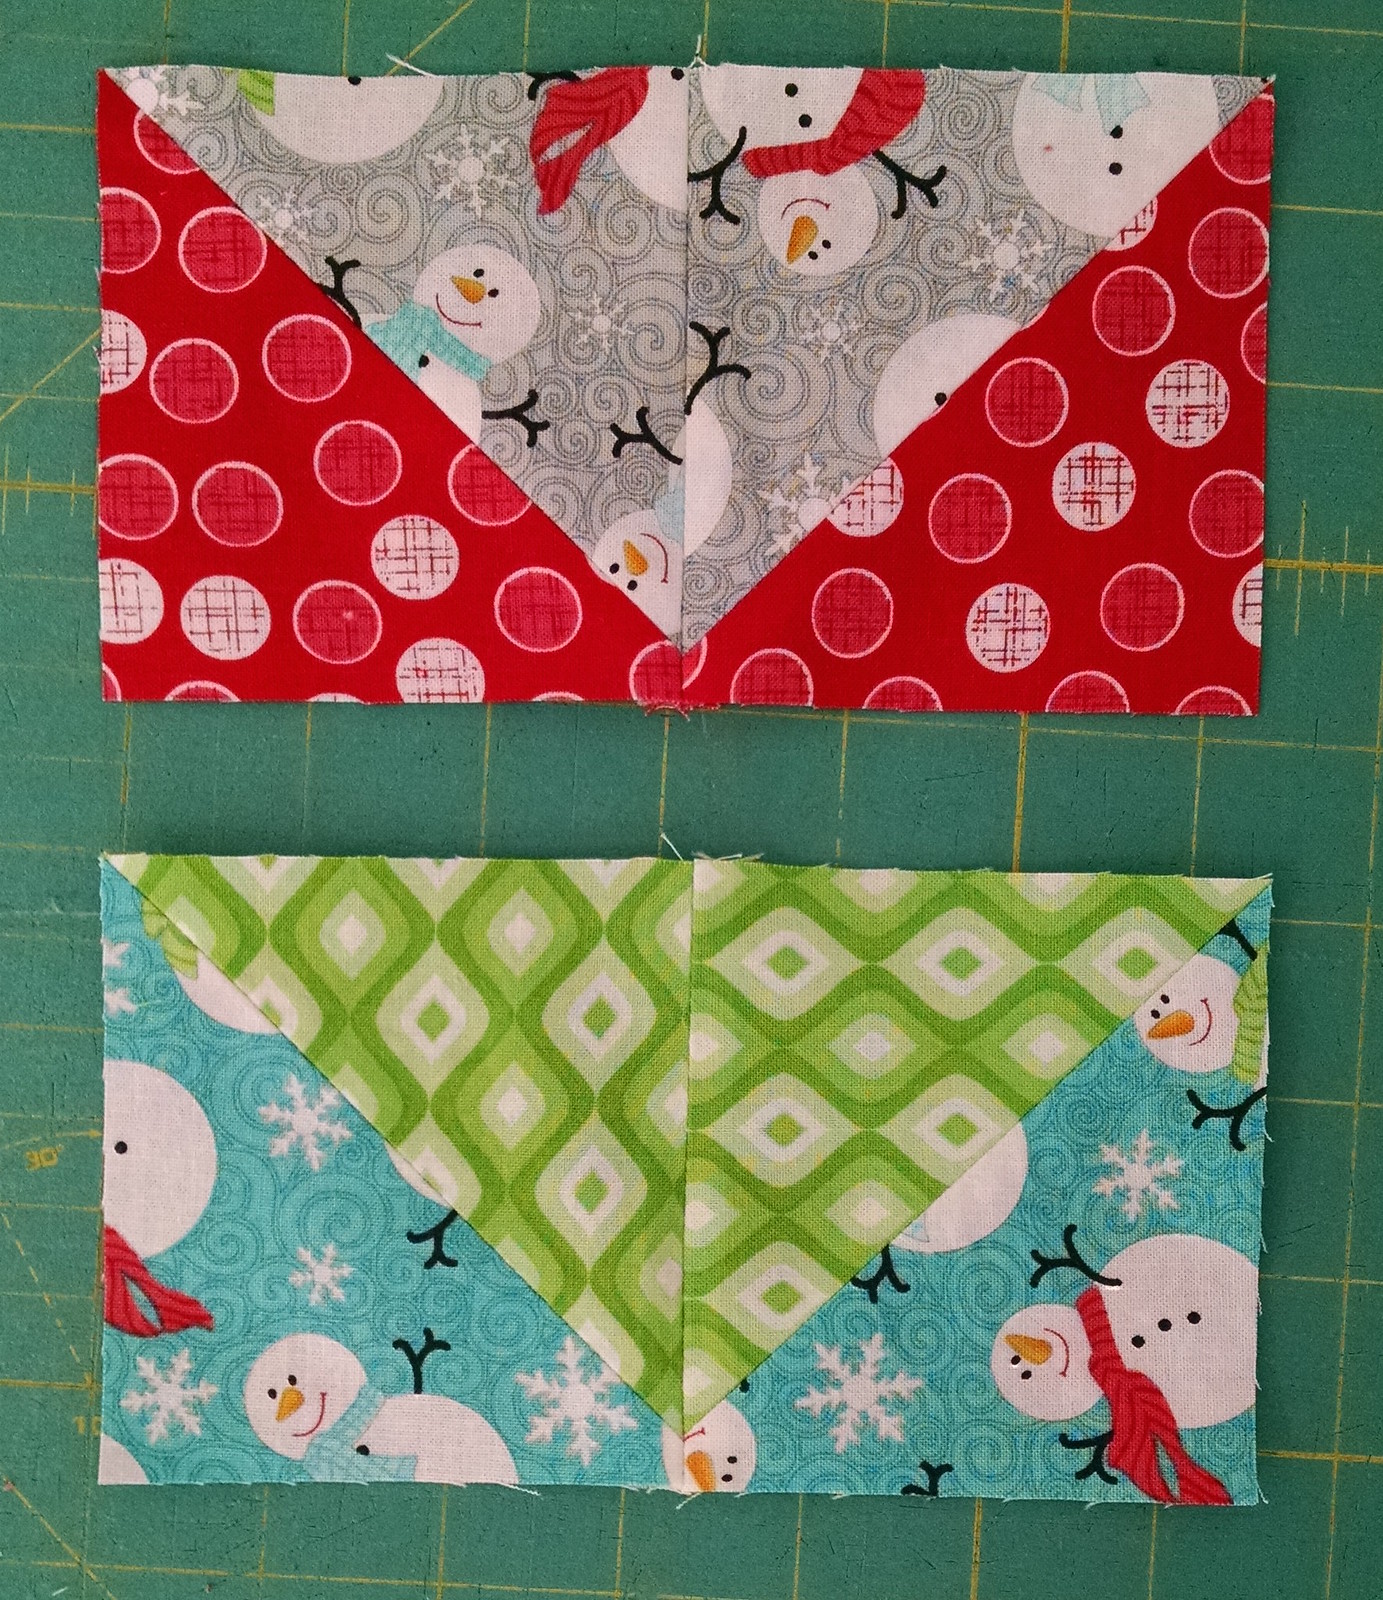
Next sew the half square triangles into pairs, as shown below. Press the seams. You will create 4 sets of the grey/red and 8 sets of the green/blue:

Christmas In July Tutorial for Benartex

Now we will work with one block at a time. Begin by laying out the red and grey block as shown:

Christmas In July Tutorial for Benartex

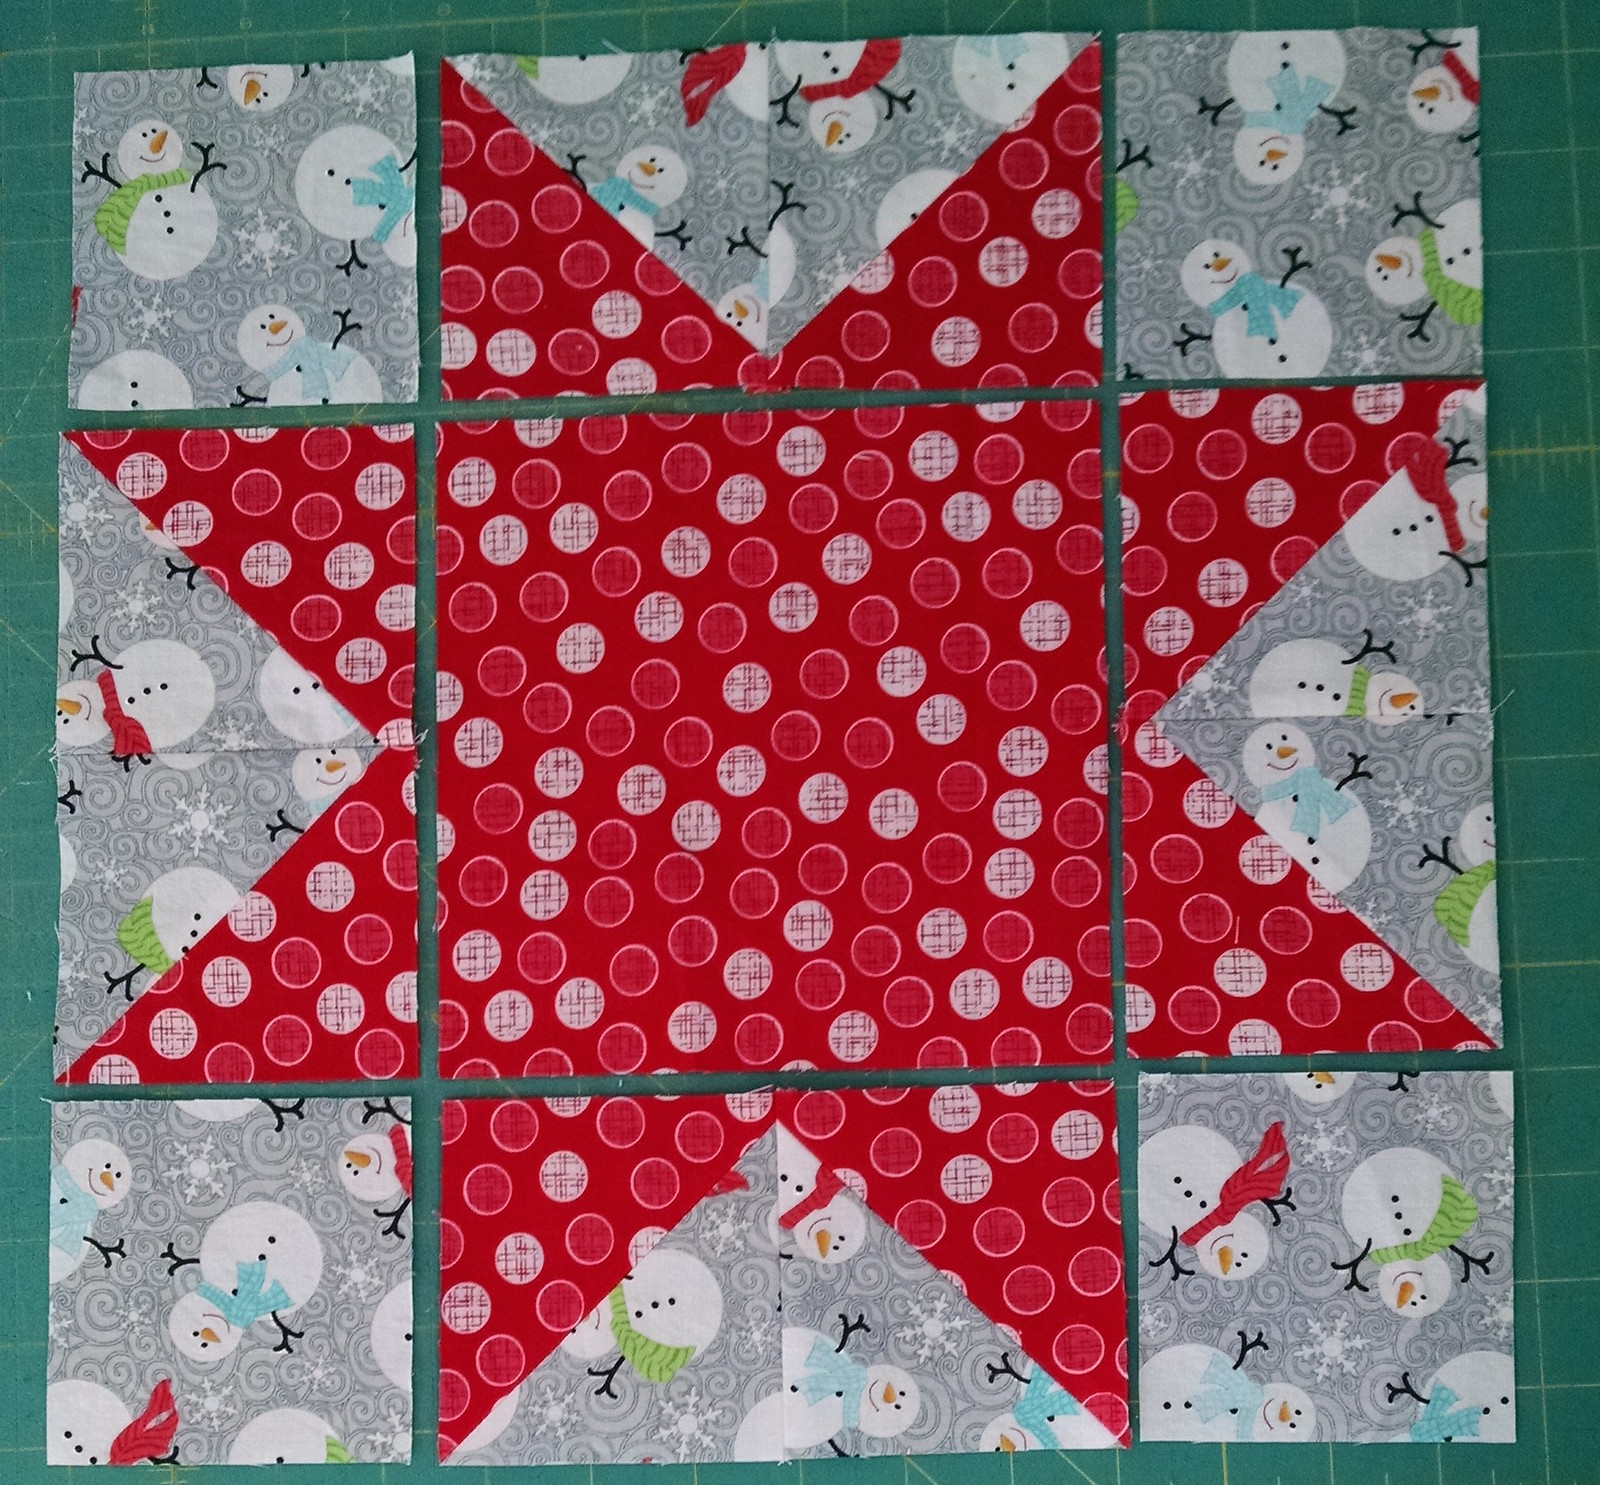
Sew the pieces into rows and press the seams:

Christmas In July Tutorial for Benartex

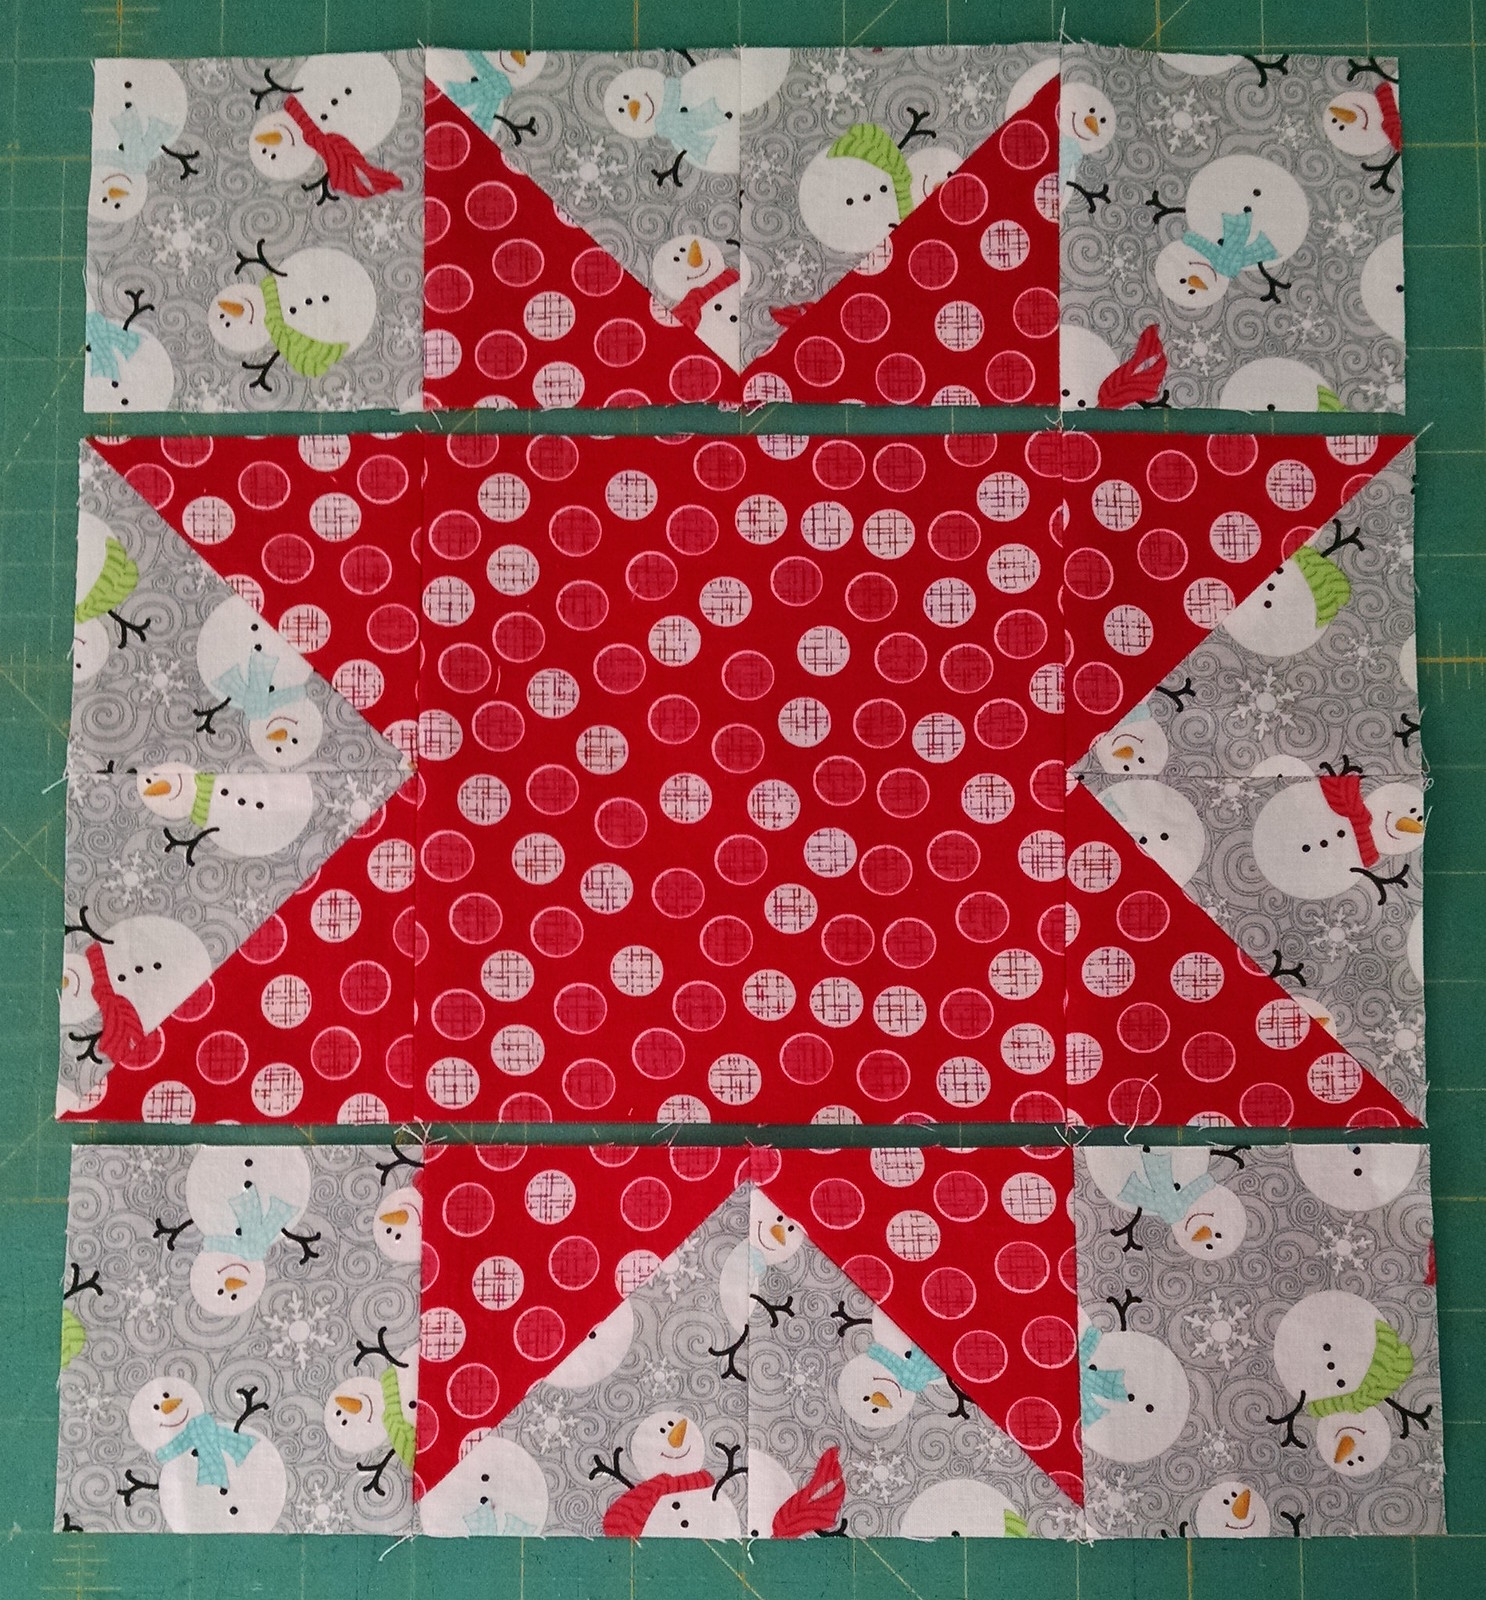
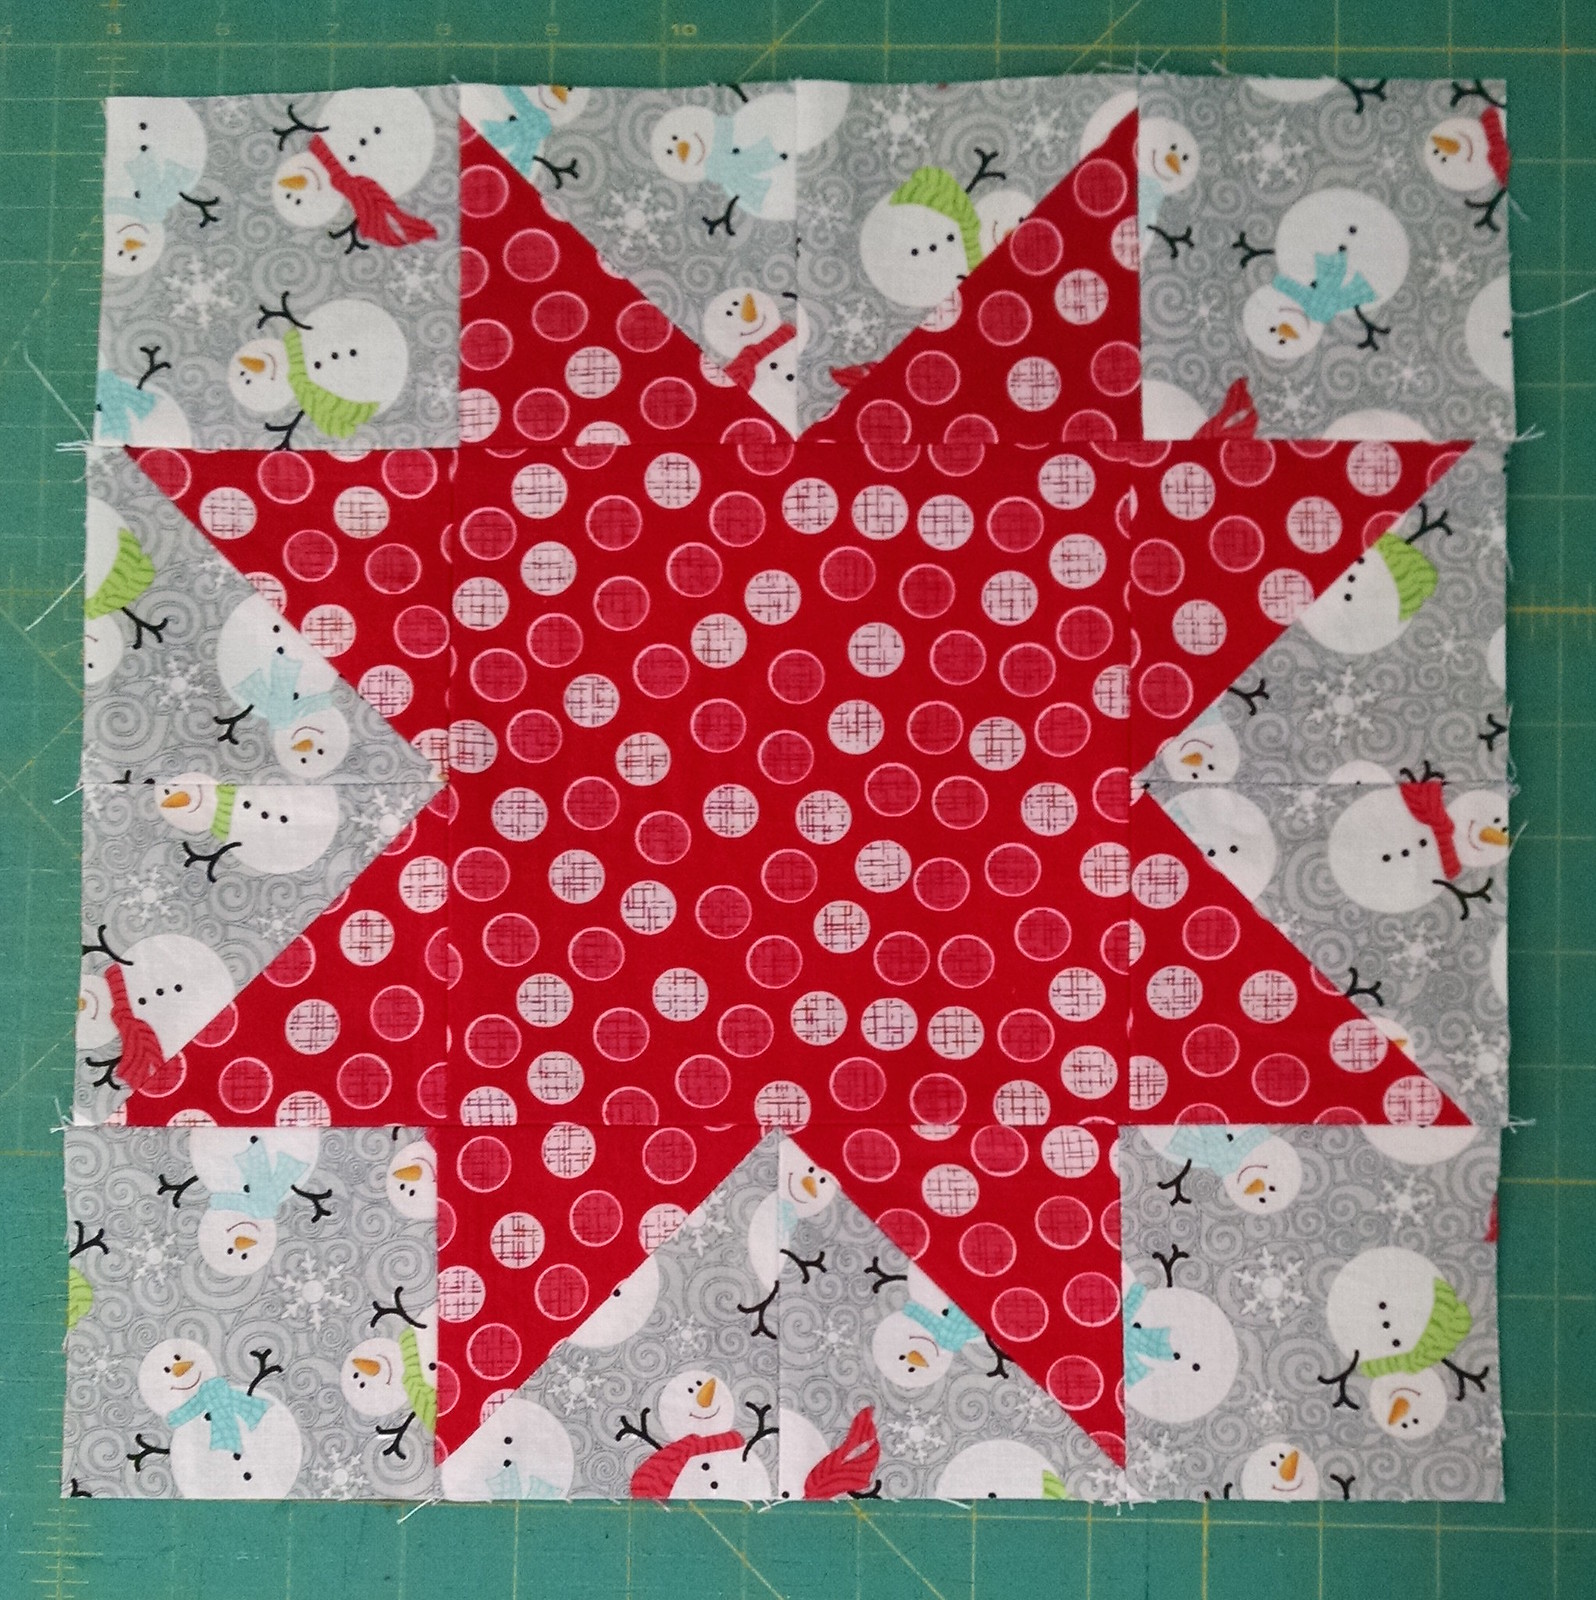
Next sew the rows together and press the seams to complete the block:

Christmas In July Tutorial for Benartex 

Attach a 1 1/2" x 12 1/2" Frosty Snowflake Green strip to the top and bottom of the block. Press seams:

Christmas In July Tutorial for Benartex

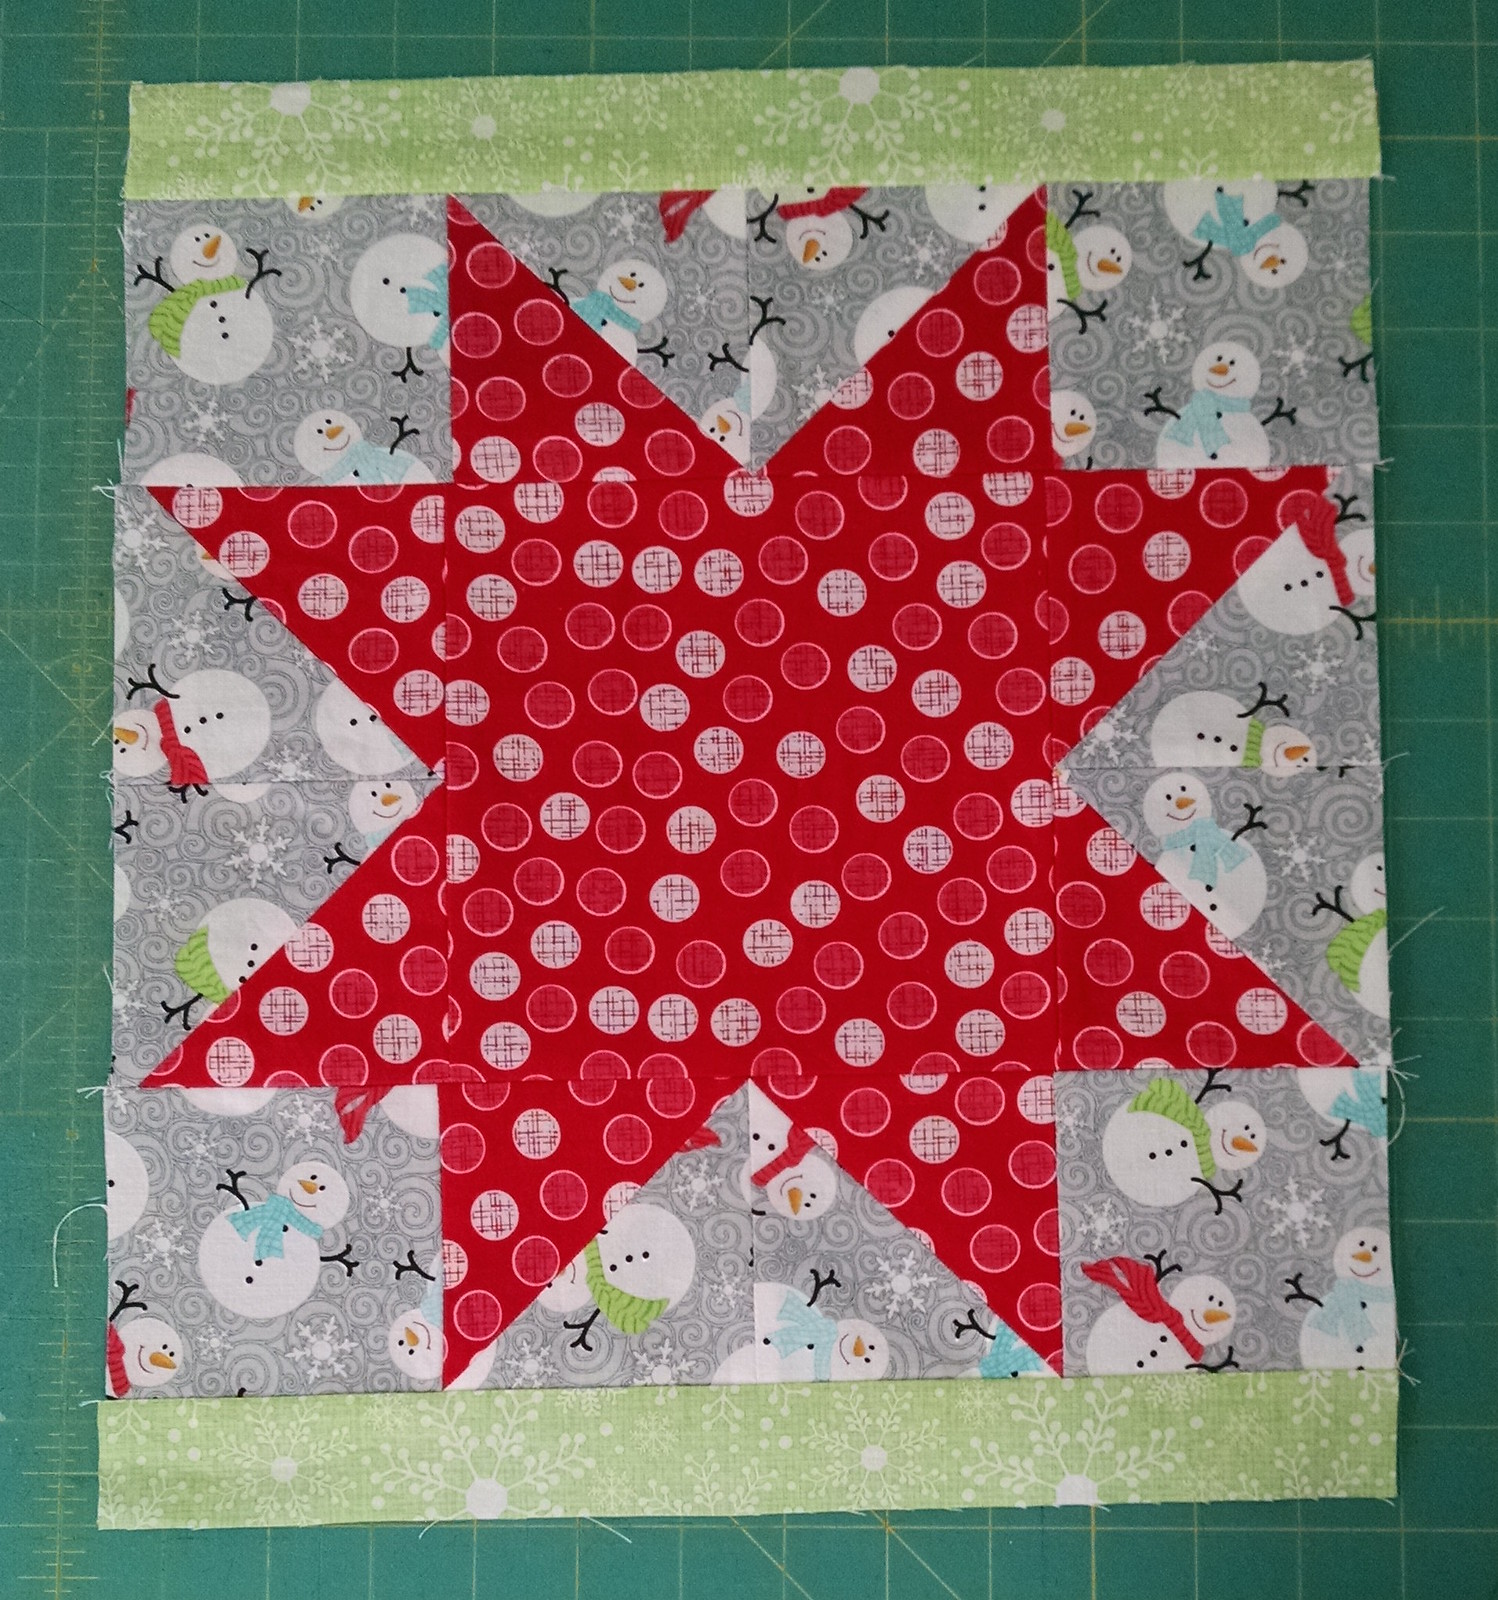
Now attach a 1 1/2" x 14 1/2" Frosty Snowflake Green strip to each side of the block. Press seams:

Christmas In July Tutorial for Benartex

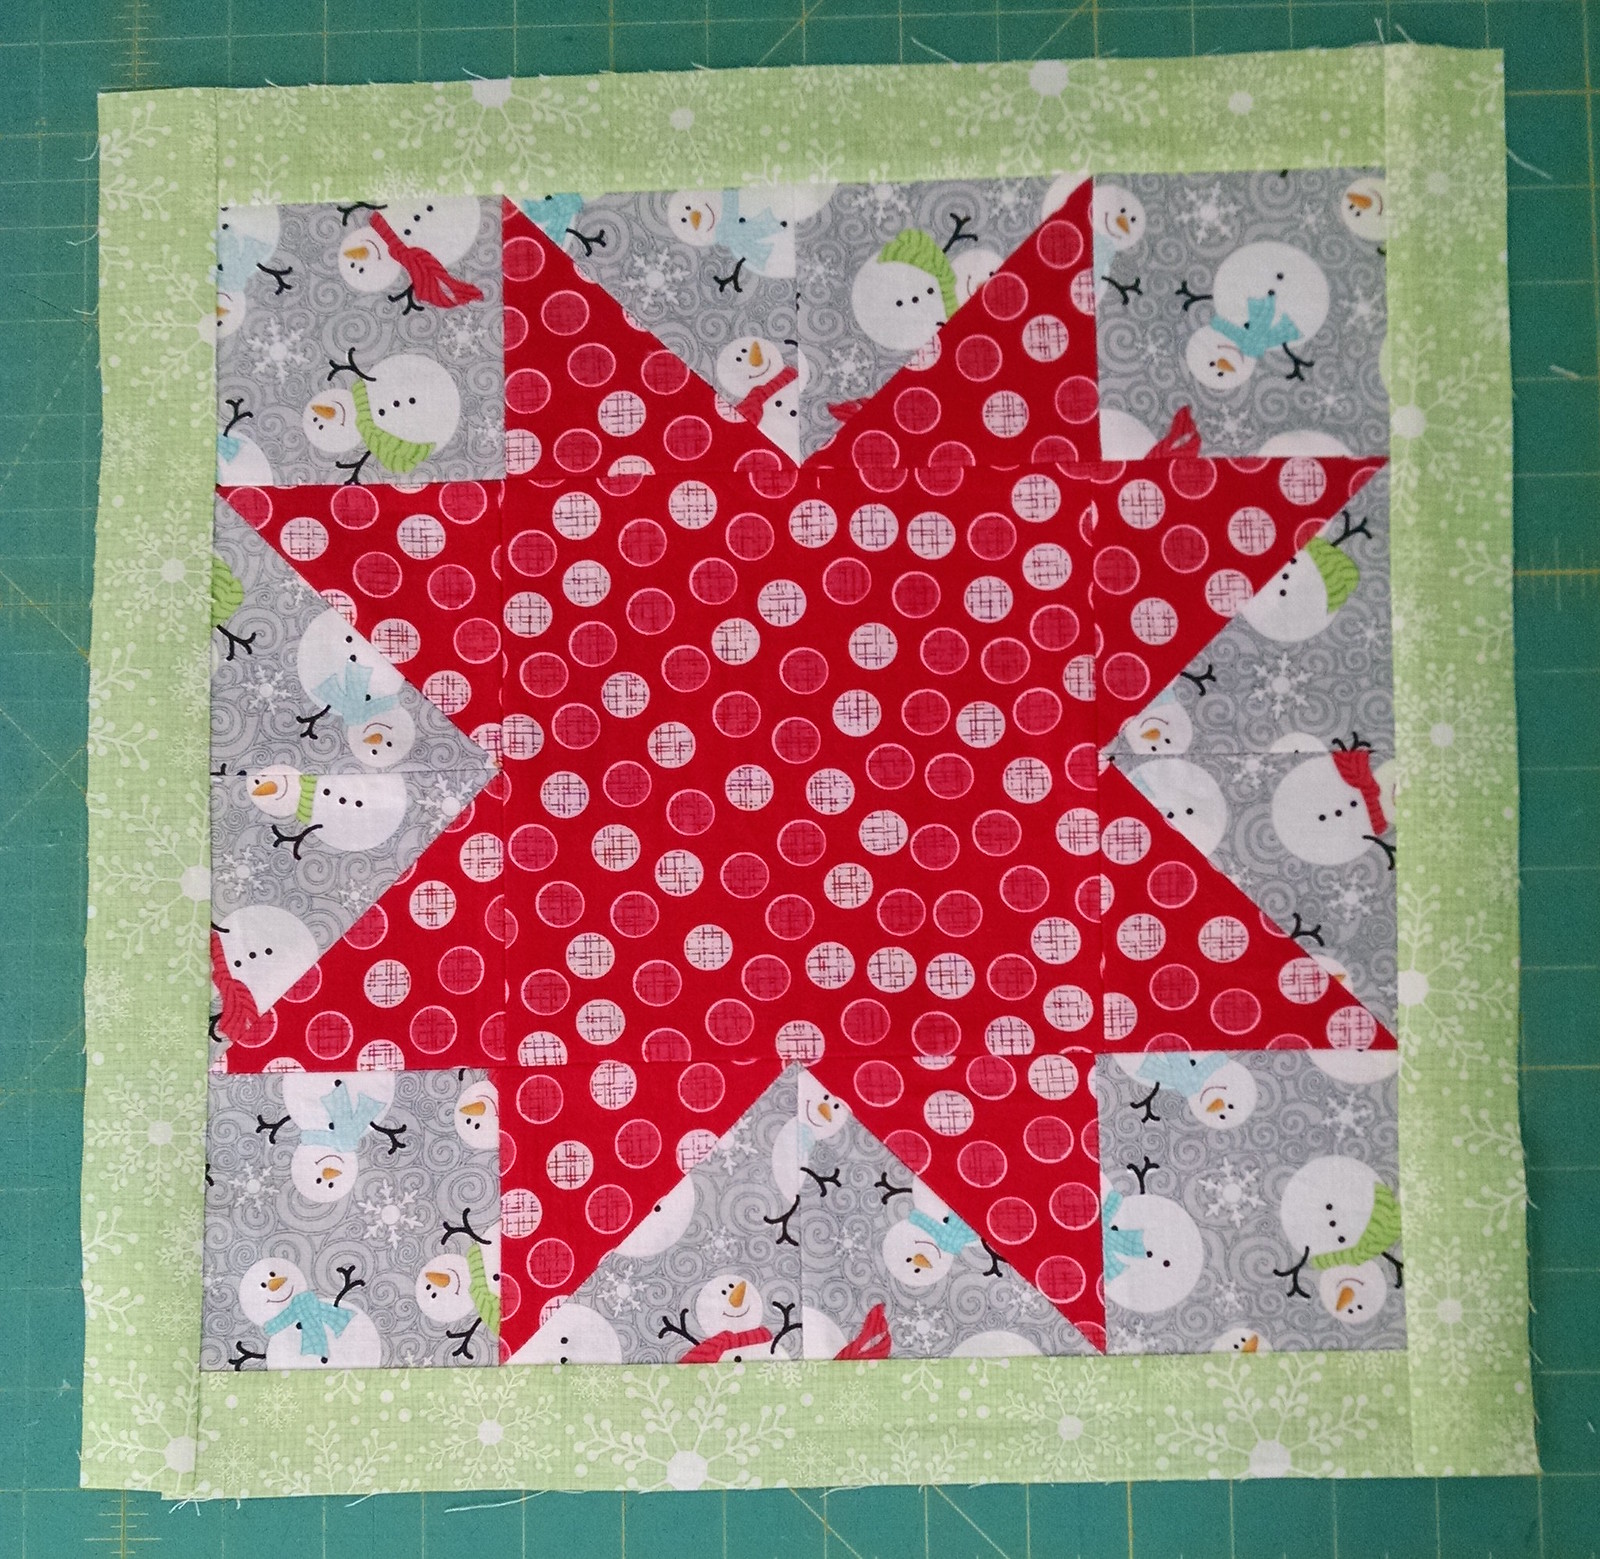
Repeat the above steps to create TWO blue/green blocks with red borders.
Stitch the 3 blocks together with the red/grey block in the center and press the seams:

Christmas In July Tutorial for Benartex

For the backing, the remaining piece of Jubilee Geo Grey fabric must be cut into 2 pieces measuring approximately 28" x 20" and pieces together along the 20" sides to create a piece measuring approximately 55" x 20".
At this point you can finish your table runner with a simple backing or quilt it. I prefer to quilt my table runners.

To finish the table runner with a bound edge, sew together the 3 binding strips of Jubilee Geo Grey and bind using your favorite method!

Christmas In July Tutorial for Benartex

Look at that, it's only July and you've got a Christmas decoration and/or gift all ready to go!

Monday, July 27, 2015

Christmas in July Tutorial for Benartex!


Hop on over to the Benartex blog for the tutorial to make this Christmas table runner and napkin set using their Frosty Forest line by Cherry Guidry!

Christmas In July Tutorial for Benartex

After you check out the tutorial, stop back here to win a fat quarter bundle of Frosty Forest care of Benartex and the coordinating Let It Snow and Frosty patterns care of Cherry Guidry!
Follow the Benartex blog and then comment below for an entry in the giveaway.


Here's the schedule for the rest of the Benartex blog hop, make sure to check out the other tutorials out there:

Tuesday Debby from Debby Kratovil Quilts using Homespun Holiday
Wednesday Kelly from My Quilt Infatuation using Ornamental Splendor
Thursday Kristen from KD Quilts using Santa's Here
Friday Melissa from My Fabric Relish using Frosty Forest
Monday Nikki from The Girl Who Quilts using Frosty Forest
Tuesday Wendy from Ivory Spring using Shades of Winter

Saturday, July 25, 2015

Florentine for Sew Many Creations

This post is going to be a big pic heavy, because I love this quilt so much! I quilted this paper pieced "Florentine" pattern for Sew Many Creations.

The background is Essex linen, and it has such great texture against the cotton prints! I went with my favorite background - straight lines! They are about 1/4" apart, but I didn't use a ruler so they have a bit of variation to them.

Quilted Florentine for Sew Many Creations

All of the blocks are quilted the same way, but the center area is rotated 90* from one block to another. I don't like to give a quilt a definitive top or bottom, unless it was designed that way, so I like to rotate the designs a bit!

Quilted Florentine for Sew Many Creations

Quilted Florentine for Sew Many Creations

The blocks have arrow shapes in the corners, and when these arrow shapes meet up they make great stars! I quilted a different fill in each arrow, but kept the fill consistent by fabric. Just another trick I use when I'm trying to keep track of several different fill patterns through a top!

Quilted Florentine for Sew Many Creations

Quilted Florentine for Sew Many Creations

Quilted Florentine for Sew Many Creations

And here's the back! I really love how the design looks on the back of this one.

Quilted Florentine for Sew Many Creations

Quilted Florentine for Sew Many Creations

It's always so fun to quilt for others!


Thursday, July 23, 2015

Navigate quilt for Sew Many Creations

After the rush of quilting for Market this spring I've actually spent some time working on my own projects! It's been really nice to get a few things done, but I'm also trying to show more of my long arming and build my client base a bit. :) I'm going to share more projects on here - some new, and some a bit older, some are mine, and some I quilted for others!

I quilted this for Jessica of Sew Many Creations. I think this was part of fall Market 2014, so maybe you've seen it around the quilting world by now! The pattern is called Navigate, and you can purchase it through the link above.
Navigate Quilt for Sew Many Creations

The pattern calls for paper piecing, and is made up for 2 blocks. I quilted the same design in each matching block. Here's the block with the cream background, I mixed up some straight lines and curves:
Navigate Quilt for Sew Many Creations

Same block at another angle (I love this bright orange, but it's hard to photograph!):
Navigate Quilt for Sew Many Creations

And here's the second block:
Navigate Quilt for Sew Many Creations

Another angle of the second block:
Navigate Quilt for Sew Many Creations

I used a mix of pebbles, swirls, paisleys and echos in the background, and I let the background quilting flow out into the two borders. I really wanted the blocks to pop, because they are so pretty!

I have another paper pieced quilt by Sew Many Creations that I can't wait to share - I just need to figure out where my new Mac "reorganized" it to for me. :)

Wednesday, July 22, 2015

Smith Wedding Quilt

I made this quilt for my cousin and his new wife. I was in a bit of a time crunch, so I went with a super-sized plus quilt. I actually really love the result, and I think I'll be making more of these! Besides, it leaves some great open areas for quilting!

Front:
Super Sized Plus Quilt

Detail quilting in the heart:
Super Sized Plus Quilt

Swirls!!
Super Sized Plus Quilt

A funky feather:
Super Sized Plus Quilt

My favorite block, which didn't photograph very well. Bummer!
Super Sized Plus Quilt

And the back!
Super Sized Plus Quilt

It was a super quick quilt to piece, and lots of fun to quilt! I hope the bride and groom enjoy it for years to come!

Saturday, April 18, 2015

Roundabout Quilt and matching pillows

If you've seen the latest issue of Quilty magazine, you may have seen my Roundabout Quilt!

I made this quilt with a fat quarter pack of Cotton and Steel plus 4 solids. It is a really fast and fun quilt to sew up! I was happy to have the quilt back in my house so we could use it on our couch! I snapped a few pictures when it arrived back home:

Roundabout Quilt and pillows

This is the layout for 1 block:
Roundabout Quilt and pillows

And here's how the blocks play together!
Roundabout Quilt and pillows

Here's the back:
Roundabout Quilt and pillows

I had some corner triangle scraps left over from the quilt, so I sewed up a bunch of pillows! Each pillow has a different layout and a different quilting style to it, but they were all created from some half-square triangles:

Roundabout Quilt and pillows

Roundabout Quilt and pillows

Roundabout Quilt and pillows

Roundabout Quilt and pillows

For the pillow backs I used a metallic from the Cotton+Steel basics and some diagonal straight line quilting! Each pillow has navy blue piping and a colorful zipper (mostly because I didn't feel like going out to buy 4 matching zips!).

Roundabout Quilt and pillows