Monday, December 8, 2014

A Simple Baby Girl Strip Quilt

I made this quilt a few months back for Matt's coworker and his wife, for their baby girl. I didn't know them very well, so I wanted to stay away from pink. When in doubt, stay a bit more neutral, right? :)

Baby Girl Strip Quilt 

I started with this fun feather print and pulled fabrics from there. I really fell in love with these colors! Most of the fabrics were prints, with a few solids tossed in as well.

Baby Girl Strip Quilt

I didn't have a ton of time to put this gift together - I stitched the strips at my mom's house when we were visiting, and I quilted it the day after I got back home (which was also the day of the shower!). Talk about pressure, I had to quilt, bind, and wash the quilt all in a day!

I quilted two zig zag sections, filled with some figure 8 quilting. In the larger spaces created by the zig zags, I quilted paisleys.

Baby Girl Strip Quilt

i really like how the zig zags at the bottom of the quilt seem to fall off the edge!

Baby Girl Strip Quilt

On the back I used a single cut of fabric. The quilt finished around 36" x 42", so it was a tight squeeze! 

Baby Girl Strip Quilt

I was surprised at how much I loved this quilt when it was finished! Sometimes it's nice to stay simple!

Friday, November 14, 2014

Pittsburgh Love

I made this mini as a wedding gift for Matt's boss. He and his wife met here in Pittsburgh, though neither of them are from here. He loved the mini quilts in our home, so I knew it would be the perfect gift for them!

Pittsburgh Love Mini Quilt
(It was so cold and windy when I took these pictures, plus we were high above the city. Matt was really nervous that he would drop the mini, which it why he was bracing it against the railing!)

I had a hard time deciding on a background fabric, not knowing what their decorating tastes are like. Luckily I had this bridge print sitting out after a visit to a LQS! I wasn't entirely sure on the color, but I couldn't pass up the print - did you know that Pittsburgh is called the "City of Bridges"? It's true, we have SO many of them!

I decided to quilt the background with simple, straight lines.

Pittsburgh Love Mini Quilt

I again used a knife-edge binding, because I just love the look of the clean edge! On the back I included a label and a hanging sleeve.

Pittsburgh Love Mini Quilt

This is the 3rd "Home is..." piece that I've made as a wedding gift, and I think so far they have all been really well received! This one may be my favorite, but I have a few others to share when I dig up the pictures.

Monday, November 10, 2014

Free Patterns and a Barn Quilt!

I have a few surprises to share!

First up, some free patterns! Head over to Camelot Fabrics where I have a few pillow patterns and a quilt pattern - all freebies! Don't feel intimidated by the piecing - it's all very fast and easy.

Here's a quick 12" square pillow I sewed up from my trial block for the patterns:
Free pillow/quilt pattern!

And now, about that Barn Quilt! A few months ago I was contacted by the Thumb Trail Quilt group in Michigan. They asked to use my Modern Dresden block design for the quilt block in their quilt block trail throughout "Thumb Region" of Michigan. Not only was my design used, but it is on the Mayville Historical Museum building in Mayville, MI!

Here's a photo of the Barn Quilt, taken from the Thumb Trail Quilt facebook page. Be sure to check them out, and if you're in the area be sure to visit the Barn Quilts in person!


If you'd like to make your own Modern Dresden mini quilt, see the following links:

Monday, November 3, 2014

Home is...

Well, I had a decent stretch of consistent blogging, right? :)

I'm hoping now that the Quilt Market rush is over (for now!), I will have a bit of time to blog! This project is one of my favorite finishes ever, and it hangs in the middle of the first floor of my house, too

I can't claim this design entirely, because I know I've seen similar pieces in the blogging world over the years. This is just my take on a really great design idea!

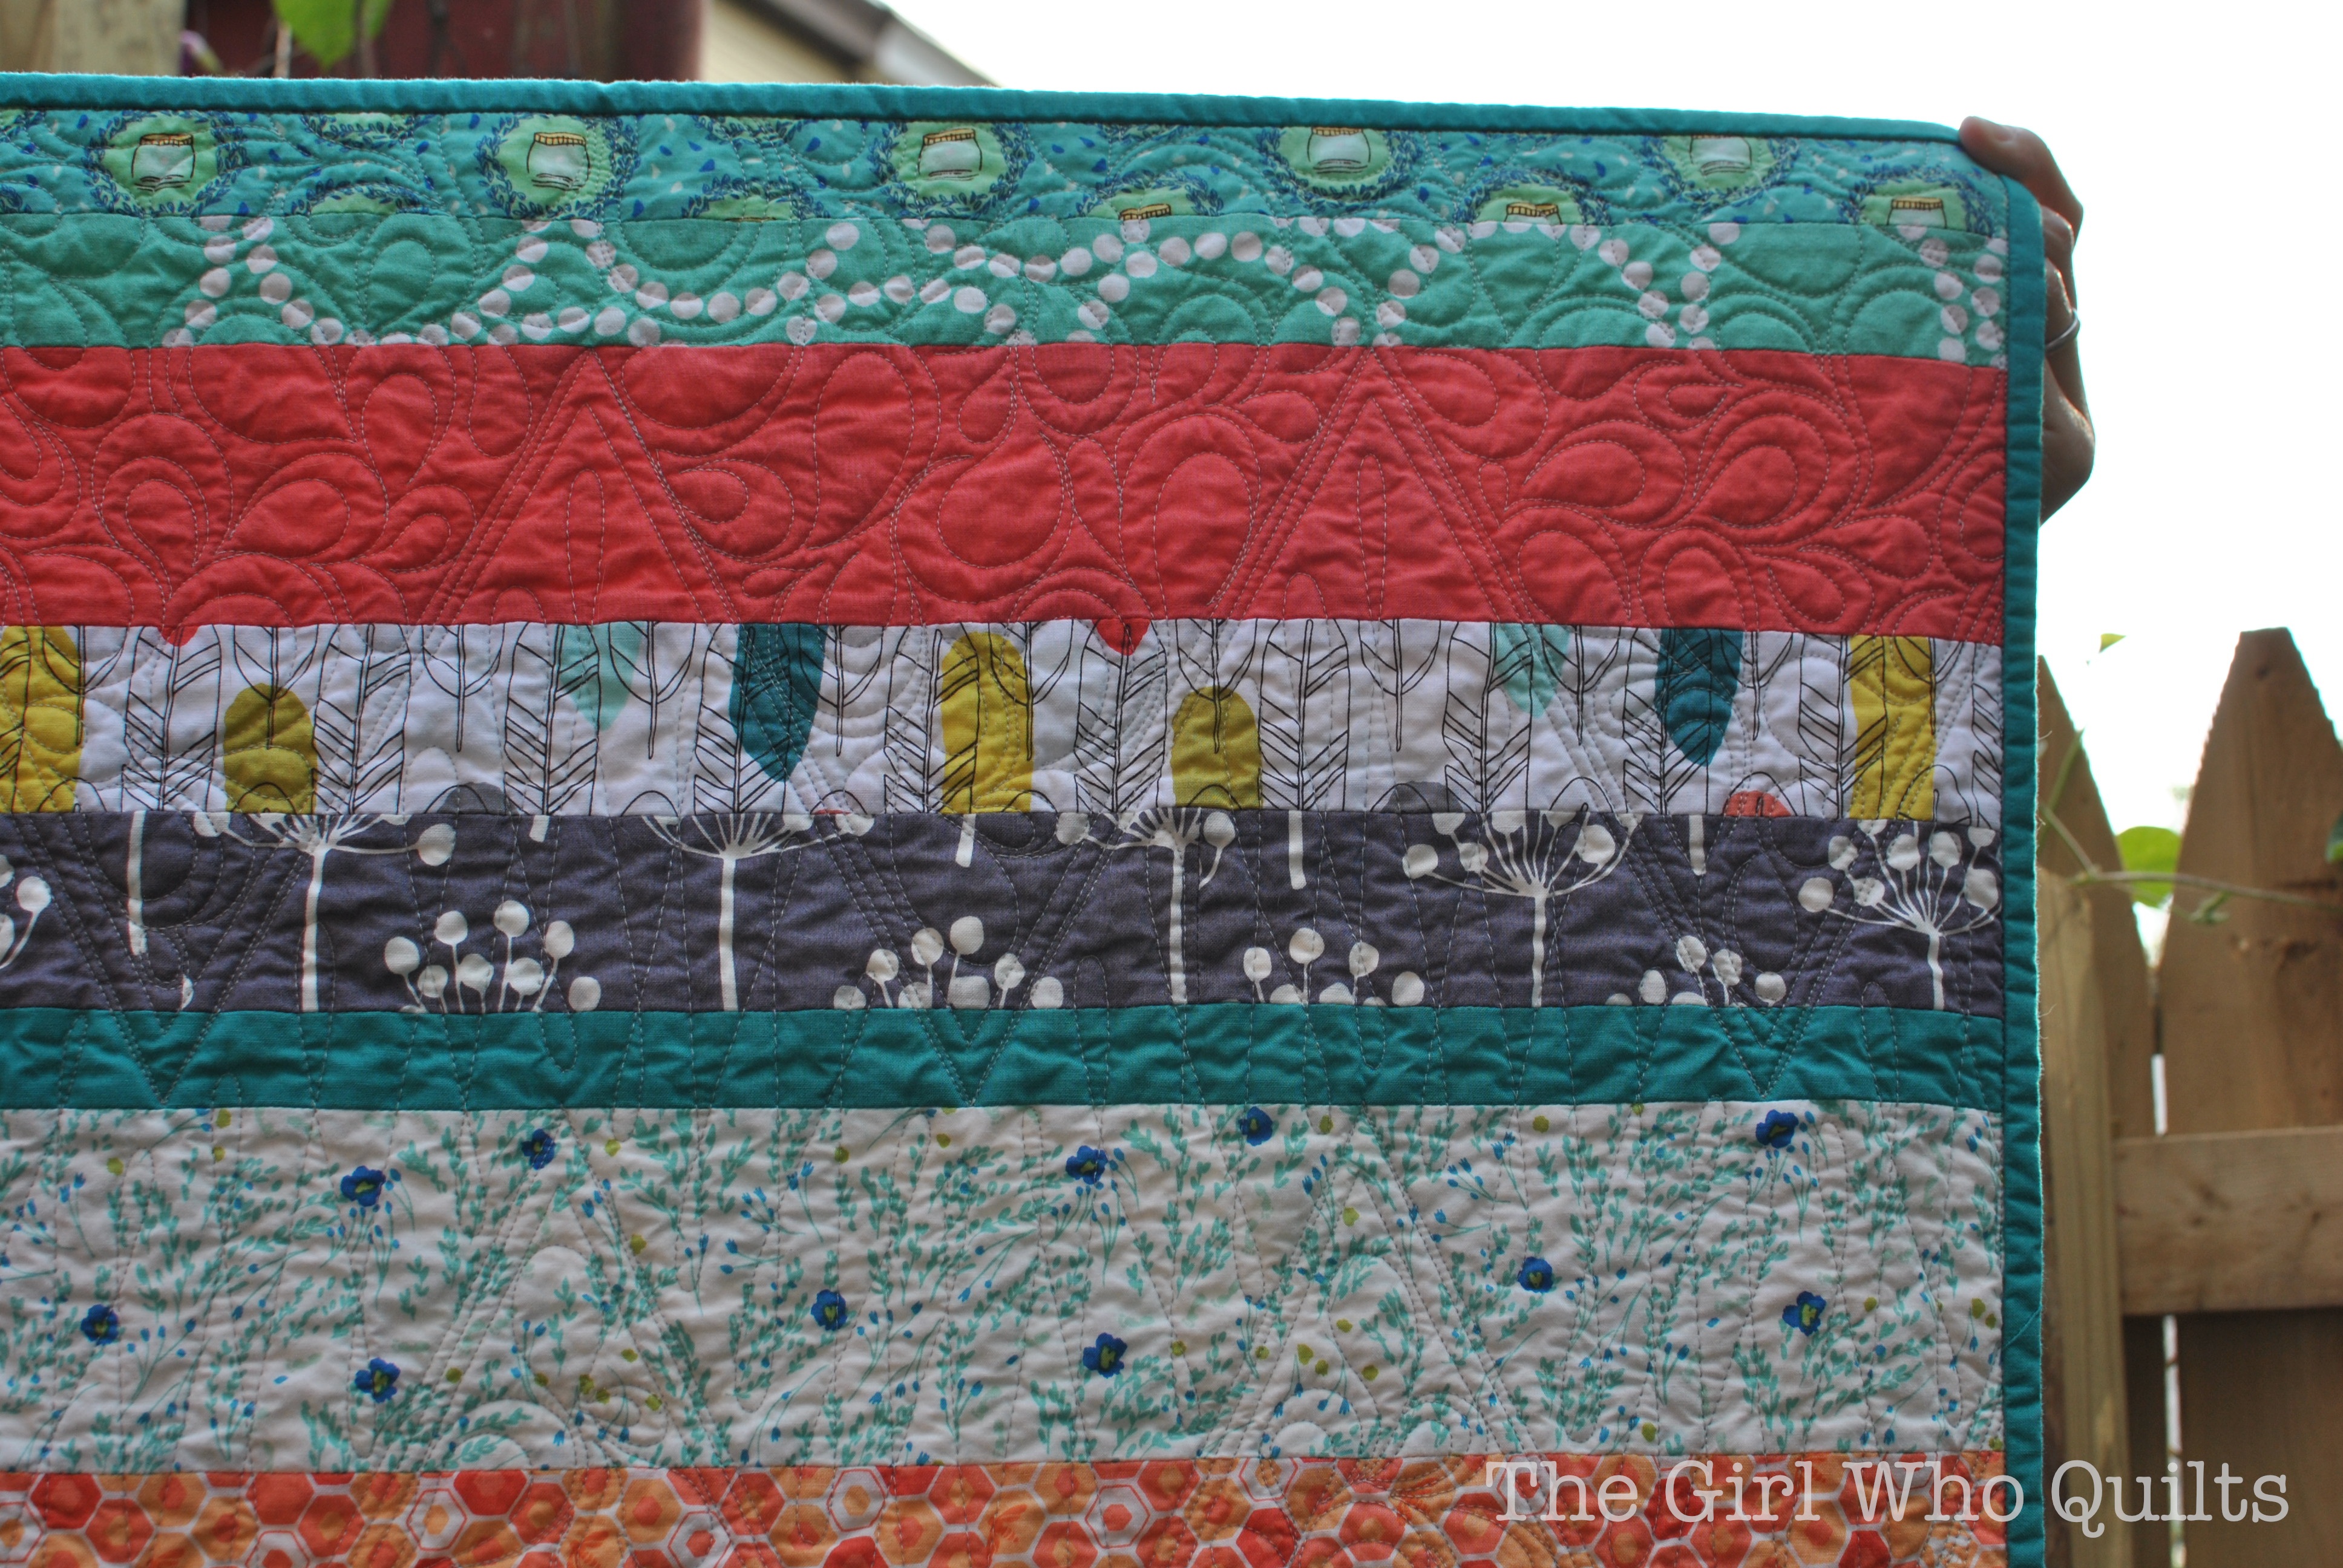
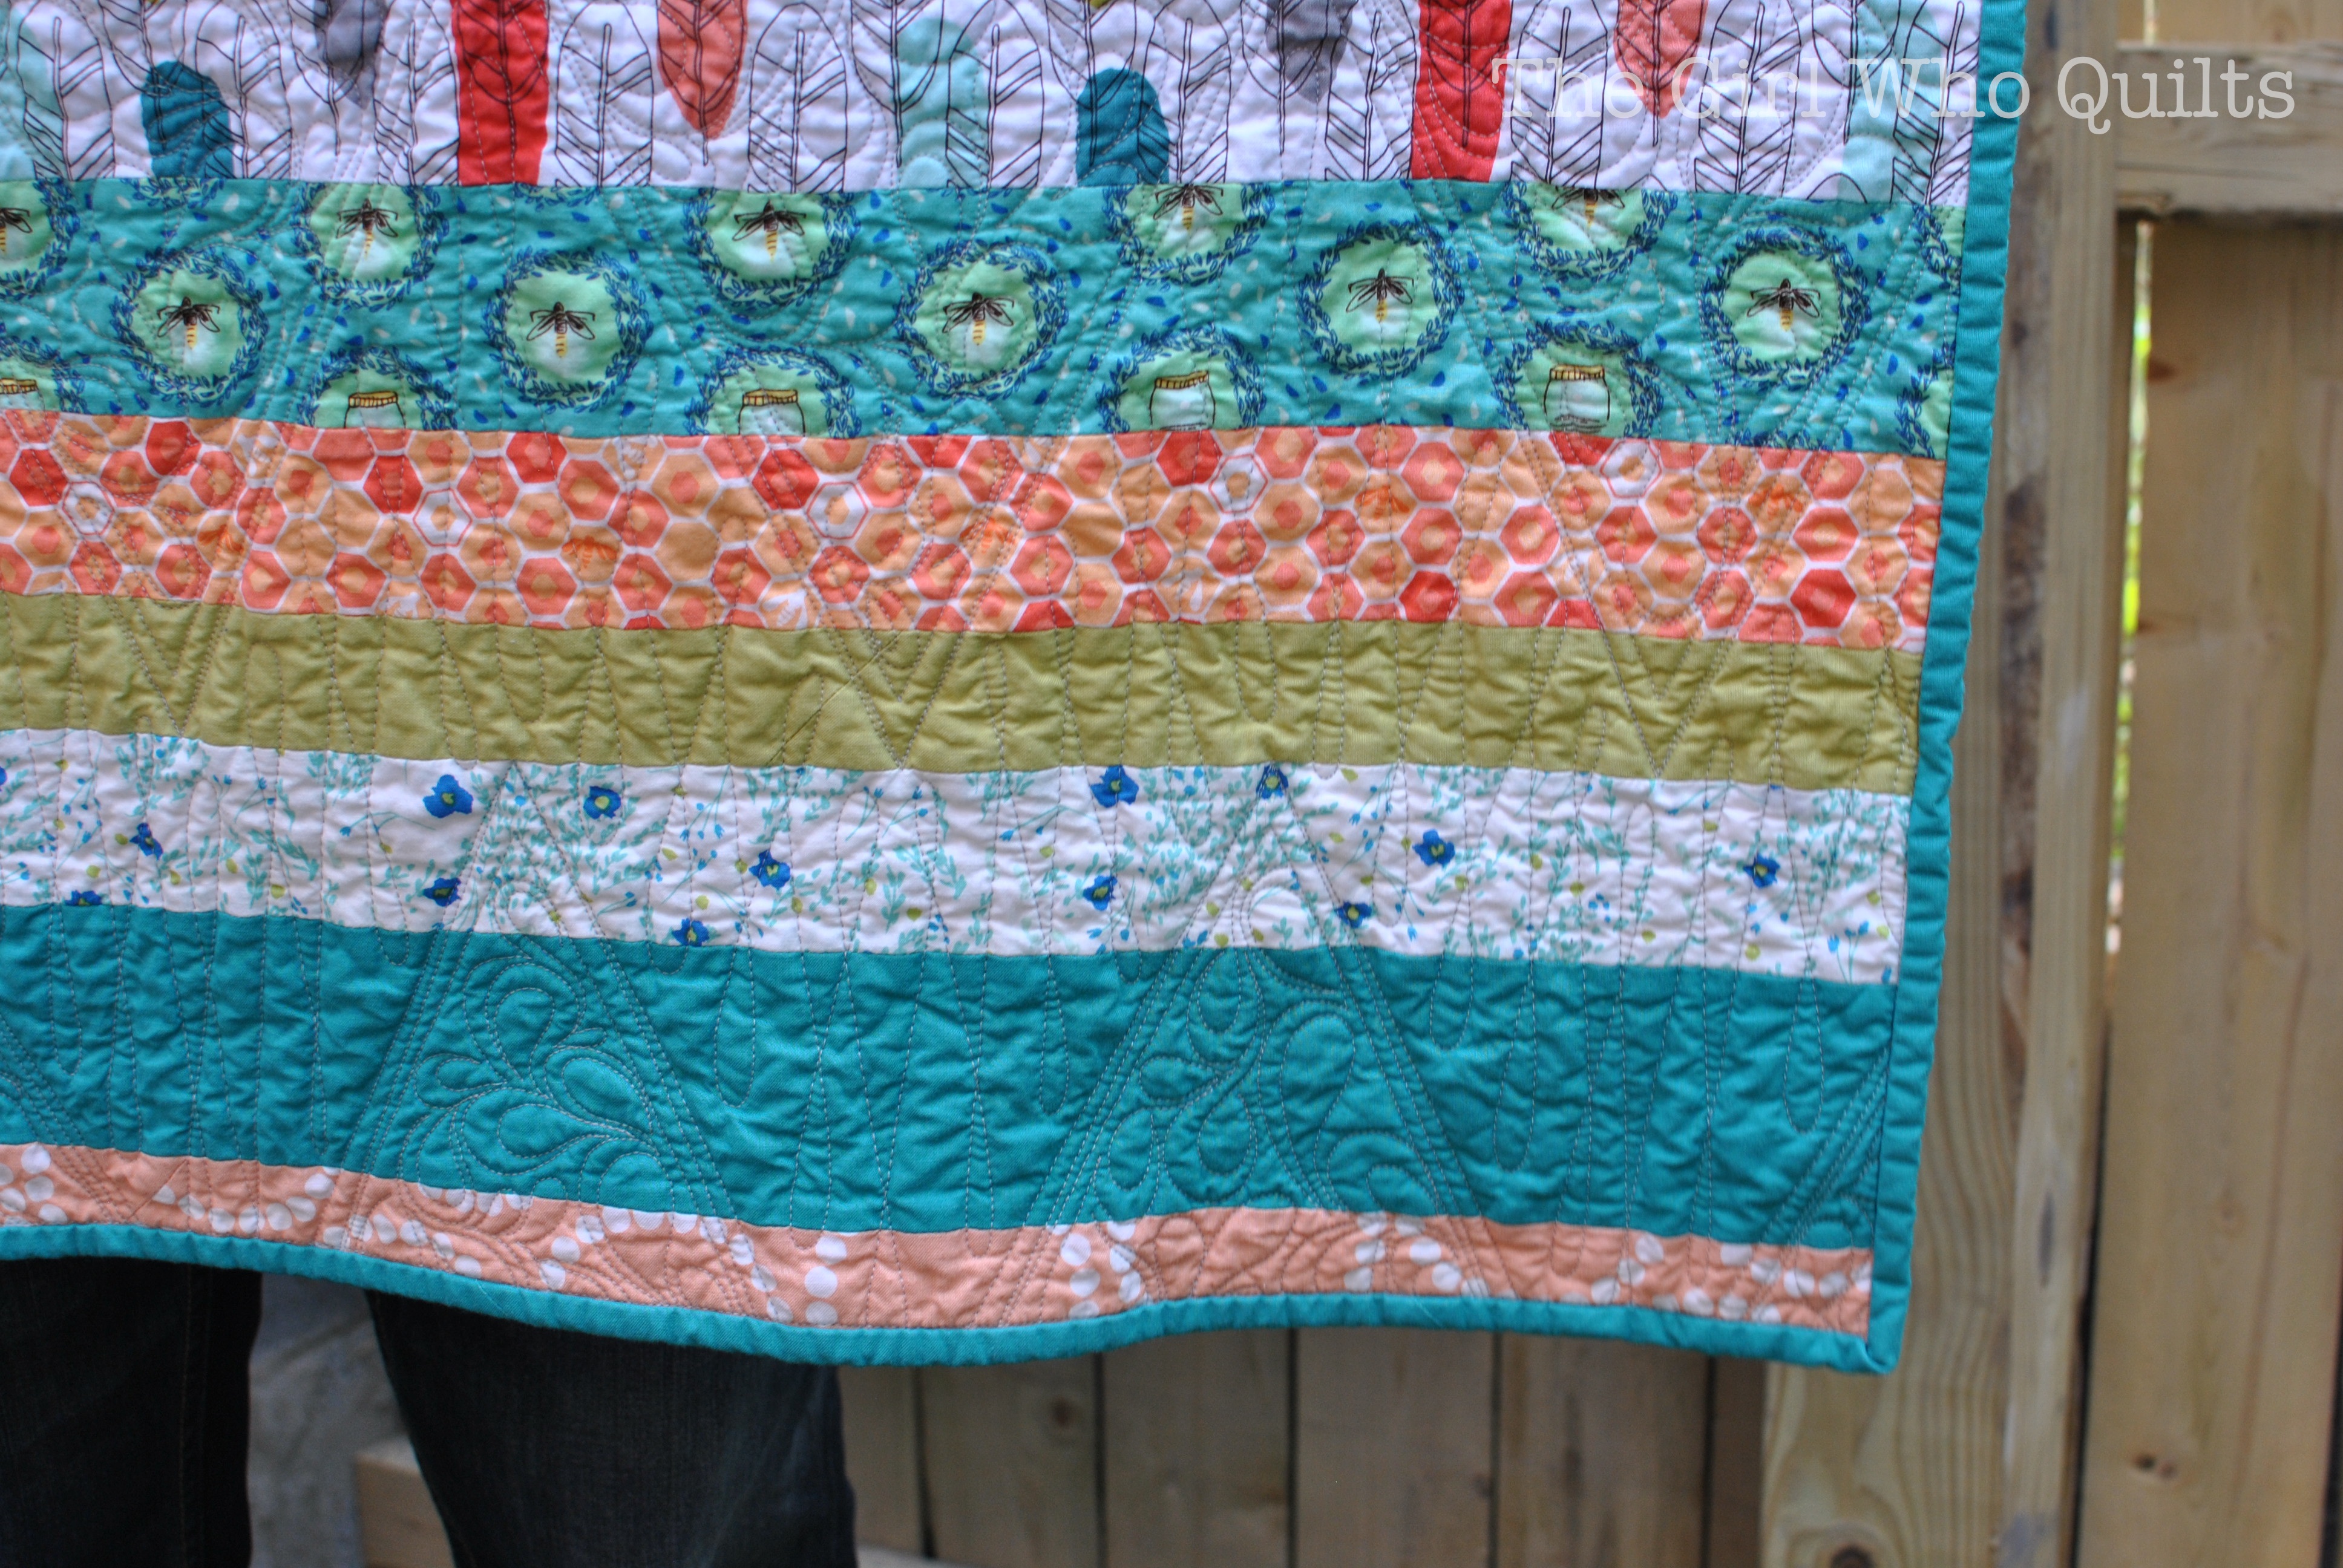
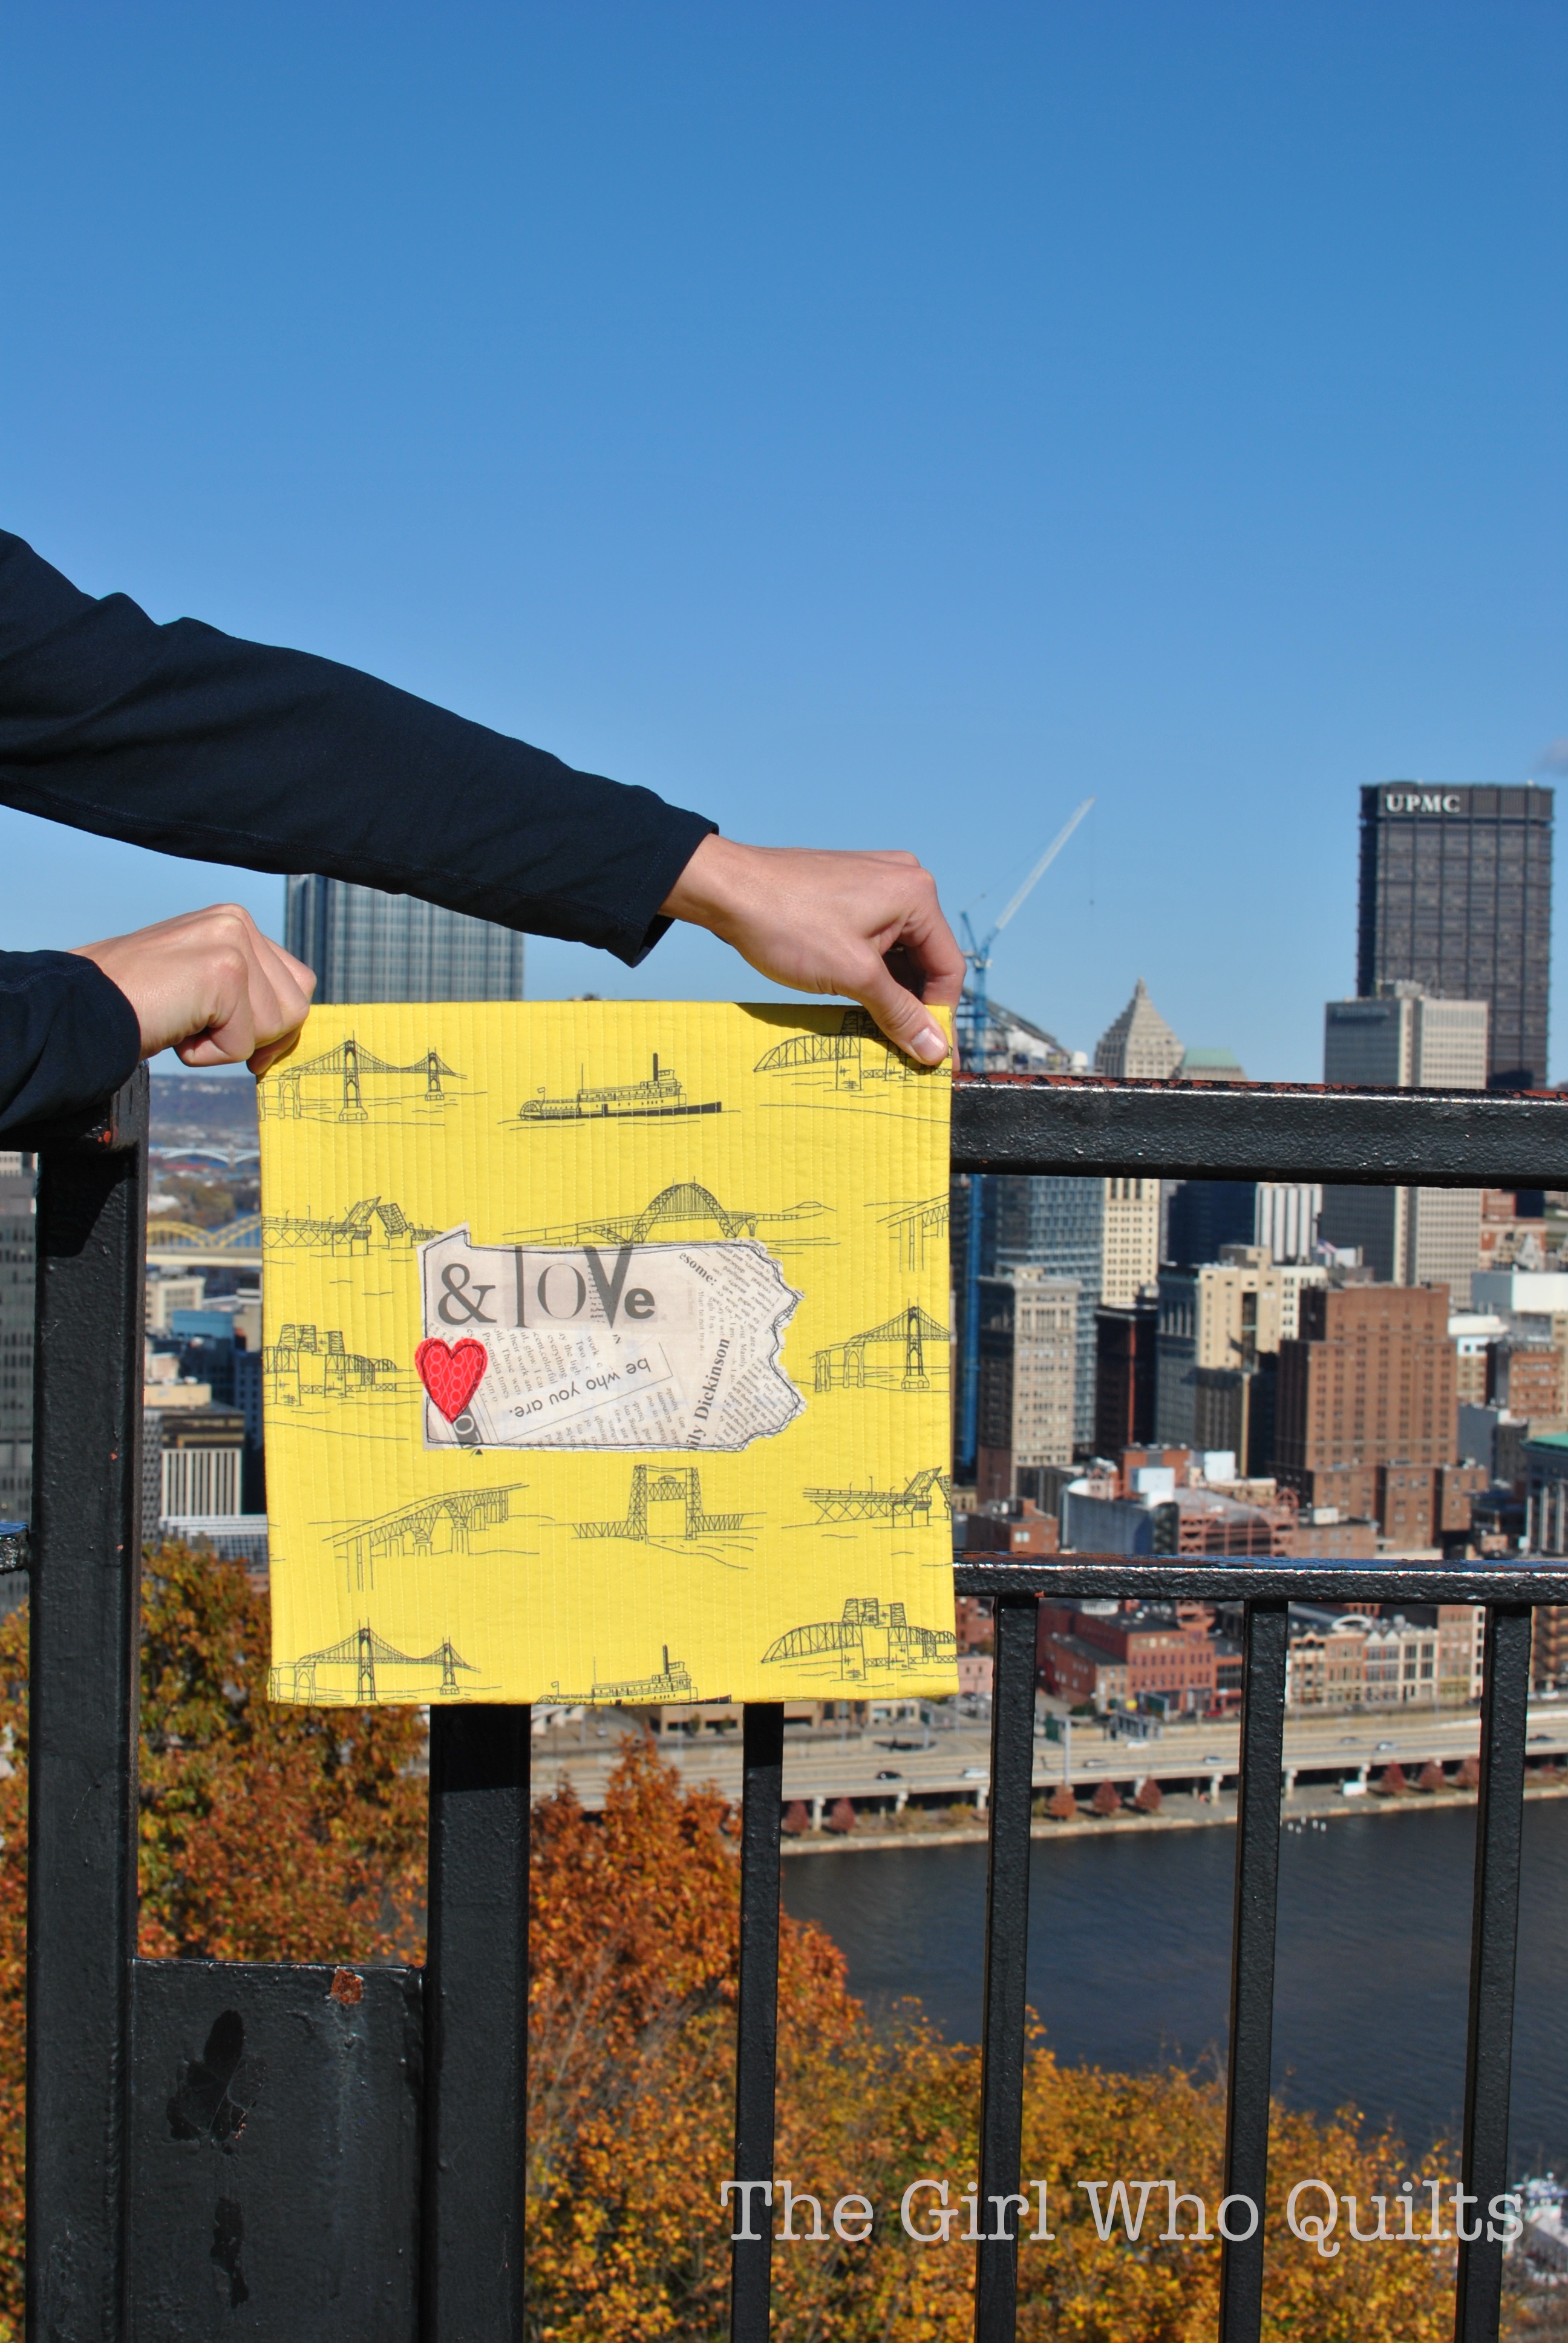
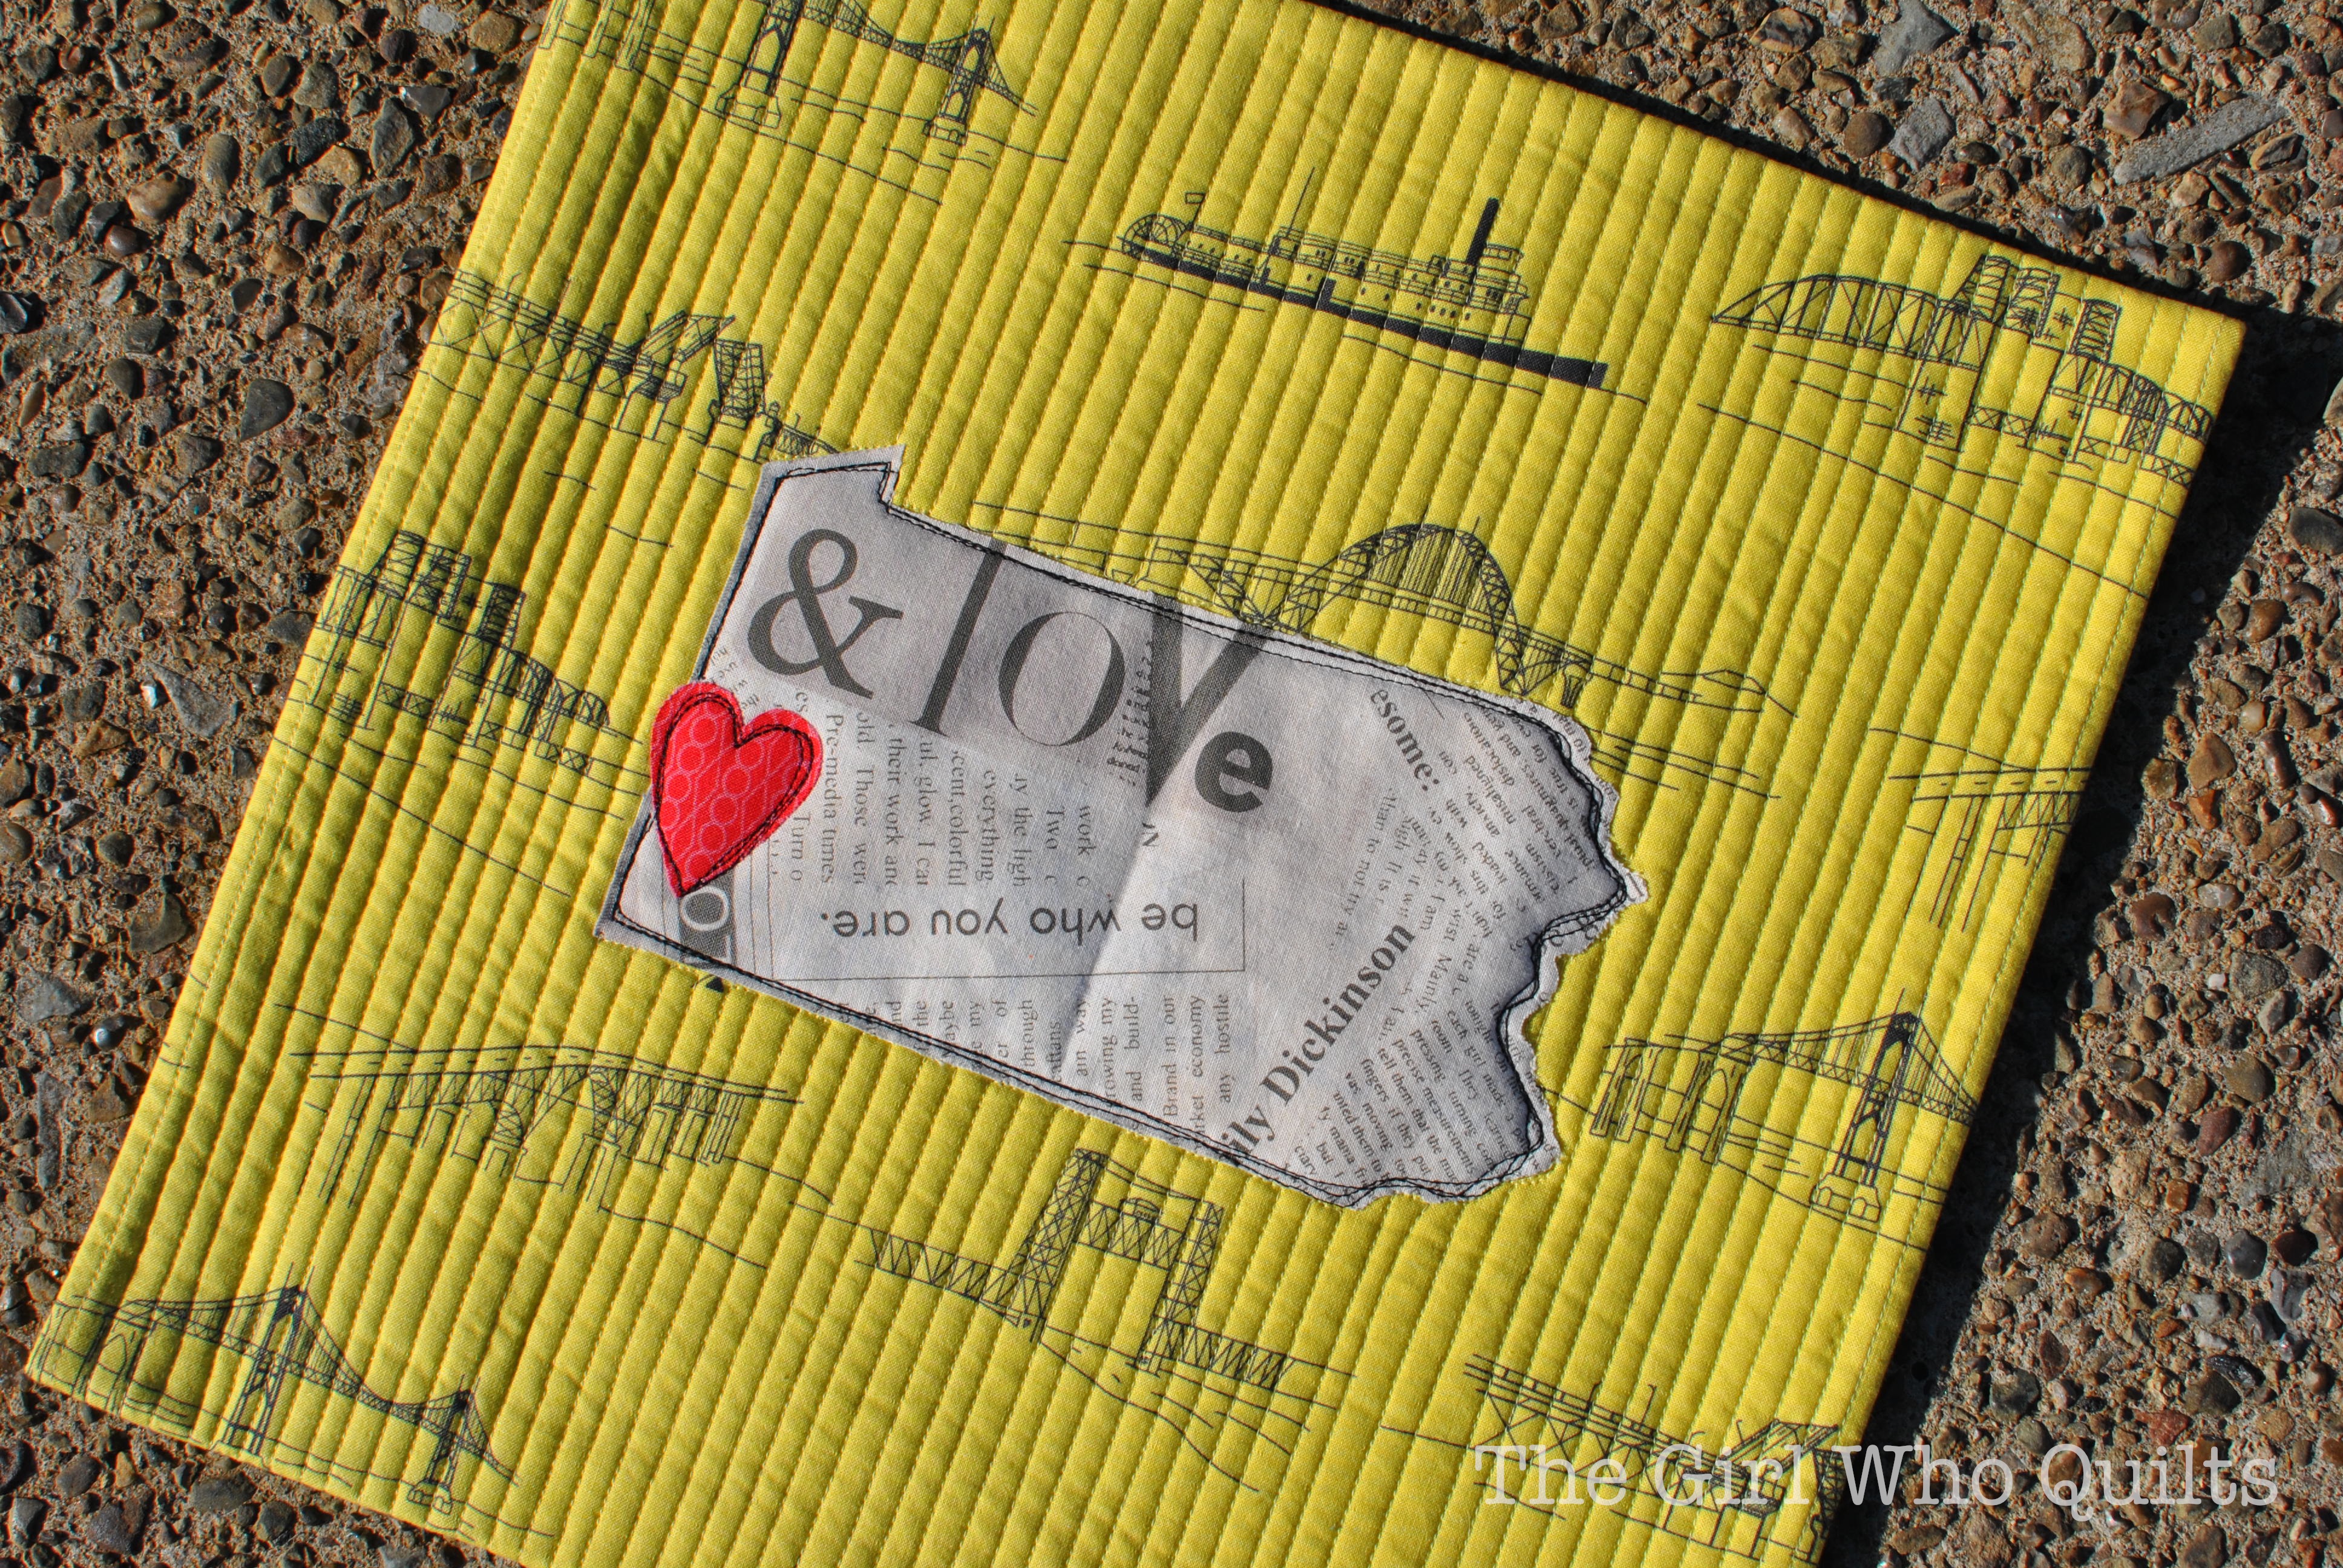
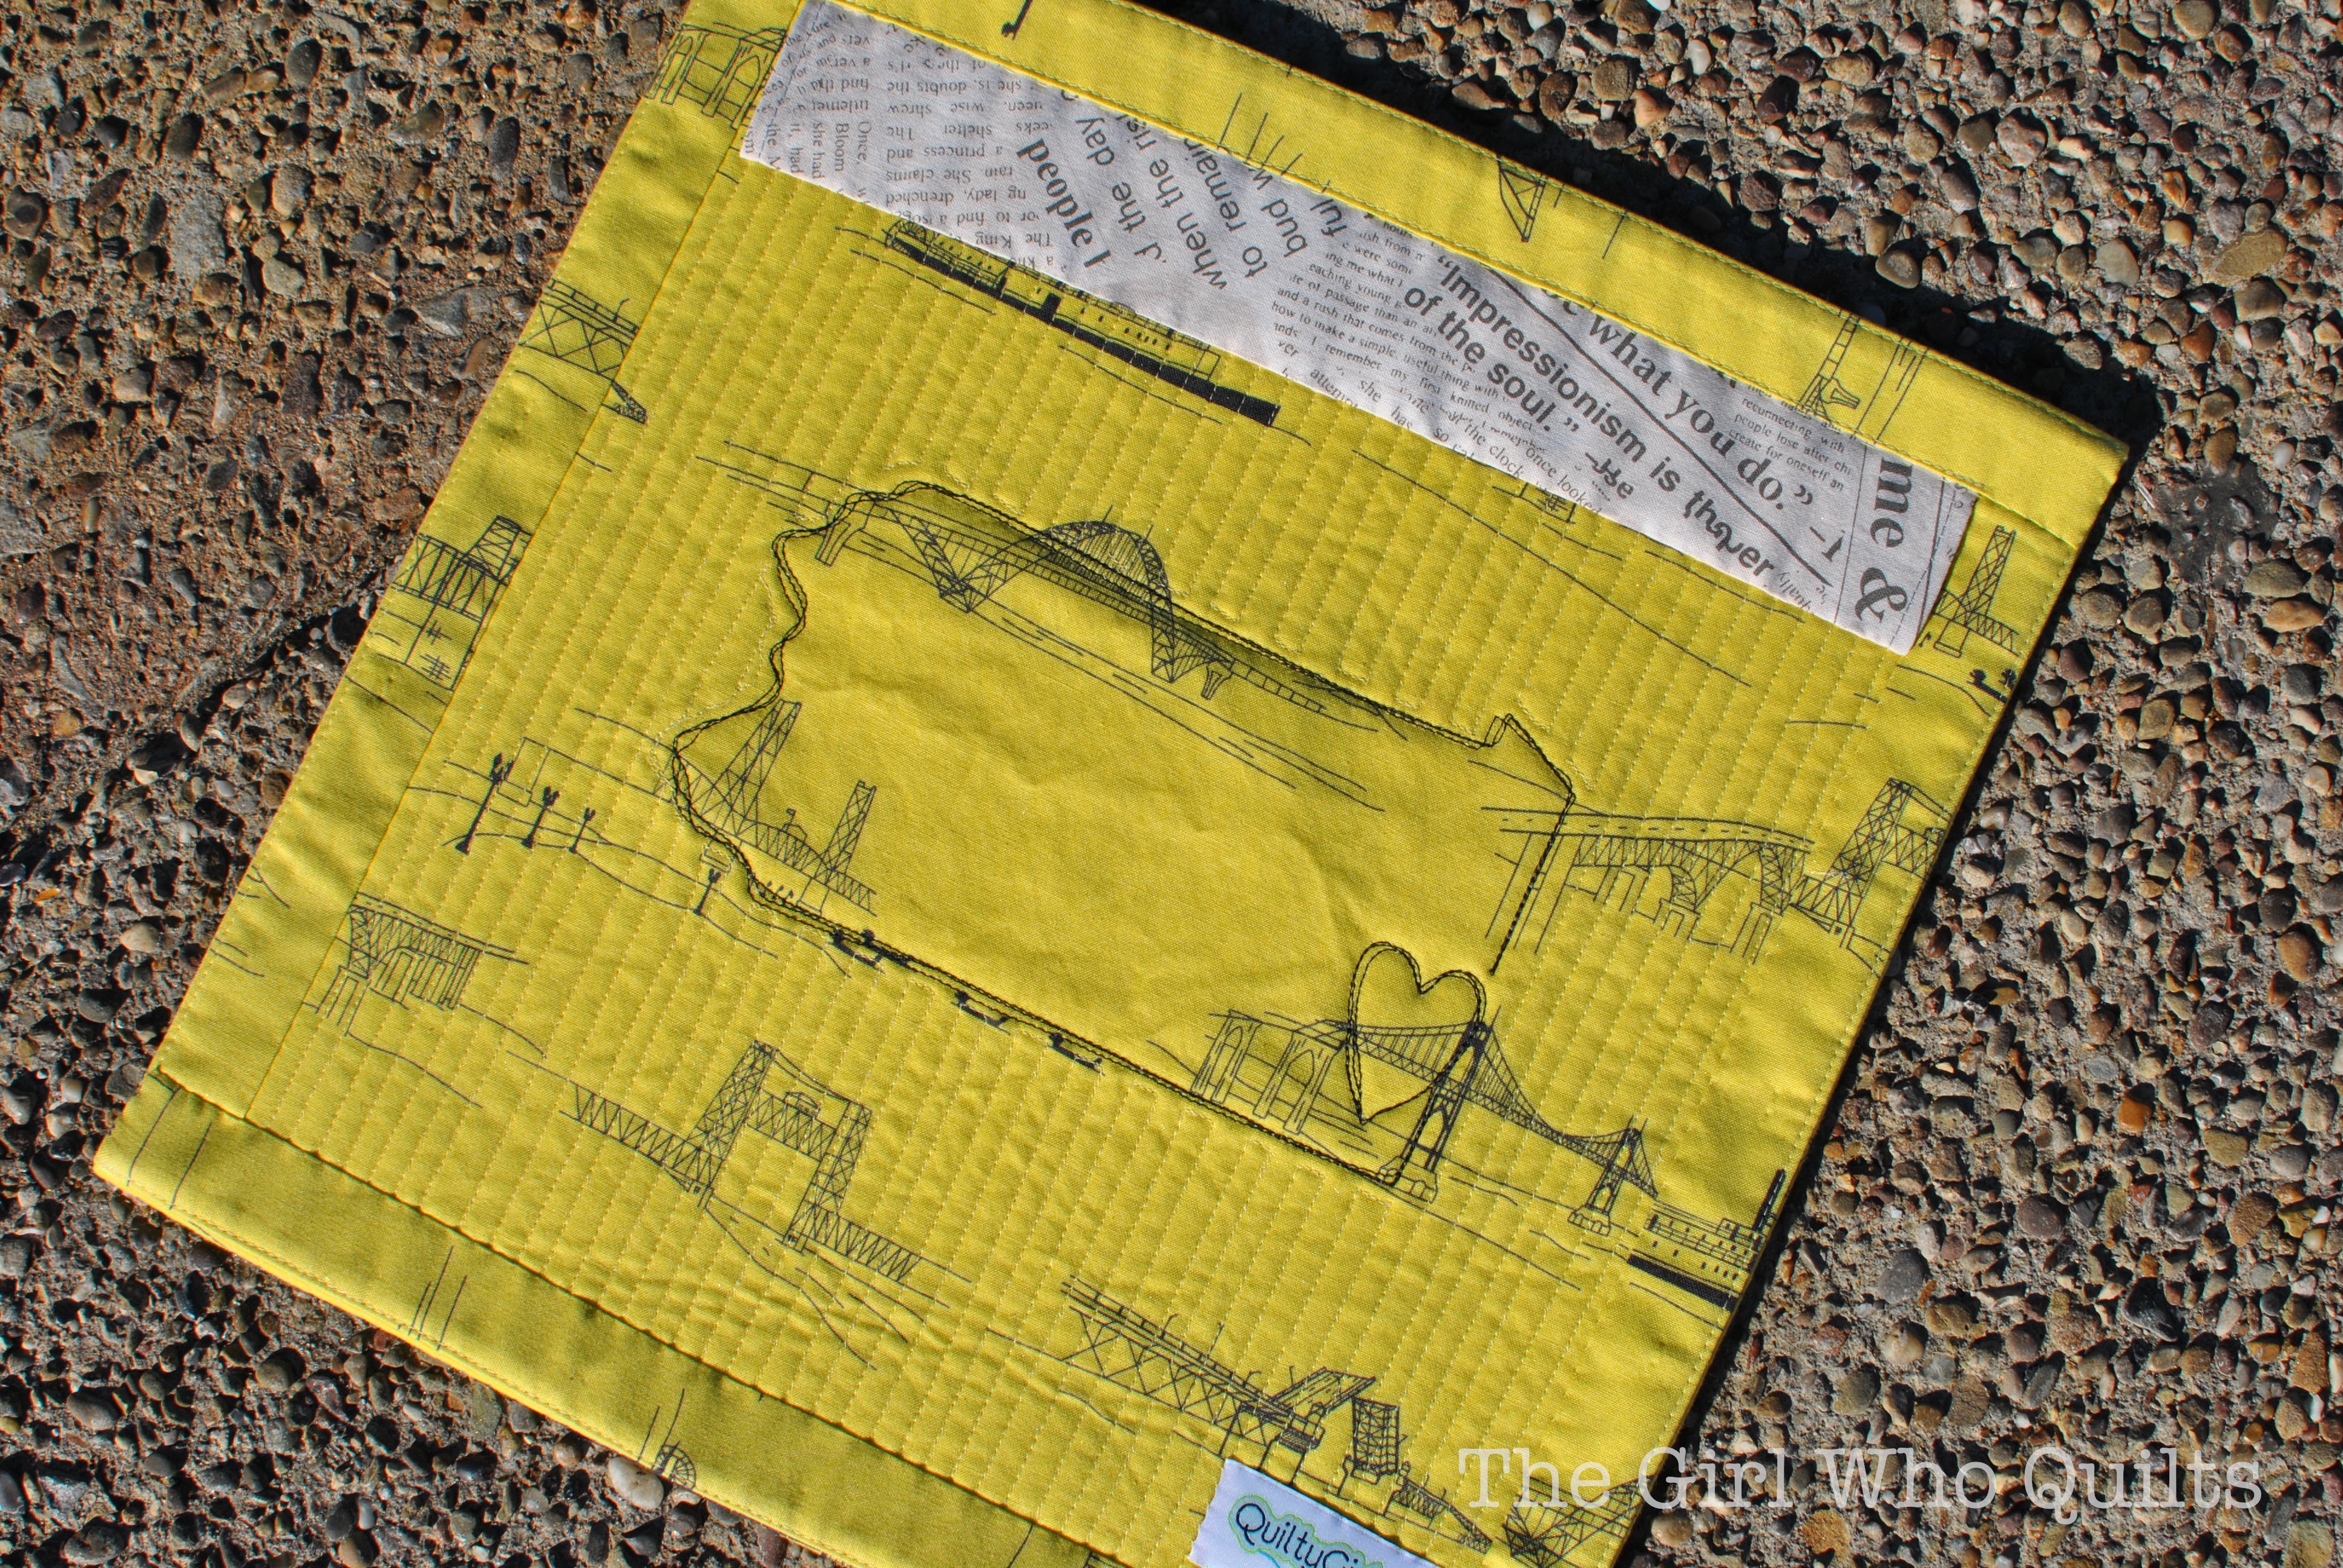
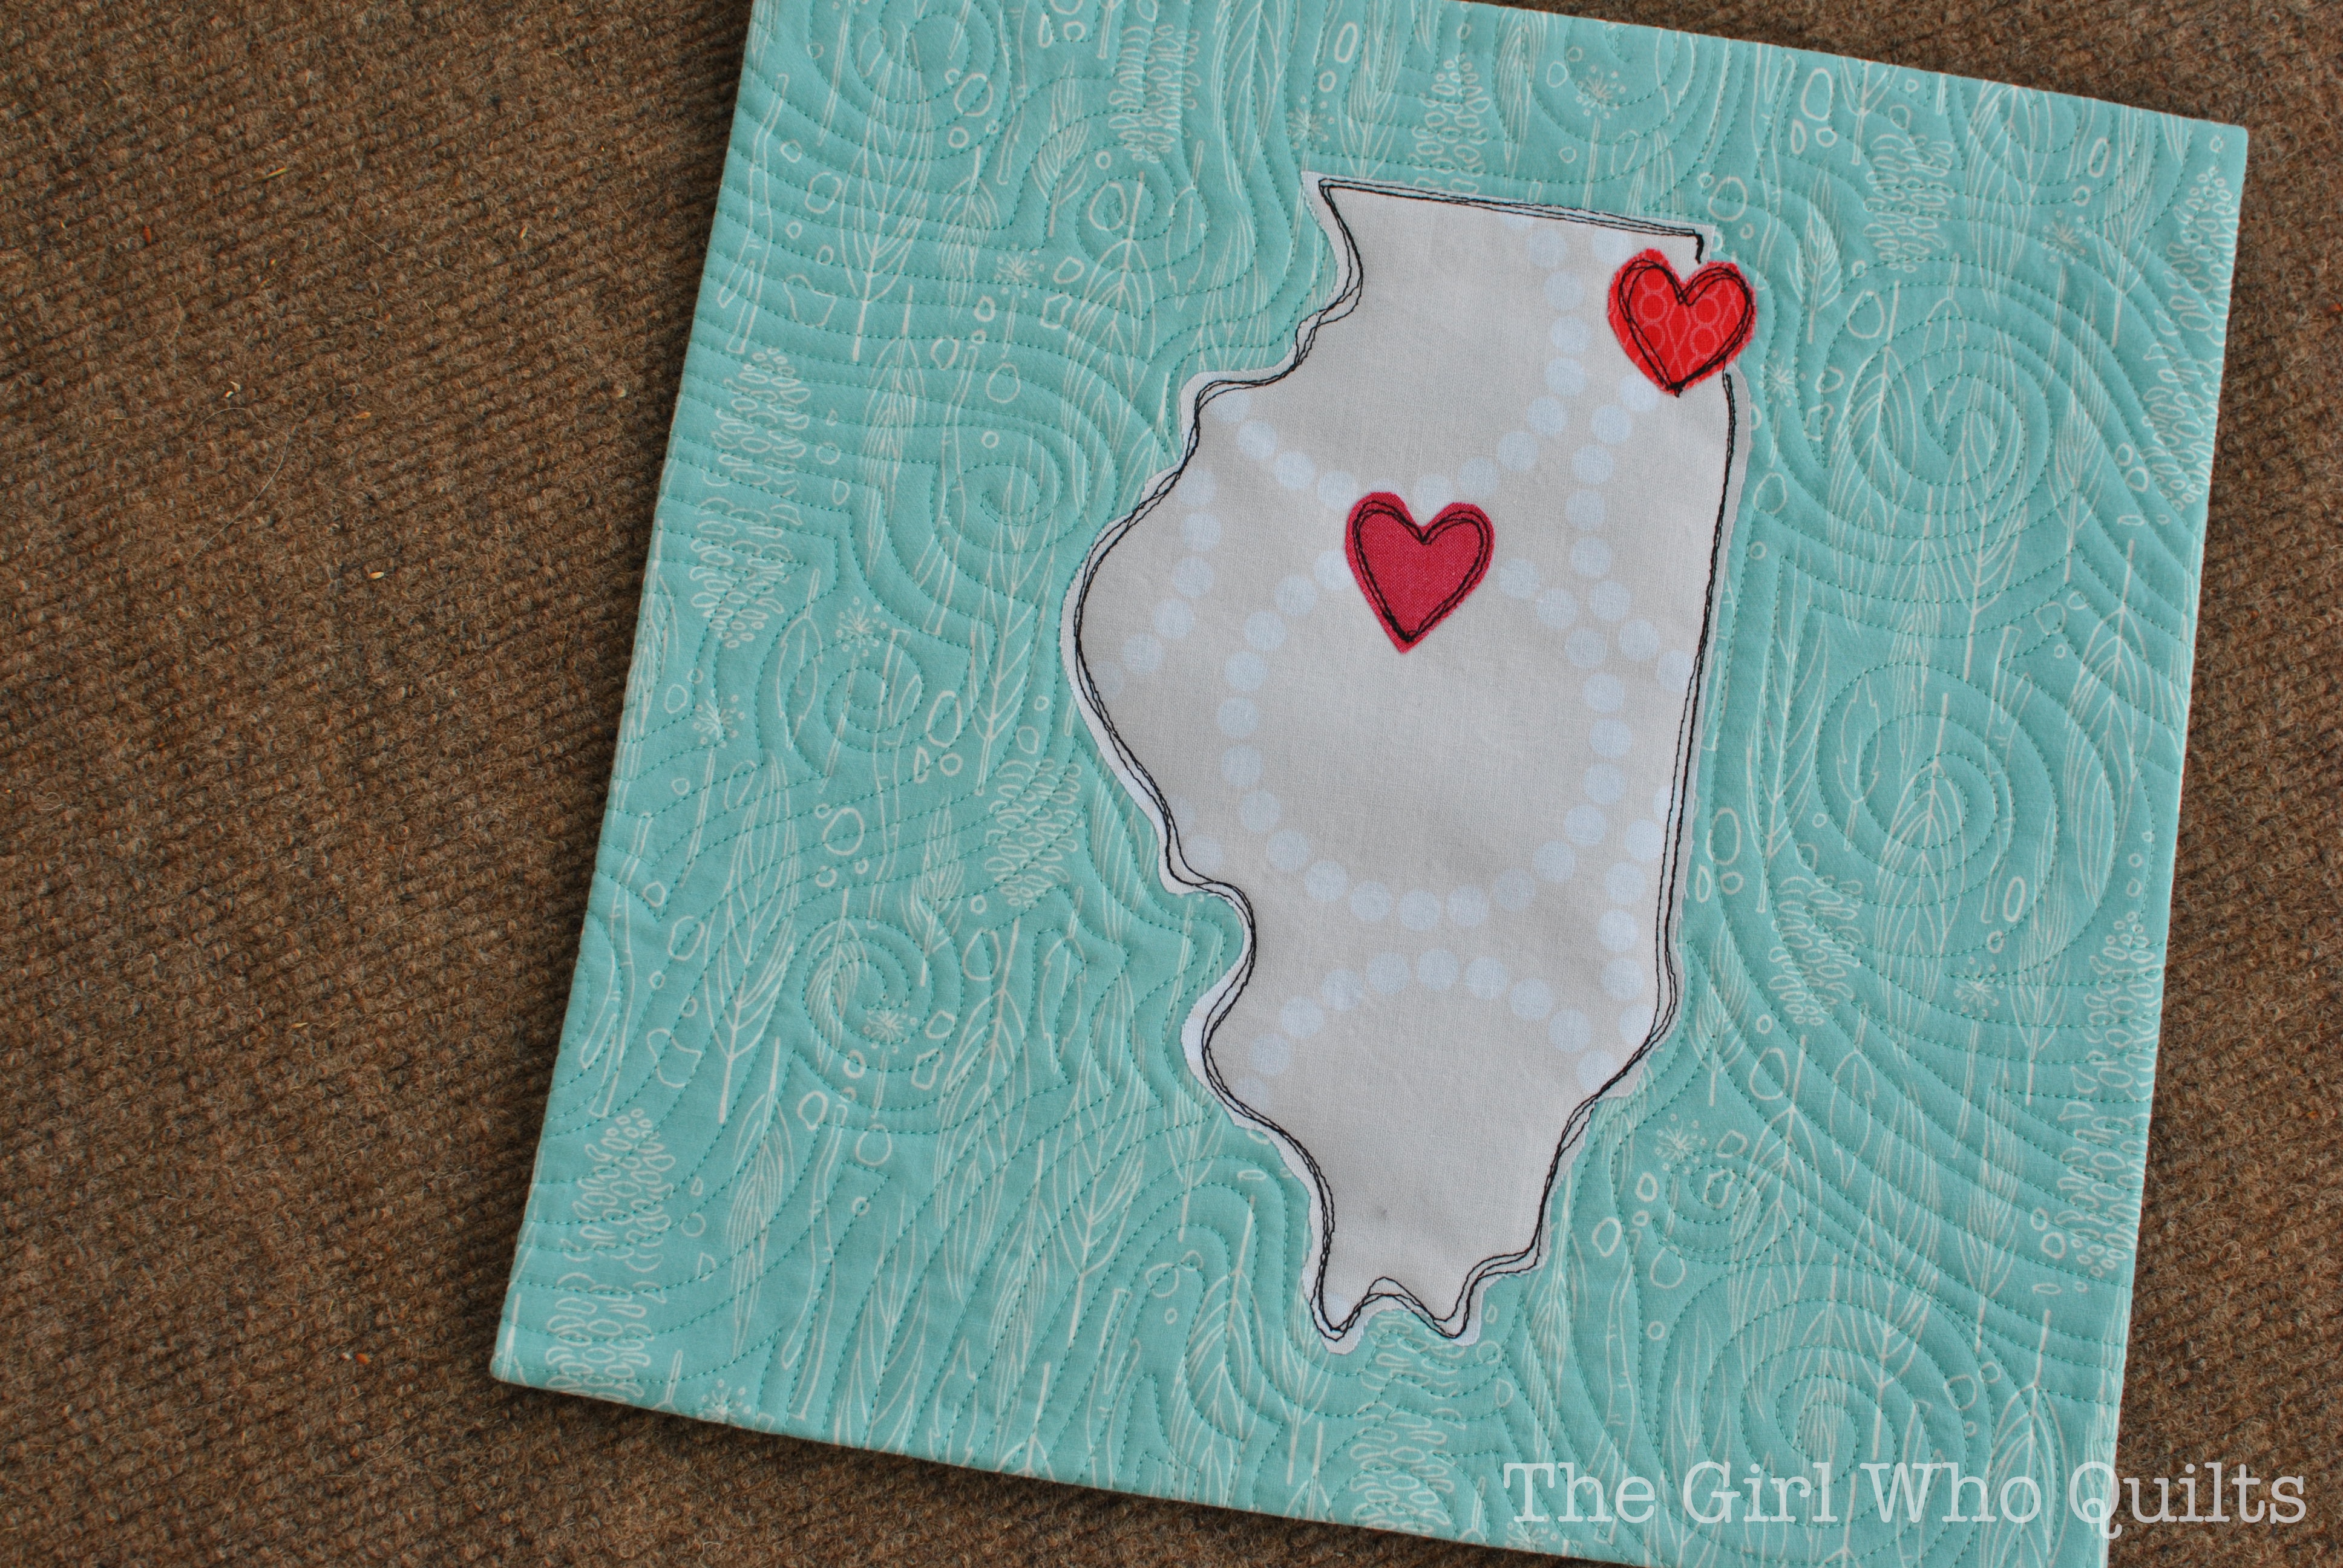
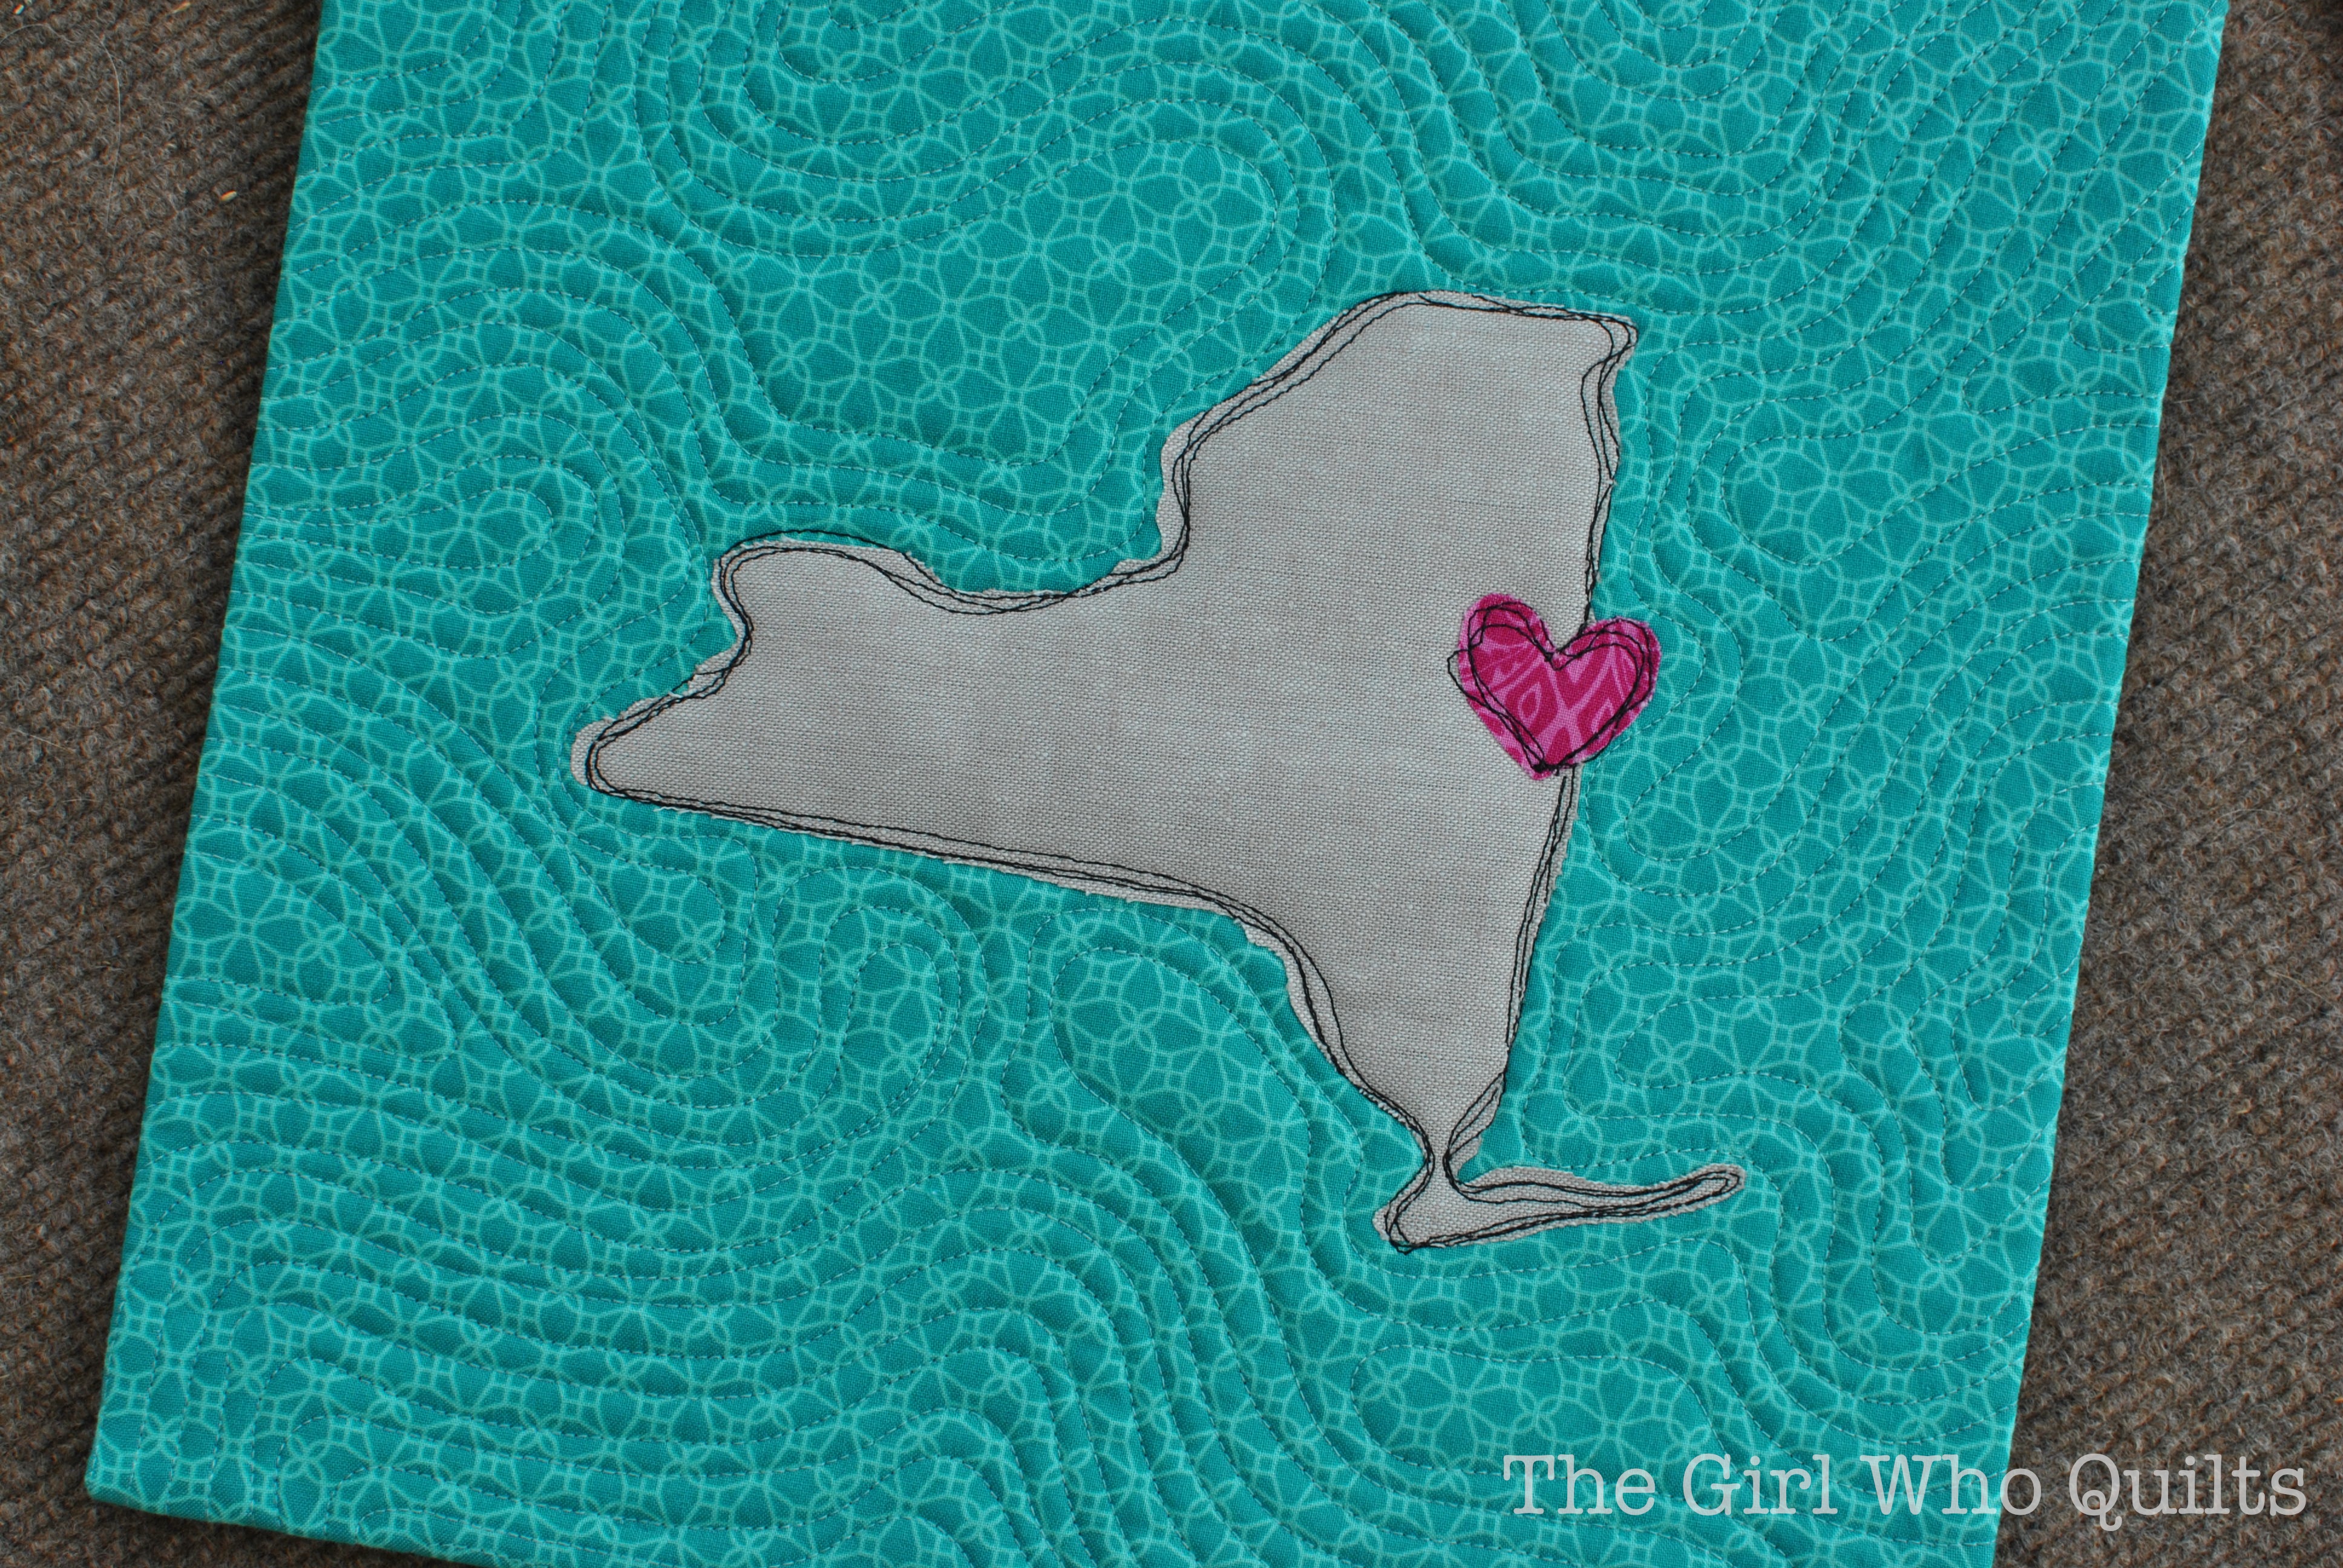
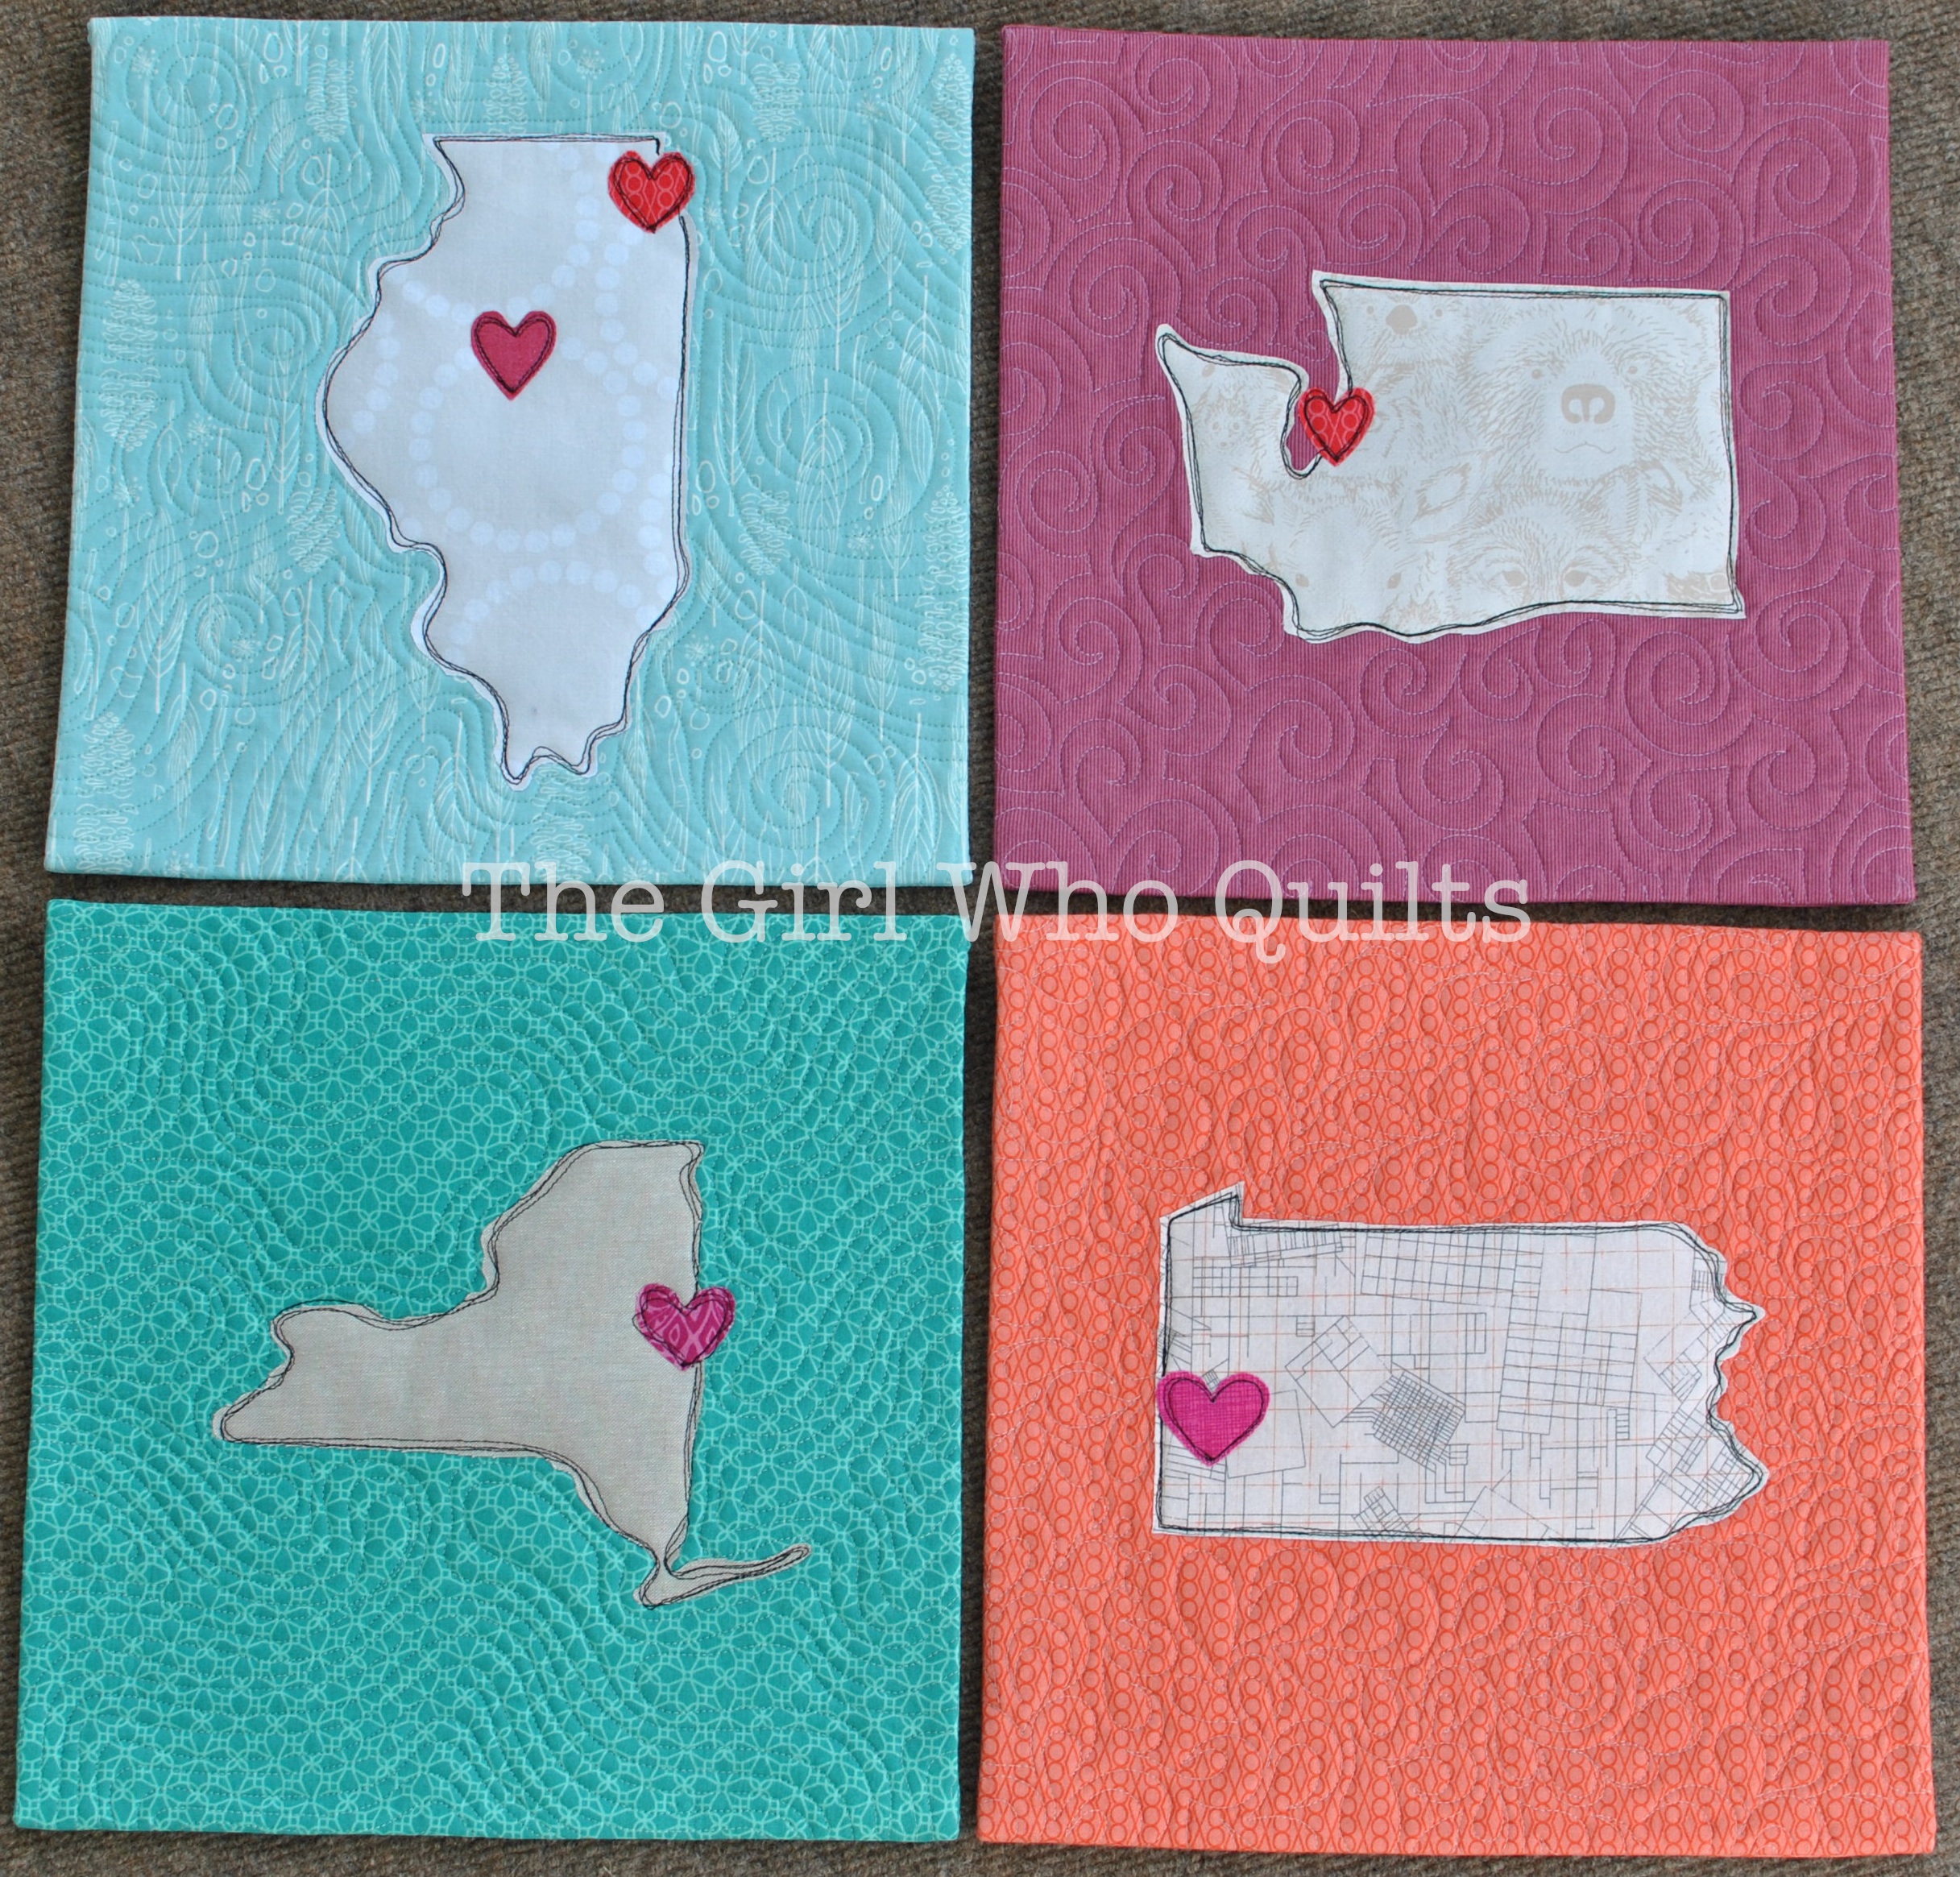
Upon finding a house to buy in Pittsburgh I decided it was *finally* time to reflect a bit on where we've been geographically over the years. In doing so, I created a mini quilt for each state that we have lived in, highlighting our locations with hearts. Because, you know, Home Is Where the Heart Is, and all that jazz. For my fabrics and colors, I tried to stick with jewel tones for the backgrounds and white/cream prints for the states. The hearts are varying shades of pinks and reds. By creating each piece separately and mixing designs, tones, and colors, I have the freedom to add to this collection without disrupting it.

Let's start at the beginning! First we have the Illinois mini. We lived in the Chicago area and also in the Peoria area of Illinois. I love the blue print in this mini - while not really a jewel tone, it really reflects the Native American history in Illinois, I think.

Home is Where...

Next we lived in Seattle, Washington. We lived in a very urban area, right in the heart of Seattle, but it was always clear that we were just steps from nature! From the "green" attitude of the residents to the mountain views in nearly any direction, I had to use a wildlife print in this mini!

Home is Where... 

From Seattle we moved to upstate New York, in Saratoga Springs. I used a linen and a vibrate green for this mini. Saratoga Springs is known for its natural springs, and despite being a small town far from NYC, it has a large "crunchy" population.

Home is Where... 

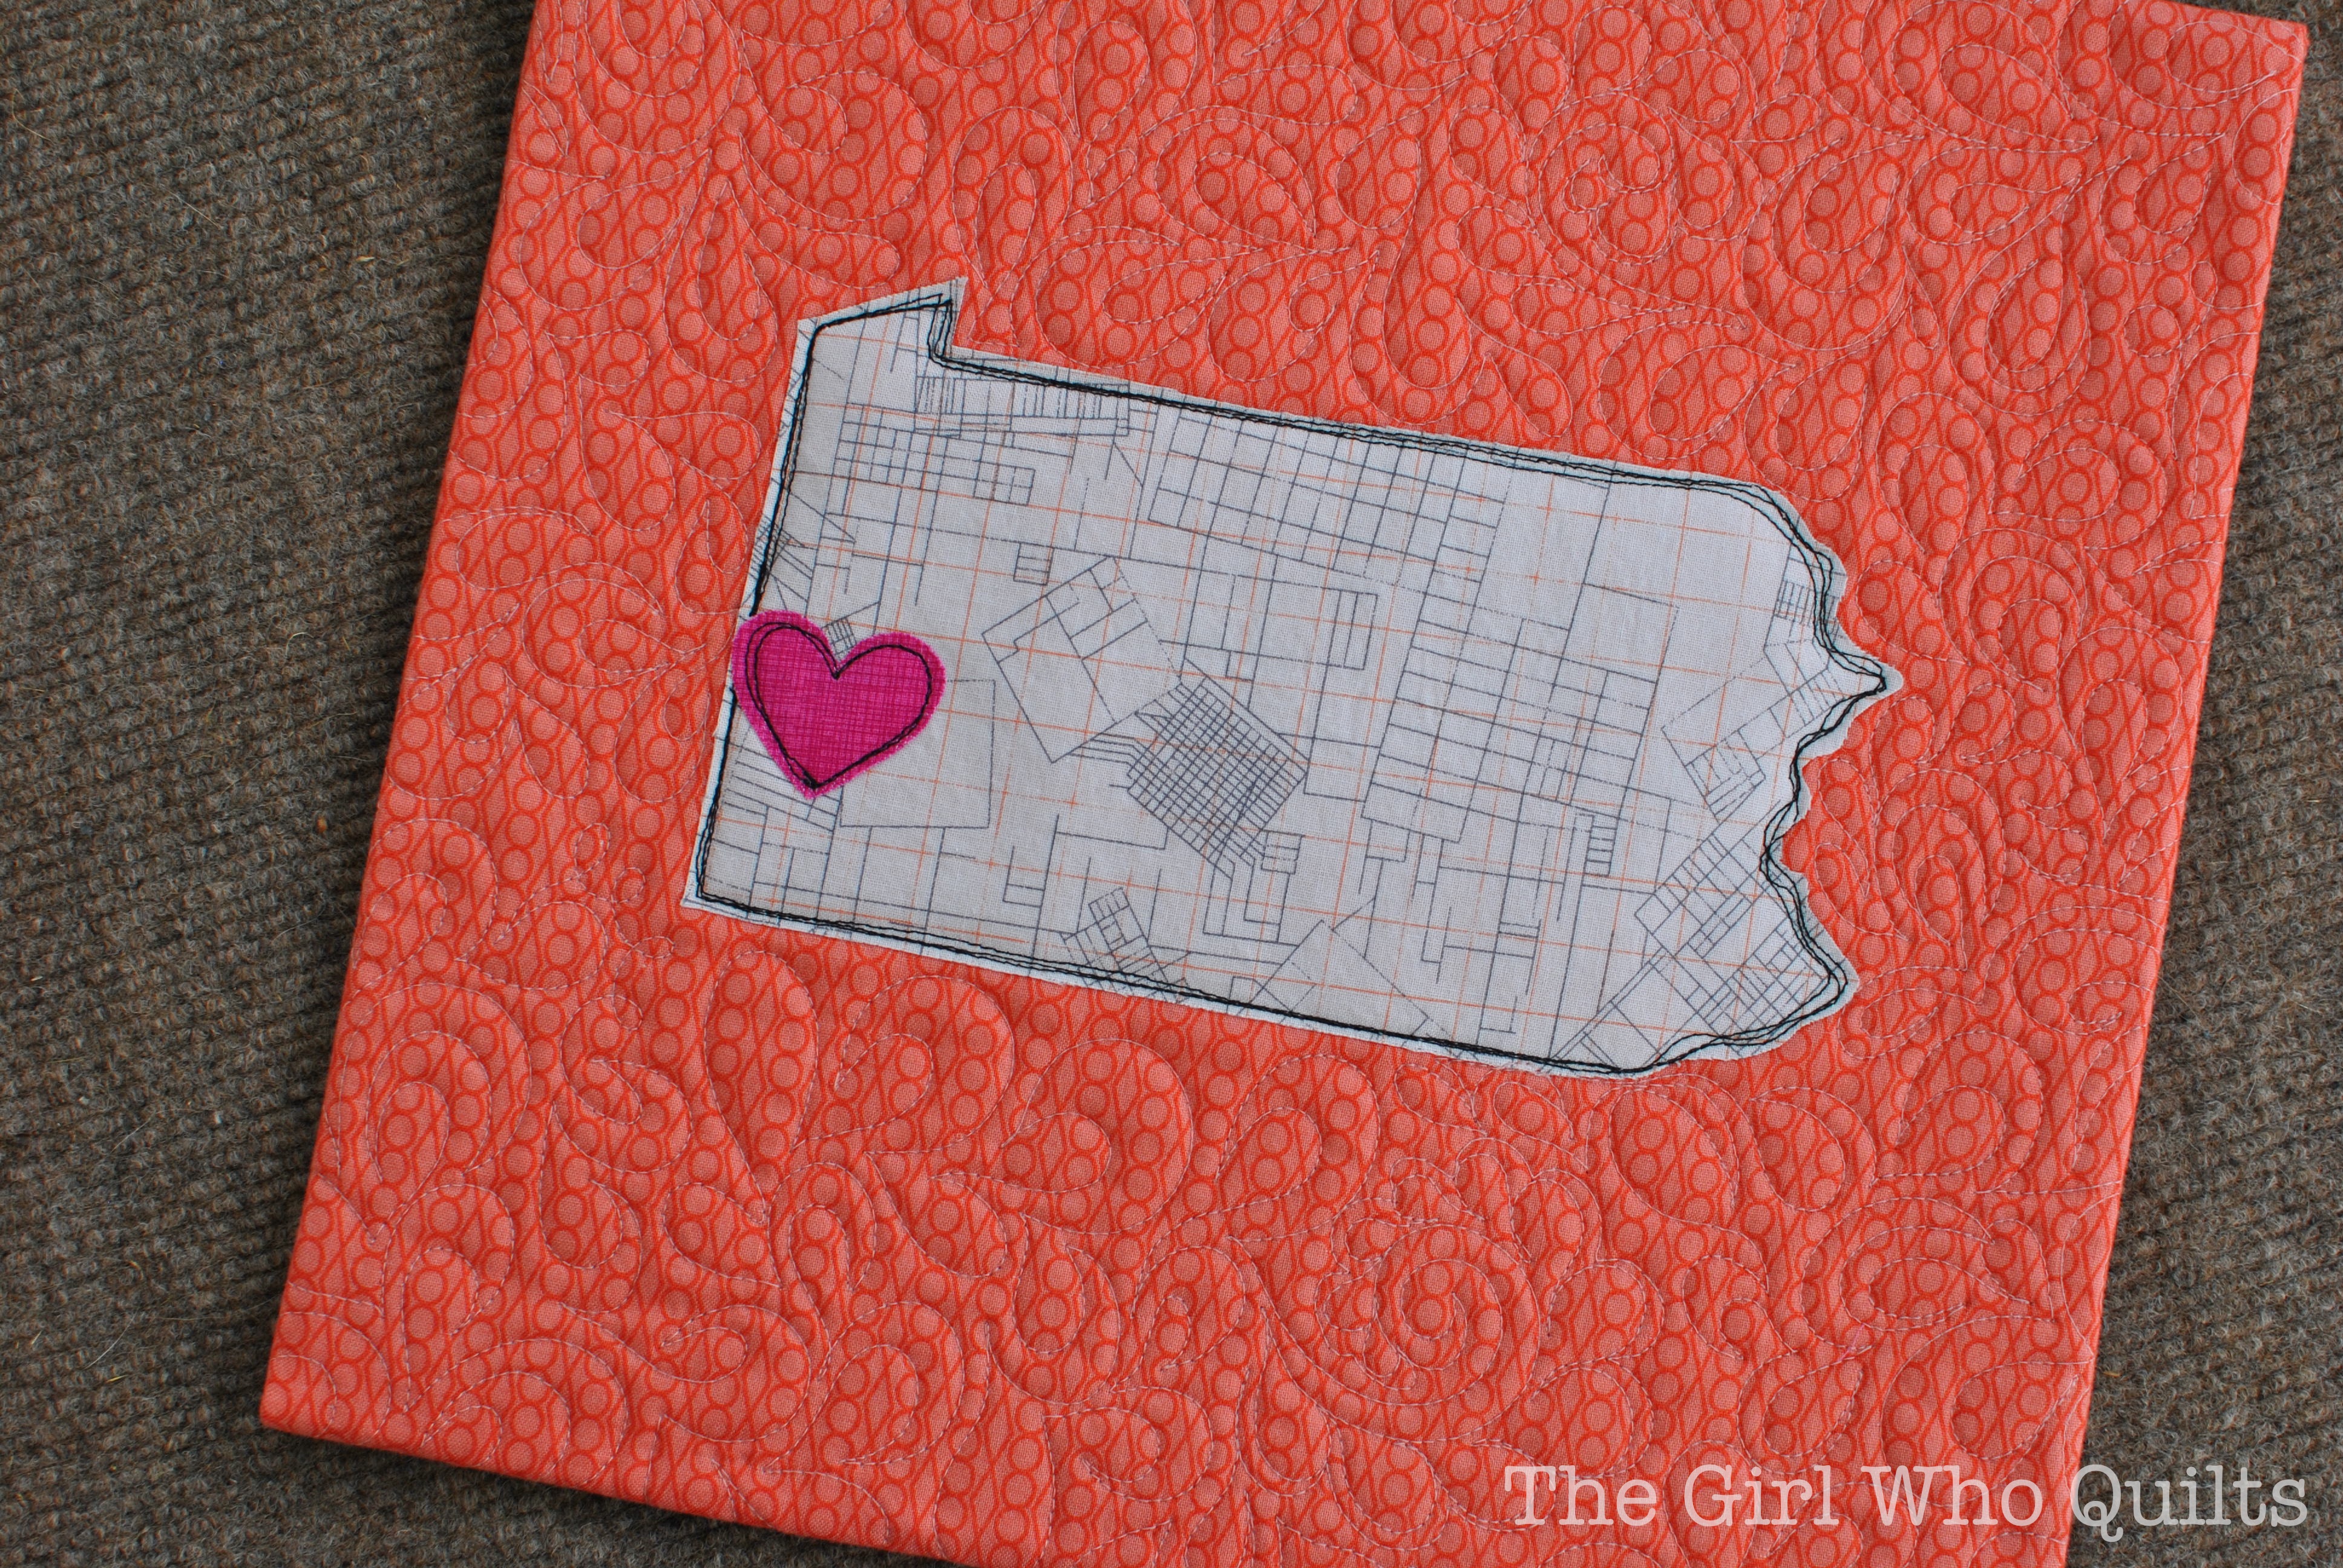
And here we are now, in Pittsburgh, PA! The house we bought in Pittsburgh is an old rowhouse that was completely gutted and rehabbed. The first time we "toured" the house, part of the (new) roof was unfinished and the walls were only framed. So, it seemed quite fitting to use a "blueprint" fabric for this mini!

Home is Where... 

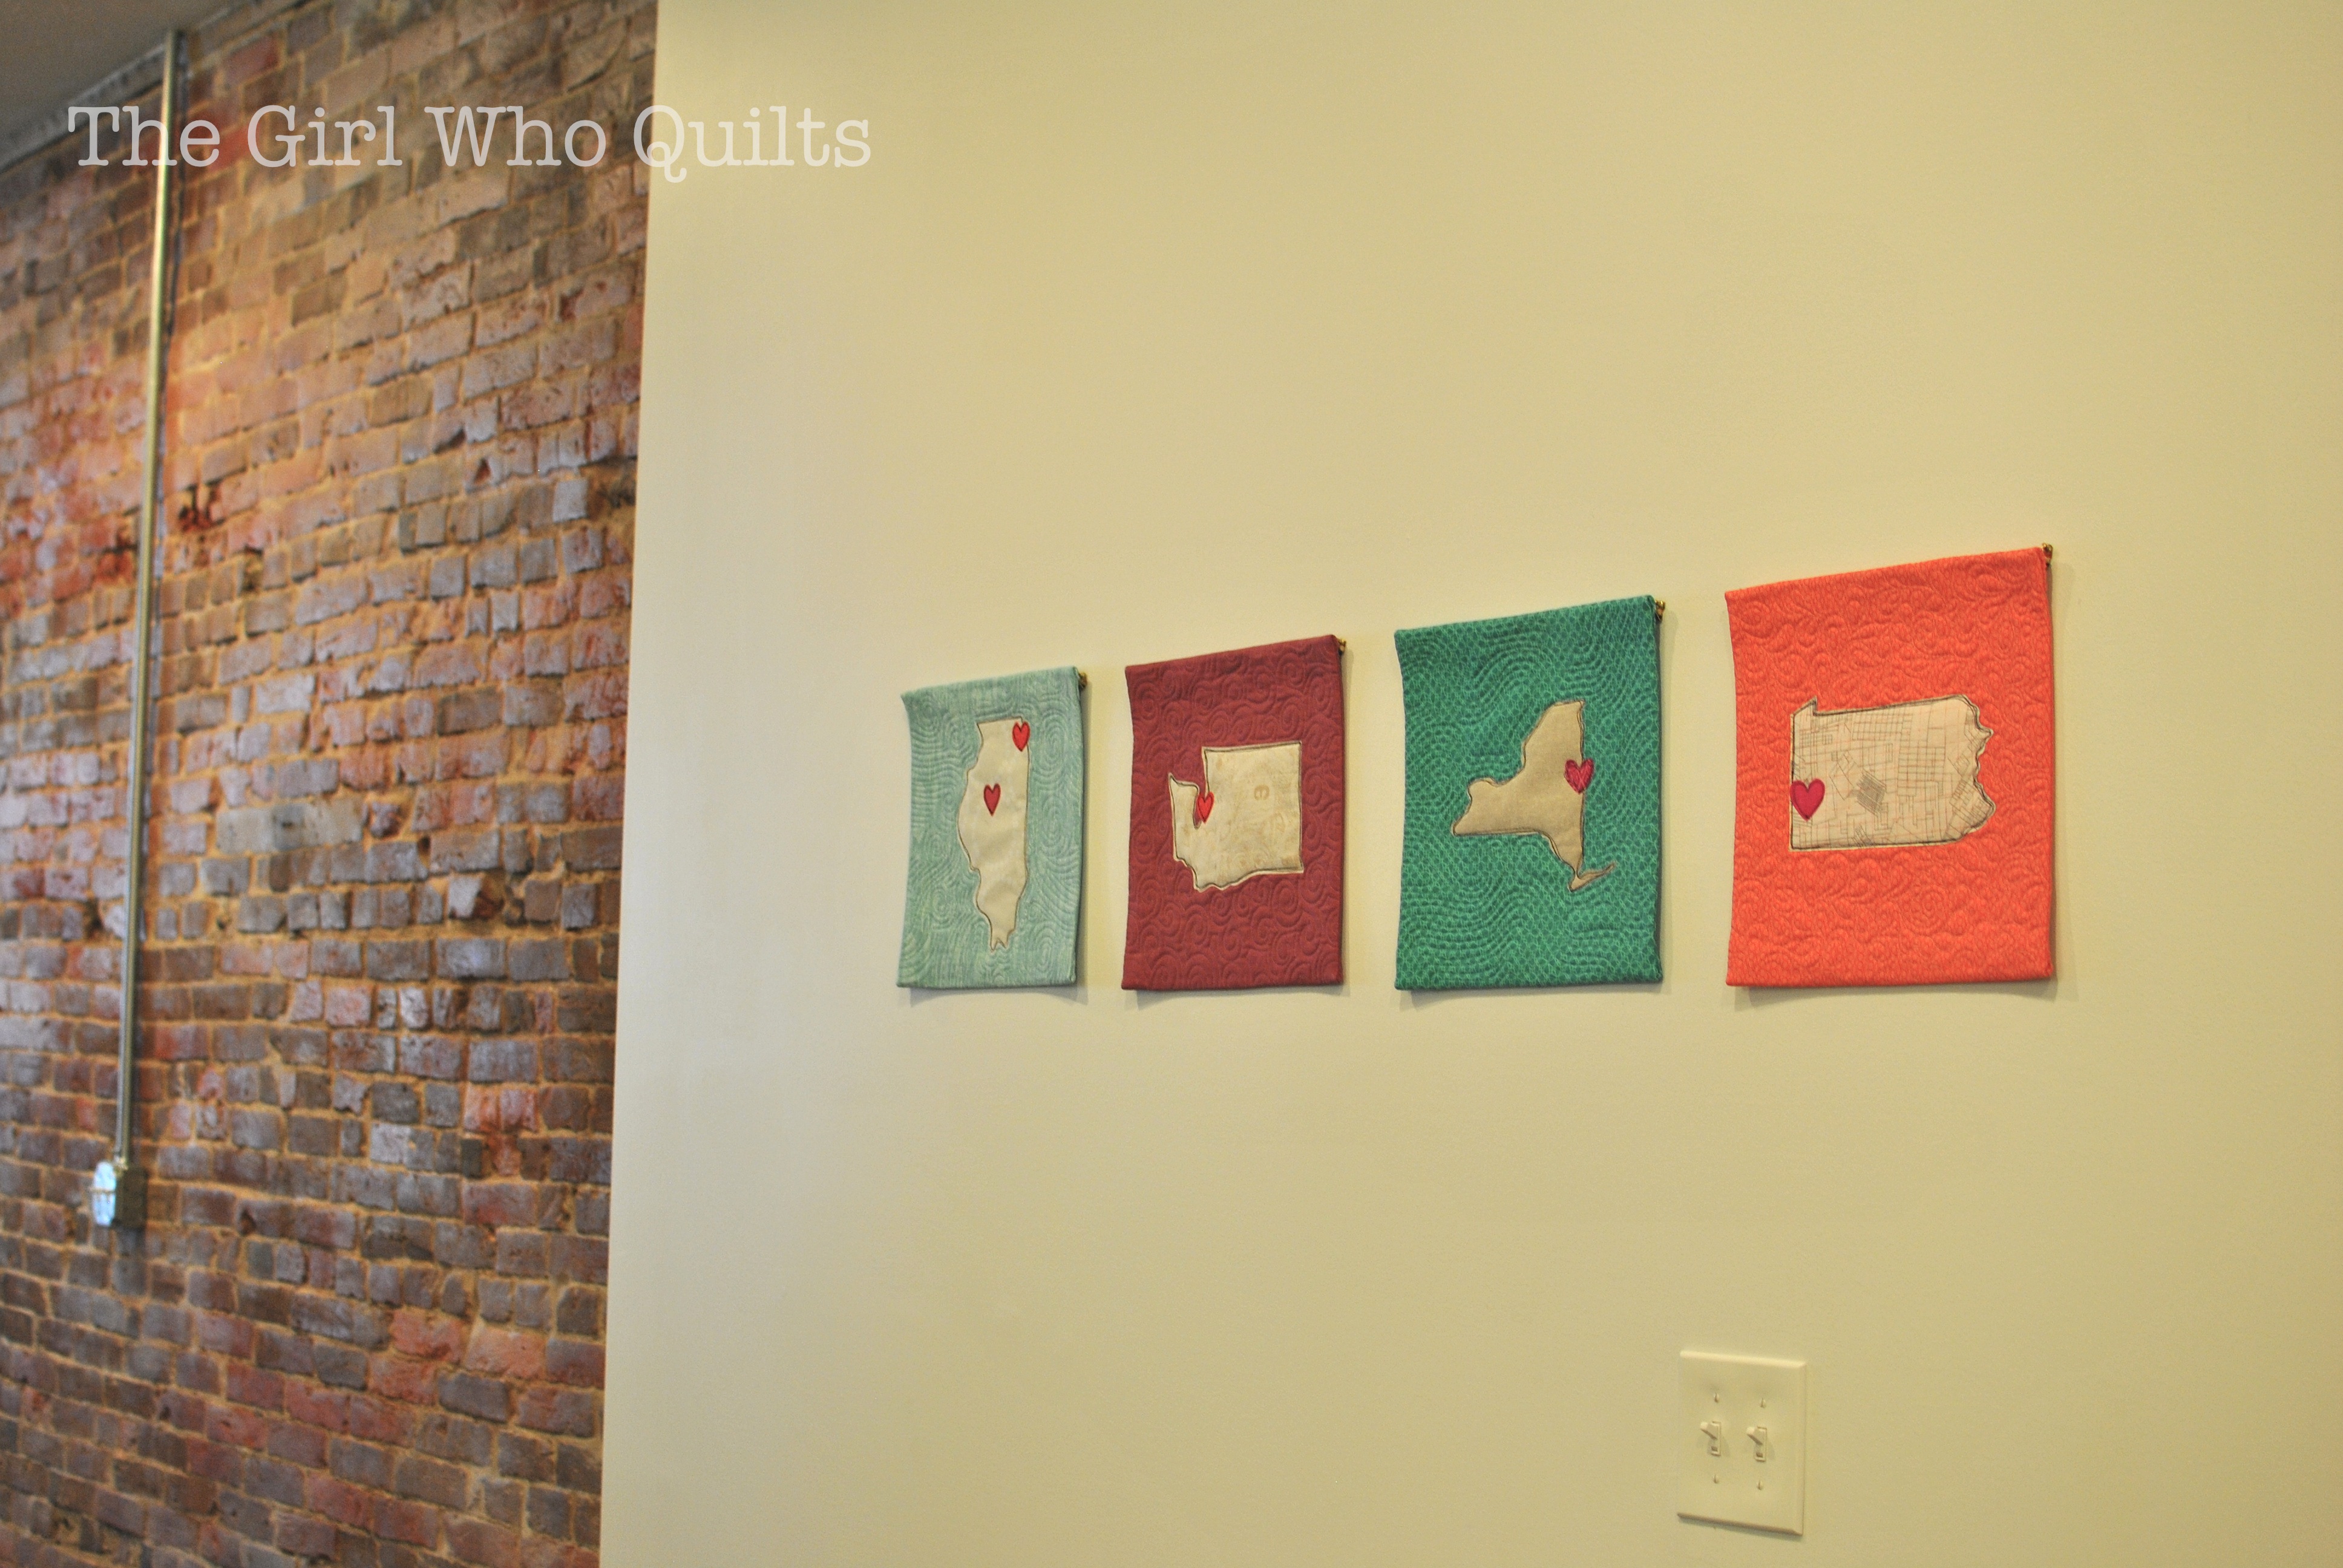
Here they are all together! We hung them in our dining area, which is where we tend to end up mingling when we have guests. It's such a fun conversation starter, and I love that they are a prominent feature in our house! 

Home is Where... 

A bit about the design process:
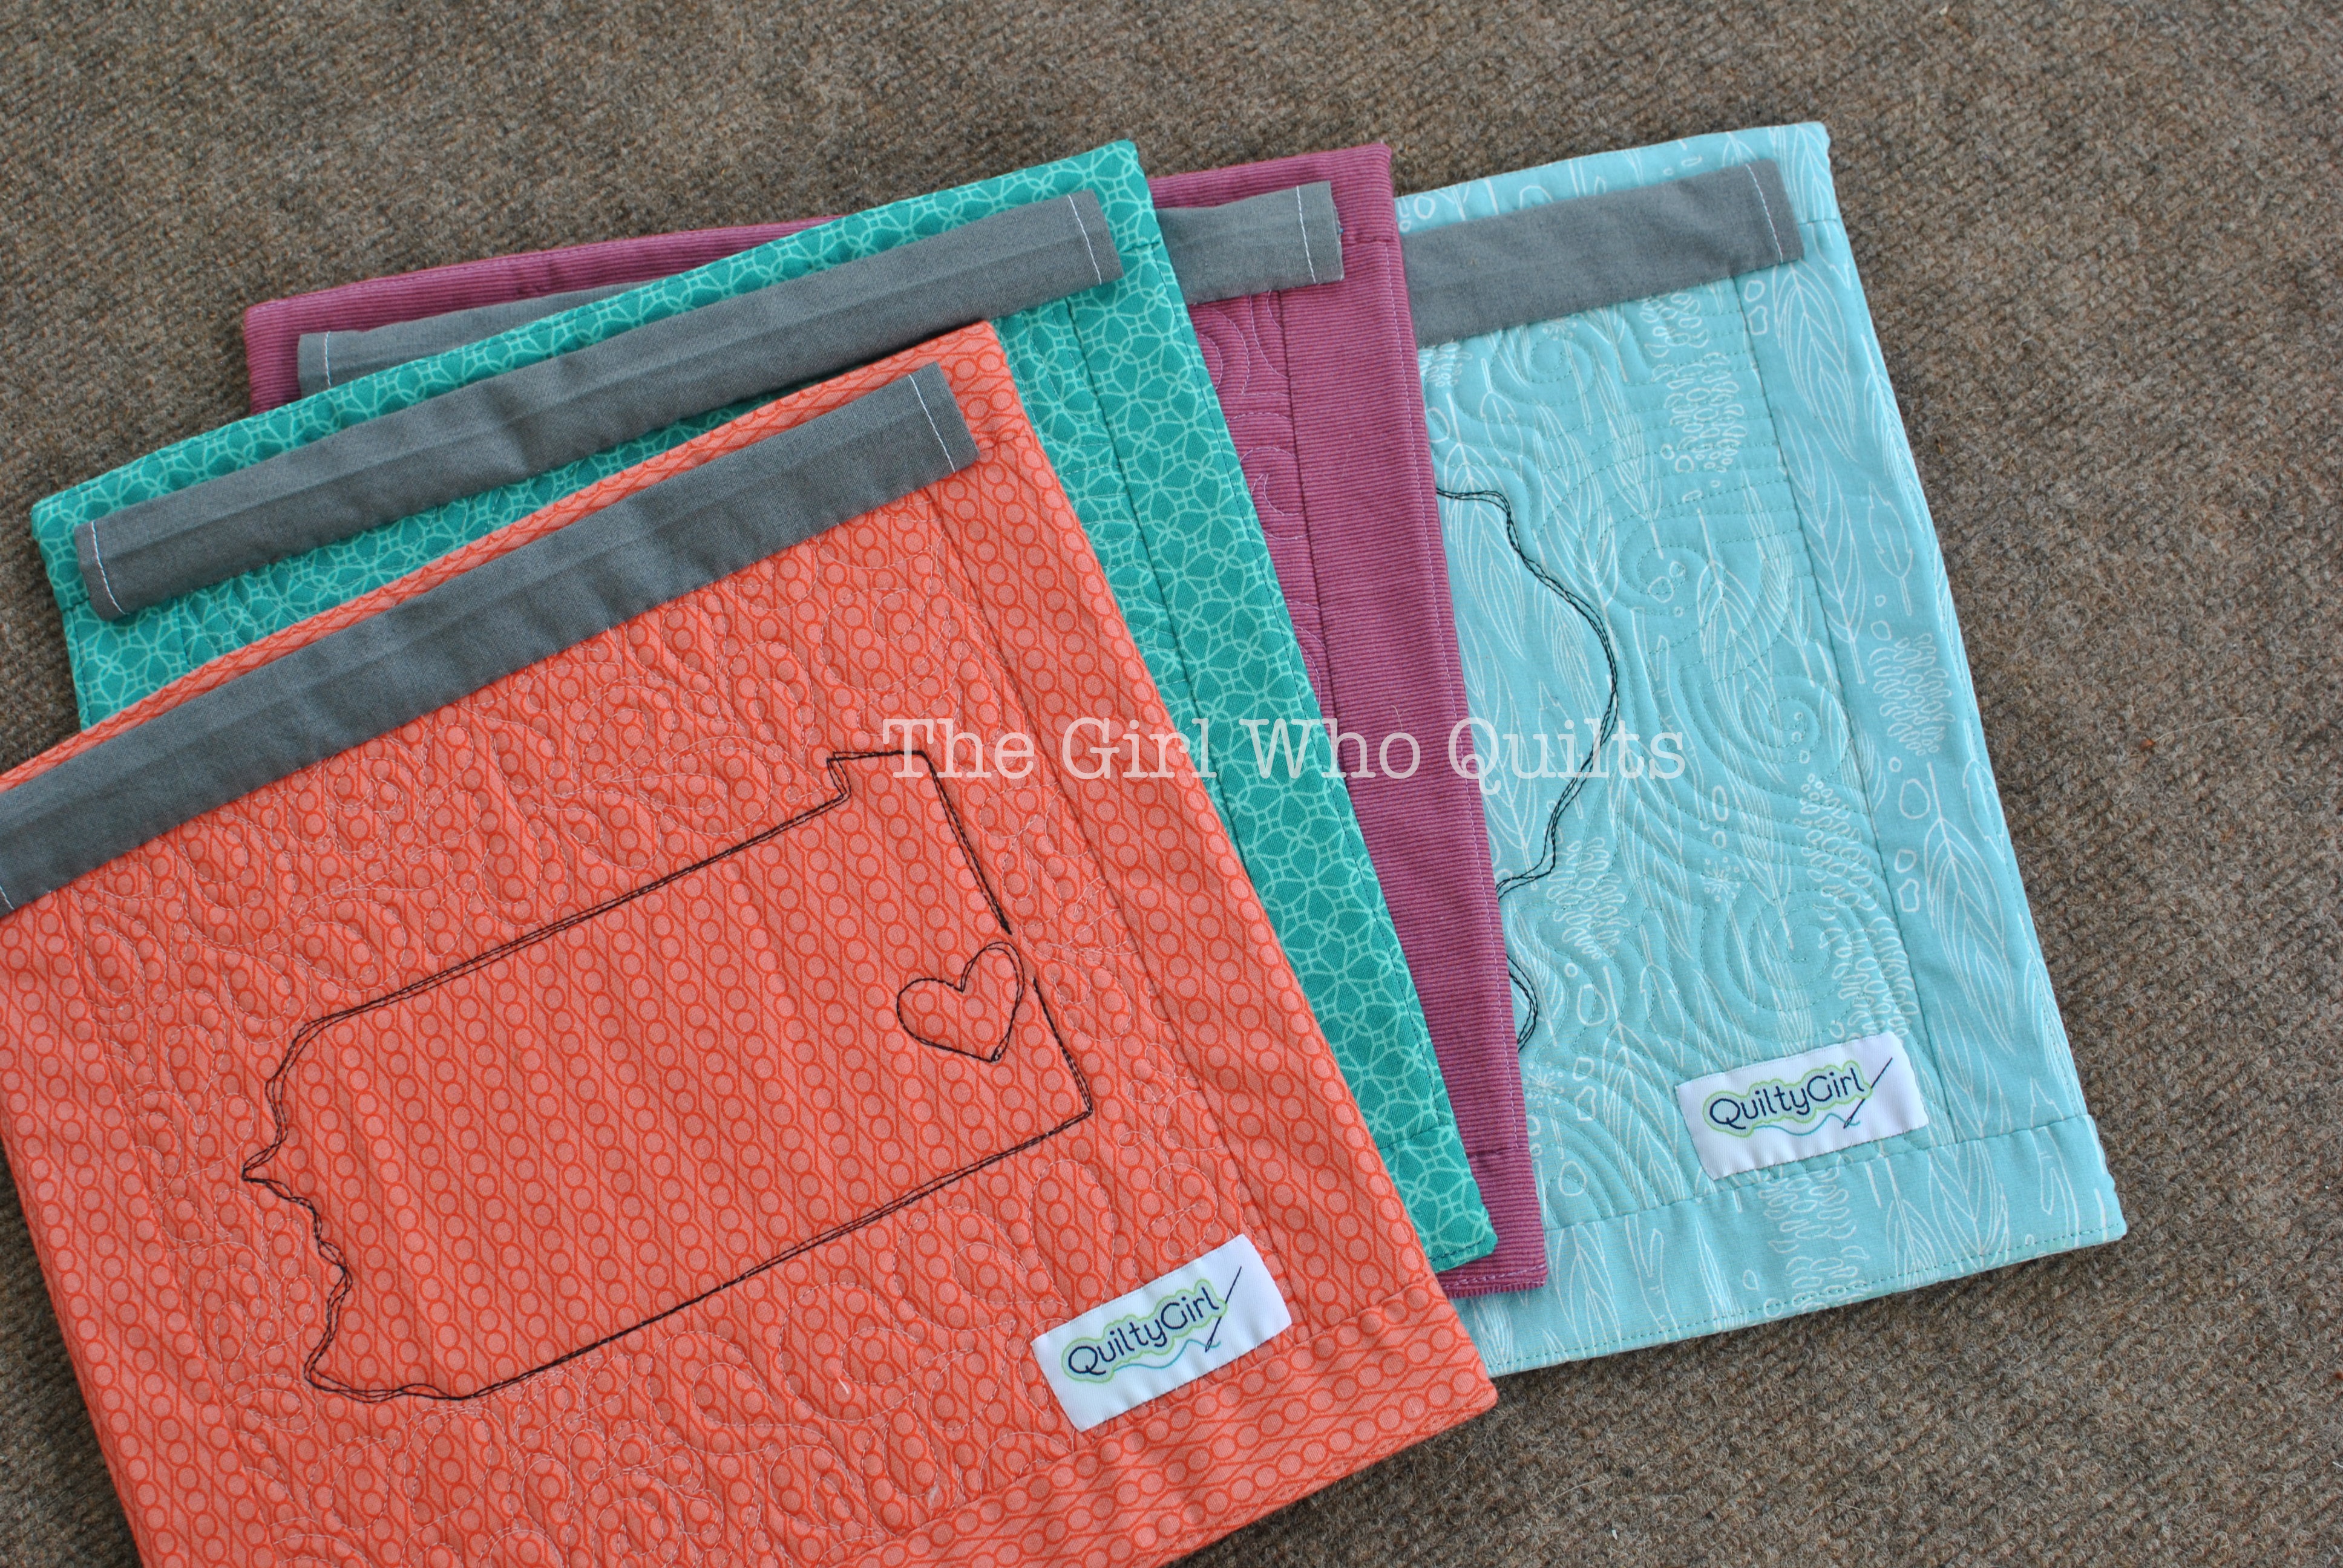
I quilted around the states and the hearts with black thread to really draw attention to the shapes. I found that 3 passes around each shape gave great definition without lots of thread build up. In the background spaces I quilted in various flowing styles with thread to match the background, again to keep the focus on the states.
To finish the minis I applied knife edge binding and a hanging sleeve on each piece. The knife edge binding is a bit more time-consuming, but the look is so stunning! Well worth the effort for this project!

Home is Where...

And one last (poorly lit) picture. Here are the minis hanging in our dining area! The adjacent brick wall is part of the living room, and to the right of the minis is the kitchen. I'd hoped to show a bit more of the house, but lighting was bad when I took this one!

Home is... mini quilts

Thursday, September 25, 2014

Upstate Quilt - for Sew Many Creations

A quick note for anyone in upstate New York! My friend Jess, the owner of Ruby Scissors Quilt Shop in Glens Falls, NY is opening a second location! The new shop is in Towne Center Plaza in Clifton Park, NY. The address is:
1603 Route 9
Clifton Park, NY

Check out her facebook page for more details!


Now that I'm in the midst of quilting for Fall Market, I'm pulling out photos of projects that I did for Spring Market!

I've partnered up with Jessica of Sew Many Creations to quilt her pattern samples! She was my very first long arm client, and I owe her so much for having faith in me!

This pattern, Upstate, fits in really well in the Adirondacks! It wasn't my usual style of quilting, but I find that those are the most fun to quilt. It really stretches my imagination to work on projects like this, and I really love how it turned out.

Upstate Quilt - Long Arm Quilted for Sew Many Creations 

The pattern alternations tree blocks and solid blocks - in this sample, Jessica used a really fun batik argyle in her solid blocks. For the argyle blocks I simply quilted straight lines following the fabric pattern.

Upstate Quilt - Long Arm Quilted for Sew Many Creations

I had so much fun with the tree blocks! The trees have swoopy branches with a woodgrain trunk and swirly lines in the background. The background batik reminded me a lot of falling snow!

Upstate Quilt - Long Arm Quilted for Sew Many Creations

Upstate Quilt - Long Arm Quilted for Sew Many Creations

Upstate Quilt - Long Arm Quilted for Sew Many Creations

I forgot to take pics of the borders! I quilted a swirl in the thinner green borders and used more straight lines in the argyle border.

Thanks for letting me quilt for you, Jess!

Wednesday, September 17, 2014

Star Quilt for Stitch

I met Tami, the owner of Stitch, when I was at Quilt Market in Pittsburgh this spring. She is so sweet, and I could tell right away that she had a fun modern shop. If you're in the Des Moines area, be sure to check out the shop! I only wish the shop had been open years ago when I would drive through Des Moines to visit my sister in Ames!

Tami sent me this cute little quilt to be custom quilted. Her only request was that the quilting not be so dense that the quilt isn't soft and snuggly.

Long Arming for Stitch

I swirled the dark grey background to give the quilt great texture without distracting from the fun piecing.

Long Arming for Stitch

In the pieced borders I quilted straight lines about 1/4" apart that shifted with the angles of the improv piecing.

Long Arming for Stitch

And for the stars I quilted straight lines in the points and a simple flower in the centers.

Long Arming for Stitch

It's so fun to quilt for others, because I get to play with so many different styles of piecing! Thanks for having me quilt for you, Tami!

Monday, September 8, 2014

Quilts for Cloud 9

I have two projects to share today! Cloud 9 contacted me to piece and quilt these projects for them, the first of which was done just before Spring Market. The second quilt was done earlier this summer. You may have seen peeks of these on my Instagram!

The FREE! pattern for this first quilt can be found here.  The fabric is available through JoAnn Fabrics, and is called Backyard Garden. The pattern was designed by Melanie Shortmas-Tuazon, and the fabric line was designed by Michelle Engel Bencsko.
Backyard Garden Quilt for Cloud 9
In the sample that I sewed up, the center shape is not pieced, but rather cut from a single print. This pattern sews up really quickly, and it's a great way to highlight some large scale prints!
Backyard Garden Quilt for Cloud 9
I worked on this quilt when I was still quite uneasy about quilting feathers. It's actually kind of fun to pull up these photos and see some of my older work!
Backyard Garden Quilt for Cloud 9
We were under a little bit of a deadline for this project, so tried to keep the quilting simple with some straight lines and easy feathers.
Backyard Garden Quilt for Cloud 9
You can see a brief Cloud 9 blog post on this project here.


The second project is also a free pattern! This fabric line and pattern were both designed by Michelle Engel Bencsko.
Rhythm Quilt for Cloud 9
This project also includes some feathers! So fun to see how much I've changed and learned. I really like the design that the feather arcs create - it reminds me of a butterfly.
Rhythm Quilt for Cloud 9
The straight lines create such great texture! Sometimes I have to remind myself to use something else for a background fill!
Rhythm Quilt for Cloud 9
It was really fun to work with Cloud 9 on these projects!

Thursday, September 4, 2014

The DNA Quilt

We are two weeks into the school year, and I'm trying my best to keep a more regular work schedule. Along with that, I have a goal of blogging at least once a week! I have a huge backlog of projects of my own to share, along with some long arm work that I did for others.
DNA Quilt
I made this quilt this spring when I had a little lull in my schedule. I started with a stack of 10" squares, and initially just sewed them together into a giant patchwork top. There was no sparkle to the quilt top, though, probably because all of the prints are a medium tone. I didn't want to give up on these great colors, though, so I cut into my quilt top and inserted black strips of varying widths. I used a black batik, which is so wonderfully dark. The black seemed to do the trick, because now the colors really pop!
With the black strips inserted among the bright colors, the quilt reminds me a bit of DNA running through a gel. :) 
DNA Quilt
For the quilting, I quilted swirly "mermaid hair", as I like to call it, in the brightly colored sections. And in the black strips I quilted curved lines. Batiks can feel a bit stiff sometimes, so I wanted to keep the quilting soft.
DNA Quilt
The binding is a orange batik in a fun zig zag print!
For the back I used several batiks that I had on hand.
DNA Quilt
The quilting is really visible on the black print in the back! I love the aqua thread against the black.
DNA Quilt

DNA Quilt

Quilt stats:
Name: DNA Quilt
Fabrics: Hoffman Batiks
Size: 54" x 67"

I'm listing this one on Etsy!
  DNA Quilt

Friday, August 29, 2014

Pillow Tutorial!

Hop over to the Benartex blog today where I'm sharing a tutorial for this fun pillow!

Tile Pillow Tutorial for Benartex

There's a chance to win a fat quarter bundle as well!

Sunday, June 29, 2014

Memory Quilt Custom

Matt's cousin contacted me a few months ago regarding a custom. She had a bridesmaid dress from a friend's wedding, and now the friend was having a baby. She found an idea on Pinterest and wanted a baby quilt made from the dress she wore in the wedding.

I must admit, I've seen these quilts and they aren't really my style. But it was a small, simple project, so I figured I would challenge myself.

Memory Quilt from Bridesmaid Dress

I knew that I wanted to add quilting cotton to the mix, and she mentioned that the dress was blue. I pulled some fabrics, but WOW was I surprised at how the very bright blue color of the dress! I added and subtracted fabrics until I had a nice mix of greys to go with the blue.

Memory Quilt from Bridesmaid Dress

For the quilt design, I was looking for something simple. I decided on isosceles triangles, so I picked up a few new rulers and chopped up my fabrics! The dress was short, so there wasn't very much usable fabric. I cut as many triangles as I could, and then I pieced the blue and greys randomly. Nothing planned, just grab some pieces and stitch them together!

I quilted the piece with a simple swirly meander. I wanted to keep the layers from shifting around, but also keep the quilt soft.

Memory Quilt from Bridesmaid Dress

For the backing I chose 2 fun prints - the kite print is also in the quilt top and I like that it brings a bit of red and purple into the design. The binding is a brighter blue, one of my favorite prints! I remember being unsure of the brighter blue, but as soon as the quilt was finished I LOVED it.

Memory Quilt from Bridesmaid Dress

Memory Quilt from Bridesmaid Dress 

In the end, I actually love this entire quilt. The blue color really pops, and the shine of the satin is a fun touch. I've heard that the mom absolutely loves it, and Matt's cousin was really happy with what I created for her friend.

Notes:
*If I remember correctly, quilt finished at about 36" x 42".
*I did not stabilize the satin. It was very easy to work with, and had very little fraying!
*Because of the bulk of the satin, I pressed all seams to the cotton fabric. Ironing did not damage the satin, but I tried to iron only on the cotton and barely touch the seams to flatten them a bit.
*I used the same needles and thread in my long arm that I would have used if the quilt had been all cotton.
*I used Quilter's Dream Poly batting in Select loft.

Saturday, May 3, 2014

Projects from my patterns!

Over the last few months I've sewn up a few different projects using my patterns. Some of these are from classes that I taught locally, and some are samples for local shops!

First up, some pillows!
The original pillows that I made for my Gathering Place pattern were done in a Christmas print:

Christmas Gathering Place Pillows

For one pillow I gathered the side panel and created a scalloped edge:

Christmas Gathering Place Pillows

On the other pillow I did some pintucking on the side panel and a zig zag edge:

Christmas Gathering Place Pillows

Click over to my flickr stream for more photos.

Next I created a set of pillows in batik. These are samples in a local shop:

Batik Gathering Place Pillows

On this pillow I combined a gathered side panel and a curved edge. I let the batik print dictate the curve on this one:

Batik Gathering Place Pillows

This is probably me favorite of them all! For this pillow I combined
 the pintucked side panel and a zig zag edge:

Batik Gathering Place Pillows

I quilted the backs with straight lines. It goes so well with both of these batiks!

Batik Gathering Place Pillows

The last of the pillows is this Halloween set. I used these to teach a local class last fall:

Halloween Gathering Place Pillows

I wanted to have a little fun with these, so I tried to create a "monster teeth" edge on this pillow, combined with a pintucked side panel:

Halloween Gathering Place Pillows

On the second pillow I created a small, tight zig zag with a gathered side panel:

Halloween Gathering Place Pillows

On the pillow backs I combined straight line quilting with a few lines of zig zag stitch. It adds a fun touch, I think!

Halloween Gathering Place Pillows

The other pattern that I used recently is the Hexie Chains quilt pattern. I love this pattern, for so many reasons! It sews up really quickly, is a great way to use some prints in larger chunks,  and is really fun to quilt! I used a layer cake for this quilt - the pattern calls for 44 hexagons, so I had to cut an extra 2 from a fat quarter. The background is Essex yarn dyed linen - it was SO easy to work with, even with all of the bias edges!

Hexie Chains Quilt in Blueberry Park

On the back I used a bunch of prints from my stash:

Hexie Chains Quilt in Blueberry Park

In the linen background areas I quilted simple wavy lines and in each hexagon I quilted a different design:
Hexie Chains Quilt in Blueberry Park

For the thin blue border I went with a simple zig zag for the quilting:

Hexie Chains Quilt in Blueberry Park

If you've sewn something from any of my patterns or tutorials, I would love to see it! I'd like to write a post featuring all of your projects! The fastest way to reach me is by email (Quiltygirl AT gmail DOT com), so feel free to send over a few pictures of your projects!