
This tutorial was originally posted on the Benartex blog last week.
Today I'm going to share a tutorial for a cloth napkin and tablerunner set using the adorable Frosty Forest fabric line by Cherry Guidry.

Let's get started!
Today I'm going to share a tutorial for a cloth napkin and tablerunner set using the adorable Frosty Forest fabric line by Cherry Guidry.
Let's get started!
Here are the prints that I used for this project:
1 yard of Jubilee Geo Multi
1 yard Jubilee Geo Grey
1/8 yard Frosty Snowflake Green
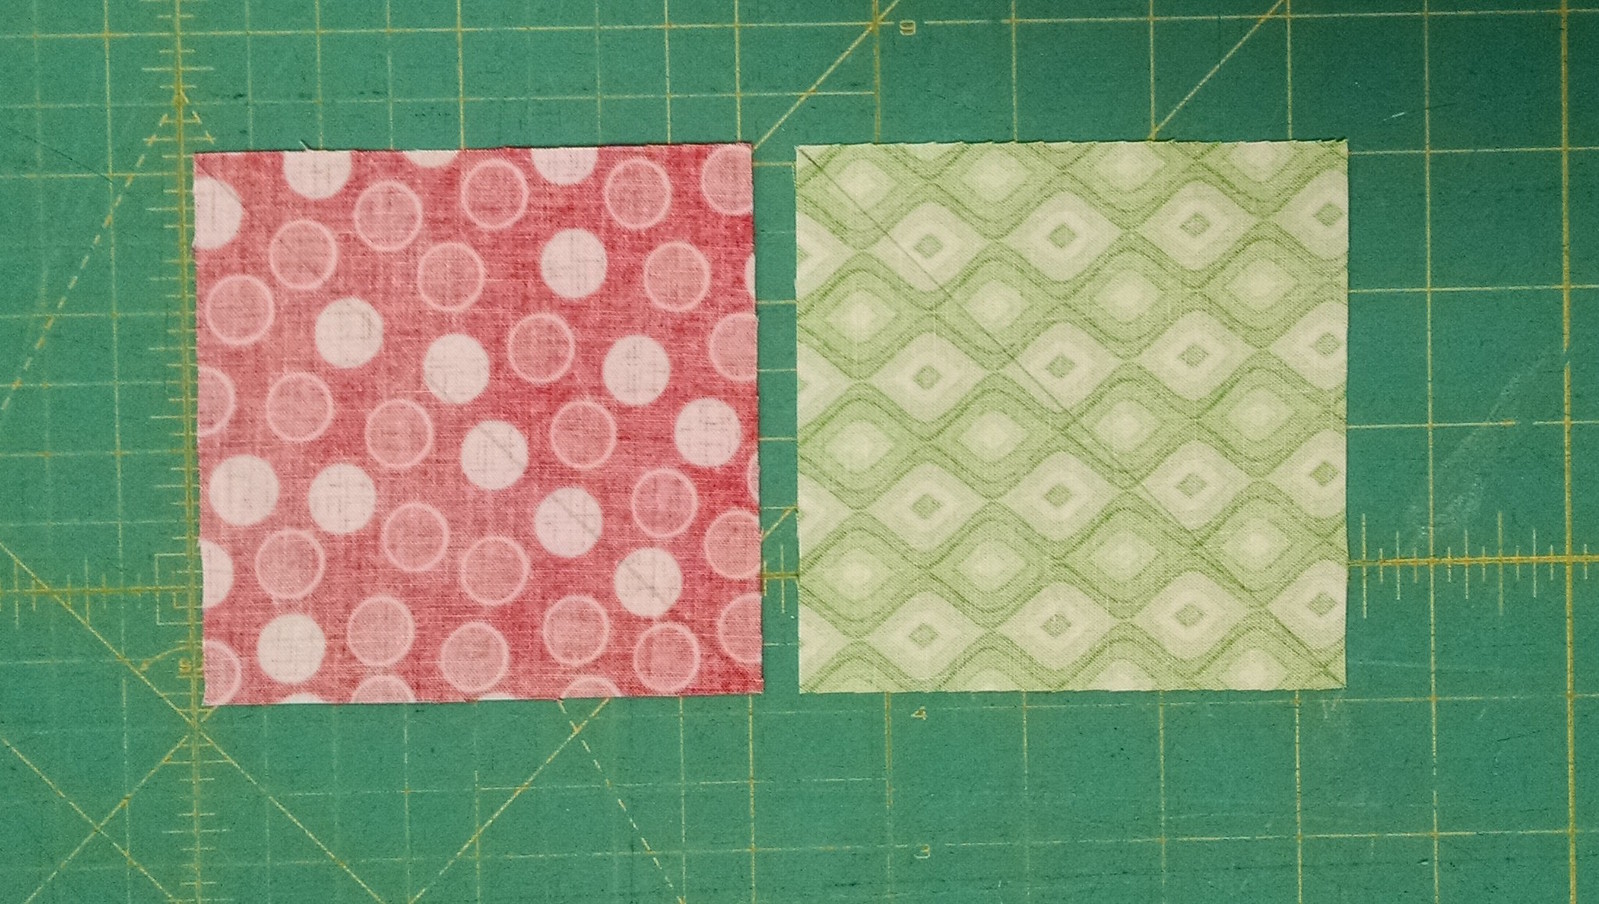
1/2 yard Dot Jubilee Red
1/4 yard Jubilee Geo Green
1/4 yard Snowman Swirl Grey
1/4 yard Snowman Swirl Turquoise
You will also need 18" x 50" of batting if you choose to quilt your table runner.
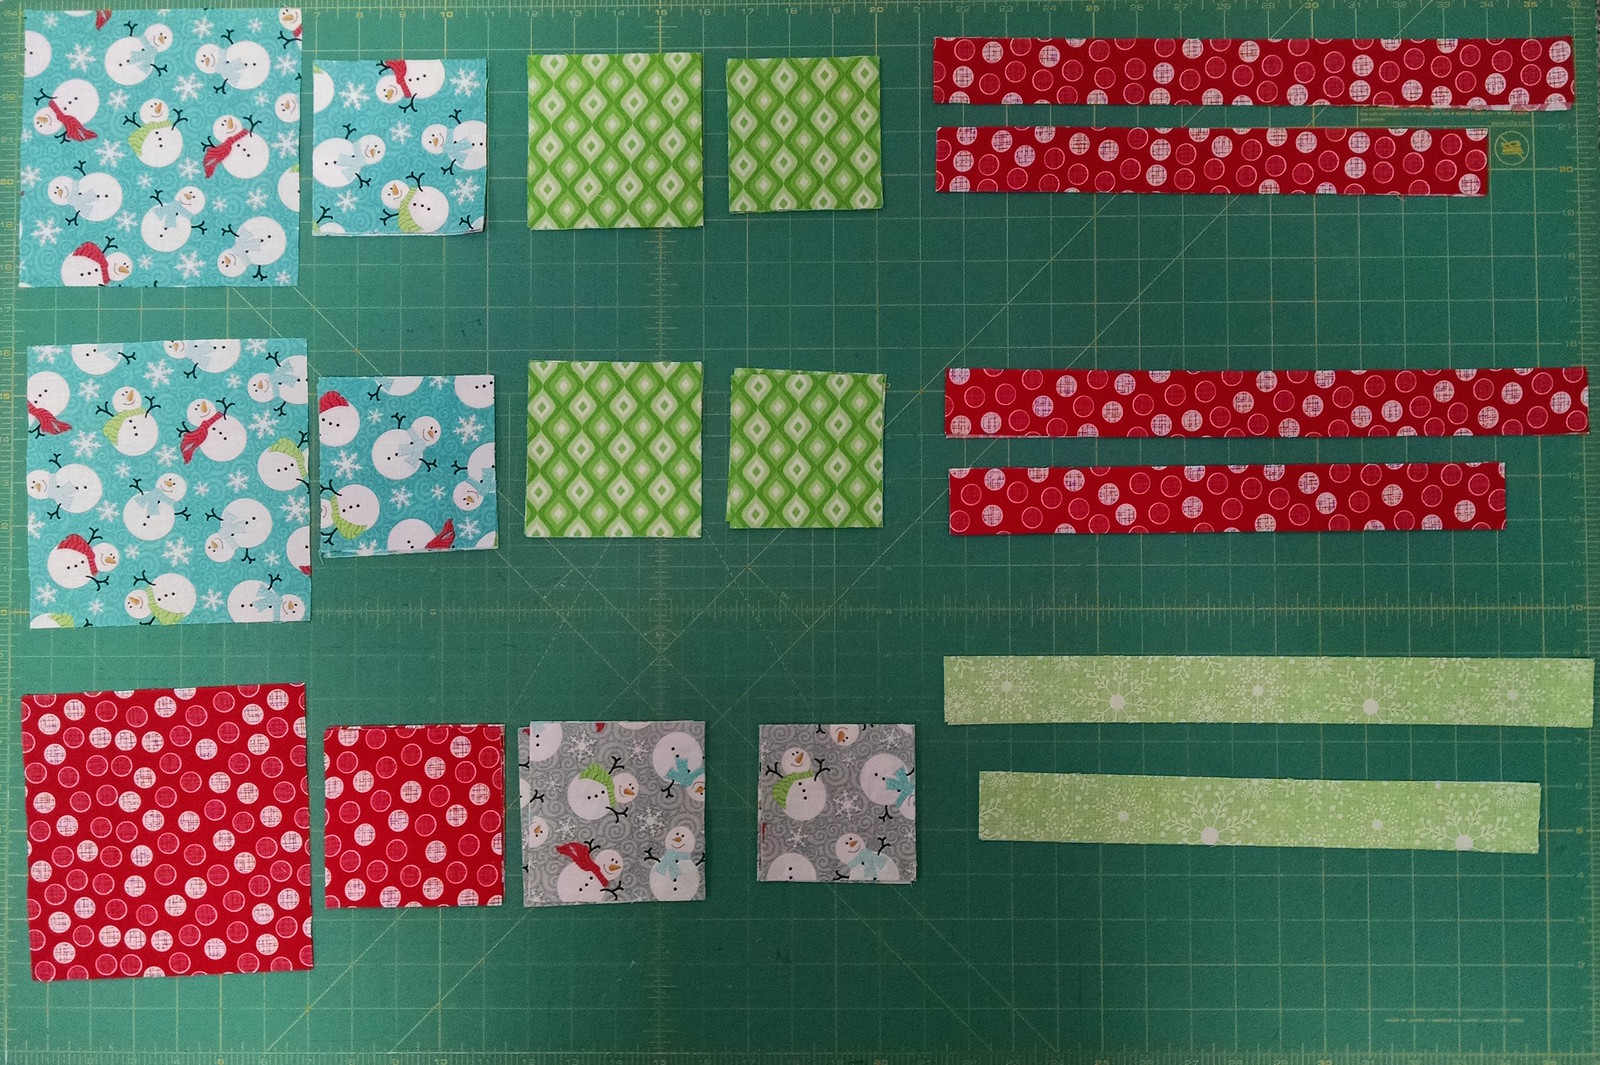
Cut the following pieces from your fabrics:
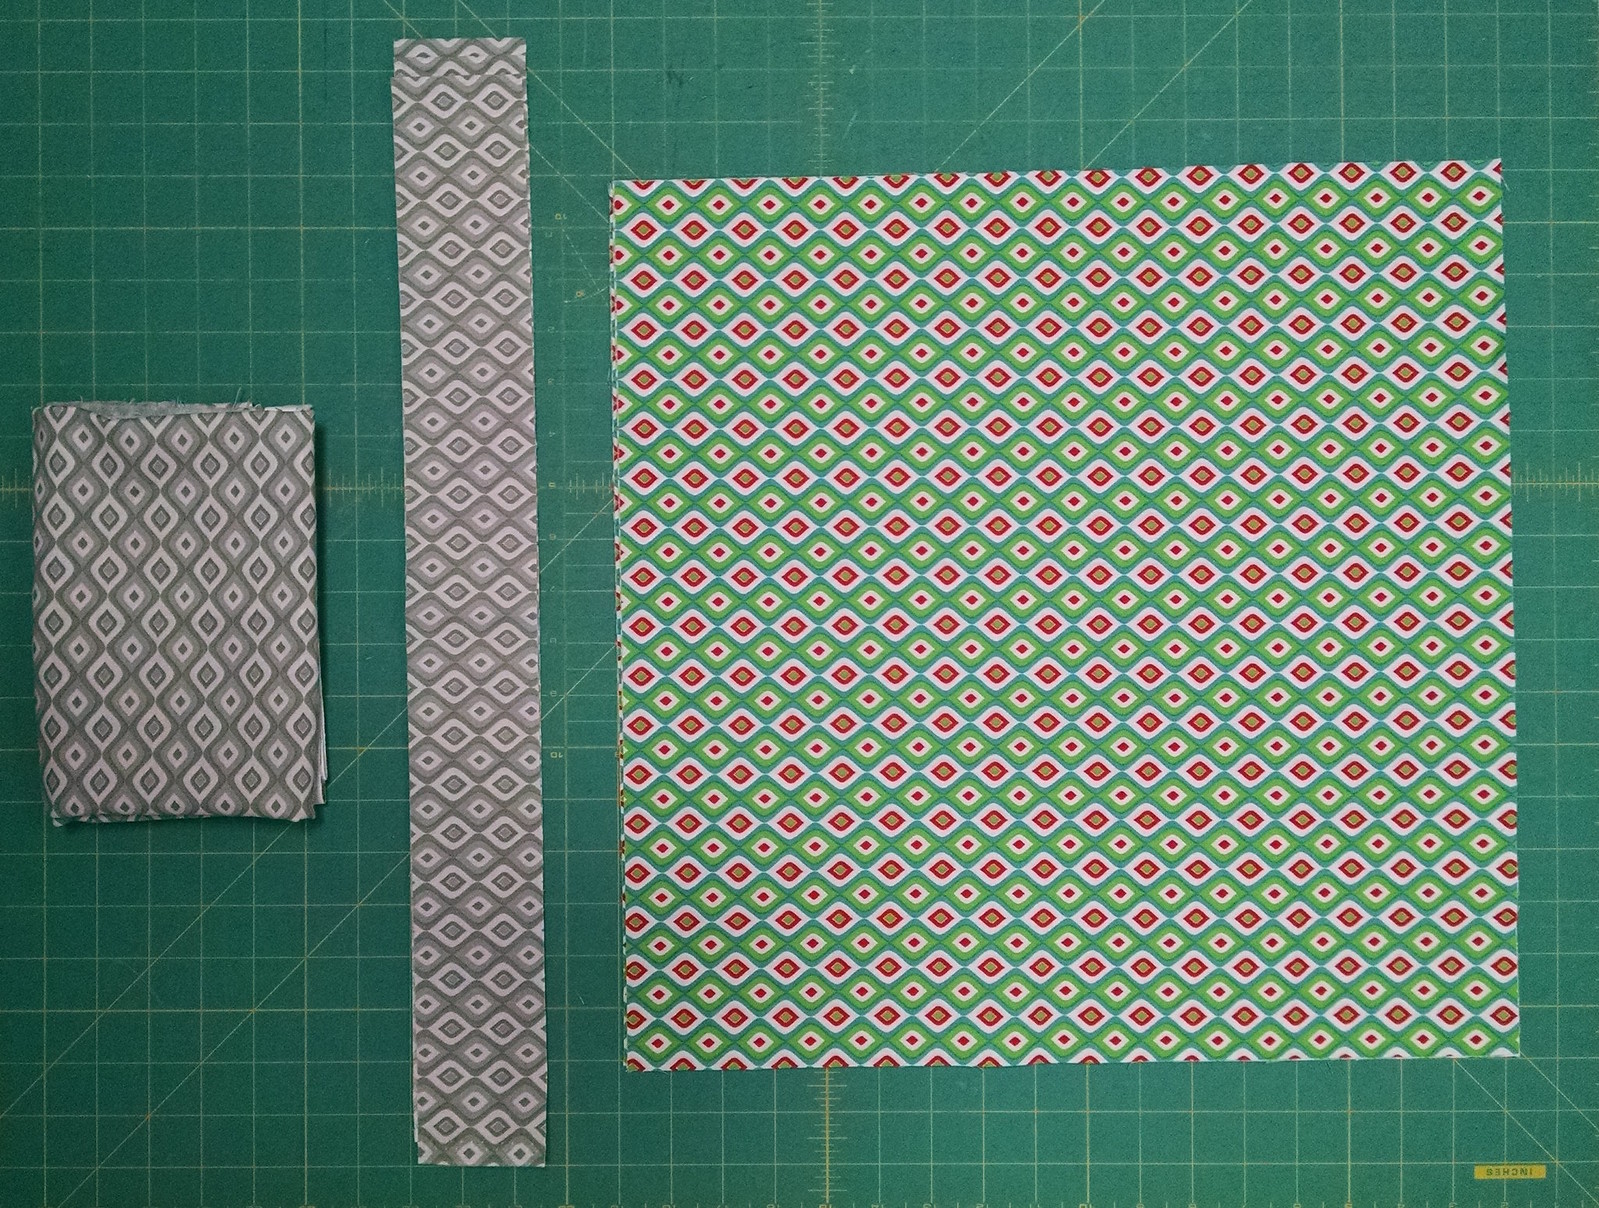
From Jubilee Geo Multi:
4 squares at 17" x 17"
From Jubilee Geo Grey:
cut 3 binding strips at 2 1/2" x WOF
(Save remaining fabric for backing)
From Frosty Snowflake Green:
2 strips at 1 1/2" x 12 1/2"
2 strips at 1 1/2" x 14 1/2"
From Dot Jubilee Red:
4 strips at 1 1/2" x 12 1/2"
4 strips at 1 1/2" x 14 1/2"
1 square at 6 1/2" x 6 1/2"
4 squares at 4" x 4"
From Jubilee Geo Green:
8 squares at 3 1/2" x 3 1/2"
8 squares at 4" x 4"
From Snowman Swirl Grey:
4 squares at 3 1/2" x 3 1/2"
4 squares at 4" x 4"
From Snowman Swirl Turquoise:
2 squares at 6 1/2" x 6 1/2"
8 squares at 4" x 4"
Here are the different size pieces for the table runner:
The backing fabric (folded on left), binding strips and napkin fabric:
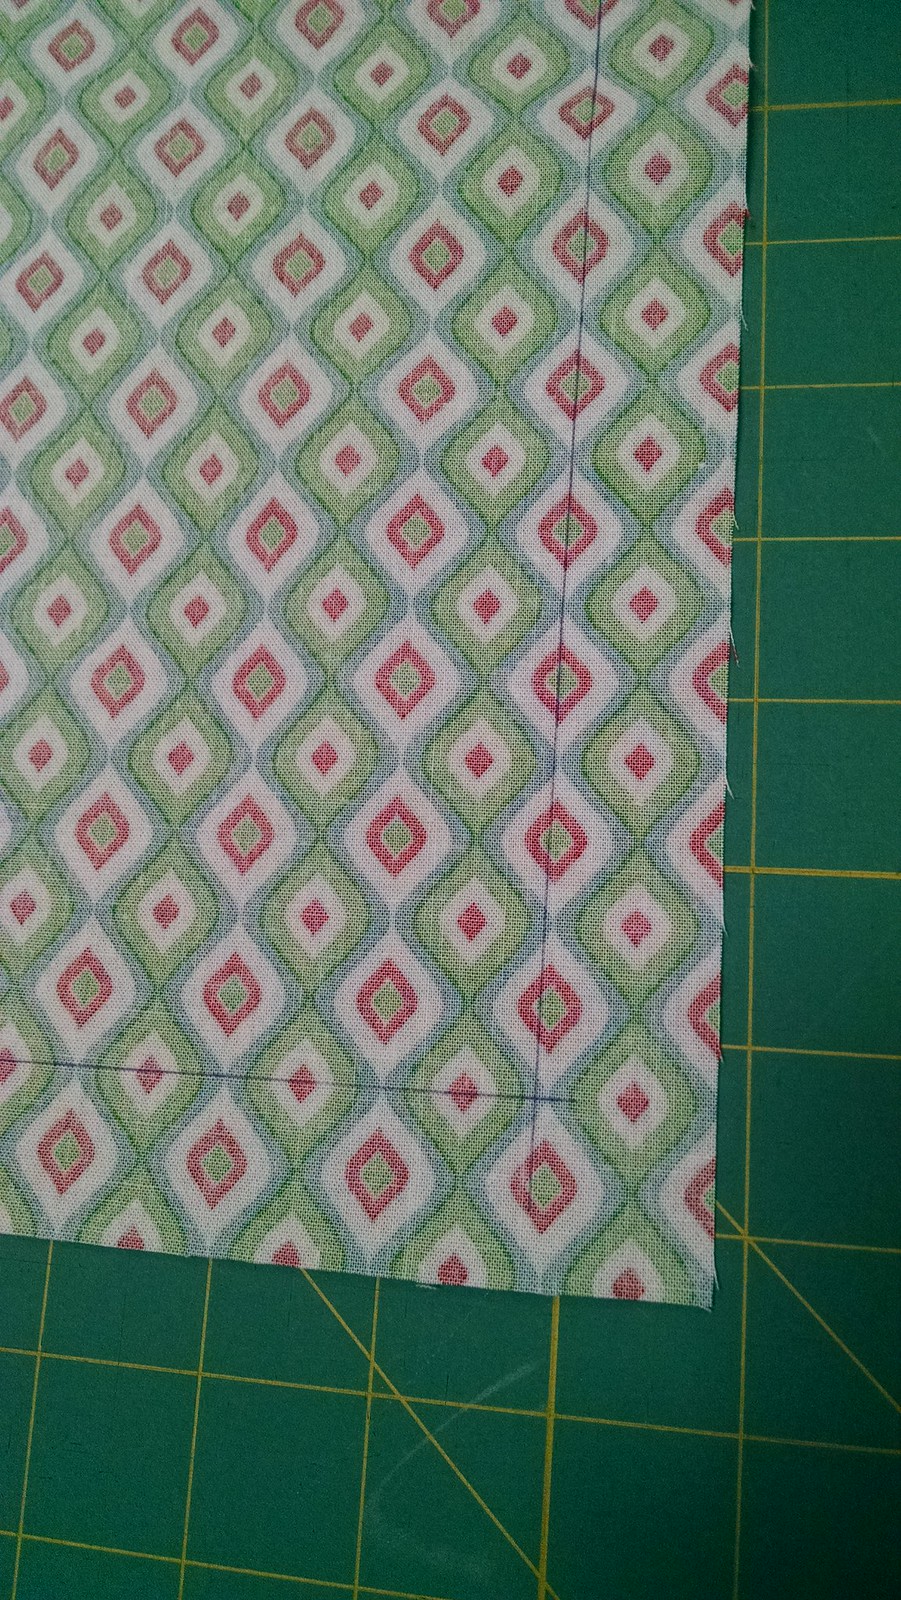
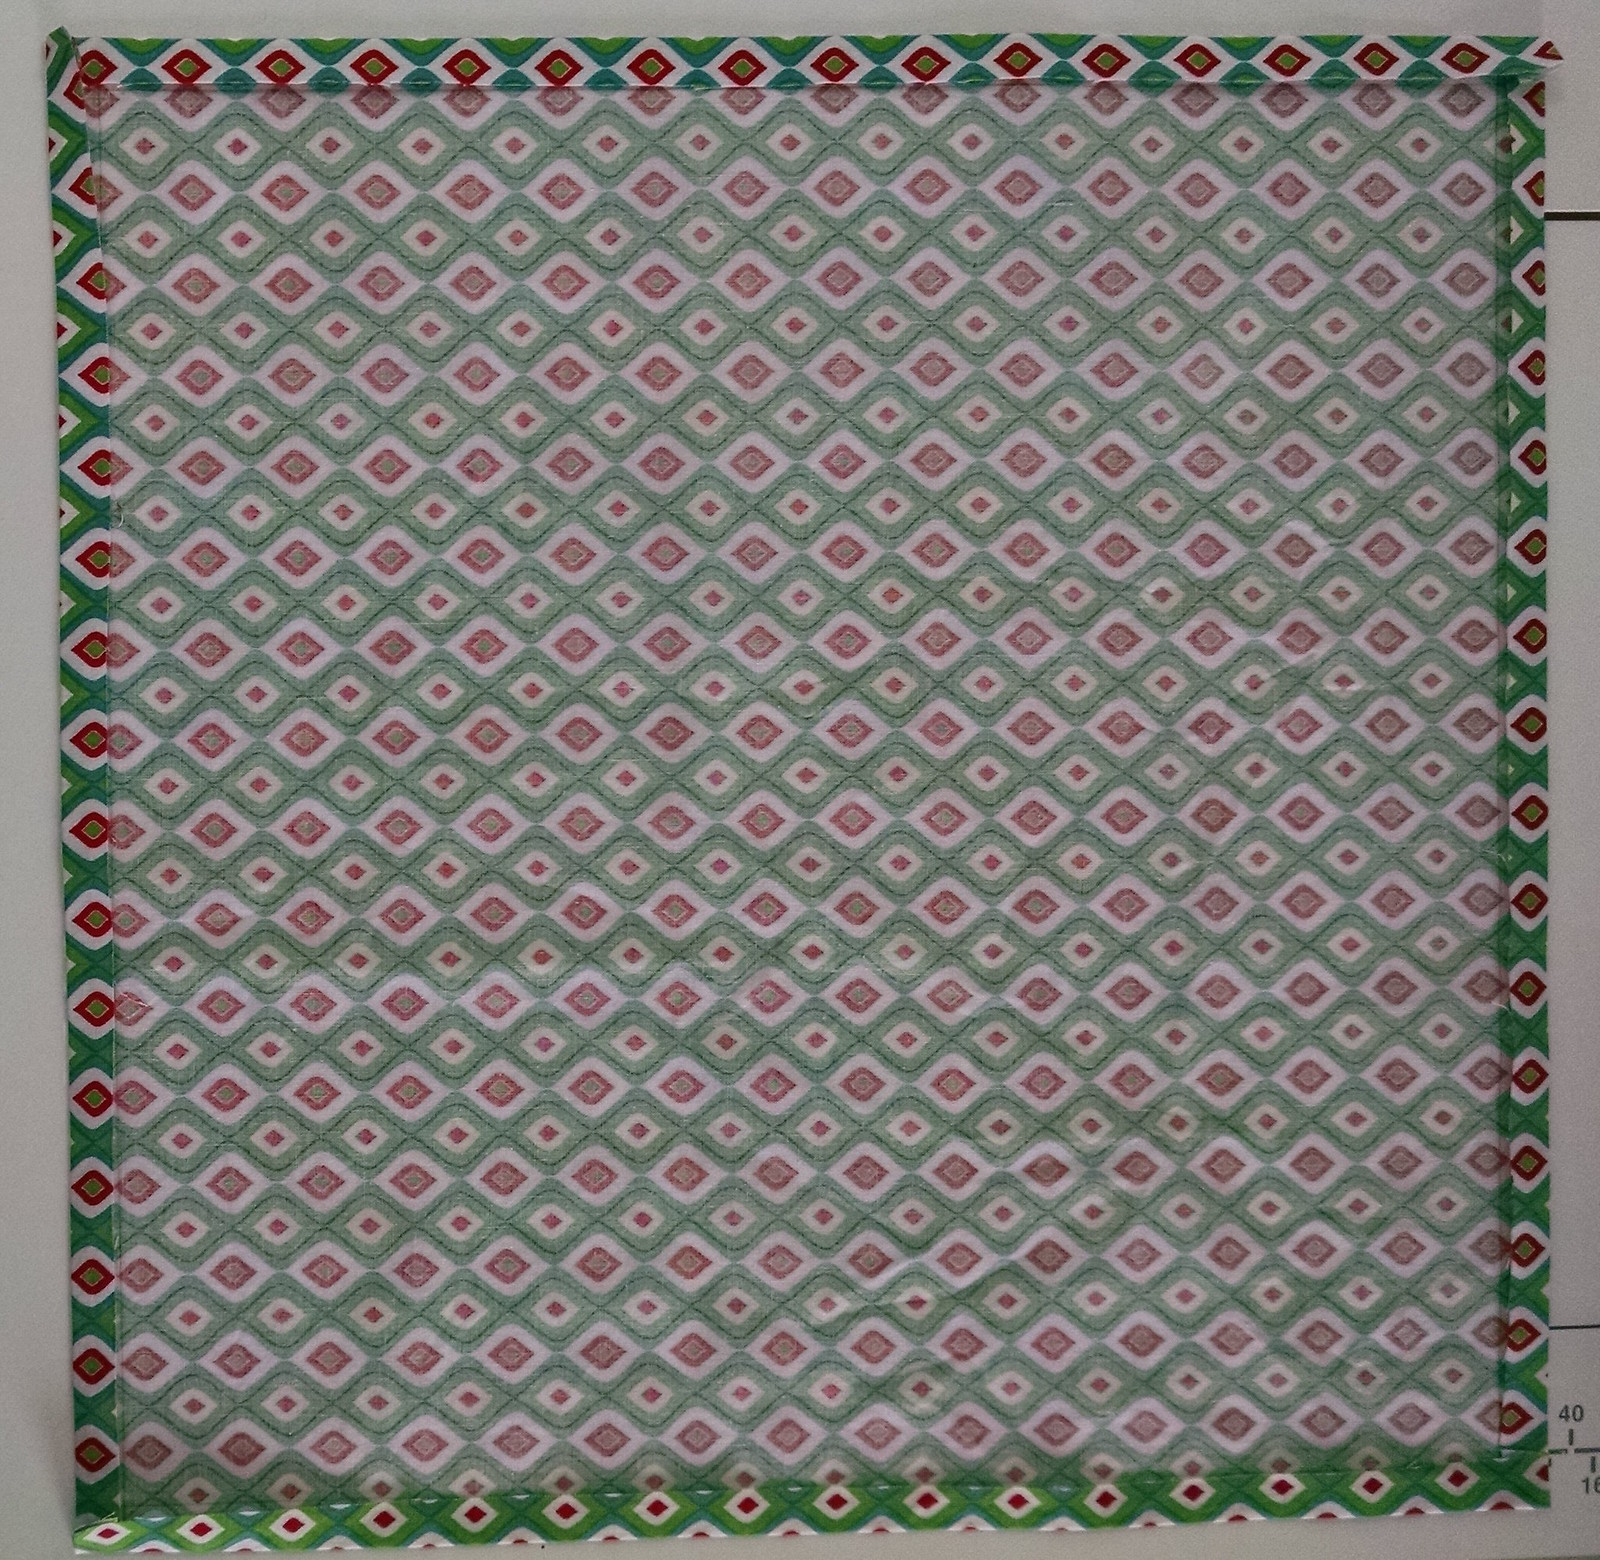
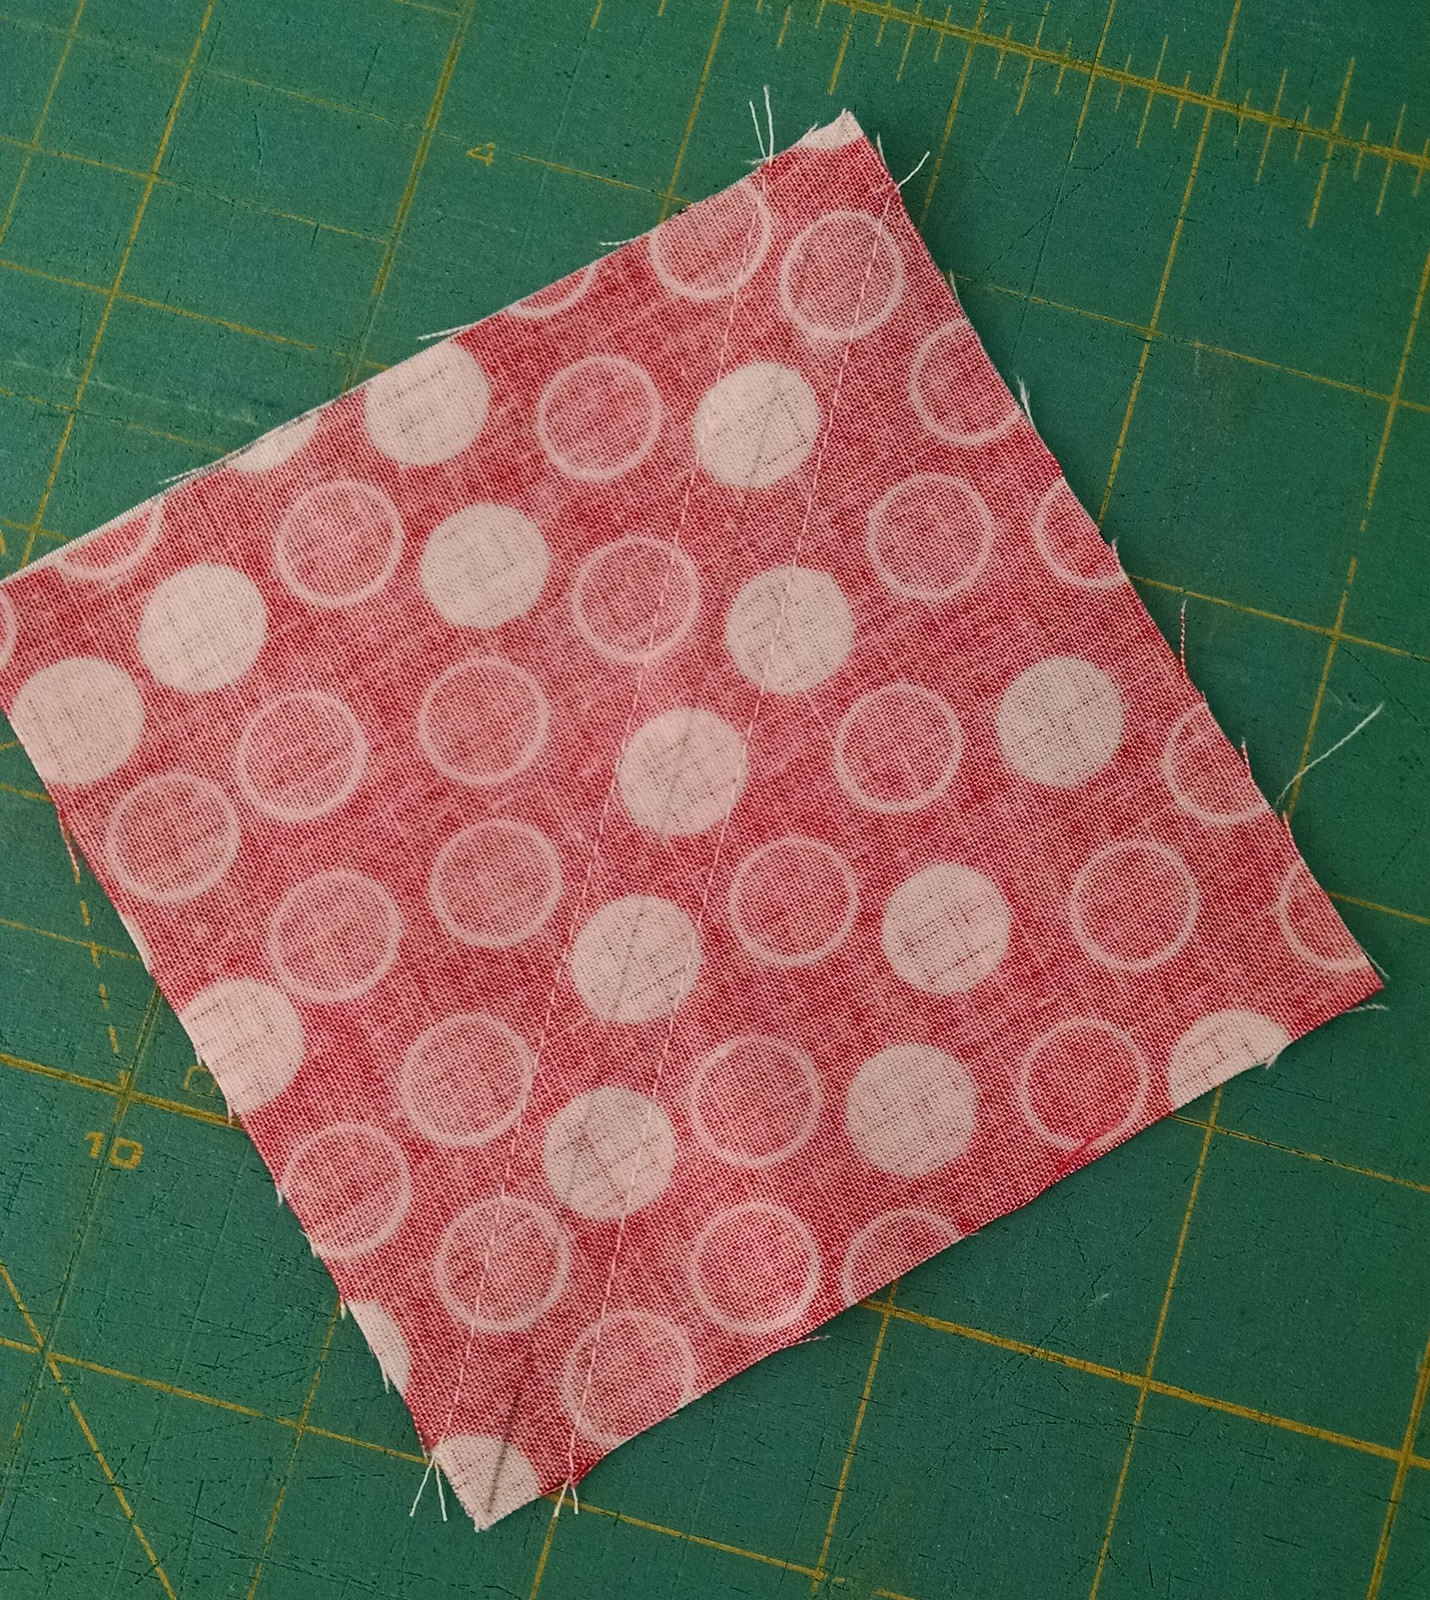
To finish the edges of the napkins, draw a line 1" from each edge of the napkin square on the wrong side of the fabric. Use a pencil or a pen that does not disappear or set with heat:
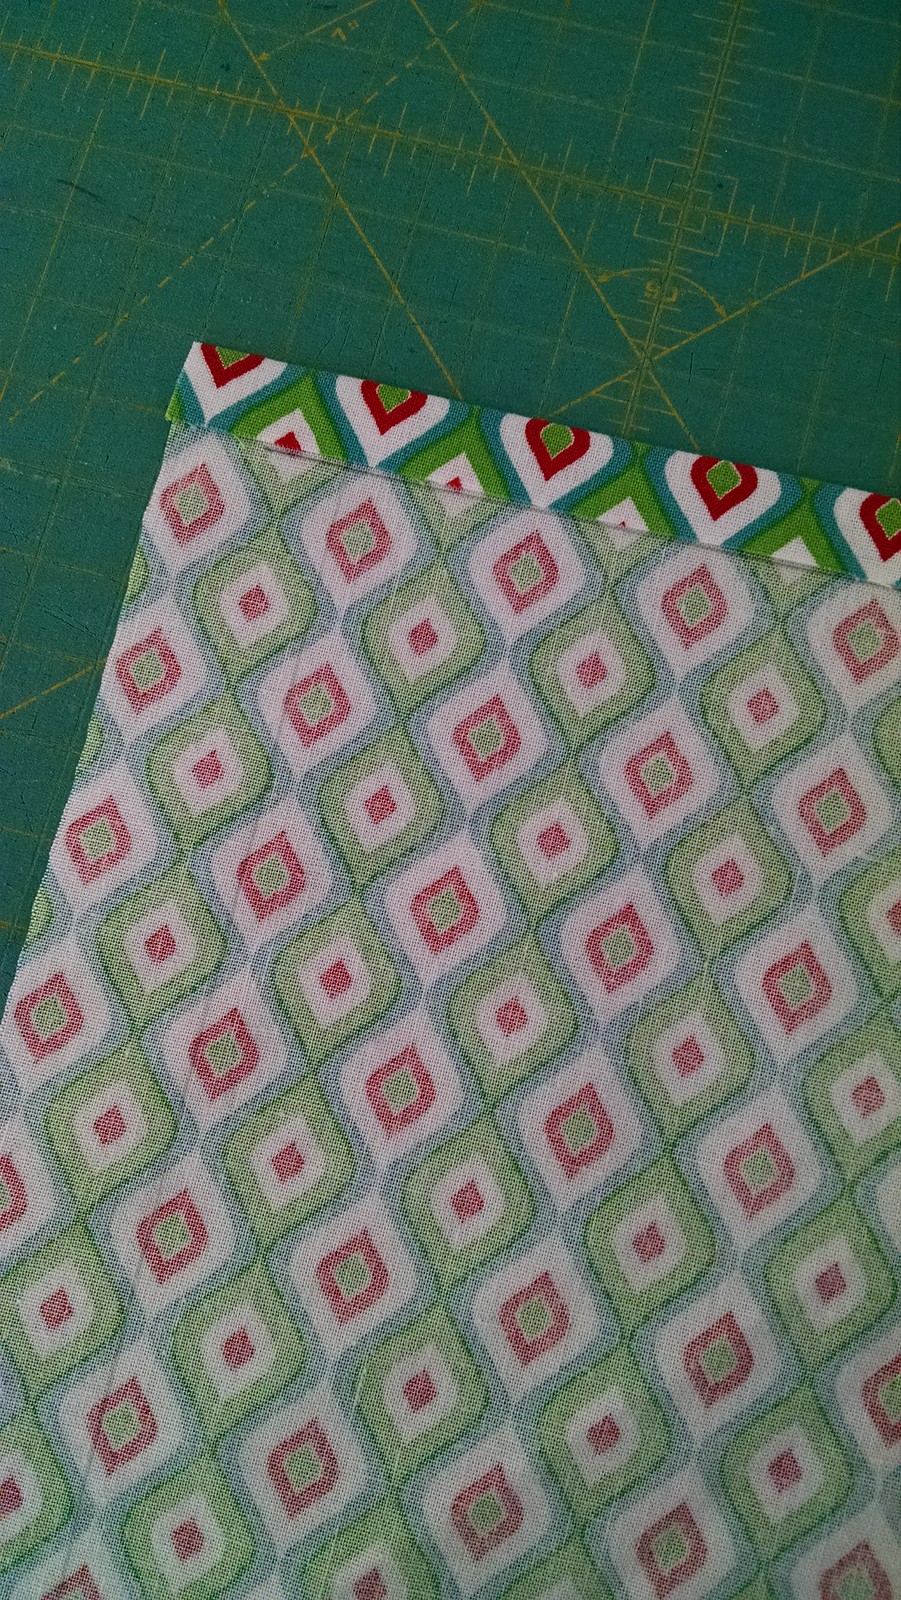
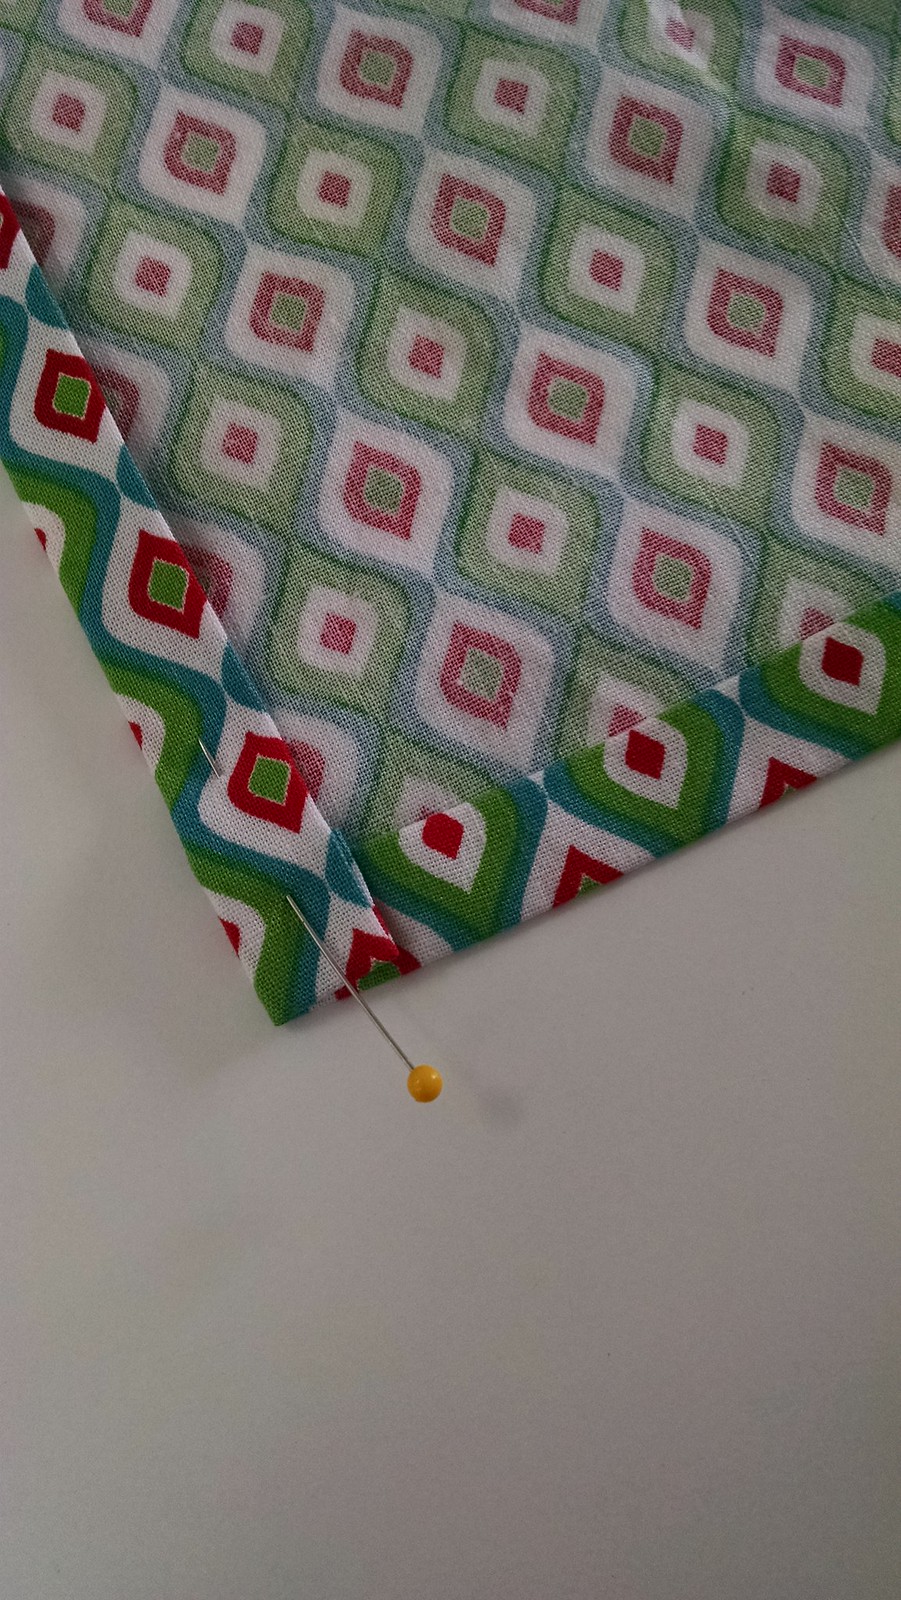
Next, fold each edge in to the drawn line. This should create a 1/2" fold (first edge is shown folded below, repeat with all 4 edges):
Once all 4 edges are folded into the lines, fold in again by 1/2" on all 4 edges:
I like to pin the corners in place:
Now stitch down all of the folded edges, being sure to catch the corners in the stitching:
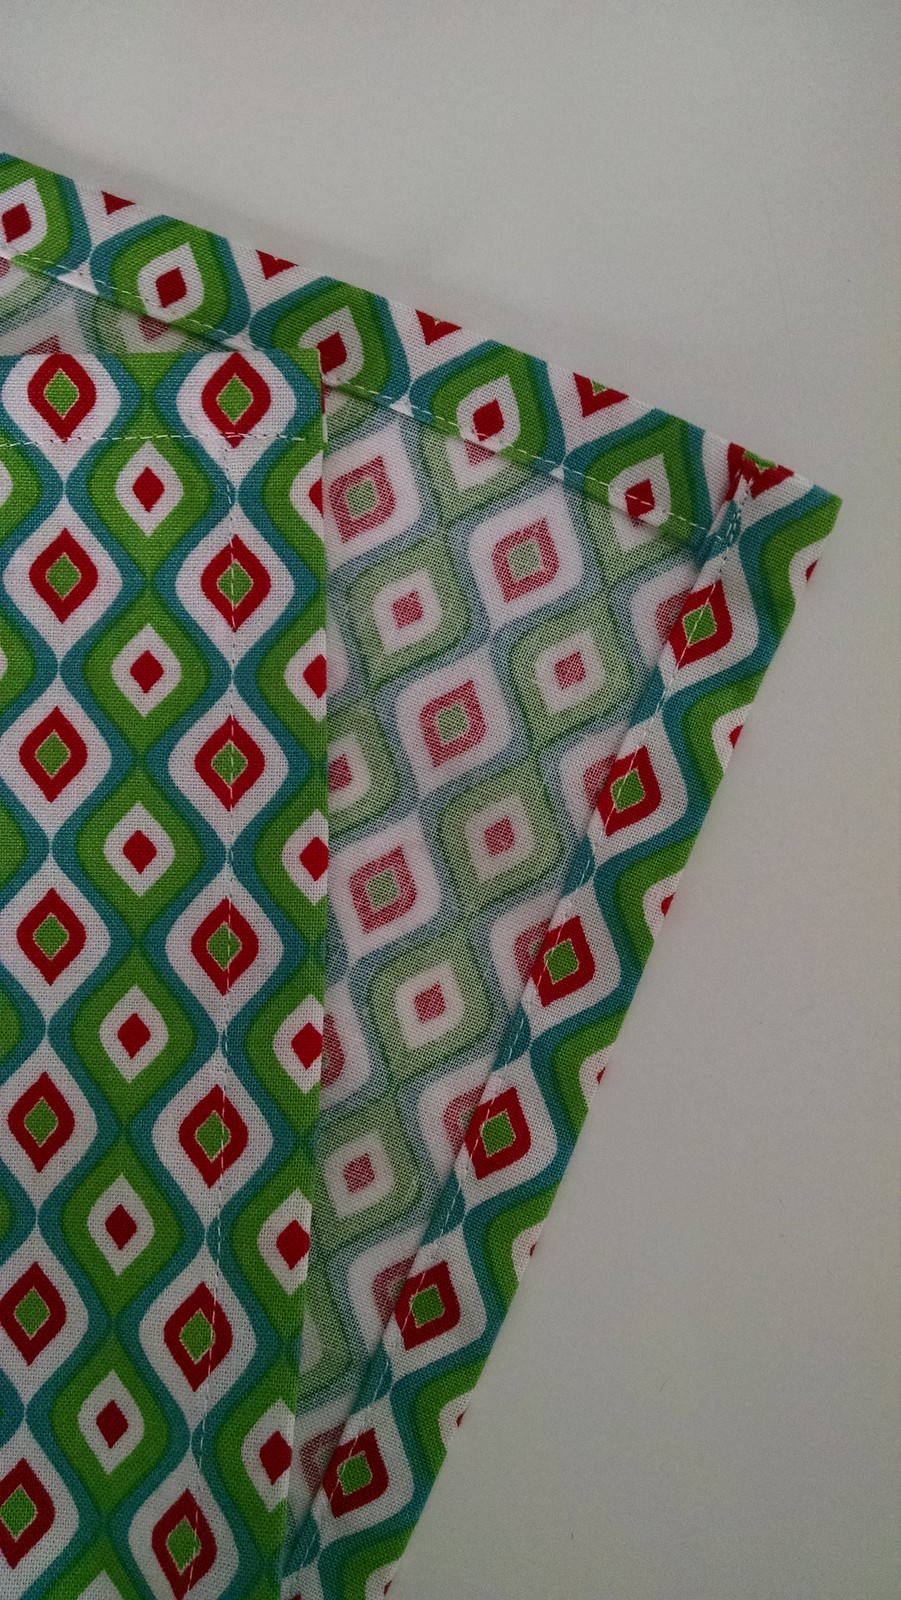
Repeat to create all 4 napkins!
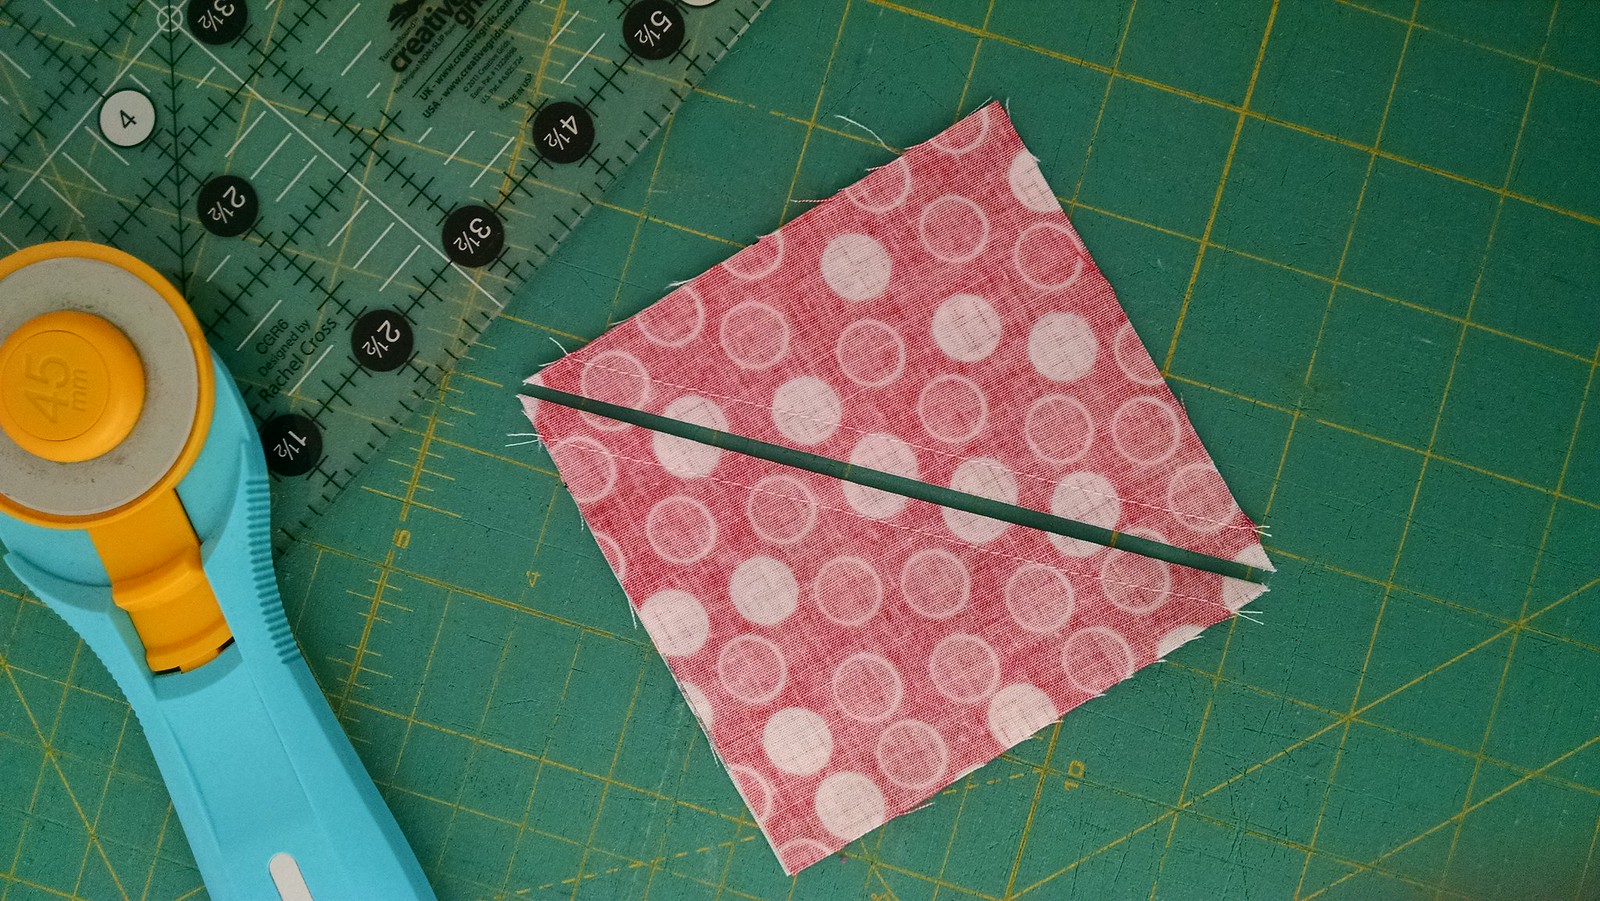
To make the table runner, begin by drawing a diagonal line on the back of each Dot Jubilee Red 4" x 4" square and each Jubilee Geo Green 4" x 4" square:
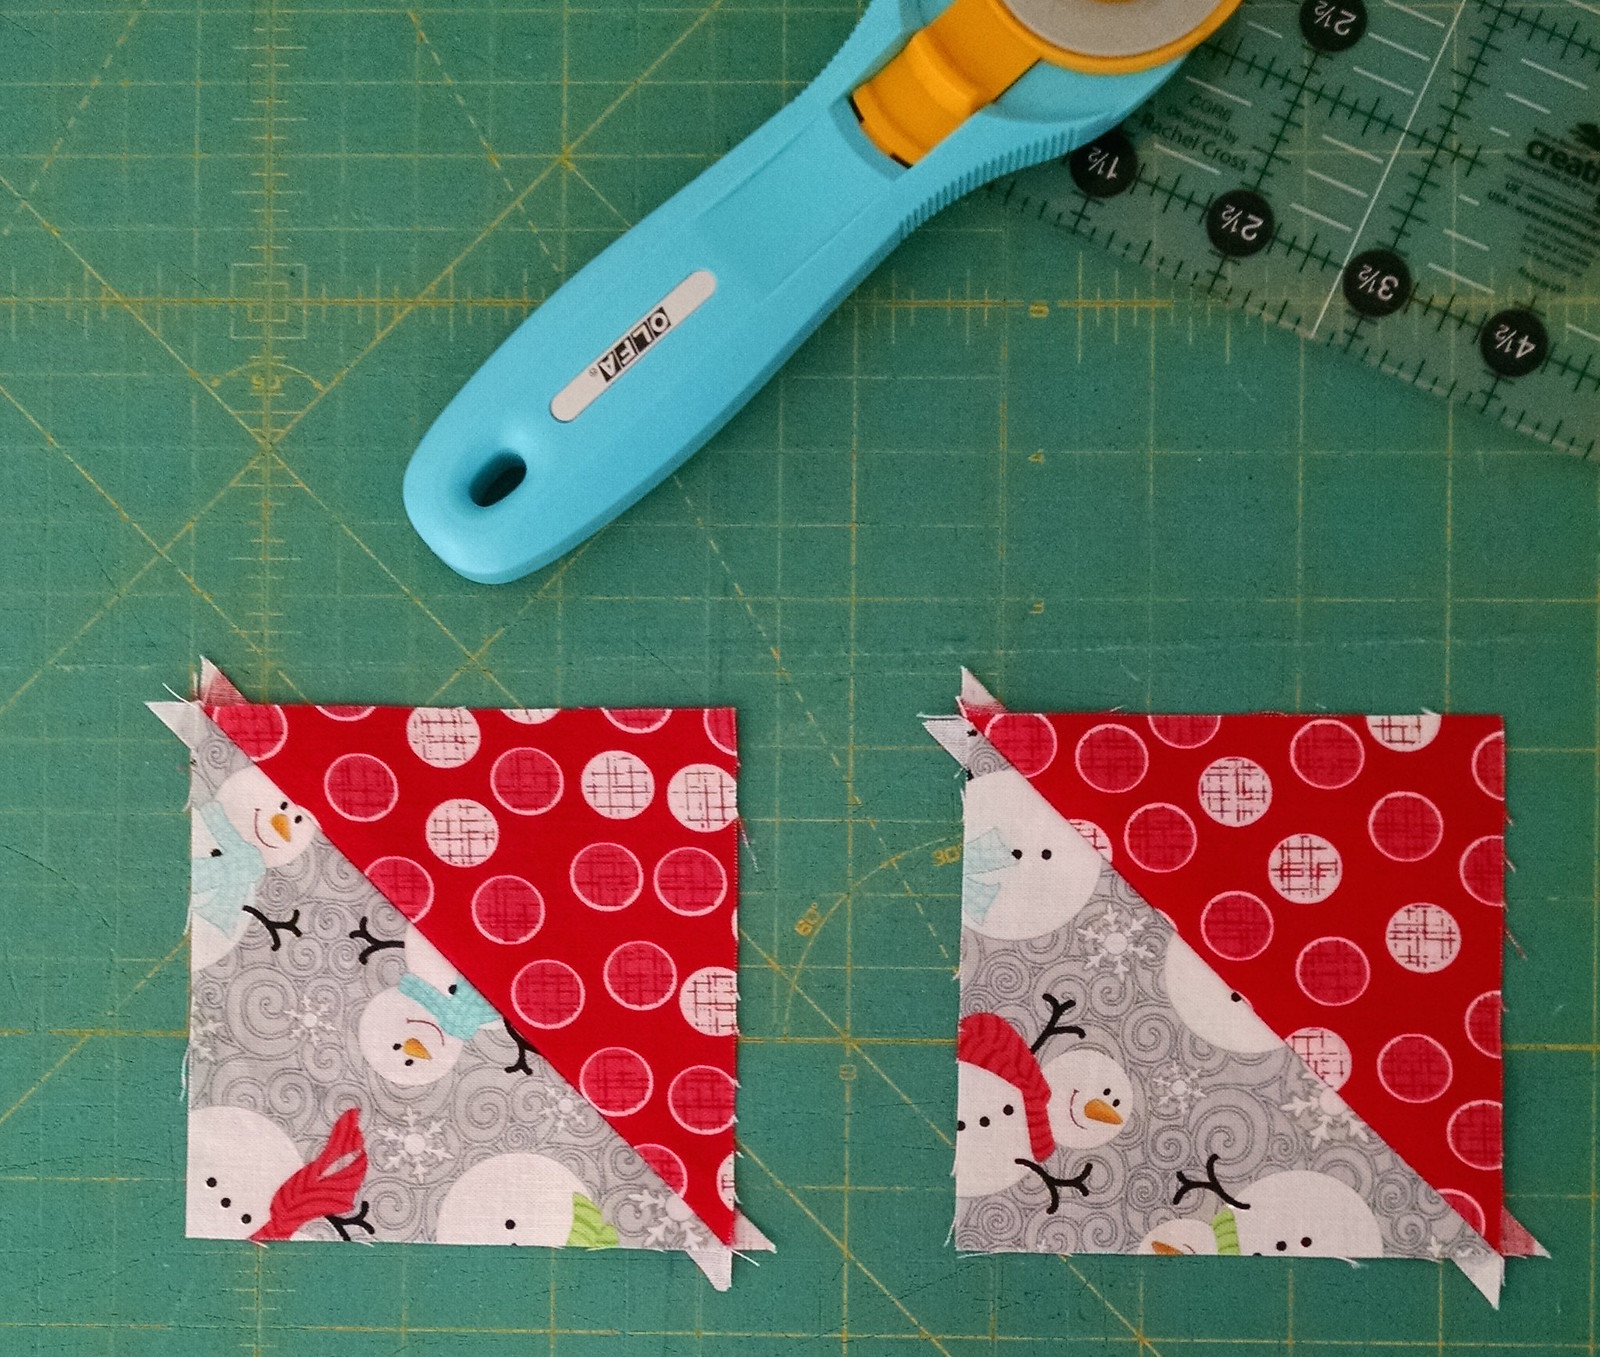
Next pair each red 4" x 4" square with a Grey Snowman Swirl 4" x 4" square.
Pair each green 4" x 4" square with a Turquoise Snowman Swirl 4" x 4" square.
Stitch 1/4" from the both sides of the drawn line. Repeat for all of the paired squares:
Trim the squares apart on the drawn lines:
Press your seams (you can choose to press open or to one side):
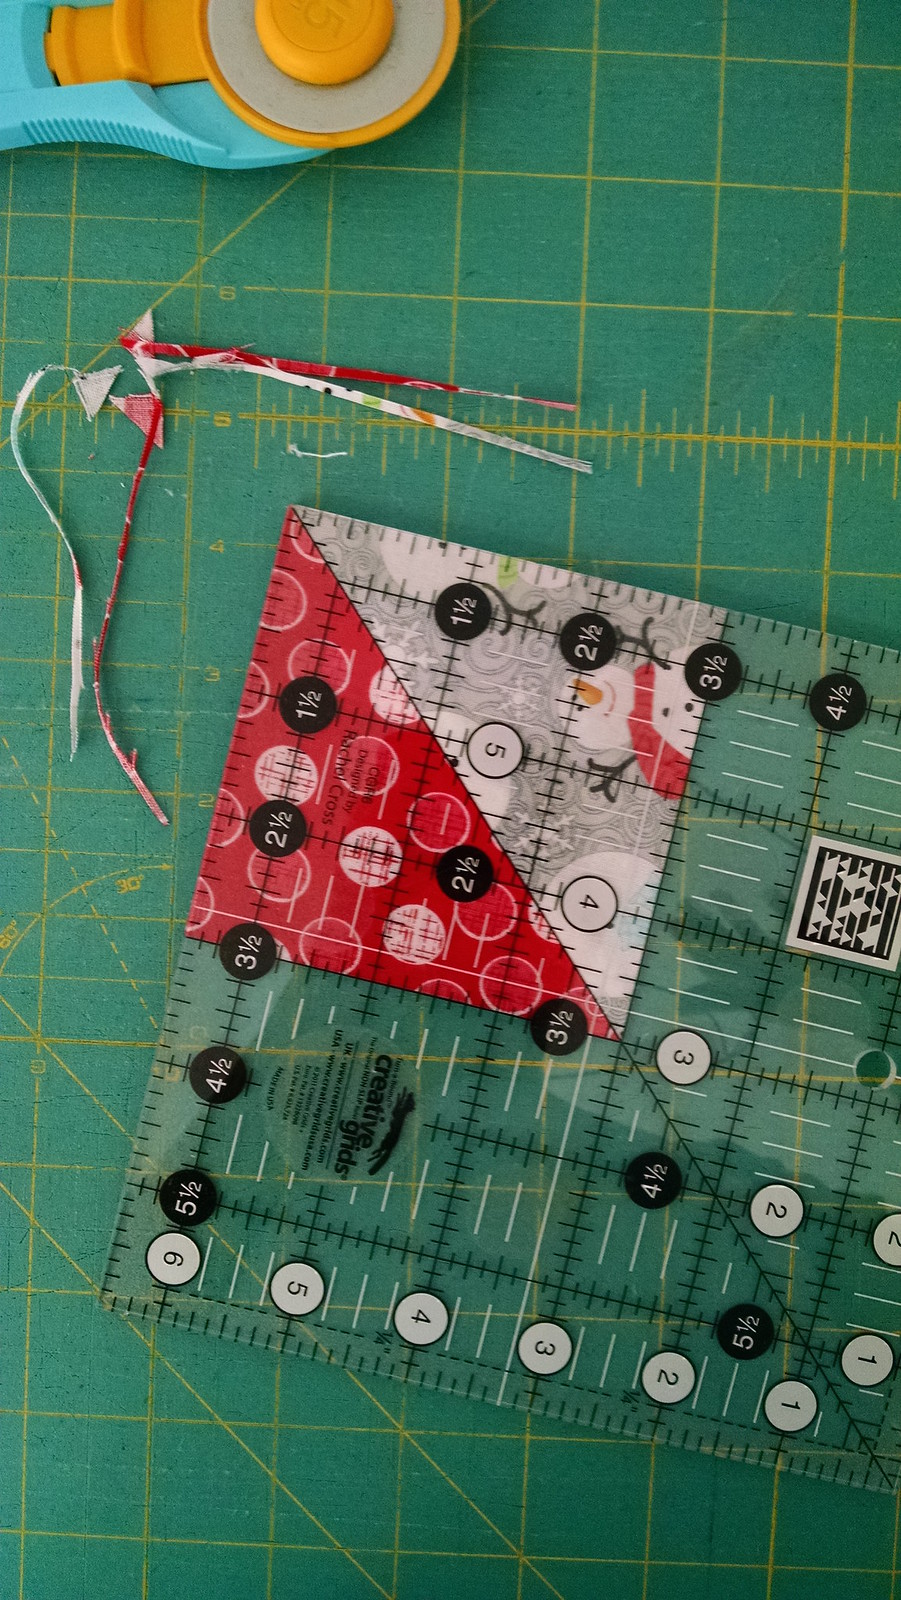
Now square up all of these half square triangles to 3 1/2" x 3 1/2". I like to use a 6 1/2" square ruler and line up the diagonal line of the ruler with the seam line of each half square triangle:
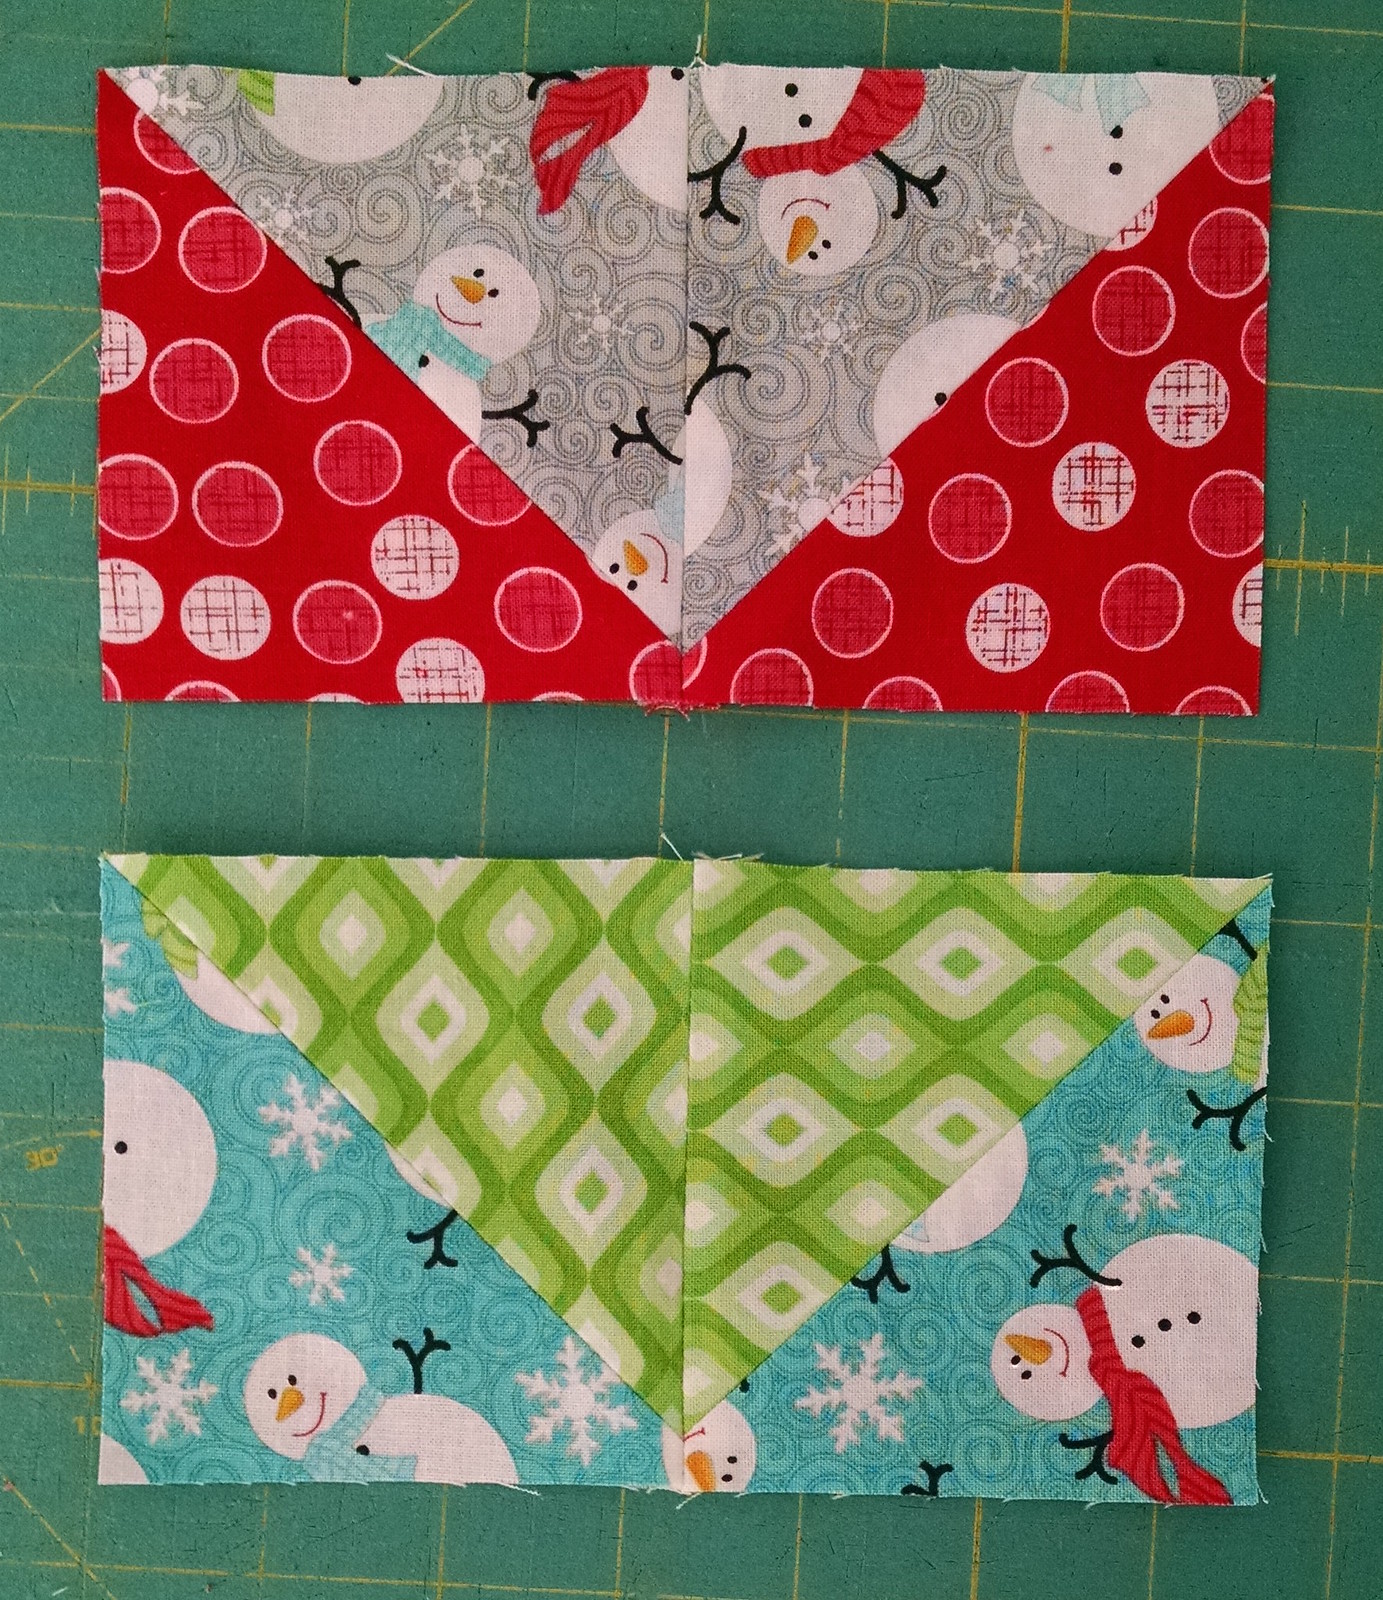
Next sew the half square triangles into pairs, as shown below. Press the seams. You will create 4 sets of the grey/red and 8 sets of the green/blue:
Now we will work with one block at a time. Begin by laying out the red and grey block as shown:
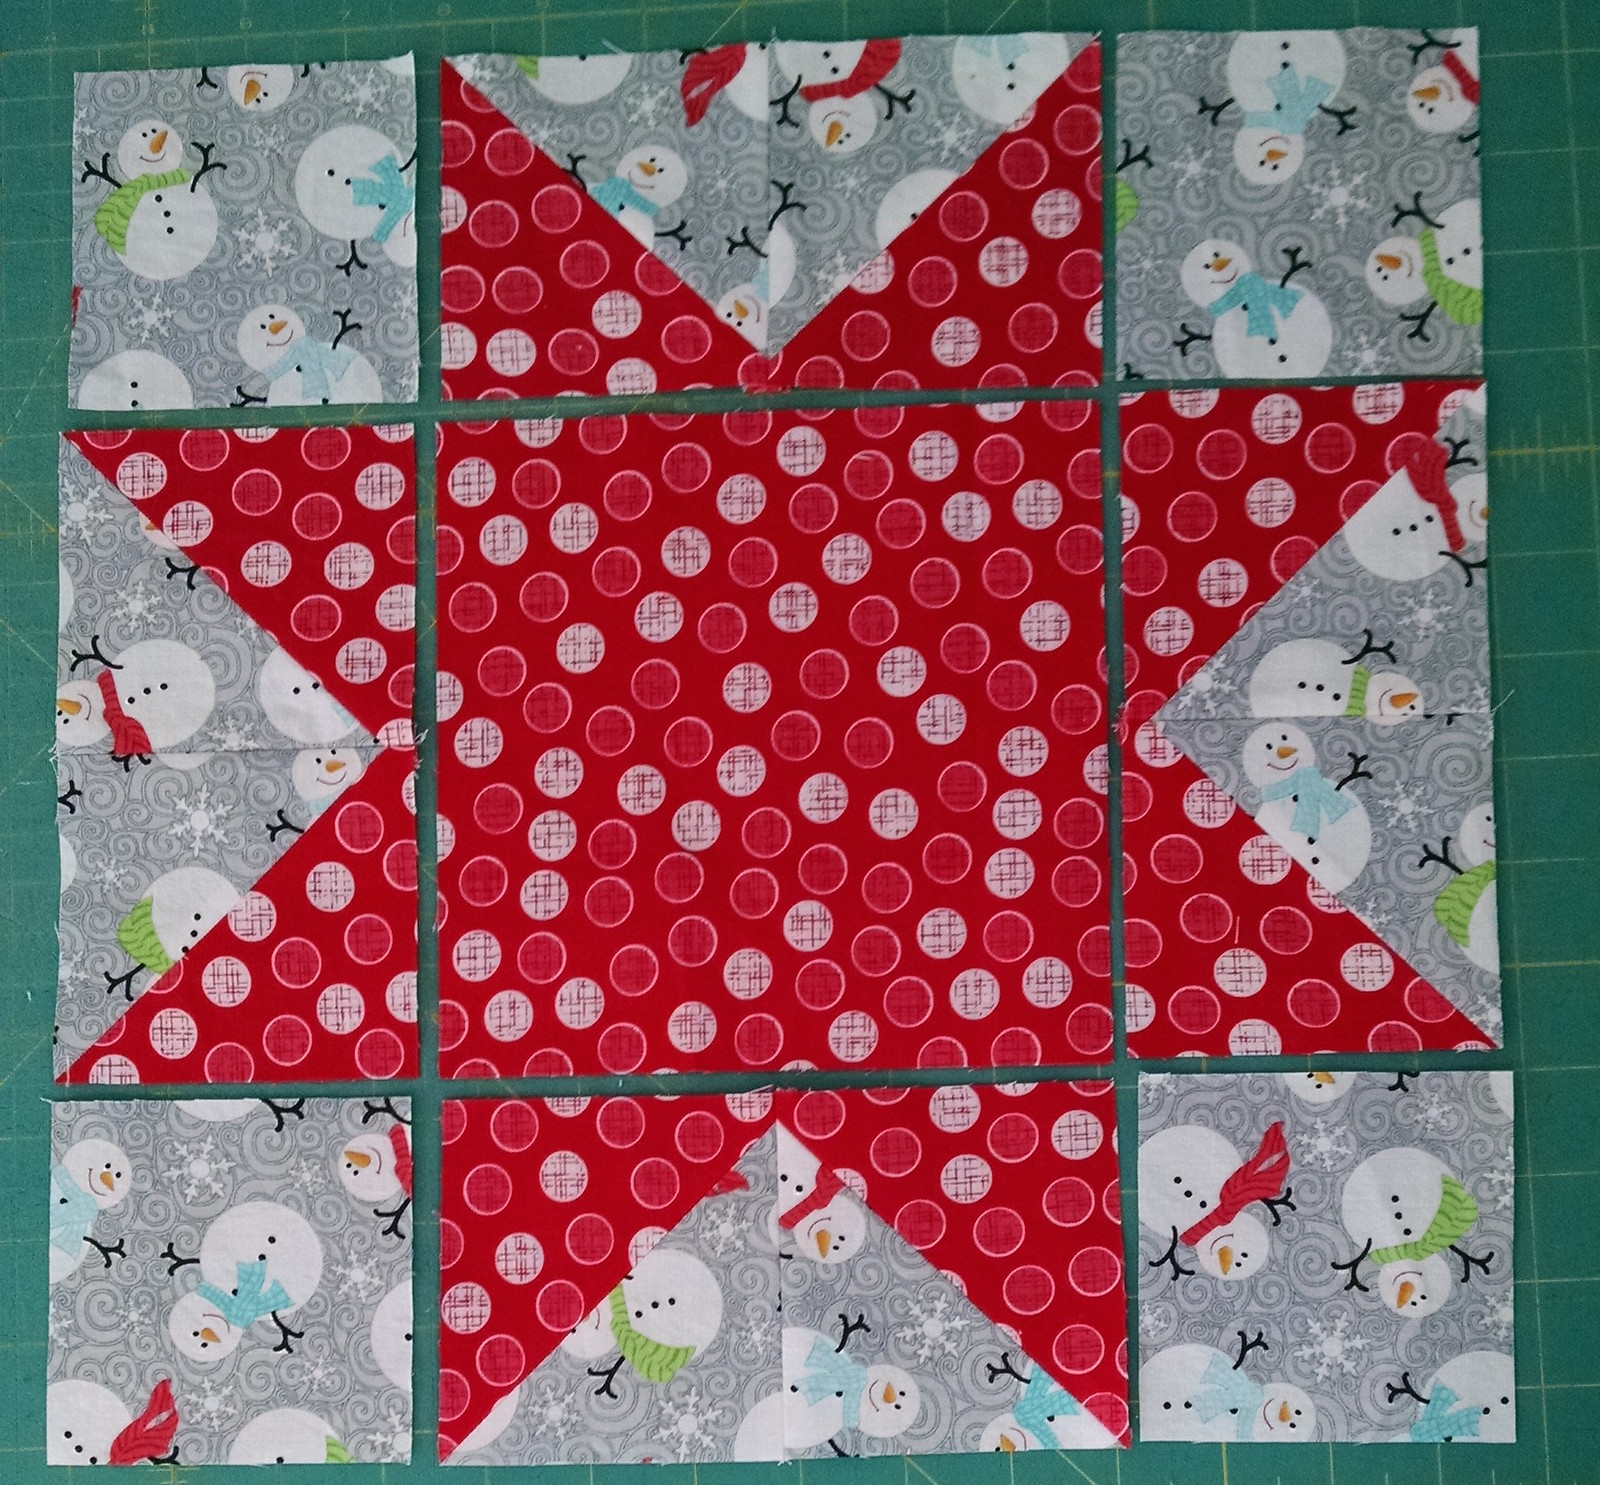
Sew the pieces into rows and press the seams:
Next sew the rows together and press the seams to complete the block:
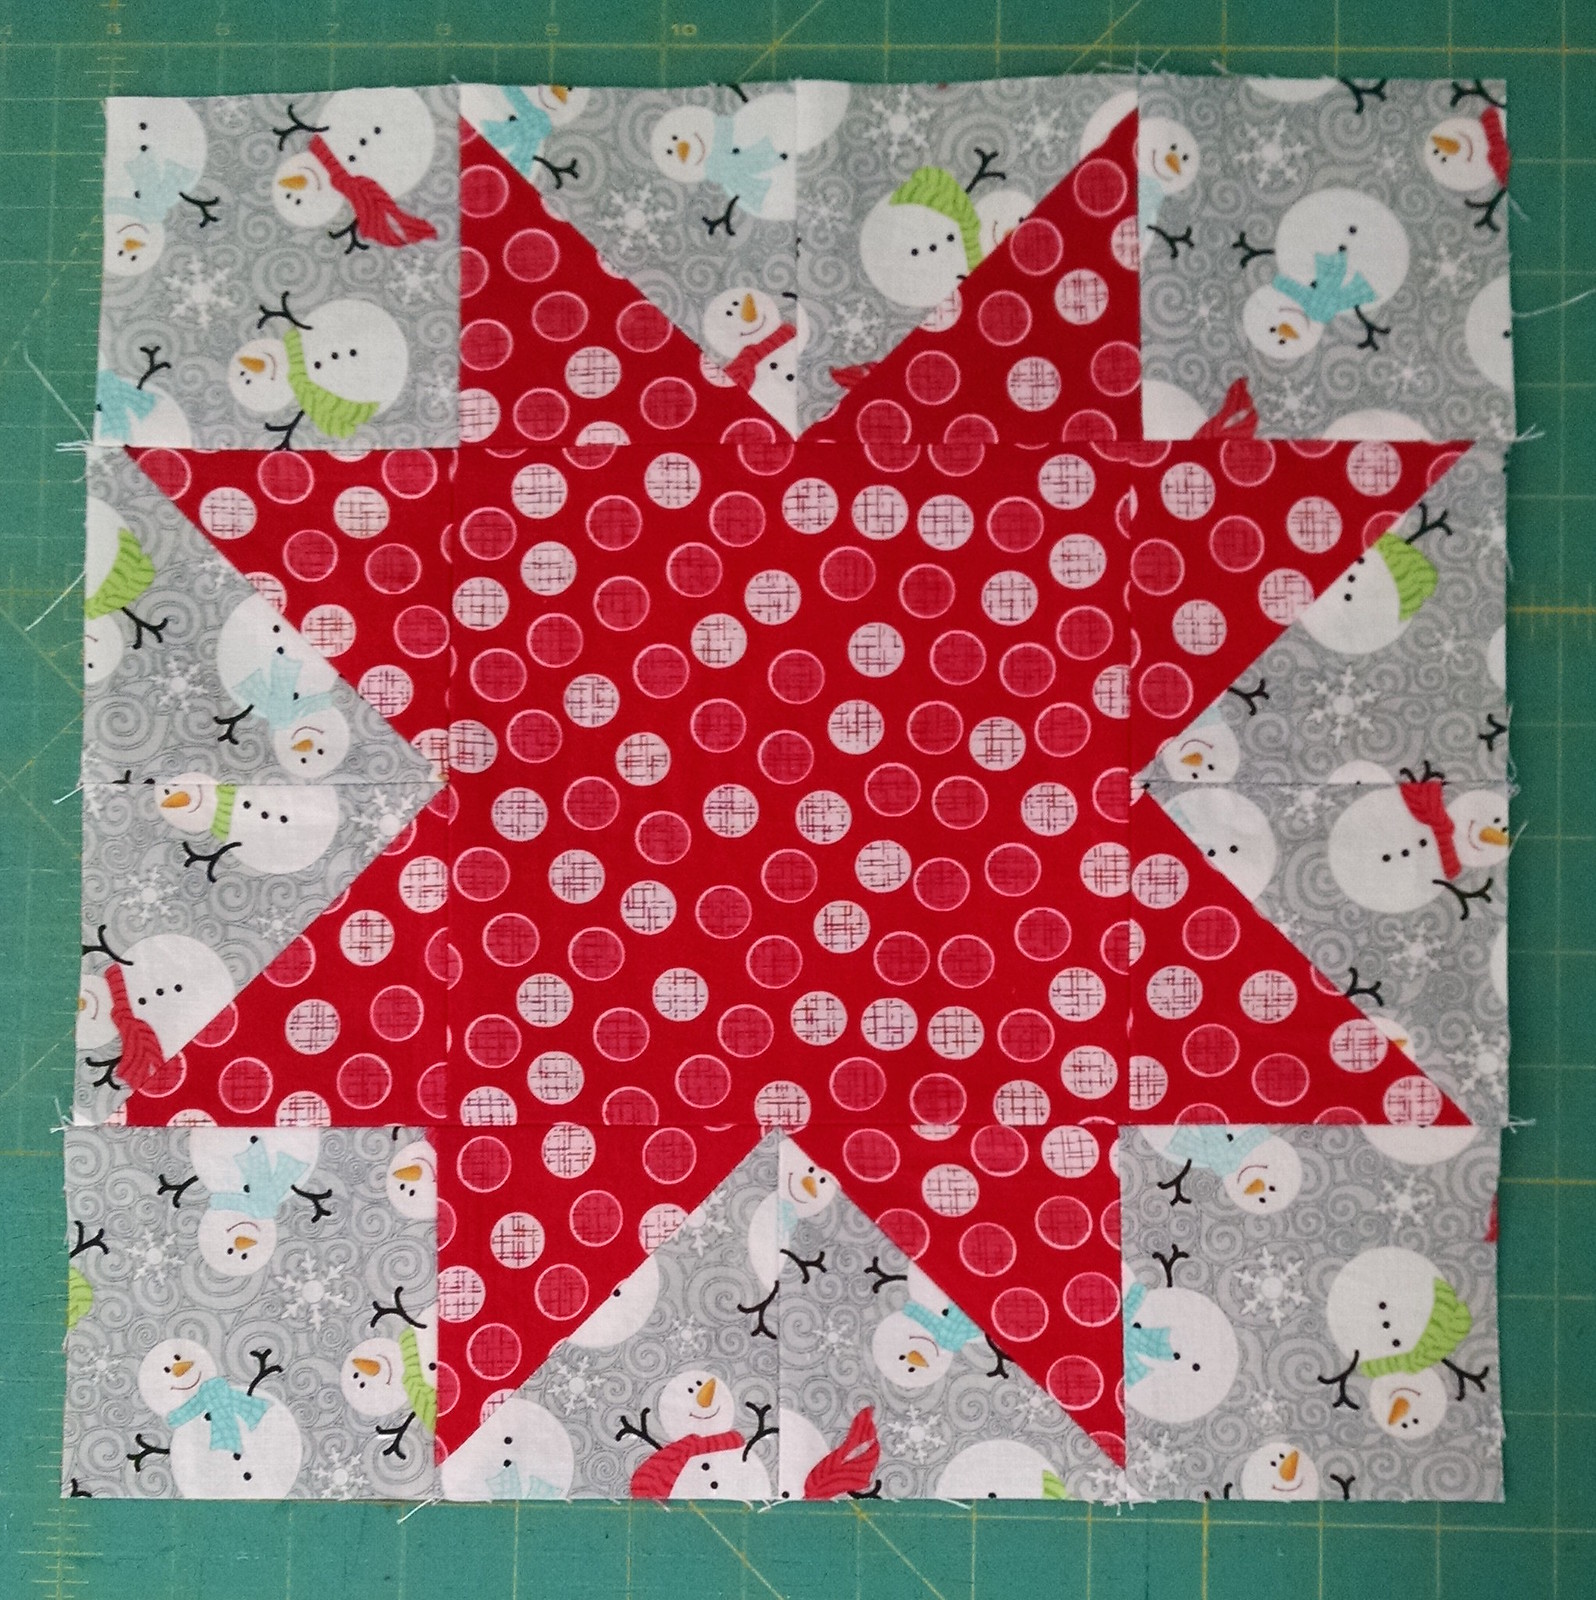
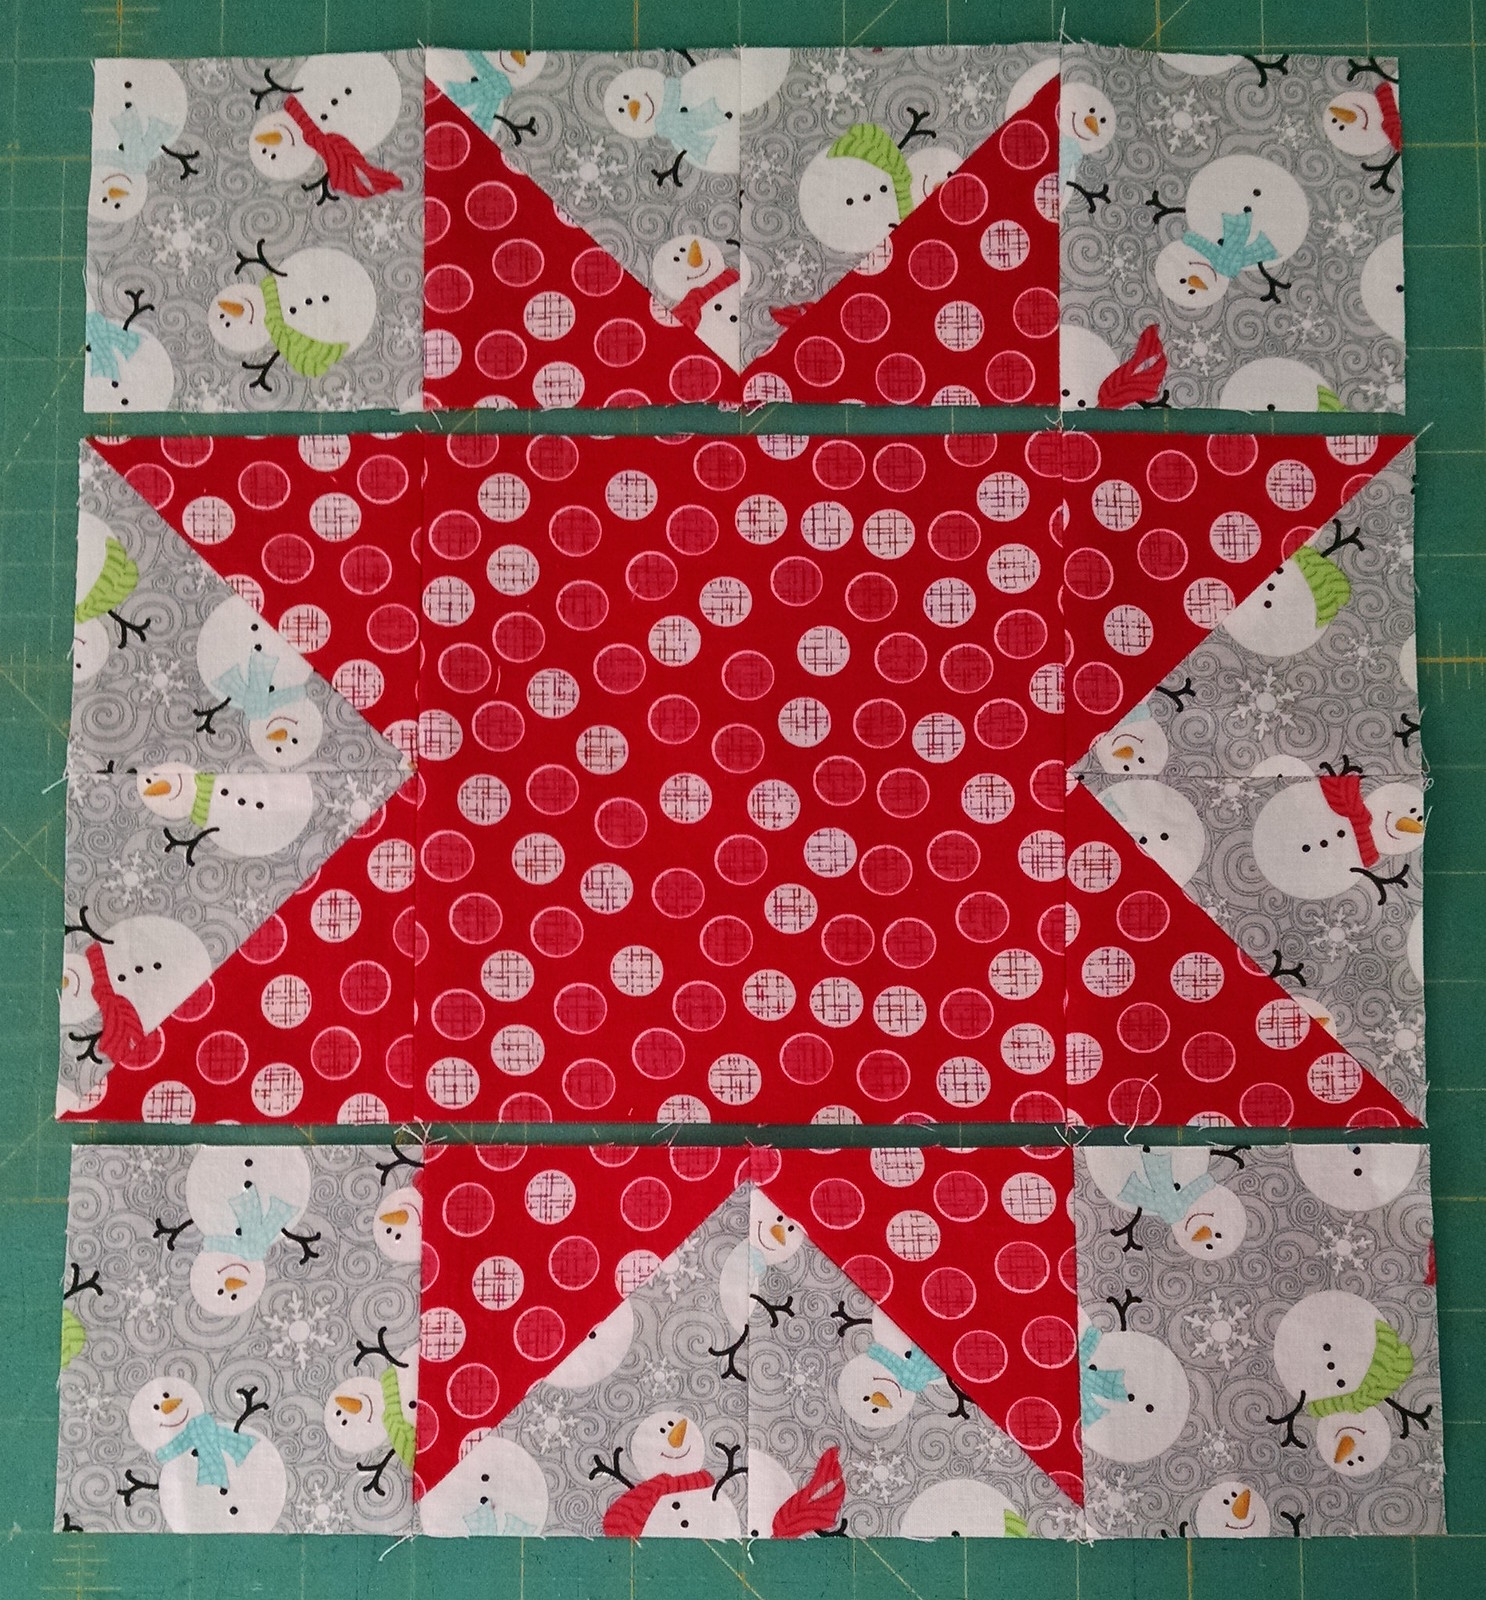
Attach a 1 1/2" x 12 1/2" Frosty Snowflake Green strip to the top and bottom of the block. Press seams:
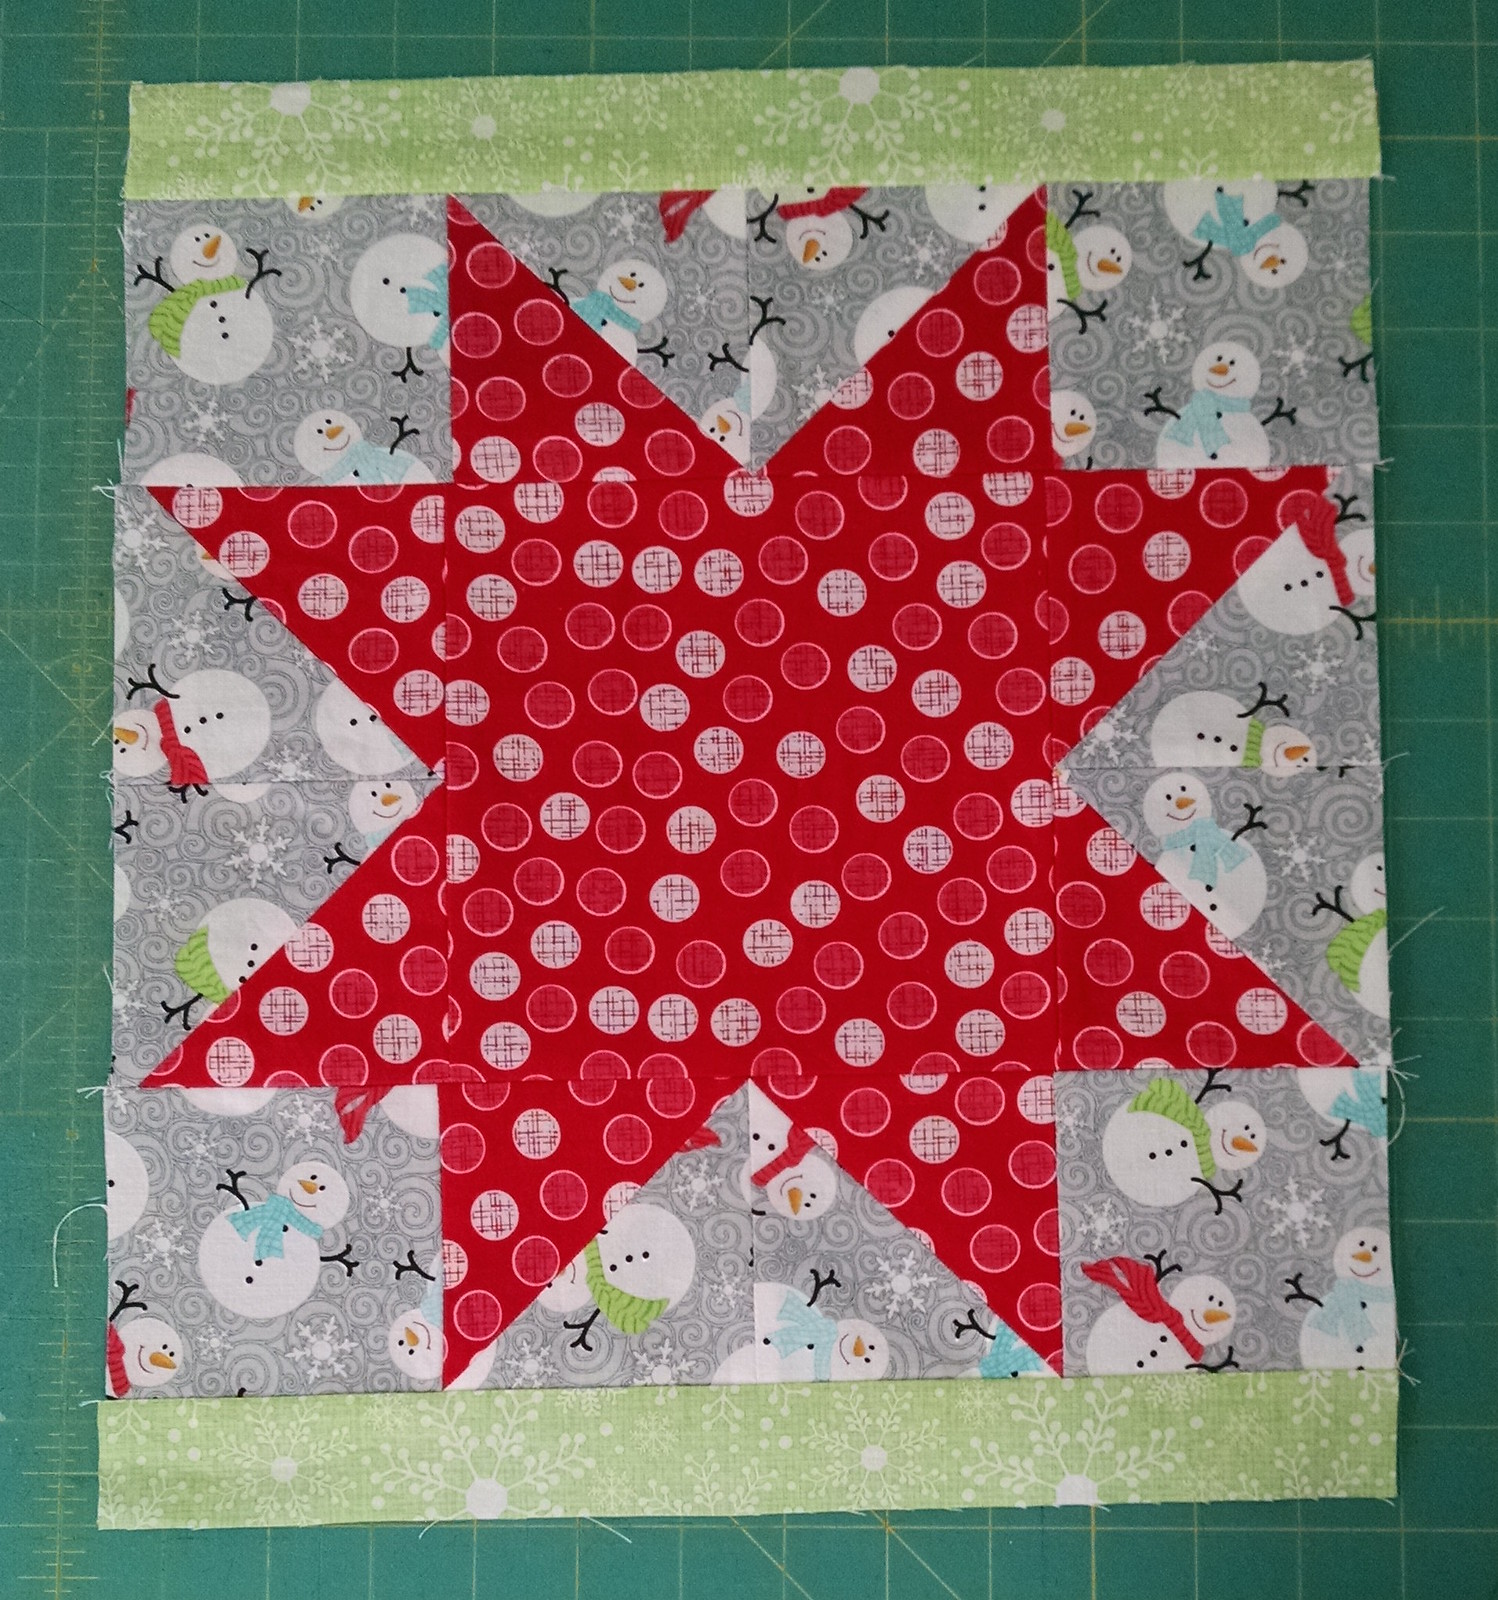
Now attach a 1 1/2" x 14 1/2" Frosty Snowflake Green strip to each side of the block. Press seams:
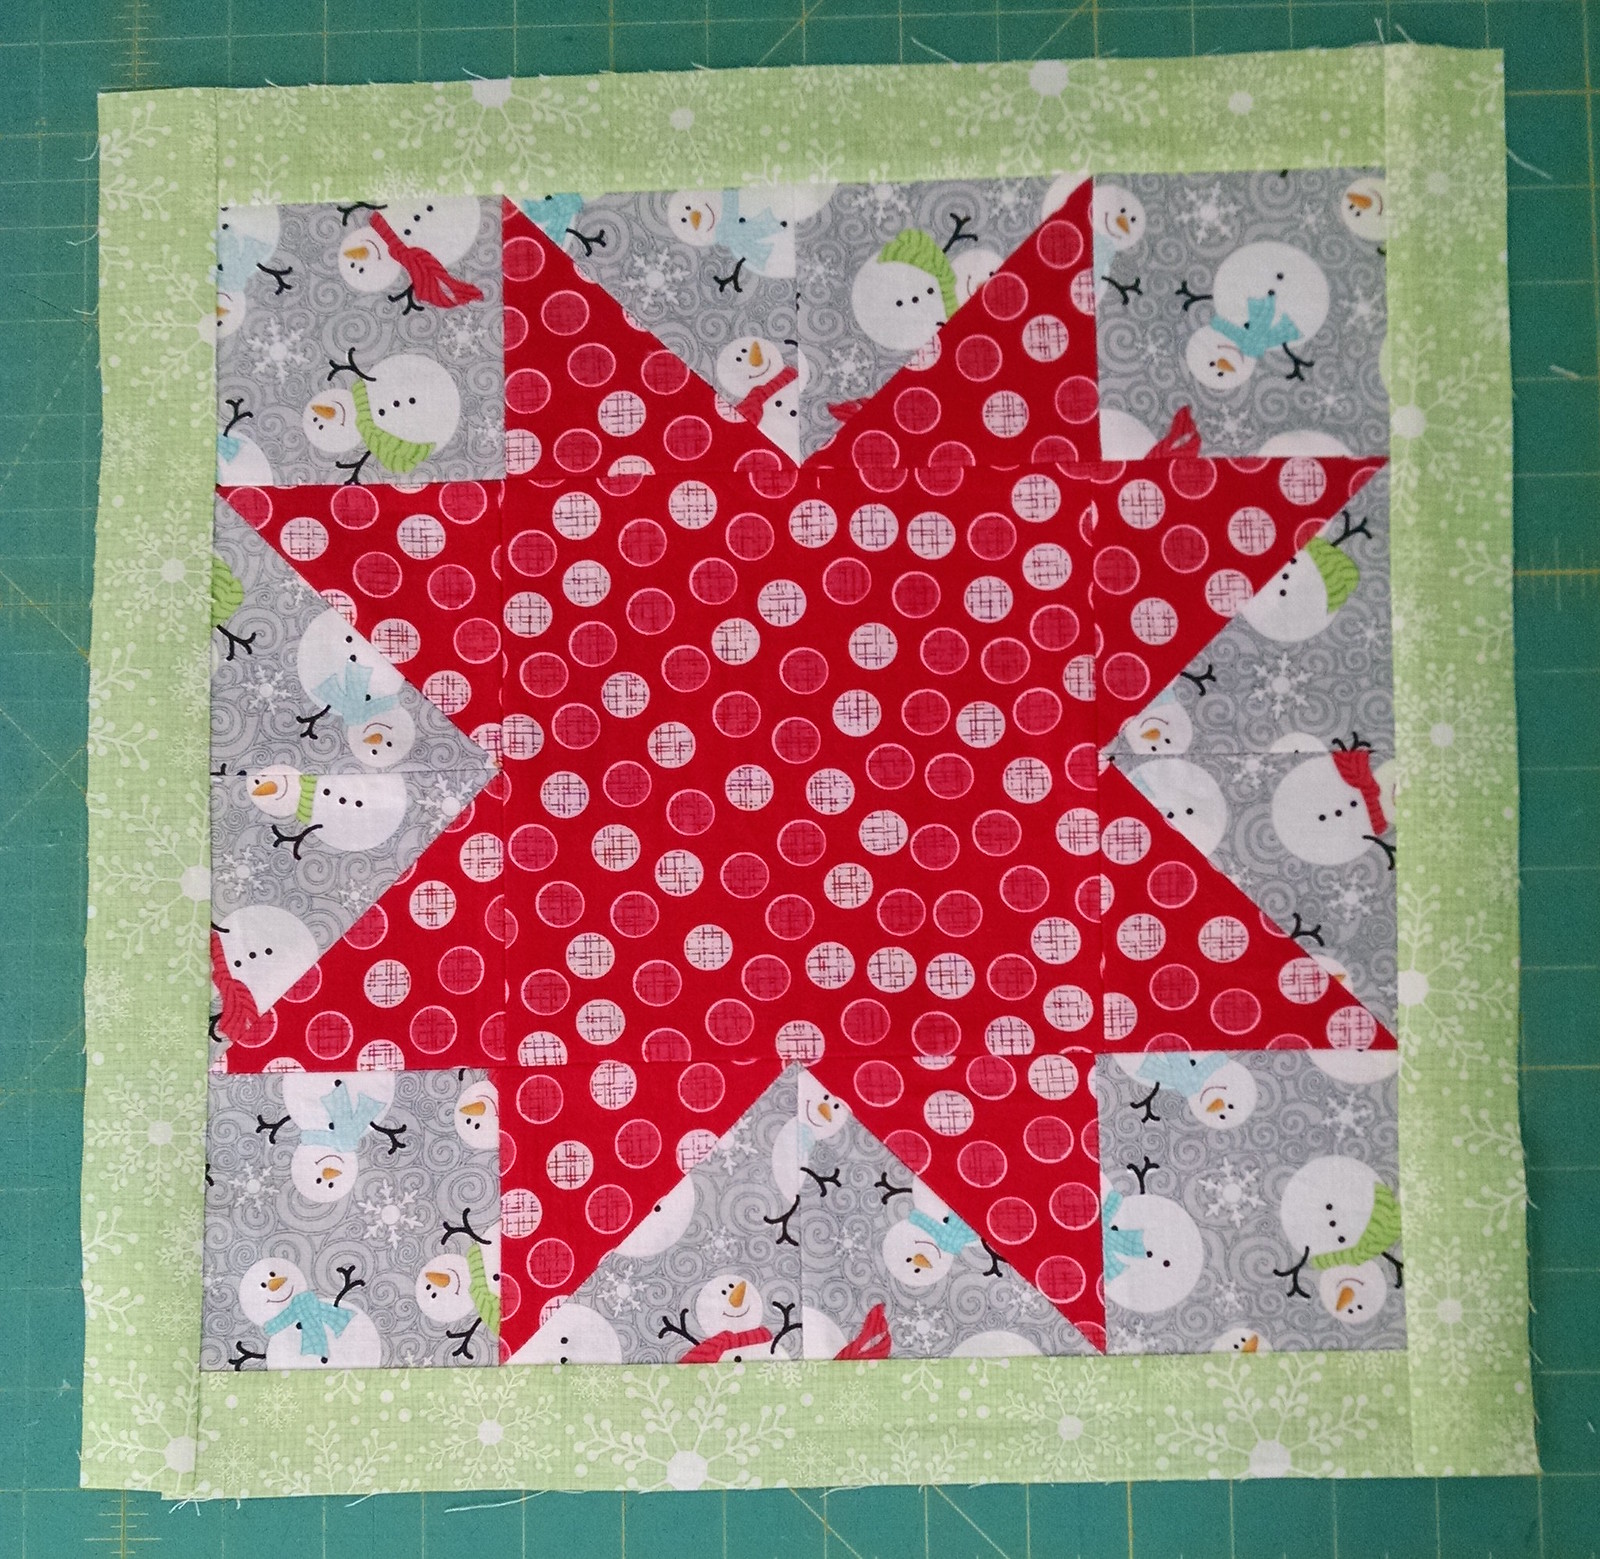
Repeat the above steps to create TWO blue/green blocks with red borders.
Stitch the 3 blocks together with the red/grey block in the center and press the seams:

For the backing, the remaining piece of Jubilee Geo Grey fabric must be cut into 2 pieces measuring approximately 28" x 20" and pieces together along the 20" sides to create a piece measuring approximately 55" x 20".
At this point you can finish your table runner with a simple backing or quilt it. I prefer to quilt my table runners.
To finish the table runner with a bound edge, sew together the 3 binding strips of Jubilee Geo Grey and bind using your favorite method!
Look at that, it's only July and you've got a Christmas decoration and/or gift all ready to go!
5 comments:
such a clear detailed tutorial thank you
I think CAESAR SHOP should be removed. It's porn.
thanks
Klg
Vimax
Distributor Vimax
Obat Vimax
Vimax Canada
Vimax Asli
Vimax Asli Canada
Vimax Original
thank you admin
the article is very interesting, it helps me and can be used for reference.
hopefully successful admin always.
Obat Aborsi
Jual Obat Aborsi
Jual Cytotec
Obat Penggugur
Penggugur Kandungan
Obat Penggugur Kandungan
Obat Aborsi Cytotec
Obat Abosi 1 Bulan
Obat Abosi 2 Bulan
Obat Abosi 3 Bulan
Obat Abosi 4 Bulan
Obat Abosi 5 Bulan
Obat Abosi 6 Bulan
such a nice embroidery designs digitizing very amazing post *%&^
Post a Comment