
Something that helped me when I was muddling through this process was to see a completed placket. I went up into my closet and pulled out one of my husband's polo shirts. Any time the instructions were unclear, I would refer to his shirt!
To start with, you will need a strip of fabric for the placket and the shirt front or sleeve.
I cut my placket piece at 2.25" wide and longer than 2x the length of the finished placket (in the photo below, my purple placket strip is folded in half). If you want a 10" long finished placket, start with a strip that is 2.25" x 25". The excess can be trimmed off later. I like to press a light crease down the center of my strip, we will use that as a guide later.

Draw the center line for the placket on your shirt front or sleeve:

Next, sew down one side of the drawn line, sew 3 small stitches across the bottom of the placket line, and back up the other side. This is stay stitching. When sewing my stay stitching, I bumped my needle over 2 positions from center and aligned my drawn line with the center line on my presser foot. I also shortened the stitch length from 2.5 to 1.25 for the small stitches at the base of the placket line.


Now cut down the drawn line, but do not cut through the 3 small stitches that you made across the base of the placket.

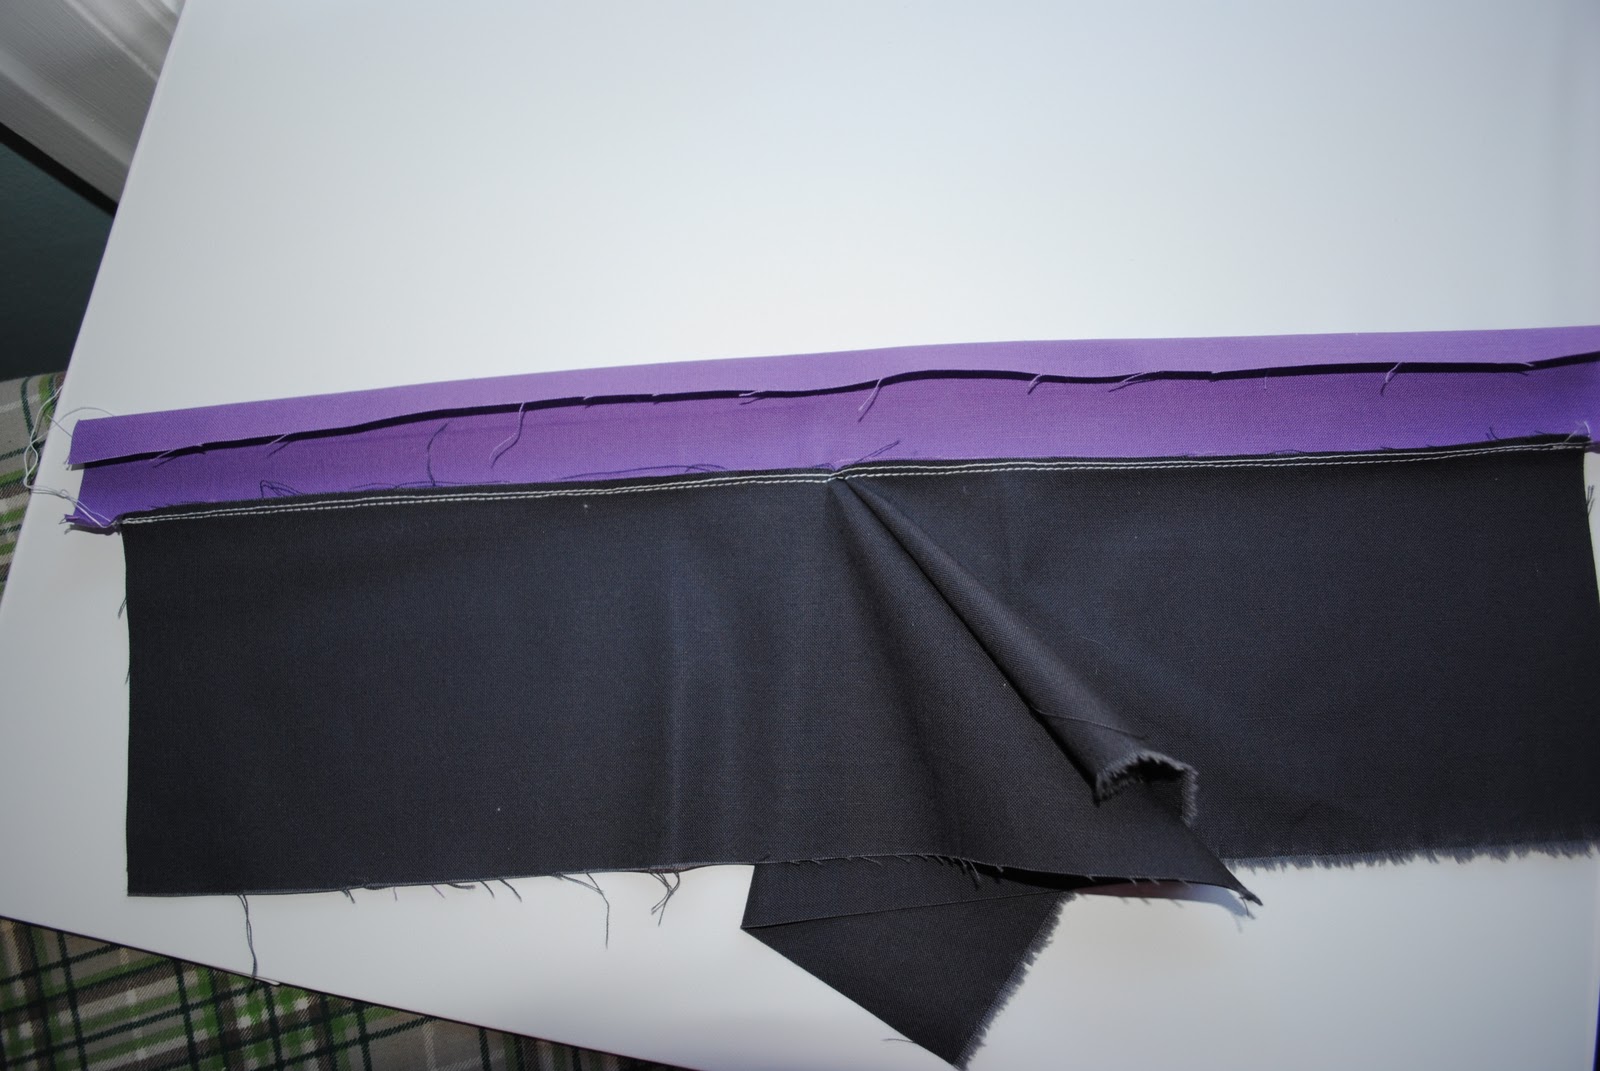
Let's apply the placket strip! With the main fabric on top, align the raw edge with the raw edge of the placket strip. Sew the two pieces together just outside of the stitching you've already made.

When you reach the base of the placket, you will have to slightly stretch the main fabric. I like the stretch the fabric slightly to first sew across the base of the placket:


After you've sewn across the base of the placket, pull the other side of the main fabric towards you and align the raw edge with the placket strip. Sew down the remaining portion of the placket strip.

When the placket strip is sewn down, iron the seam towards the placket.

If you didn't do so earlier, you'll need to iron a crease down the center of the placket strip now.
Then press the edge of the placket strip in to meet the center crease.
We are going to encase the raw edges now by folding the placket strip along the center crease. You want to be sure that the folded edge of the placket is covering the stitching lines by about an 1/8 inch, or more.

I like to pin at this step.

Turn the piece over. To stitch down the back of the placket, you'll want to stitch in the ditch on the front.

At the center, continue to stitch slowly in the ditch and gently pull the main fabric so that the placket is open.

When you finish stitching in the ditch, turn the piece over and check that you caught the folded edge of the placket in your stitching. If you missed any sections, pick out the stitches, repin the section and sew it down again.
Here is the seam that was stitched in the ditch:

If you're making a sleeve vent, you can follow the instructions in the pattern that I used above to sew the diagonal line on the vent and continue with your sleeve.
For a shirt placket, we have a little more work to do.
Press one side of the placket under the main fabric. In the photo below, the right side shows the placket pressed under.

Now lay the piece down so that the main fabric is flat. Press well.

Now we will stitch down the portion of the placket that was folded back. My placket is 3/4" wide, so I stitched down 5/8" from the folded edge.

When you reach the base of the placket, you'll have to pull the other side of the placket towards you to keep it out of the way. Sew to the base and backstitch a bit.

I like to stitch across the base of the placket as well. To do this, lay your main fabric out flat. Press it if needed.

Now stitch across the base of the placket, making sure that you catch the placket fabric in this seam. It will be bulky, so just sew slowly.

And you're done! Here are some pictures of the front and back.


You may notice some small puckers at the base of the placket. To minimize these, you have to keep your stitching lines at close together as possible when sewing down the placket strip in the beginning. That would involve sewing the stay stitching lines closer together and sewing as close to the stay stitching as possible when sewing down the placket strip.
A woven fabric will naturally show more puckering than a knit, because the knit will stretch. A lot of the smaller puckers won't be noticeable on a completed garment, though.
If you have any questions, leave me a comment or send me an email! I tried to include more photos than usual, because I tend to be a minimalist when it comes to tutorials.
2 comments:
You are a genius!!
Thank you so much. I have been bashing my head against a wall with this shirt dress and since I'm doing it years after the original "Frock by Friday" I felt out was a bit behind to ask questions.
But you have solved my problem. Thank you for generously posting your research for those of us still bumbling along on our own.
maryhaw@gmail.com
Post a Comment