
I seriously considered ditching the templates and working out the math for each block as I go along. I love math, and I know that my work is more accurate when I rotary cut my pieces. But I wanted to keep in the spirit of this project, so I'm using the templates from the book. I hand pieced and quilted my first quilt using templates, so this process isn't new to me.
This time around, I am using my rotary cutter to cut around the templates and I'm machine piecing my blocks. I thought I'd share the process that I use, first I will go through how I prep my templates:
Supplies:
Thin Cardboard (i.e. cereal boxes)
Spray Adhesive
Templates*
Rotary Cutter - it's best to use a separate blade for paper
Ruler
*A member of the FWQAL flickr group graciously combined all of the book templates onto 15 pages. I used these templates printed at 100% and they are measuring up great! If you need help finding the template document in flickr, let me know. This is not meant to be a substitute for purchasing the book, however. :)
*A member of the FWQAL flickr group graciously combined all of the book templates onto 15 pages. I used these templates printed at 100% and they are measuring up great! If you need help finding the template document in flickr, let me know. This is not meant to be a substitute for purchasing the book, however. :)

Take the cardboard inside and lay your templates out. I don't like to lay any of my templates over the folds in the cardboard. As you lay each piece down, smooth it over with your finger. If there are bumps or wrinkles, you can pull the piece back up and try again. I find it pretty easy to smooth out the bumps without pulling the pieces back up, though.

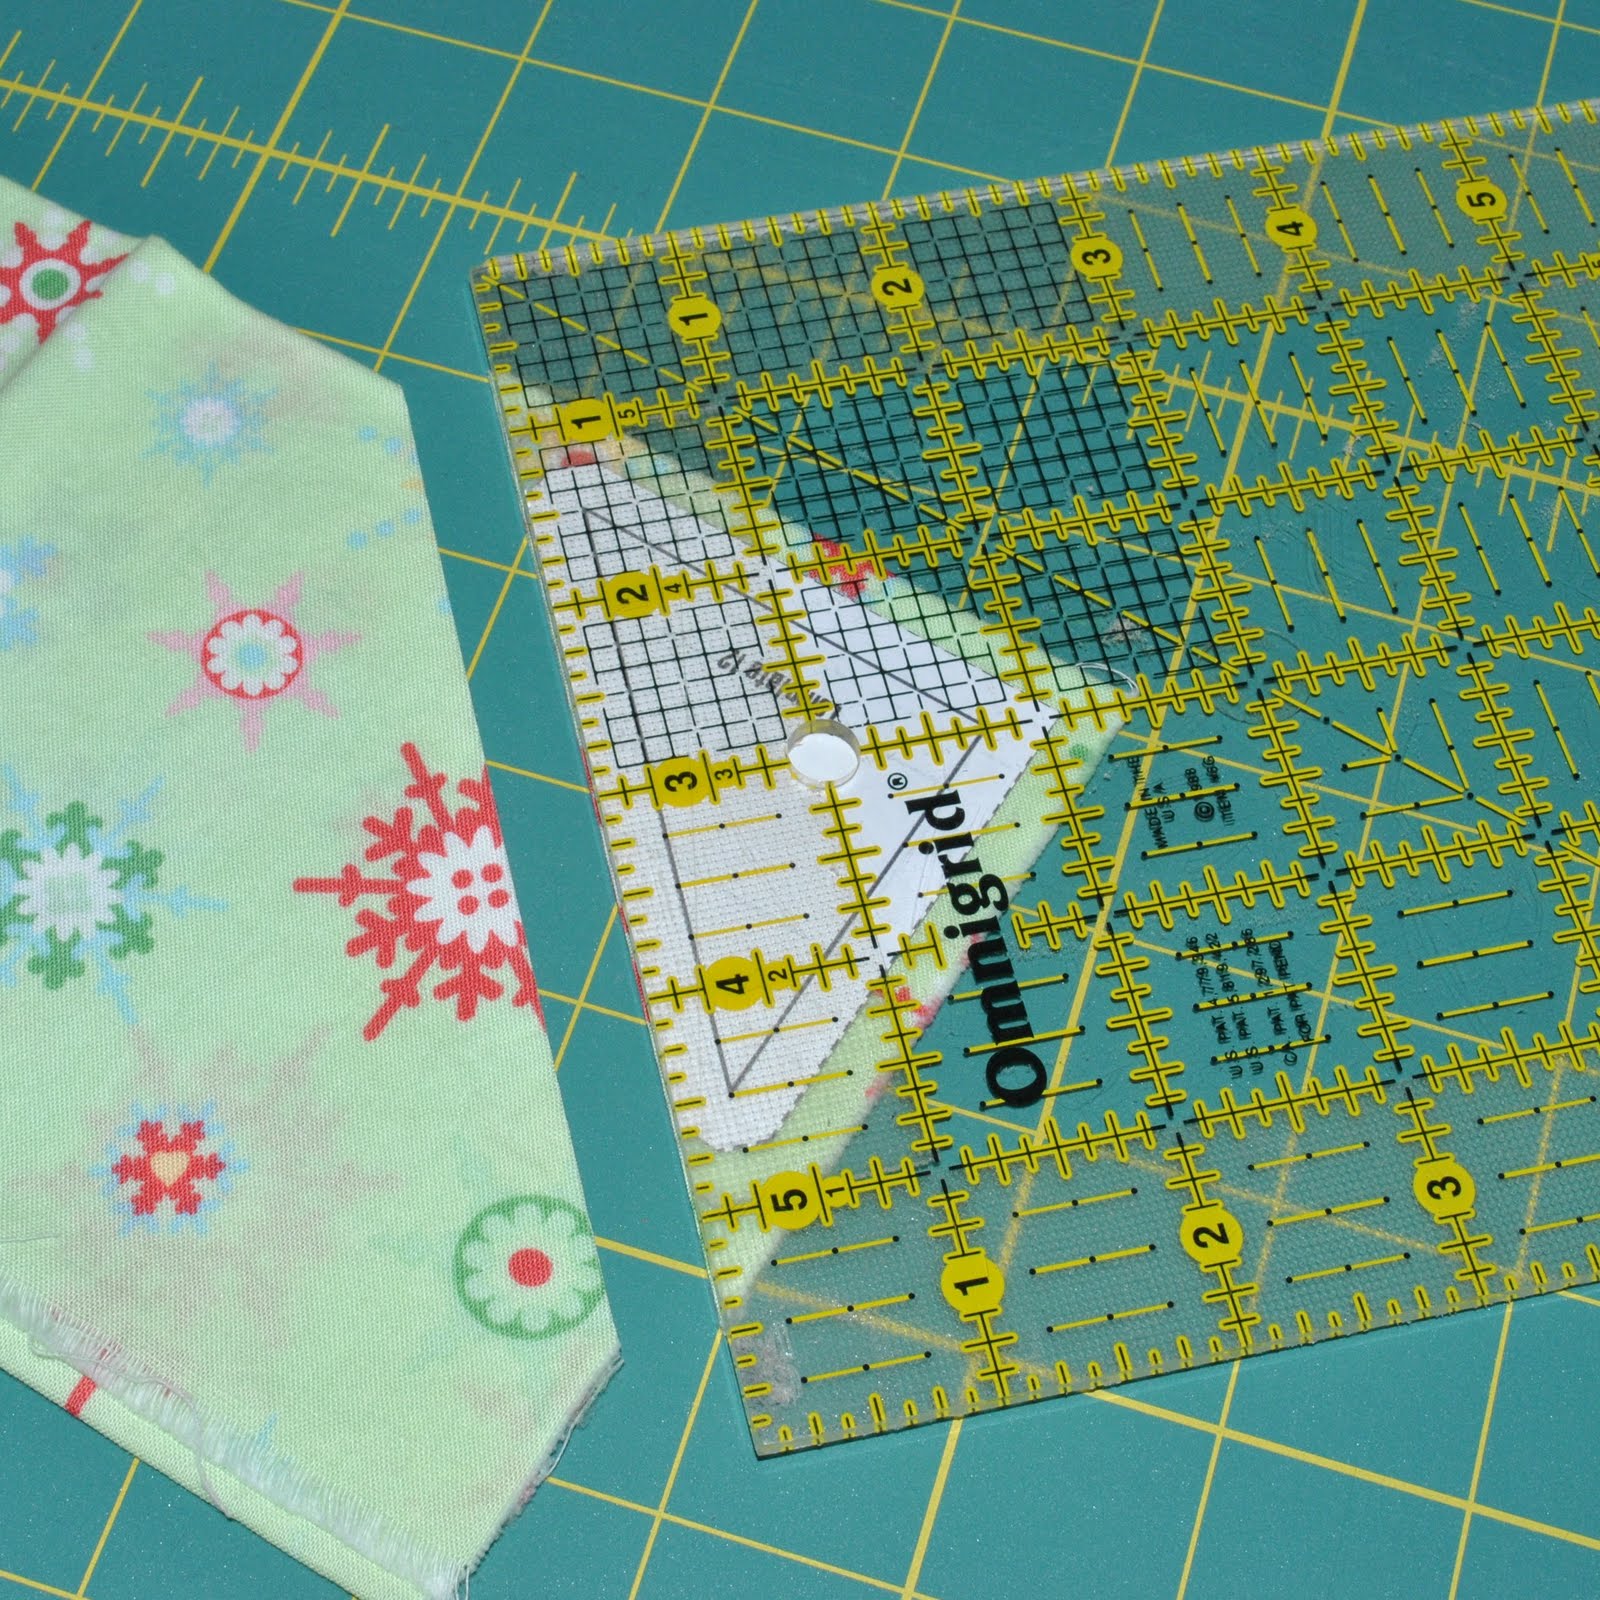
When I cut my templates, I line up the solid SEWING line on each template with the 1/4" line on my ruler. That ensures that I have an accurate seam allowance, regardless of the dashed/cutting lines. (See the red arrows below pointing to the solid SEWING lines.)


Now that the templates are ready, I will go through how I cut my pieces using the templates and a rotary cutter and ruler.
Supplies:
Templates
Masking Tape
Rotary Cutter and Mat - switch out your "paper" blade at this point
Ruler
Fabric

For reference, I chose the Big Dipper block for this tutorial. It only requires one template!

To start, make a loop with masking tape and stick the loop to the back of the template.

Now stick the template onto the fabric. I cut 4 layers at a time here.

Line your ruler up along one edge of the template. I line up the solid SEWING line on the template with the 1/4" mark on my ruler.

And trim!
Repeat on all remaining sides (don't trim those funky corners yet!).

Now to trim the corners, I don't use a ruler. I just set my rotary cutter on the edge of the corner and press down. I try not to roll my cutter around a lot, because I want a small, clean cut.

Here's my triangle with 1 part of the corner trimmed.

Repeat with the little bit that is remaining. Line up the rotary cutter, and press down.

Ta-Da!

Repeat until all of your pieces are cut, and piece as desired! You may need to use a fresh piece of masking tape after a few templates. If the template isn't staying put on the fabric, use fresh tape. You don't want the templates moving around!
I've seen a few blog posts now where people are questioning the funky corners on the pieces. Fussy Cut explains it really well in this post, scroll down for the picture and explanation. They really do improve accuracy in piecing!
Up next, my first few blocks!
9 comments:
Yes, can you please direct me to the templates on flickr. I have the book and so refuse to print one template/page so I was doing the math, and on weird templates actually measuring them on my computer screen! Yep, I definitely need that flickr page! Thanks.
Thanks for sharing how you did your templates. It's a great help....could you direct me also to the flikr page of templates? Thanks! Your blocks look great!
I found the template page via the forum but I just never could get them to print out right. Don't know what I'm doing wrong.
From Marti Michell has made acrylic templates with double-blunt engineered corners for many years. If you already own some of these template sets, you can use pieces in them to cut 101 of the 111 blocks in Farmer's Wife. Sets A, B, D, N and S are used most frequently.
Thanks for this post! It's super helpful.
I know I am really late to the game but, I'm starting my Farmers Wife Quilt this weekend! Thank you so much for the tips they were very helpful.
Do you know if the template download is still available? If so, I could use some help finding them.
Thanks in advance!
- Leisel
Instead of using cardboard, I buy those plastic "for sale" signs that you put in windows or in your yard I buy them at Walmart or any home improvement store. The ones I buy are about 9x12". They cost less than $1.00 each and you get a lot of templates out of them. Then I punch a hole in the corner of them and put them on a 3" ring like a binder has. They never wear out and are very easy to keep track of and find, without searching thru all those templates!! You can also write on them with a sharpie!! Much easier than cardboard!
Hello-
I am interested in borrowing templates vs printing out each block. Do you still have yours? I found the all templates document but it doesn't tell me which relay to which block. After printing out 4 of them I need to come up with a better plan or abandon this goal.
Thank you, Janice
Post a Comment