
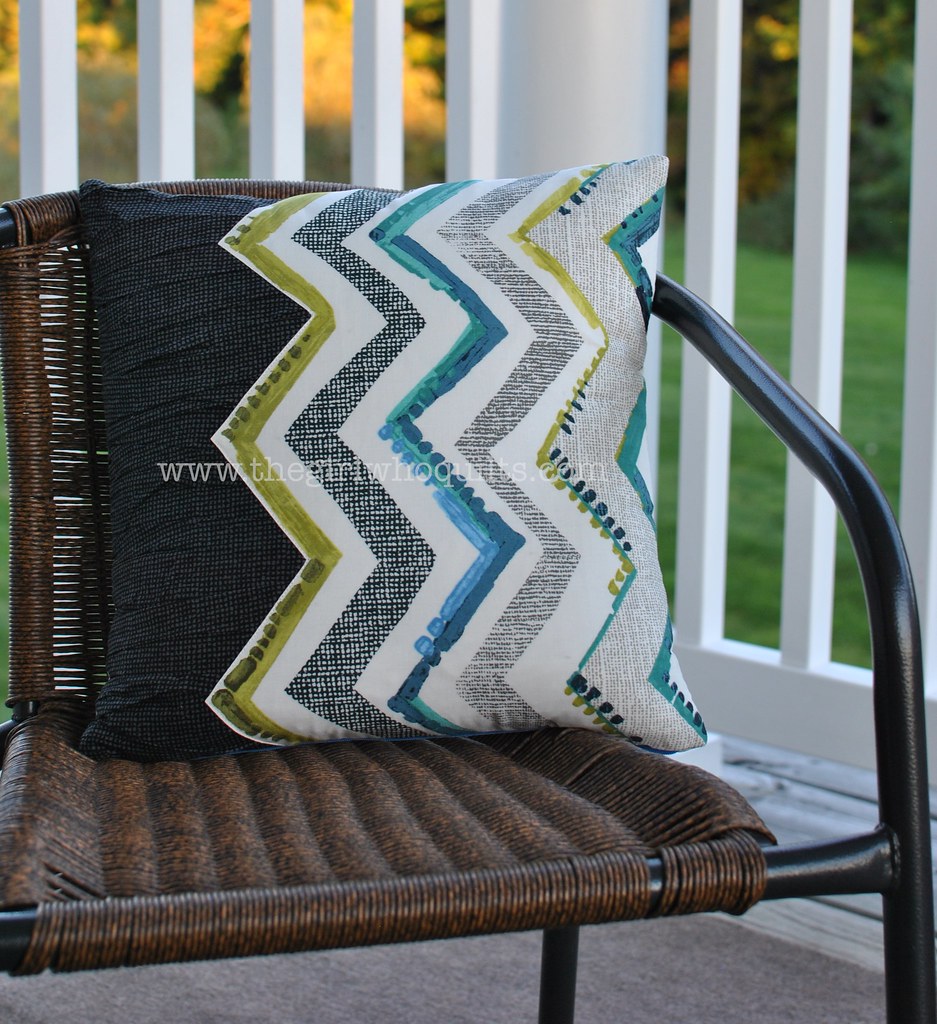
This tutorial was originally written as a guest post HERE for the Benartex blog.
In case you missed out on the tutorial over at Sew in Love (with Fabric), see below to make your own Gathering Place Pillow!
I am also organizing a class for this pillow, along with a few design alternatives! If you're near Glens Falls, New York, contact Patti's Quilting and Fabrics for more information!
Supplies:
Fat Quarter of focal print
1/4 yard coordinating print (preferably a blender fabric)
Fat Quarter for pillow back
16" x 16" piece of lightweight fusible interfacing
16" x 16" pillow form
14" zipper (optional)
Let's start cutting!
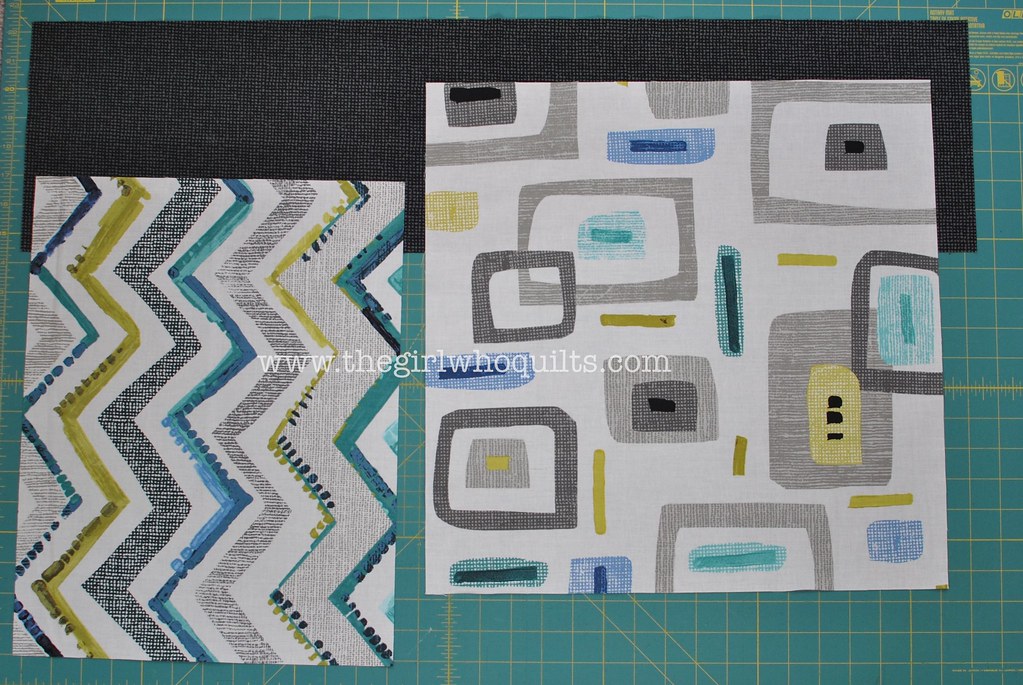
Focal fabric (zigzags): 12.5" wide x 16" long
Coordinating print (black): 8" wide x 32" long
Backing (squares print): 16" x 16"
Lightweight fusible interfacing - not shown: 16" x 16"
Lightweight fusible interfacing - not shown: 16" x 16"
We are going to gather the coordinating print, so let's start by sewing gathering stitches down both long sides of the 8" x 32" piece. To do this, set your sewing machine stitch length as long as possible. Leave at least 3-4" thread tails at the beginning of your seam and sew about 1/8" from the raw edge. Leave 3-4" thread tails at the end of your seam. Sew another row of stitches in the same manner about 1/4" from the raw edge. Repeat on the other long edge of this piece.
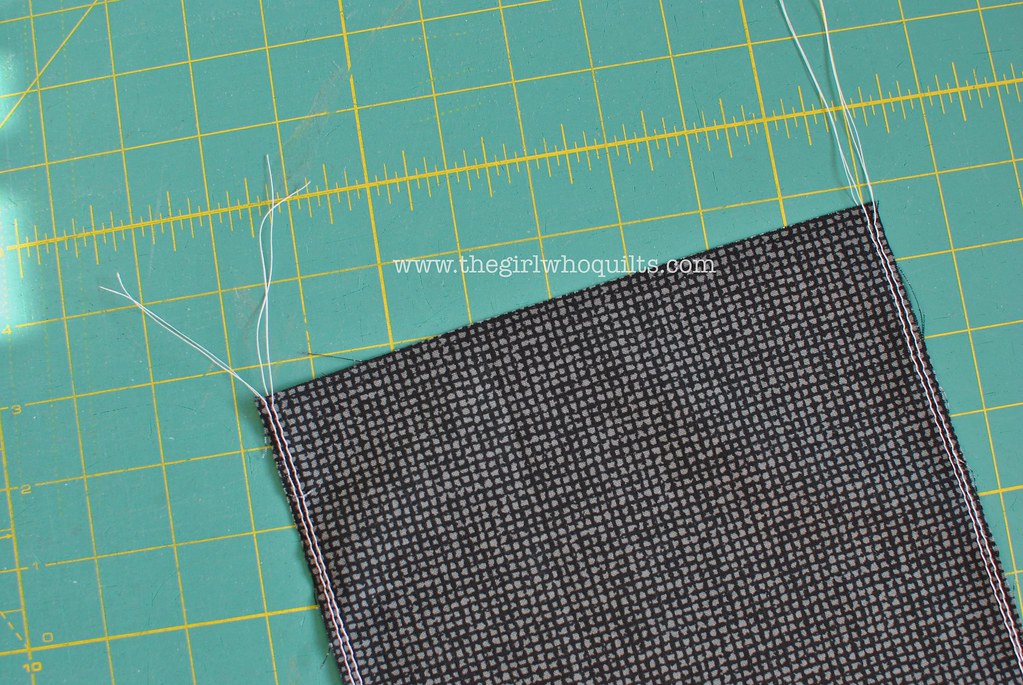
Now find both of the top threads on one side and gently tug those threads to gather the fabric up. Do this slowly and gently so as to not break the thread. Repeat on the other side. Evenly distribute the gathered fabric so that the piece is now approximately 16" long.

We are going to fuse this gathered piece to the 16" x 16" square of fusible interfacing so that it is easier to work with. It doesn't need to be perfect, and you will end up pressing your gathering as you fuse. Don't worry, all of the "wrinkles" will look great on the finished pillow!
Begin by aligning one gathered edge to the edge of the fusible. Lightly fuse the piece so that you can lift it and move it slightly if you need to. When you're happy with the placement, press it once more.

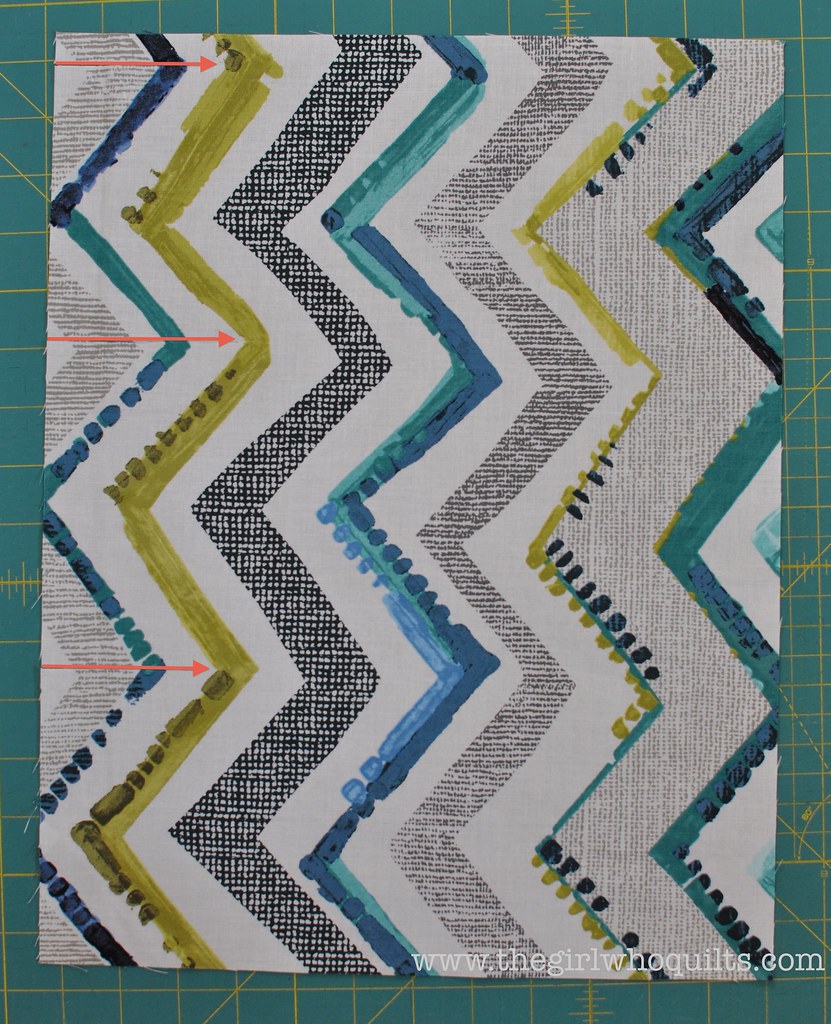
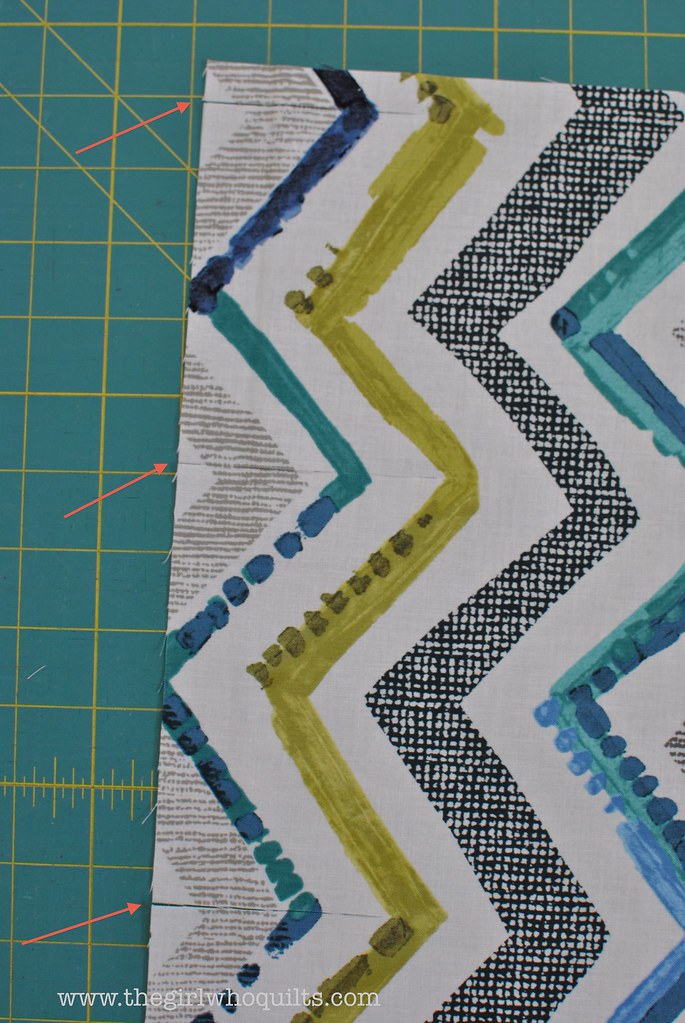
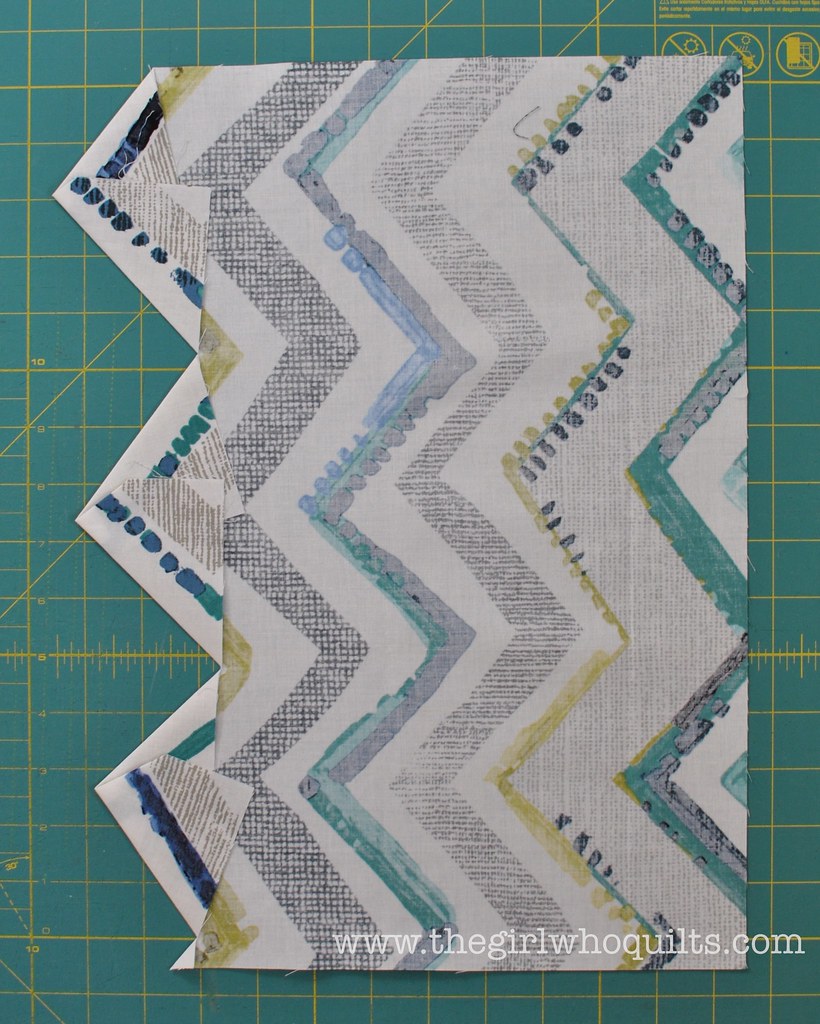
Next we will prepare the focal print. Cut slits into the fabric as shown with the red arrows below. I followed the zigzag print of the fabric, so my cuts aren't even or uniform. I chose to cut up to about 1/8" from the lime green zigzag so that the cream background would show.
Here are my cuts in the fabric:
Starting at one corner, fold the corner to the back following the zigzag.
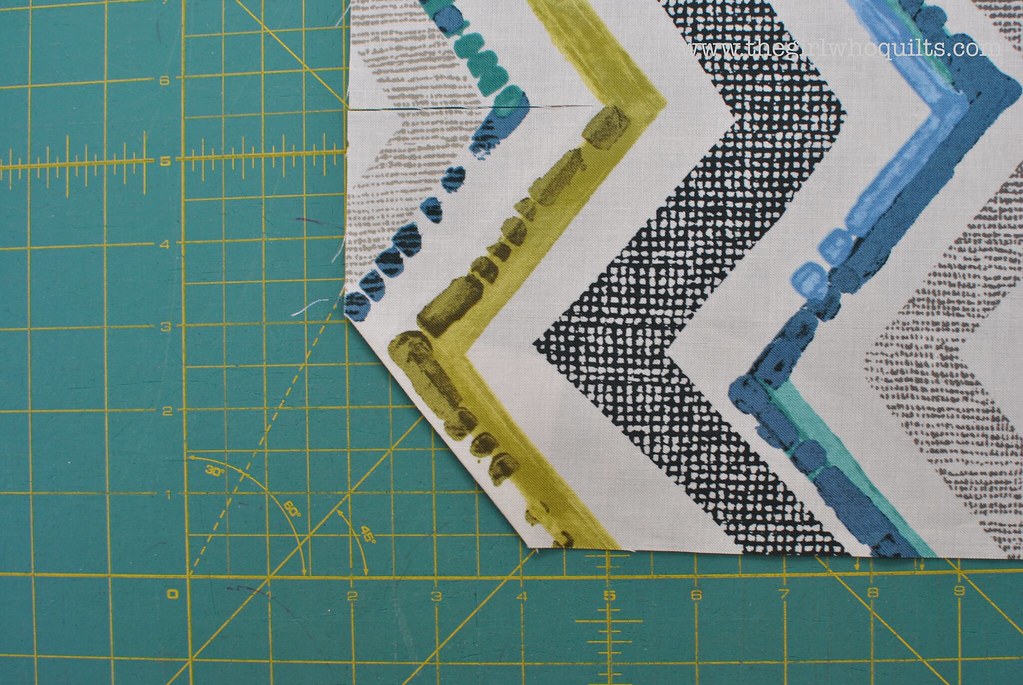
Fold one edge and press before moving on to the next fold, always following the print for guidance. Continue up the side of the fabric.
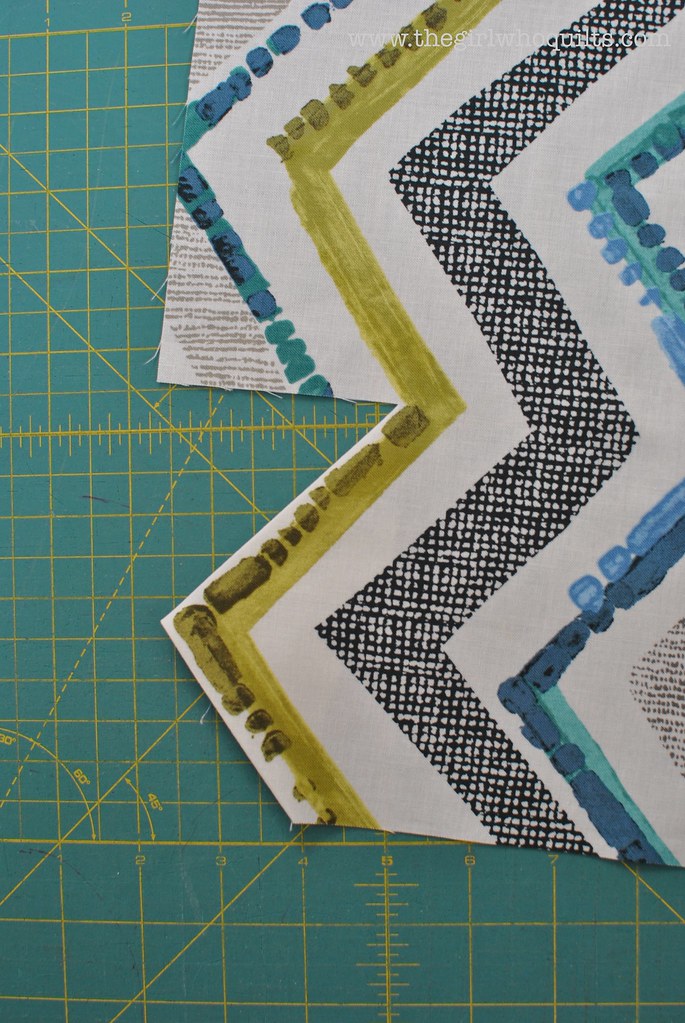
This is how your piece should now look! I clipped away that little piece of fabric at the top.
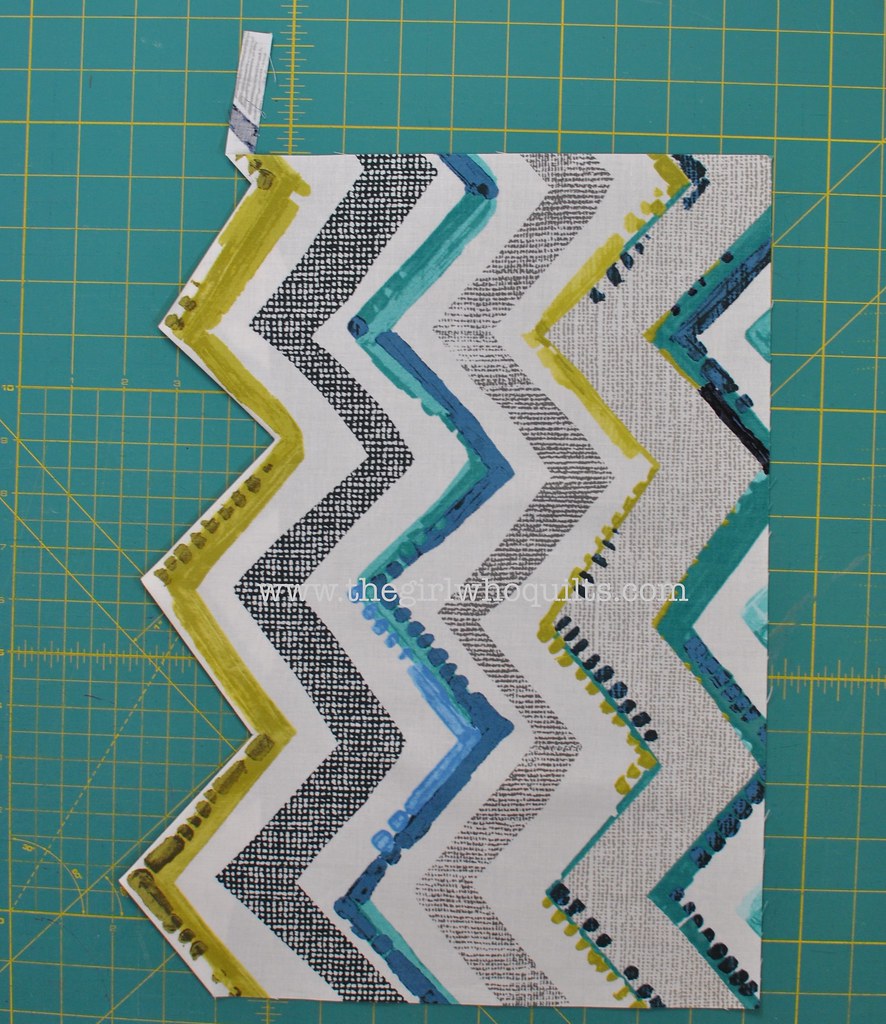
Here is how the back of your piece should look:
Now place the focal print on the fusible interfacing. Align the raw edges and lightly fuse in place.
The points will overlap the gathered fabric, so they will not fuse down. Pin the points down as shown.

Now it's time to sew again! Set your stitch length to about 2.5 and use a thread that blends with your focal print (I used cream here). Topstitch the folded edges of the zigzag. If you'd rather, you can use a zigzag stitch instead of a straight stitch for this step. Remove the pins as you sew.
This next step is optional. Do you see the shadowing caused by the black fabric underneath the cream?

If you want to fix that, here's how:
Because we *lightly* fused the pieces down, we can go back and peel the fabric up from the interfacing.

Now CAREFULLY trim away some of the fabric underneath as shown by the red arrows. When you're done, fold the fabric back down and fuse back onto the interfacing.

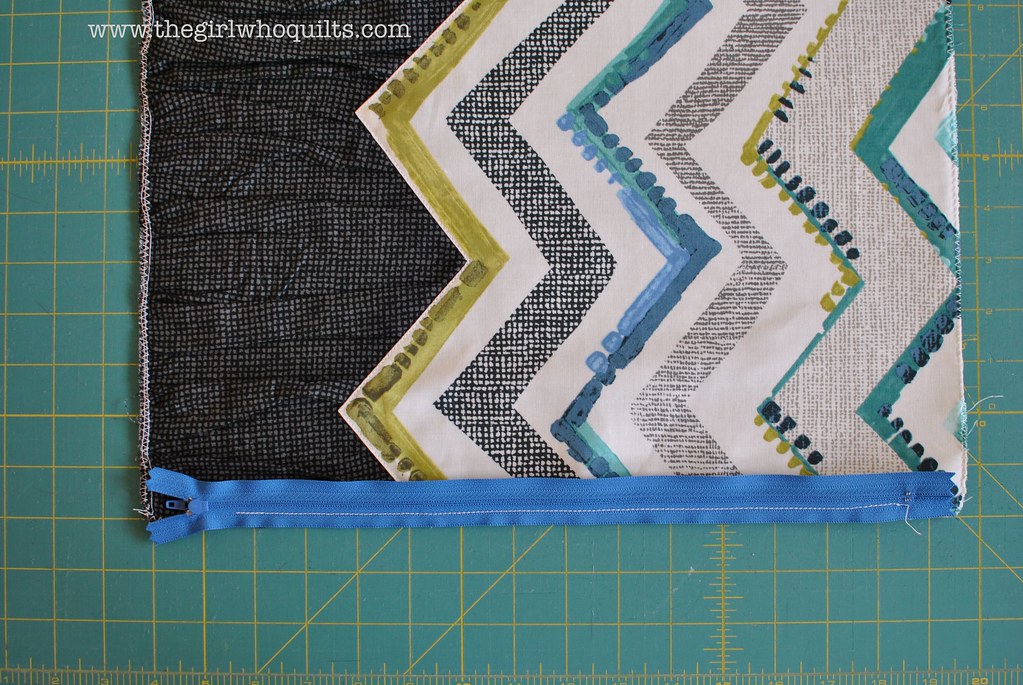
Let's put the pillow together! I like to zigzag stitch or serge the raw edges of my pillow front and back before assembly. You can also quilt the front and/or back of the pillow. I chose to quilt the back with straight lines.

To install the zipper, place the zipper down along the bottom edge of the pillow front and sew down using your zipper foot. I start and stop my stitching 1-2" in from the pillow corners as shown below (my stitch line is the white thread on the blue zipper).
**As an alternate to the zipper closure, you may wish to finish the pillow with an envelope-style back or another technique of your choice!**
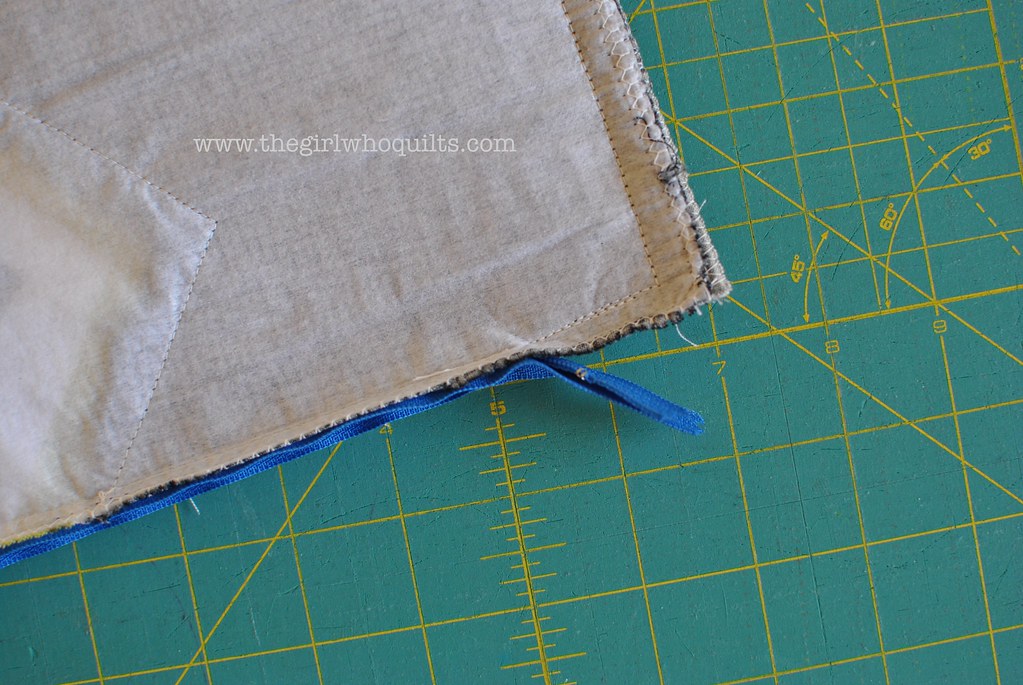
Now sew the other edge of the zipper to the pillow back.
Open up your zipper at least half way. Now line up the raw edges of the pillow front and back, and sew using a 1/2" seam. On the bottom edge of the pillow where you installed the zipper, pull the zipper ends out and away from the seam, and stitch from the corner up to the zipper seam, as shown below.
Turn your pillow cover right-side out, poke the corners out nicely, and give it a light press with your iron.
Now you can insert your pillow form, and you're finished!
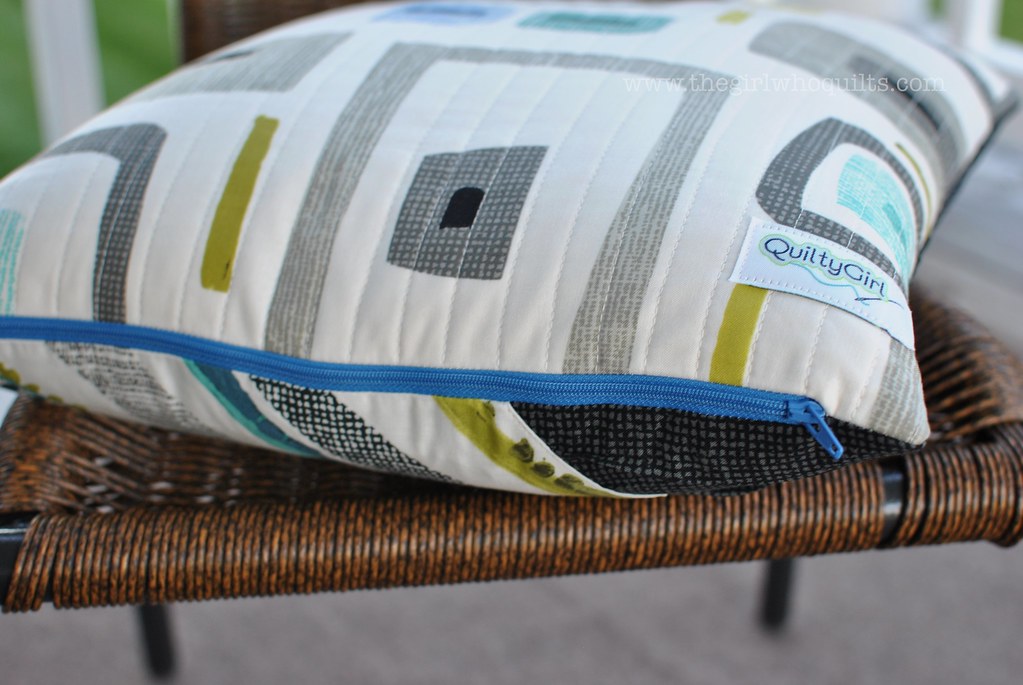
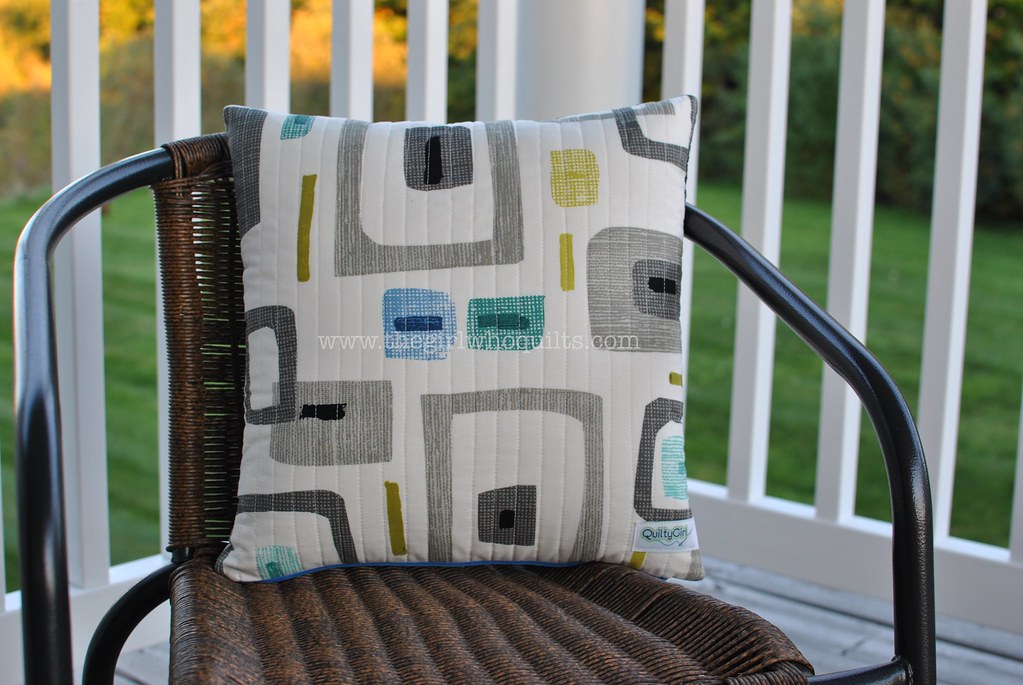
Pillow front:
Pillow back:
3 comments:
I love this pillow! :) I'm posting on Benartex this week - and didn't know I could re-post the tutorial after. That's cool :) Congrats on teaching!
This is so fun!
What a great pillow idea - thanks for a great tutorial!
Thanks for such a wonderful share! Gorgeous pillow and fab tutorial! First time to you blog, but I'll be back!
Post a Comment