Monday, April 30, 2012

Preschool Tree Quilt

Here it is, Addy's classroom auction project! Every class is expected to create an art project for the school auction, so this year I volunteered to lead Addy's class project.
DSC_0125
The class involvement included tracing either child's hand onto green fabric (backed with fusible web) and helping them to write their name on the hand print. Once we had the hand prints, we (parent volunteers) cut them out. I then worked on drawing the tree based on the number of hand prints.
Not wanting the tree to look too sparse, I laid the hands over a green treetop. I free motion quilted around each hand.
The hands:
DSC_0128
The treetop:
DSC_0126
On the front of the tree I included a "carved" heart with the class details:
DSC_0127
The quilting details! I quilted the sky in a meadering, the tree trunk in a long, thin meandering variation, and the grass in a random zigzag pattern:
DSC_0133
Another shot of the quilted grass and the piecing:
DSC_0135
I found a great alphabet print for the backing, and I also included a sleeve to hang the quilt:
DSC_0136
And the label:
DSC_0138
The finished size of the quilt is approximately 45" x 58".
And now for the auction details! The quilt ultimately went for $225. It's a bit lower than I would have expected, but ever bit makes an impact!

Thursday, April 26, 2012

quilts, market bags, and auctions, oh my!

While we were living in Seattle, Addy went to Catholic school. Like most private schools, Addy's school had a yearly auction to help raise money. I think I mentioned *the* auction quilt in another post, but that will have to wait. Right now I want to show what our family contributed to the auction.
I knew I wanted to make a quilt for the auction, but with a cross-country move looming in the near future, I needed something simple. I stumbled on this idea, and decided to give it a shot with a jelly roll of Hideaway. The top was quick to piece (although I didn't come close to the record of 35 minutes), and I thought it made for a nice unisex baby quilt. I may try this technique again in the future, if I need a quick gift.
DSC_0075
I quilted this in an all over meander and used 5 of the jelly roll strips for the binding. All of the different colored gingham prints worked great for that!
DSC_0077
I really love this fabric line, each print is so fun! And the bright reds and greens paired with the pale yellows and blues work really well together.
DSC_0078
I adore the print featuring the houses. And that red print with the birds, that's one of my favorites.
DSC_0084
But possibly the cutest print in the line is the deer print:
DSC_0083
For the backing I used some leftover strips (I cut my top down to make a baby quilt rather than the lap quilt that 40 jelly roll strips yields) and the pearl bracelet from Lizzy House. That print is such a great shade of yellow! It seems to go with just about anything.
DSC_0079
I finished the quilt by machine-stitching the binding and adding a label to the back.
DSC_0080
For the second item that our family donated, I made some market bags. Everyone in Seattle seems to already have reusable market bags, but who wouldn't want a coordinating set?!
I followed the Reusable Grocery Bag pattern by Keyka Lou/Michelle Patterns. I made three regular size market bags plus a mini market bag that also stores the larger three bags when not in use.
Here is the mini bag:
DSC_0098
The mini with the 3 larger bags:
DSC_0099
Details of the 3 larger bags:
DSC_0100
I used Joel Dewberry's Modern Meadow collection for these. I wanted something dark, to hide dirt and stains, and not too girly. I did have to use a few of the flower prints, so I tried to use them mostly for lining.
I can't wait to hear how the auction goes this weekend. Hopefully by early next week I will have *the* auction quilt to share, along with details on how well it did!

Friday, April 20, 2012

Modern Workshop Minis...and a quilt spotting!

Do you follow Jenny at Sew Kind of Wonderful?  She recently came out with her quilt curve ruler, which I can't wait to try out! Lots of wonderful quilters have been getting creative with Jenny's ruler over on the Fat Quarterly Blog. After reading one of Jenny's posts this week I wandered over to the Fat Quarterly blog, and imagine my surprise when I saw one of my quilts!! During the March Madness posts (of which I missed completely while I was miserably sick in Chicago!), my quilt popped up on the Fat Quarterly blog to showcase the Echo fabric line by Lotta Jansdotter!! I was shocked and flattered to find my quilt! If you're curious, you can check it out here.

And now, on to those mini quilts!

Chelsea at Pins and Bobbins hosted the Made in Cherry quilt along earlier this year. Each time a new quilt along post popped up in my reader, I heard that little voice telling me to add *just one more* project to my working list. I'm worked hard to finish up all of my WIPs, though, which is when I realized that I could make a mini Made in Cherry quilt! If I can start and finish the project in a day or two, it doesn't even need to pop up on the WIP list, right?
I pulled out a charm pack of Modern Workshop plus one of my favorite prints from Ruby, and got to work. In my mini, the squares finish at 2". Total finished size is 16" square.
DSC_0119
This was also the first project that I quilted in the orange peel design!
DSC_0022
I love the orange peel, but I also love the outline quilting! They play together so well in this mini, if I do say so myself.
DSC_0120
For the backing I used a print from Kate Spain's Verna.
DSC_0123
I had lots of 2.5" squares left after my Made in Cherry mini, so I made another mini, in a different layout this time. Finished size is 12"x16".
DSC_0117
Lots of straight line quilting:
DSC_0017
And some cute little ladybugs on the back (from Flutterby by Tula Pink), binding is a stripe from Just Wing It by Momo.
DSC_0118
I hoped to use this mini on our coffee table, but it's quite a bit smaller than I would like. It makes a great little table topper, though!

Monday, April 16, 2012

Love U Charm Quilt and Orange Peel Quilting Tips!

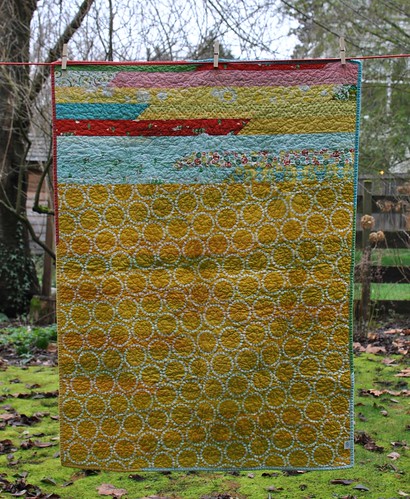
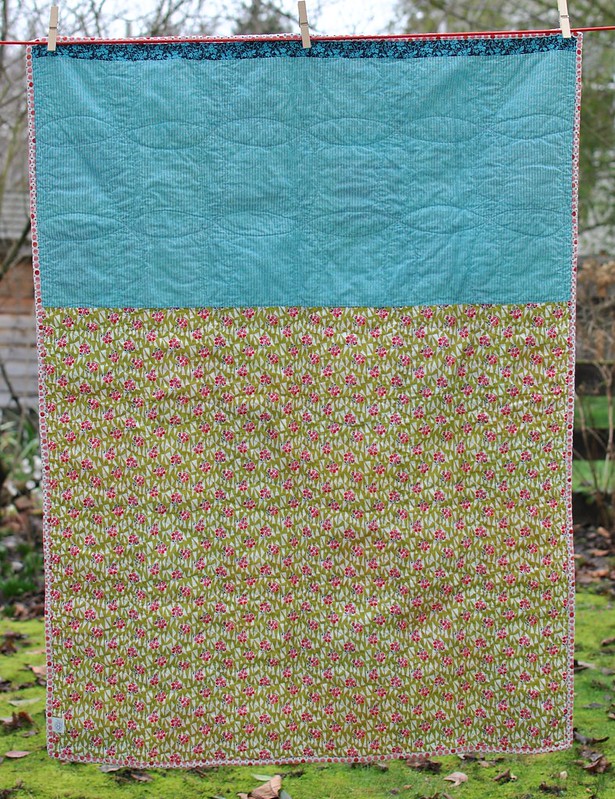
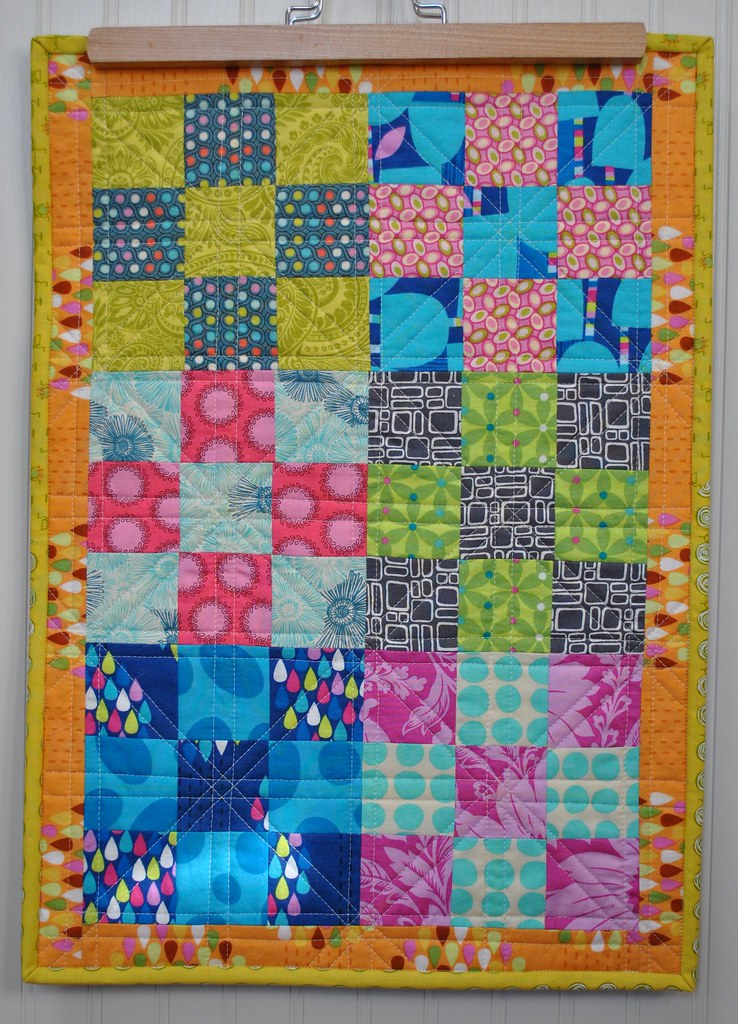
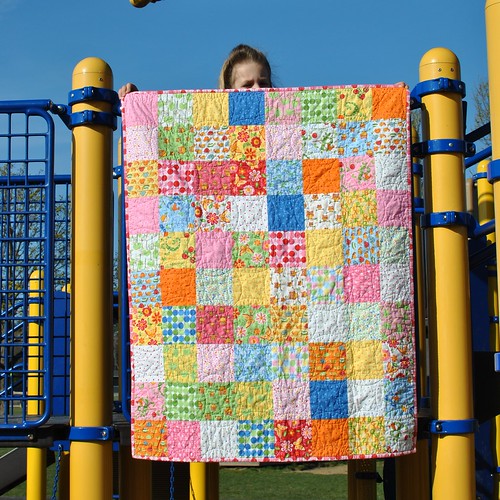
I sewed up this simple charm square quilt for a college friend who is expecting her second baby, and the first girl! I had a few charm packs of Love U by Deb Strain for Moda in my stash, and while I was touring a few LQS here in New York I found two of the prints in a brushed cotton. I knew they'd be perfect for the binding and backing!
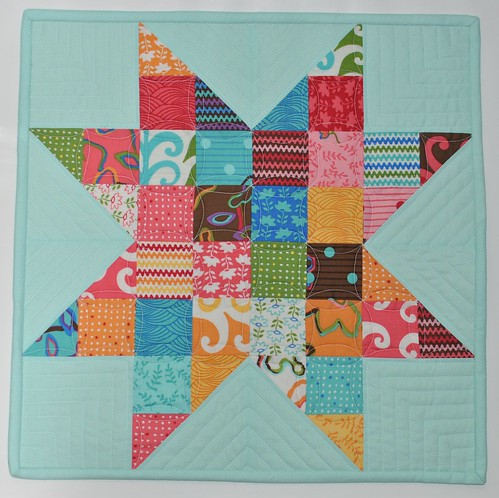
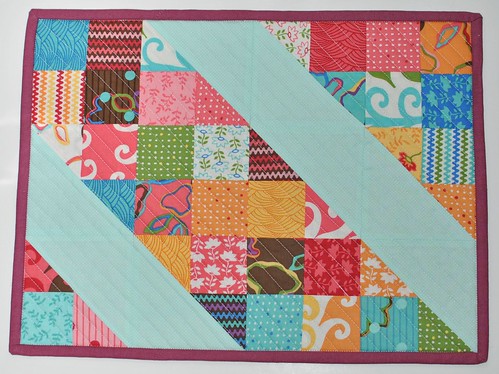
Here are a few shots of the quilt. Keep scrolling if you'd like to know how I quilted the orange peel design!
DSC_0063
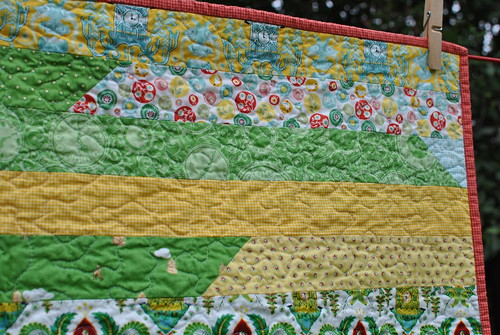
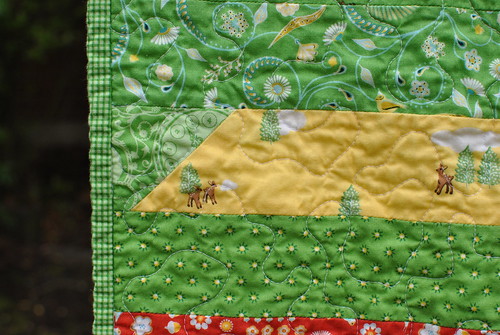
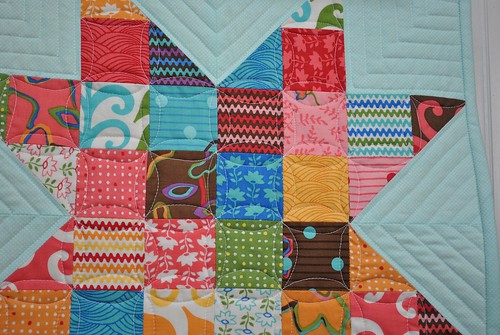
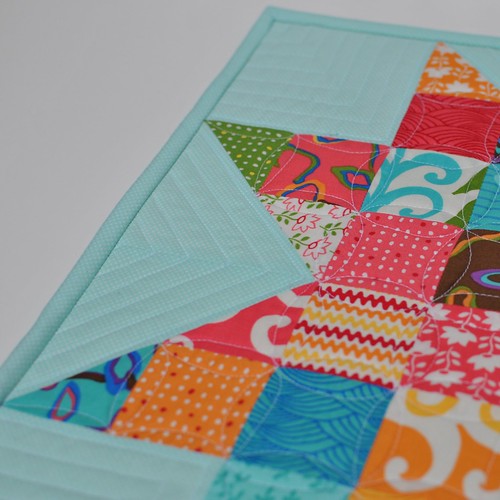
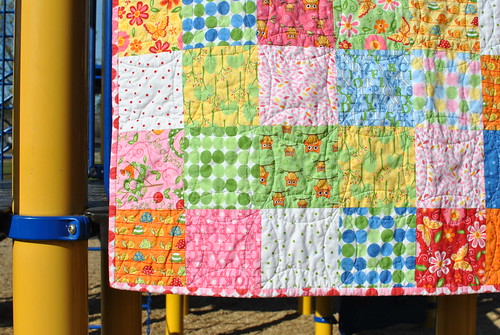
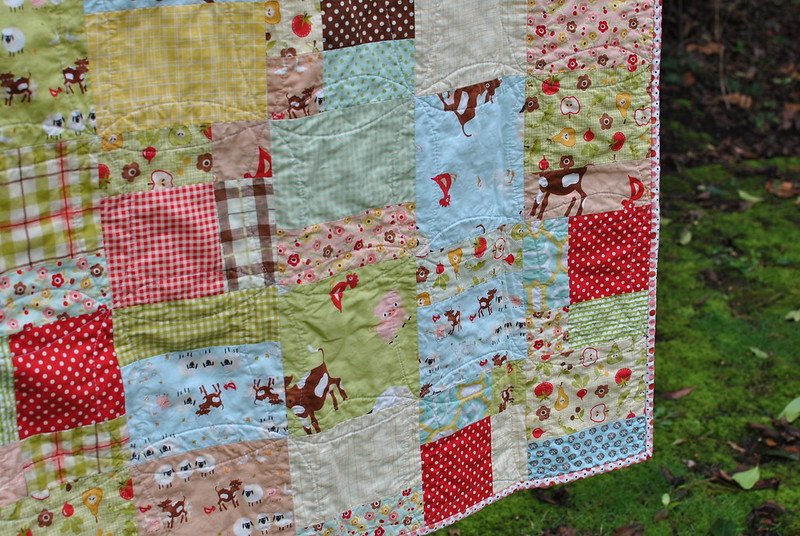
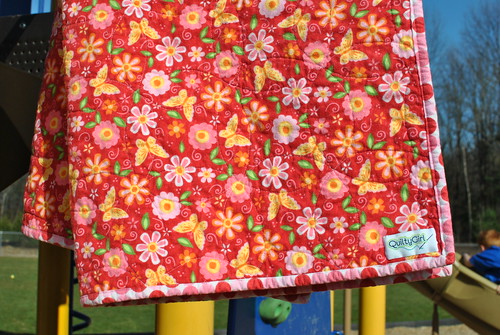
Here is a closer look at the quilt front:
DSC_0066
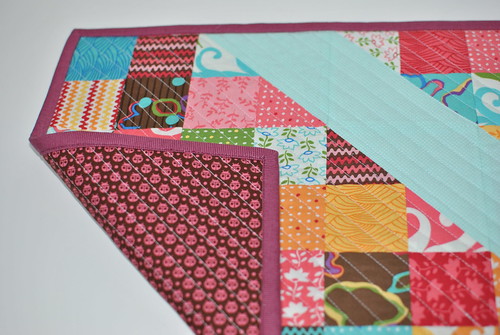
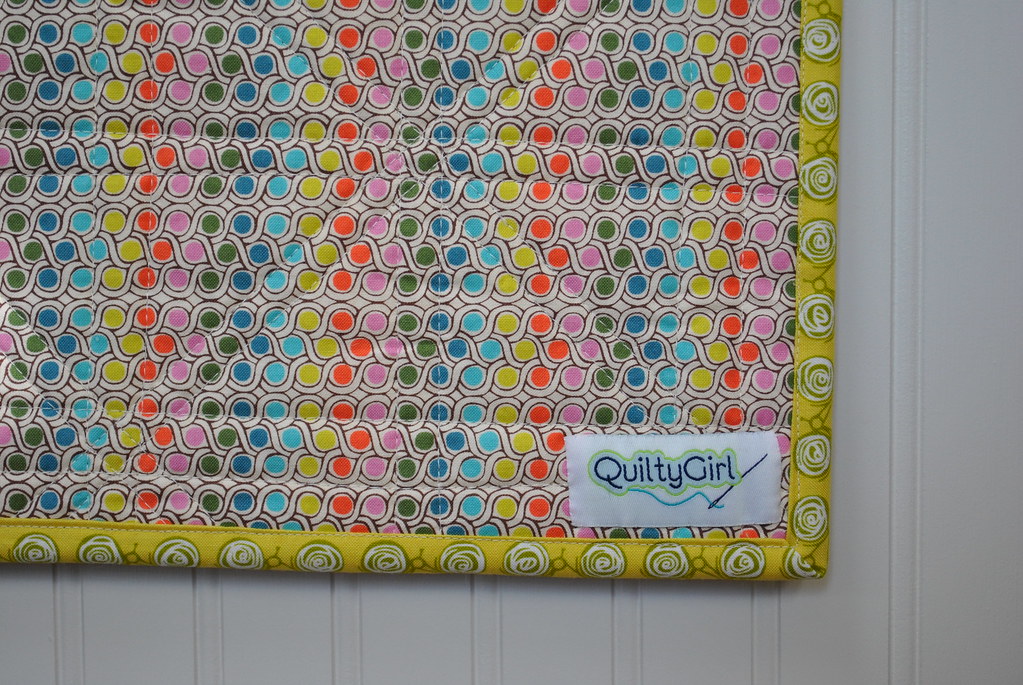
The brushed cotton on the back and the binding are so cuddly!
DSC_0071
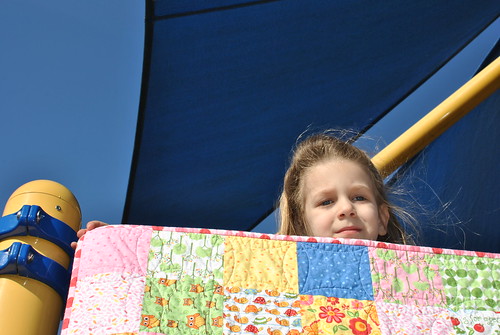
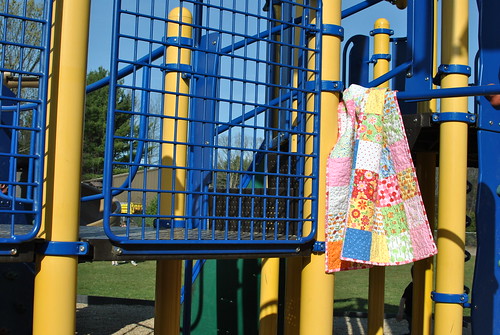
Here's my little helper:
DSC_0067
I love the bright colors of this quilt combined with the yellow and blue play structure!
DSC_0069
And now that you've endured my photos, here is how I like to quilt the orange peel design. (Clicking on the photos will take you to flickr, where you can enlarge them to see details better!)
-I find that this technique works best when you have a base grid, such as in this simple charm quilt. If your quilt has more detailed piecing, consider drawing a grid onto your quilt top using a water soluble marker, or whatever temporary marking tool you like best.
-I quilt this design with a free motion foot. I think it is a lot faster than trying to maneuver the curves with a walking foot.
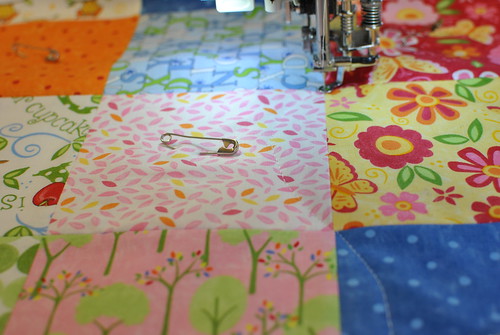
-Because this quilt style involves crossing over your quilting lines, be sure to baste extra carefully. A poor basting job could result in a lot of puckers where the quilting lines intersect.
-I like to begin in the center on one side of the quilt and work my way out. This will make more sense with the photos below.
-And lastly, this is a technique that seemed the most natural to me when I wanted to try this quilting design. I'm sure I didn't "invent" it, and there are lots of other great tutorials and techniques out there. I don't want to step on anyone's toes, especially since this quilt style seems to be quite popular right now. I would just like to share what works before for me, in hopes that I can help someone else who would like to give the orange peel a shot!
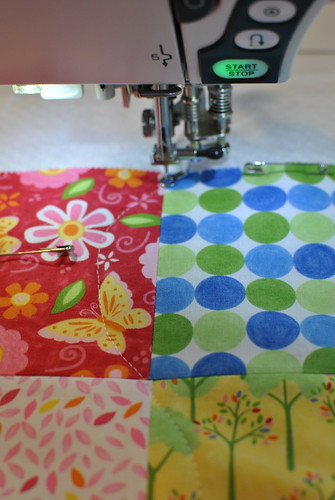
I am going to use the seams in my piecing as a guide in my quilting. Here I've started with a seam that is in the middle of one side of the quilt. I anchor my threads and begin about 1/4" in from the raw edge of the quilt. This ensures that the quilting isn't cut off when I add the binding!
DSC_0040
Now I'm going to sew a curve from my starting point to the next intersection in my piecing. The key to this technique, and really any free motion quilting, is to become comfortable with starting and stopping your stitching lines. The smoother the start/stop transitions, the better the quilting will look!
DSC_0041
Now that I've quilted my first curve, I'm going to pause with my needle down in the quilt and reposition my hands to quilt the next curve. (Depending on the size of the grid that I'm quilting within, and my comfort level with the quilting technique, I don't stop at *every* intersection. But when in doubt, I like to pause and reposition my hands.) My first curve was on the right side of the seam line, so my next curve will be on the left side of the seam line, moving in the same direction. 
DSC_0042
Here's a better picture of the curved lines:
DSC_0047
I continue to quilt the curves in this "serpentine" shape until I reach the end of the seam line. Always remembering to stop my stitching 1/4" before the quilt edge!
DSC_0049
(You can also see in the above photo that my quilting lines don't always cross exactly at the intersections of my piecing. That's ok, it will look great in the end! Also, don't worry too much if your curves aren't all the same size. Trust me, this is a really forgiving quilting style!)
I don't have a picture of this next step, but now that I have reached the end of the quilt, I need to continue back the way I came, creating curved lines on the opposite sides of the piecing seams. At the end of the row, I will end up with something like this:
DSC_0050
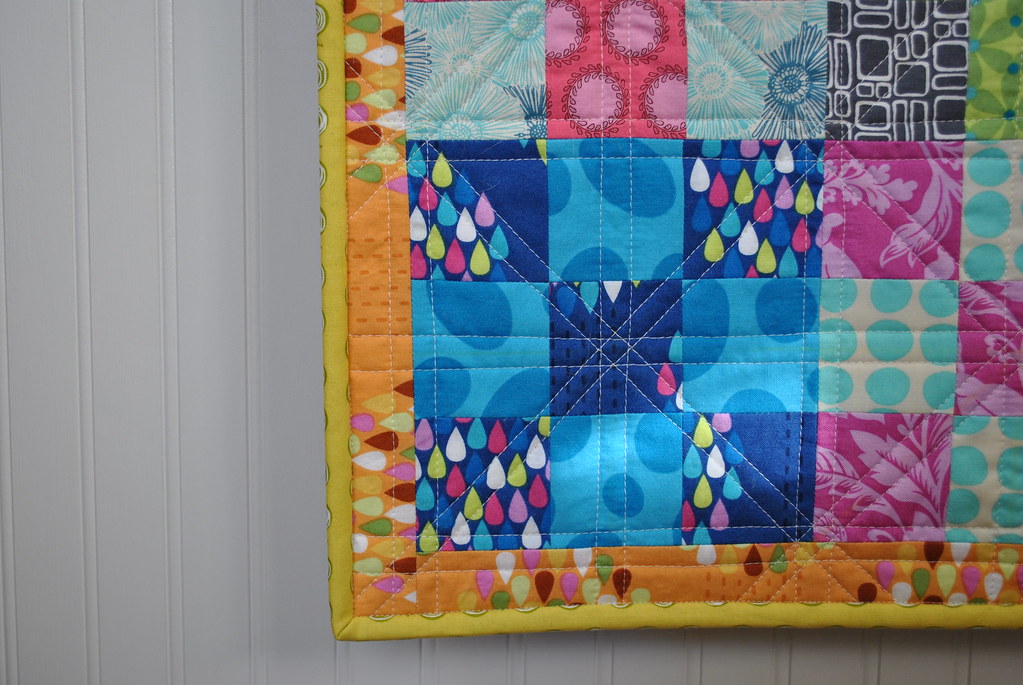
And here's a close up, with a little bit better focus:
DSC_0051
When I have 1 row done, I continue quilting these rows of curved lines-but I don't want to quilt the outside edges quite yet. I like to work from the center to one end of the quilt and then begin again in the center and work out to the other edge. When all of the rows are quilted, I turn the quilt 90 degrees and do the same thing over! The overall design will begin to appear as I quilt perpendicular to my original rows. I continue working back and forth in the rows, and I'm always surprised to see the circular shapes appear in my quilting! I'm always starting and stopping my quilting lines 1/4" in from the raw edge of the quilt.
When all of the rows have been quilting, from top to bottom and side to side, it's time to quilt the edges. I like to do this last, because it is less likely to pucker once all of the other quilting is done.
Two things to remember when quilting the edges:
-Start and stop all quilting 1/4" in from the raw edge of the quilt
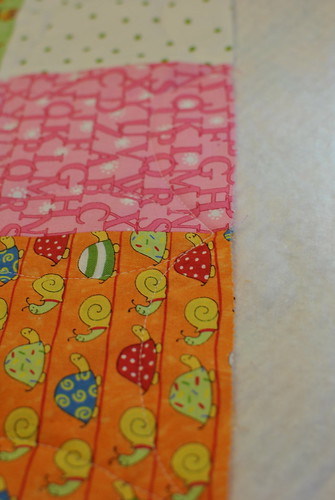
-Quilt all of the curves the same way, it will look more like a scallop than the serpentine curve that I quilted before. Here is a shot of the quilting on an edge of the quilt. Notice in the background that my machine is stopped about 1/4" inside of the raw edge of the quilt.
DSC_0054
And here's another shot of the quilt edge.
DSC_0056
Once I have all 4 outer edges of my quilt finished, I'm done with the quilting!
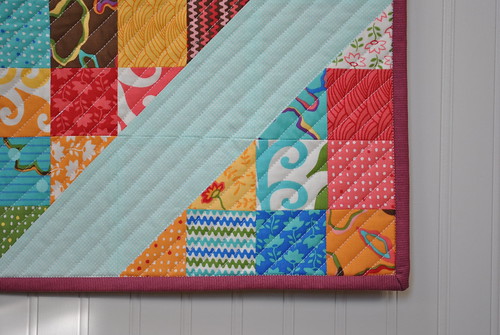
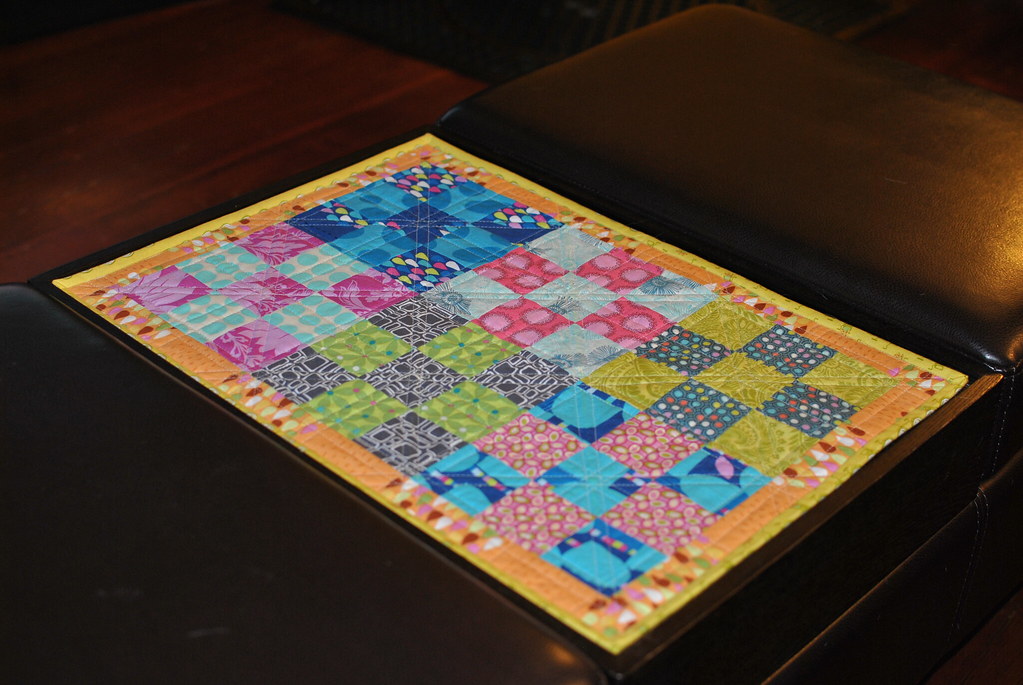
Now that I've taken you through the quilting, take another look at the quilt once it's bound and washed. I can promise you that many of my curves were slightly off, and my quilting lines didn't always line up quite right. But look at the fabulous circular effect!
DSC_0079
Now go try this out and tell me what you think! Next up, I think I'm going to try quilting the curves diagonally through my charm squares. I can't wait to see how that looks all quilted up!
DSC_0077

Monday, April 9, 2012

A different kind of patchwork

A friend of mine from high school recently had a baby girl. I don't know all of the details, but my friend has some pretty serious health issues, and ended up on bed rest for several weeks. I can't even imagine how boring that must have been, so I wanted to send her something special for her baby girl. I had a layer cake of Farm Fresh and decided to try creating an oversized Disappearing 9-Patch block. I used the 10" layer cake slices as the basis for the D9P....and I hated it. There wasn't enough variety in this fabric line to give the quilt a sufficiently scrappy feel. I hadn't sewn the D9P blocks together yet, so I played around with it on my design wall and eventually decided to just chop the blocks up some more. I cut each of the blocks into 4 pieces and mixed them up until I had this:
DSC_0068
Unfortunately, the animals in the largest print were chopped up a bit. But I like the overall feel of this layout a lot more. I quilted this in the ever popular orange peel style, and it was a lot of fun! I chose to quilt it free motion, which I think was a lot laster than using a walking foot. In the process of researching this quilt style I developed my own way of achieving this design, which seemed a lot easier to me than some of the other methods out there. I have another  baby quilt in the works right now, so hopefully I can snap some in-process pictures to show how I like to quilt the orange peel.
DSC_0070
The above photo shows the quilting pretty well, although the photo is a bit dark!
DSC_0071
I used the DS Quilts pink dots (from JoAnn's) for the binding. The colors went so well with this line!
DSC_0072
For the backing I used three more DS Quilts prints.
I really like the softness that this quilt has because of the widely spaced quilting. I will definitely use this quilting design again soon!

Thursday, April 5, 2012

If you can't beat them...

Wow, I can't believe it's been so long since my last post. Well, no, scratch that, I CAN believe it. Since my last post I have: finished up an auction quilt (I'll share it soon!) for Addy's preschool class, had all of my household belongings and my two dogs packed and sent off to New York, traveled to the Chicago area with Addy, helped my parents move, caught a nasty virus which resulted in me sleeping and complaining for 7 days straight, traveled with Addy to New York, found out I had strep throat, and worked on organizing the new house. Addy and I have now been in New York for 4 days, and I'm on the road to recovery, Matt did a great job getting the house set up, and we found out about kindergarden screening just-in-time! So while I have lots of projects to work on, I'm going to share something I made awhile ago. Here we go!

We have two dogs. With their friendship and home security comes lots of dog hair; it's a package deal. Over the last ten years we have developed a cleaning rhythm to keep the dog hair at bay, and for the most part the house appears clean enough. But try as I might, I can not keep our dark wood and leather coffee table/ottoman clean! It's a great piece of furniture: stuffed leather ends, perfect for propping your feet up, and a wooden table in the center. Plus there is storage inside of it! Like I said, it's perfect. Except that is accumulates dog hair.
Finally one day I gave up on keeping the table area clean, and decided it would be best to just hide the dog hair as it accumulates. And so, I made a mini quilt! I pulled all of the fabrics for the 9-patch squares from my scraps.
DSC_0013 
Straight line quilting:
DSC_0011 
The back and binding, Sugar Pop by Liz Scott and Weekends by Erin McMorris:
DSC_0015
The mini quilt in use:
DSC_0067
It fits so perfectly in the coffee table! We have been using the coffee table with the mini quilt for several months now, and I really love it. It brightens up the table, and hides the stray dog hairs between vacuumings!
I have stacks of finished projects to share on here, so hopefully I'll have a few spare minutes to jump back on here soon!