Wednesday, October 24, 2012

Modern Quilted Tote

Have I mentioned that I have a ton of sewing to do for my sister's wedding? Well, I do. And as a true procrastinator, I decided to start a new project in lieu of working on the wedding quilt.

A few days ago Elizabeth posted her technique for creating patchwork panels, as she used in her Weekender Bag. I've been itching to make a patchwork tote lately, so I tossed aside my sewing obligations and started digging through my stash! I didn't have large enough pieces of Cotton Duck Canvas, but I do have a ton of hymo canvas (also known as haircanvas). Hymo canvas is typically used to add shape to outerwear pieces, but I've also read that it has been used in handbags. And while it's not an inexpensive supply, I don't have any plans to use it - so I cut into my yardage for this tote!

Modern Quilted Tote

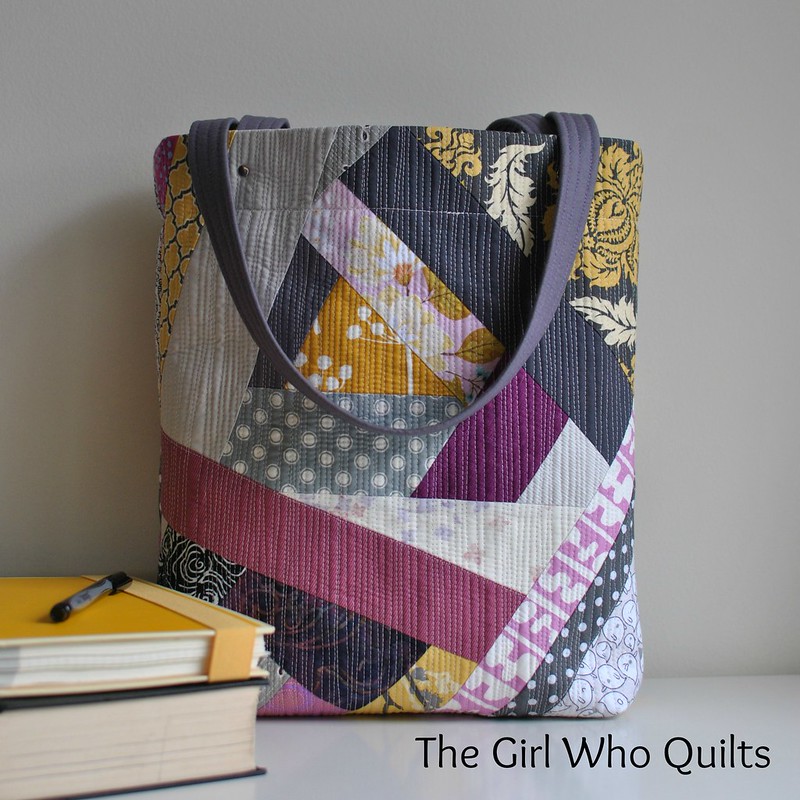
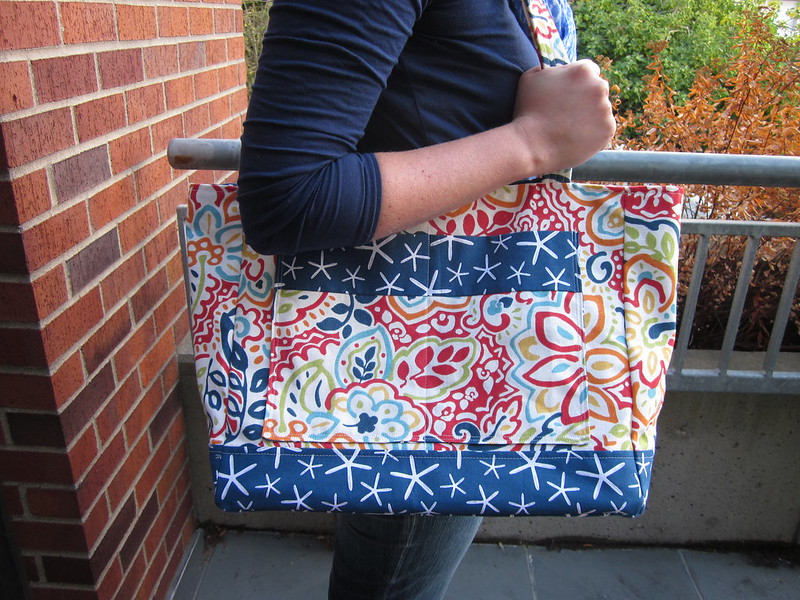
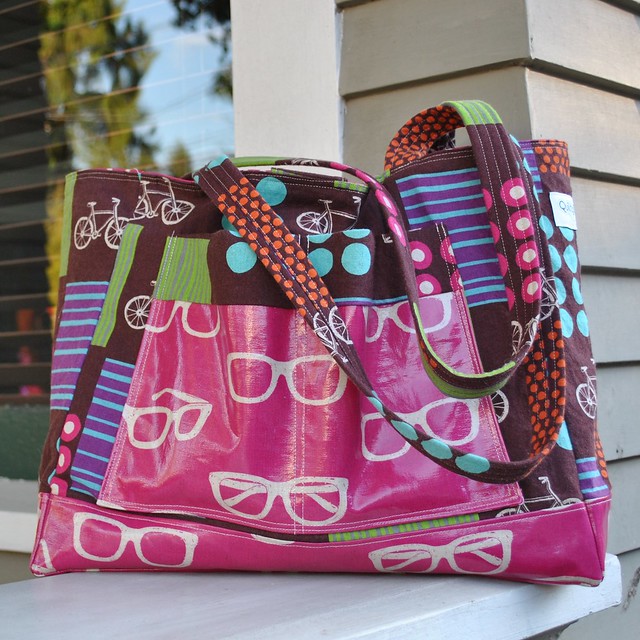
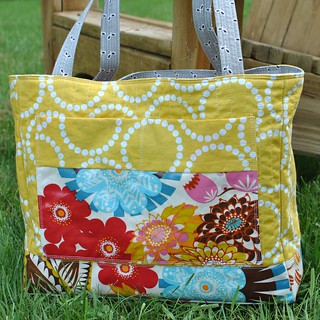
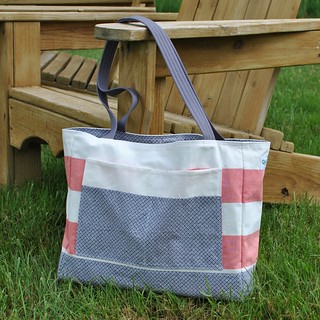
I absolutely L.O.V.E. everything about this bag. At 14" tall, 11" wide, and 3" deep, it's a great size and shape, and the 25" long straps make the tote easy to carry.The hymo canvas gives the tote a lot of structure without adding ANY stiffness.

Modern Quilted Tote

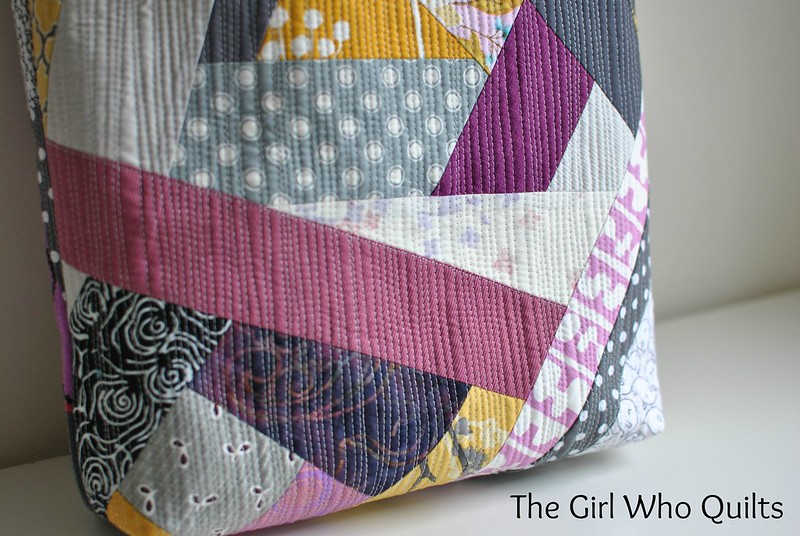
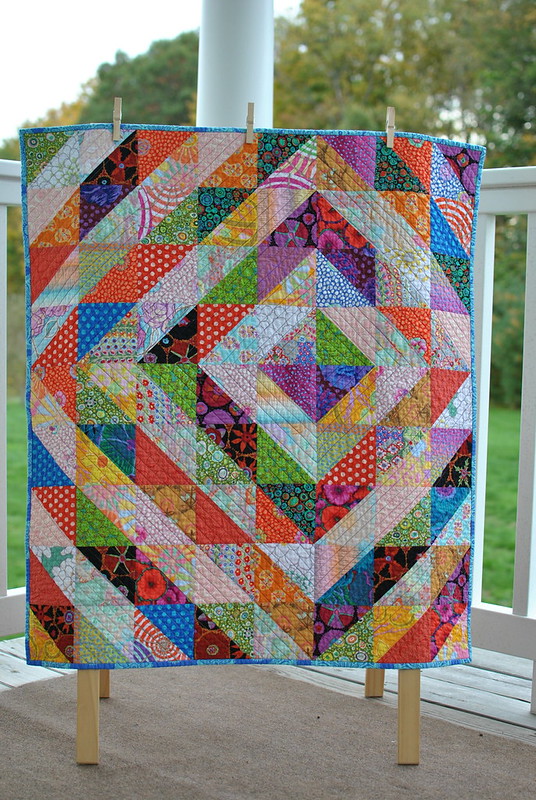
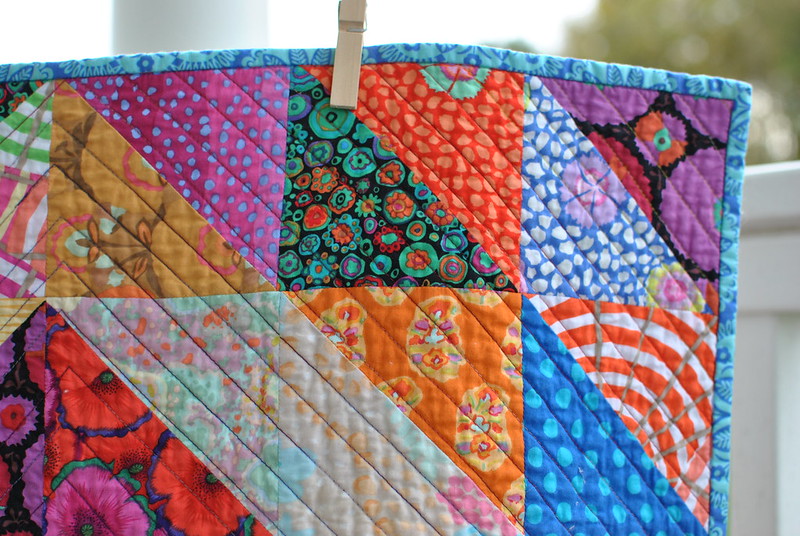
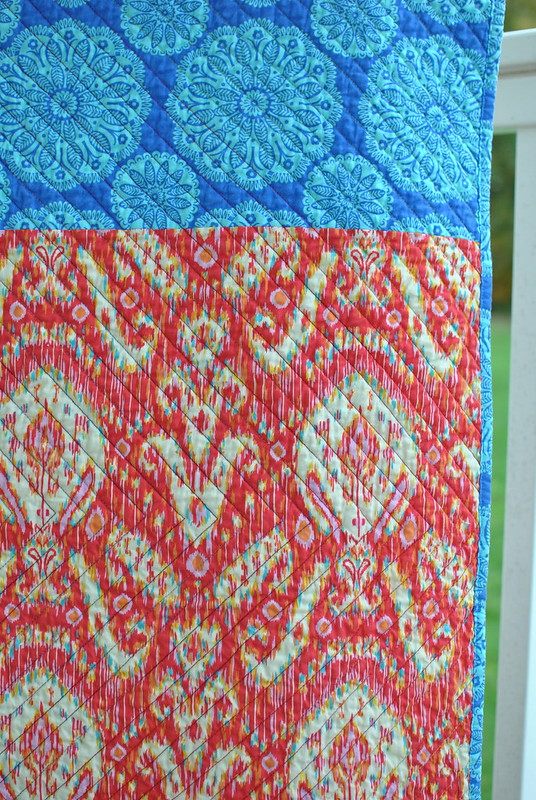
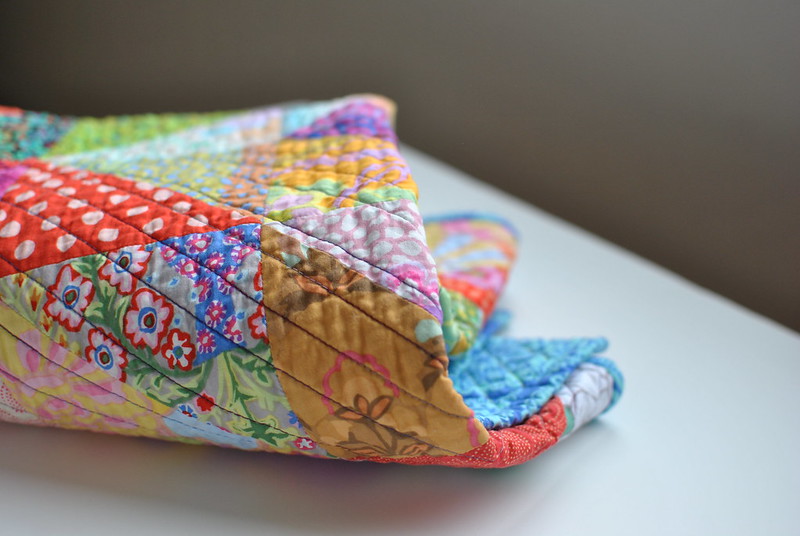
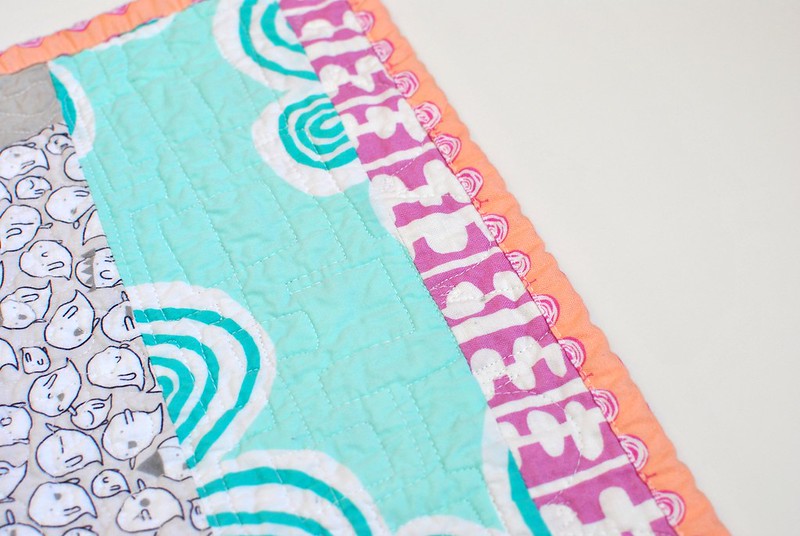
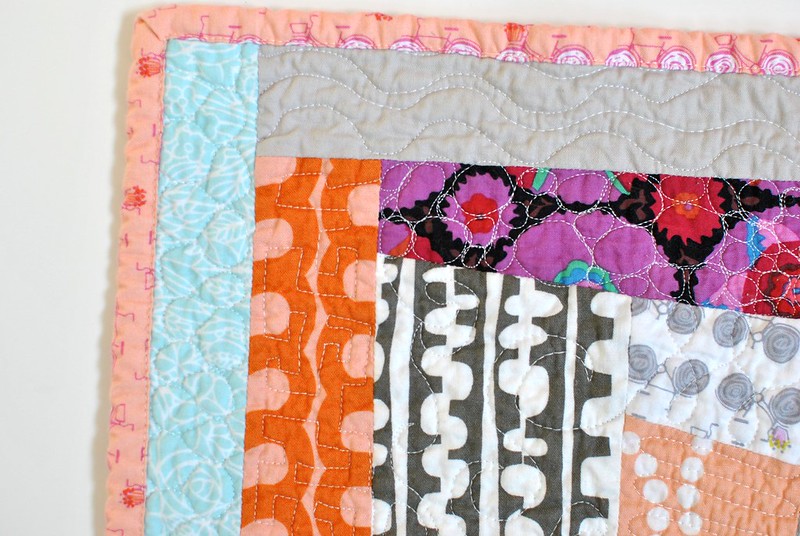
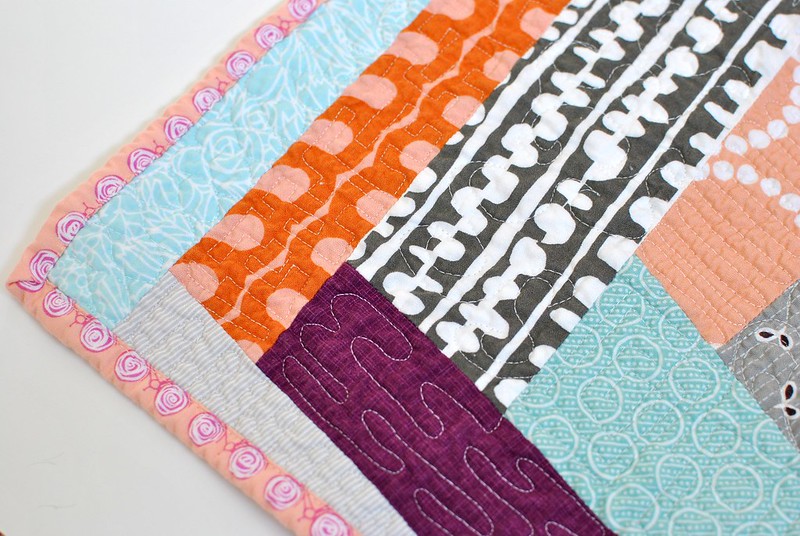
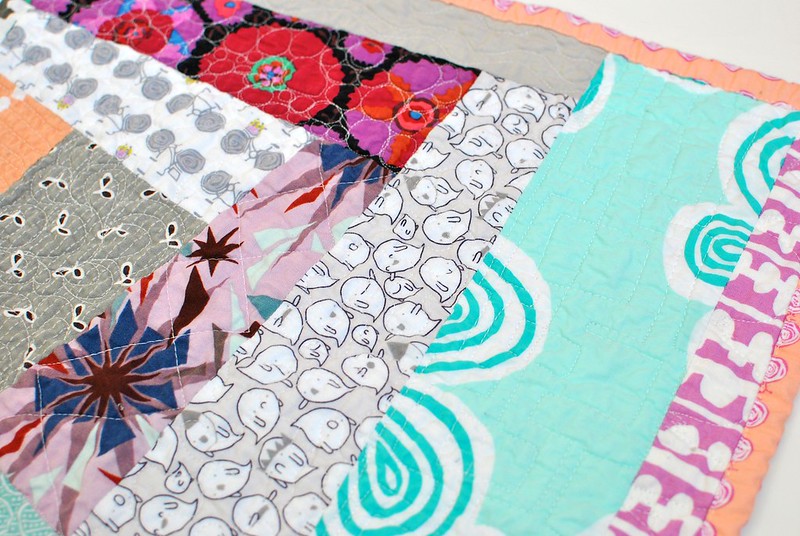
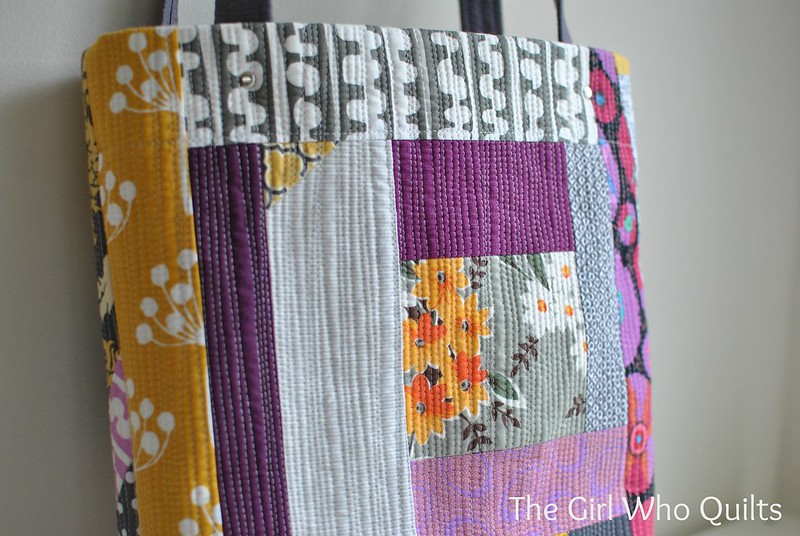
For my quilting and construction, I used a slightly different style than Elizabeth. I pieced my tote panels using the hymo canvas and a layer of cotton batting as a foundation (very similar to how I piece my scrap blocks). After my panels were pieced, I quilted them with very dense organic lines.

Modern Quilted Tote

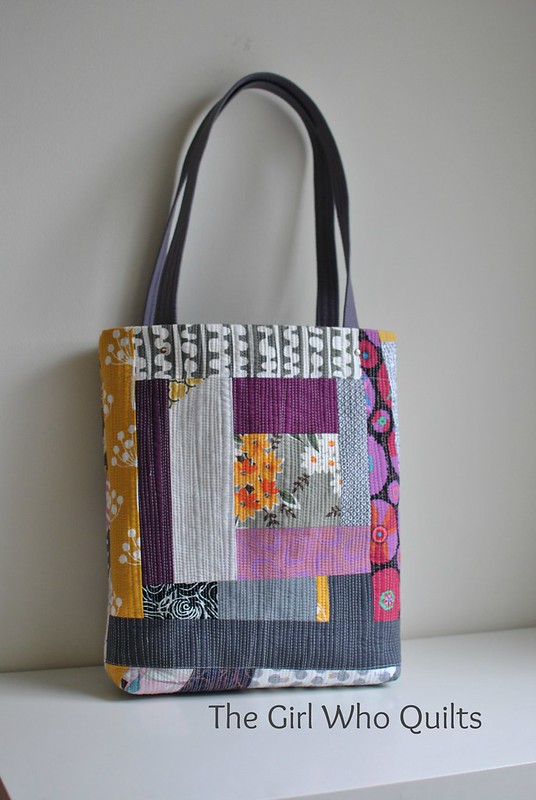
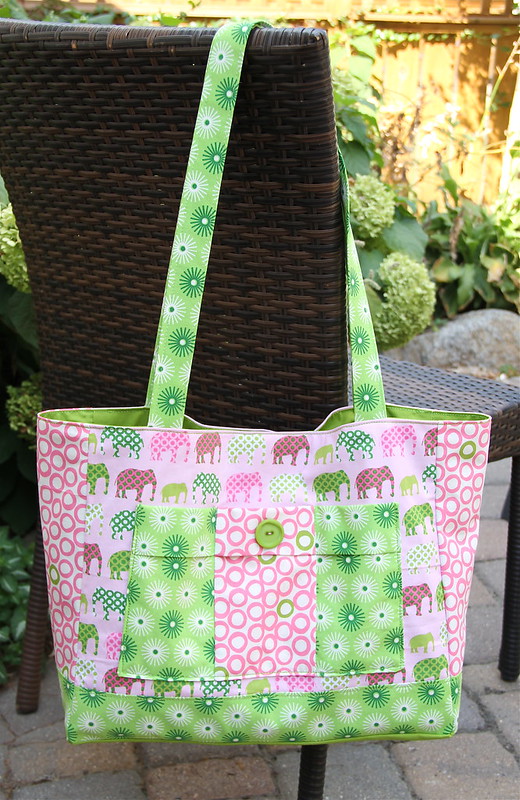
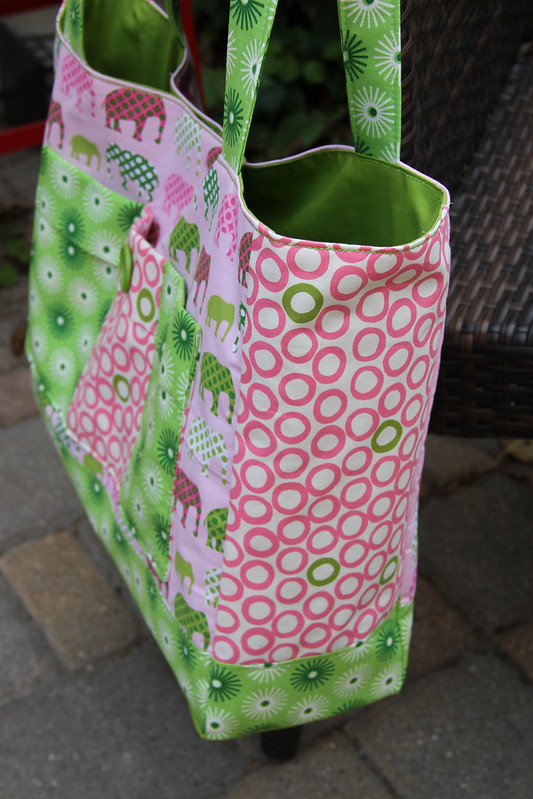
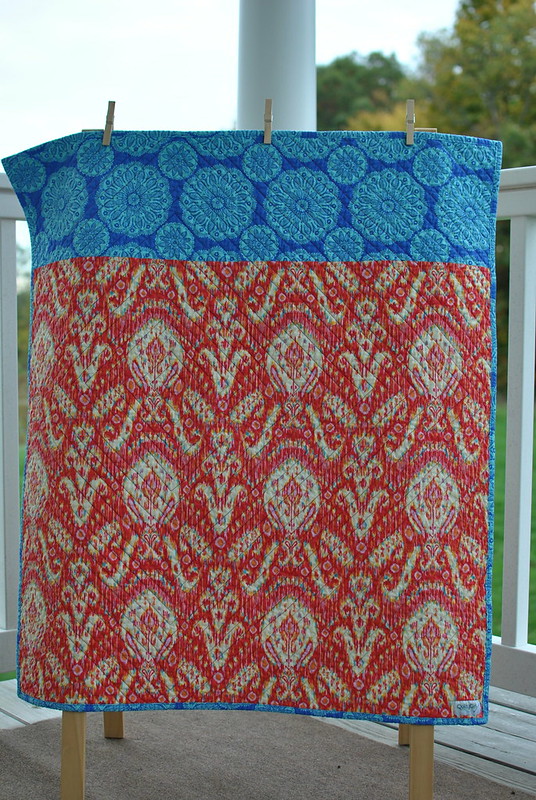
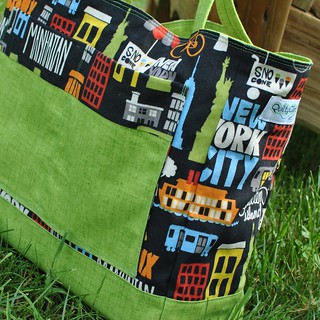
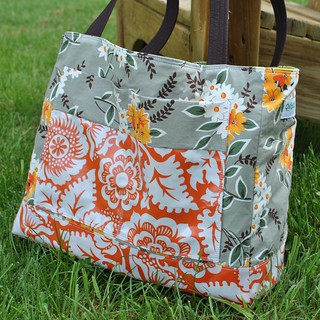
The two sides of the tote are unique.

Modern Quilted Tote

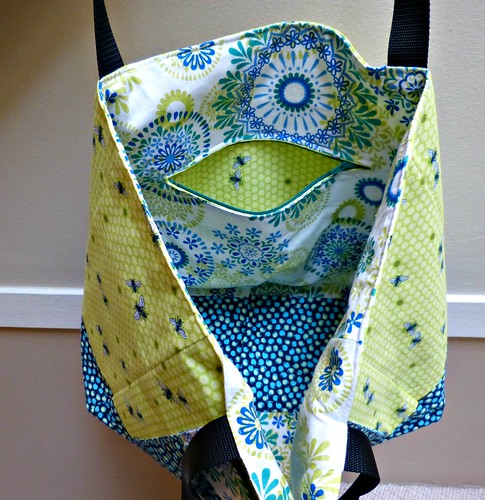
When I first started this project, I knew the approximate size and shape that I wanted for the finished tote. The dense quilting took quite awhile, during which time I started to think more about the construction. I decided to try a new (to me) style by folding the top of the tote down by 2". I attached the straps inside the tote as well, so that they appeared to be seamless from the outside.

Modern Quilted Tote

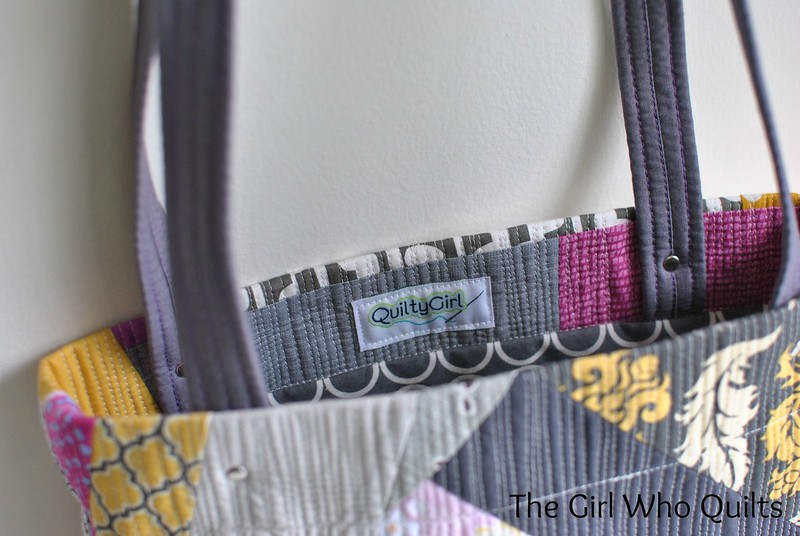
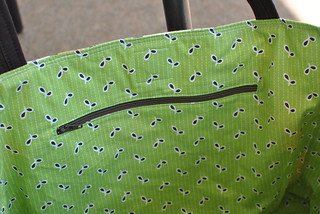
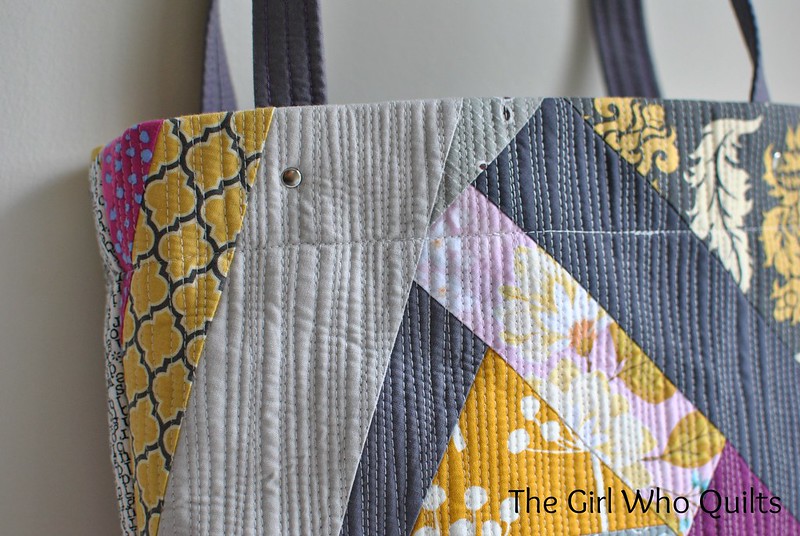
To further secure the straps to the tote, I added metal rivets. They are visible from inside:

Modern Quilted Tote

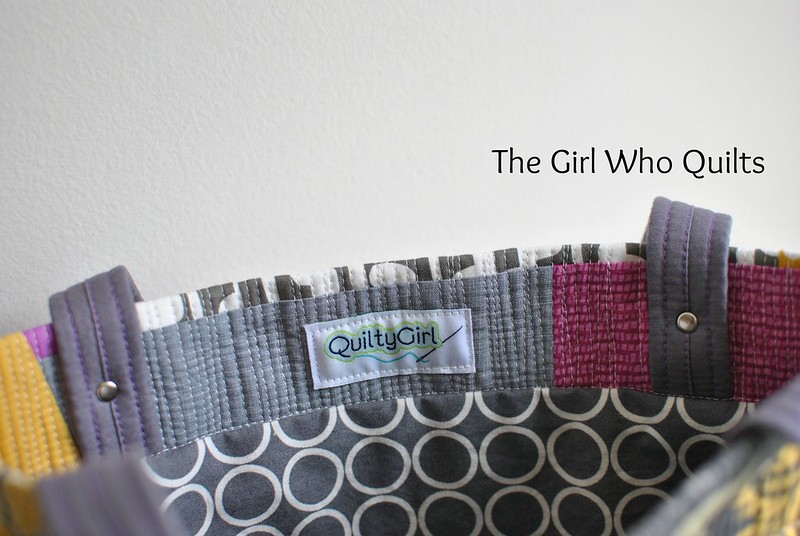
And on the exterior of the tote:

Modern Quilted Tote

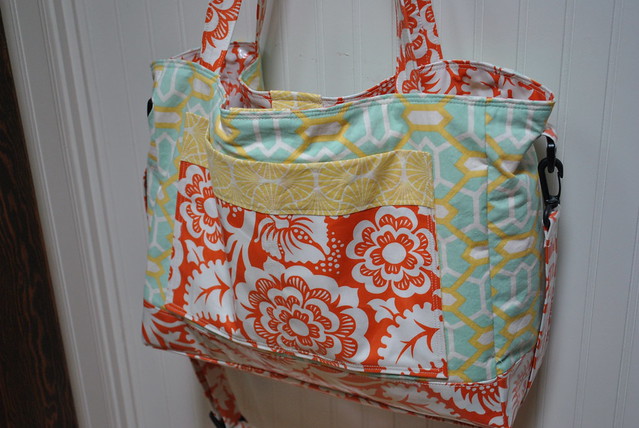
You may see a few more of these totes around here soon. I have enough hymo canvas for 3 more totes, I think. After that, I may have to look into a reasonably priced source to purchase more!

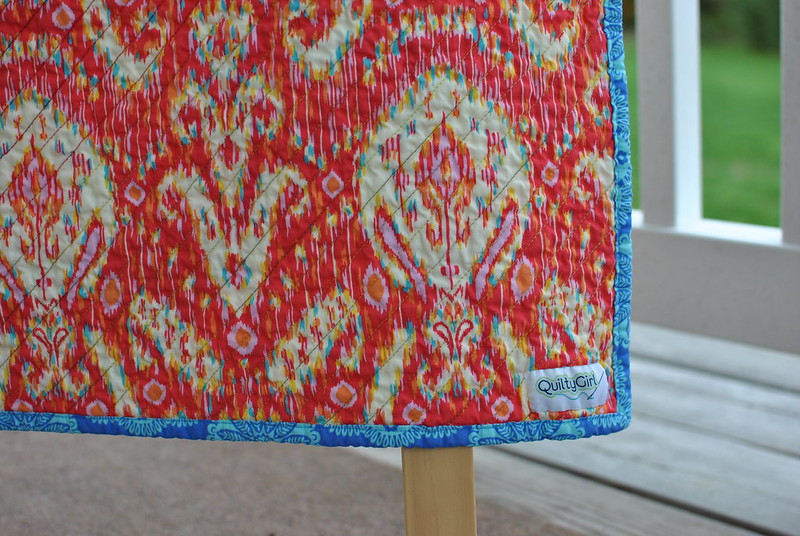
This tote is now listed in the shop!

Tuesday, October 23, 2012

More totes, and another pattern GIVEAWAY!

I have two more totes to share with you, both sewn up by my awesome pattern-testing friends! The first tote was made by Meaghan, who I met through blogging and got to hang out with IRL last year when we lived in Seattle!
I think this picture is a good representation as to the size of the tote. It is a great large size without looking huge.

Market Square Tote made by Meaghan at MadeByMeaghan

Meaghan used home dec fabric, which gives the tote a bit of structure. I love the structured look! And that blue accent print reminds me of starfish. Perfect for a trip to the beach. :)

Market Square Tote made by Meaghan at MadeByMeaghan

Michelle also pattern tested for me. I haven't met Michelle IRL, but she's always so sweet when we email back and forth! Maybe some time I'll find myself in her neck of the woods and we'll have a chance to meet up in person. :)
Michelle used a really cute elephant print for her tote exterior. She also chose to fold down the front pocket (which she pieced! how fun!) so that a bit more of the elephant print would show. I love that she added a button where she folded down the pocket!

Market Square Tote made by Michelle at CityHouseStudio

I hadn't thought to use a coordinating print on the sides of the bag, but I really like this look. Michelle showed me three design possibilities that I hadn't even thought of!

Market Square Tote made by Michelle at CityHouseStudio

I also wanted to show off Michelle's interior zip pocket. This was the first time she had done this technique, and it looks great! She also chose to use a traditional magnetic snap for her closure. In the pattern I include detailed instructions for adding a sew-in magnet and some basic instructions for a traditional magnet or velcro.

Market Square Tote made by Michelle at CityHouseStudio

Now hop on over to Michelle's blog where she's giving away a PDF copy of the Market Tote Pattern!

Friday, October 19, 2012

Beautiful Disaster Quilt

I volunteered to make a quilt for a benefit recently. I actually thought that I had a quilt finished and ready to donate, but the quilt that I had in mind wasn't really in proper condition to donate. (It was a red and white quilt that I finished awhile back. After I finished it, I washed it and put it away to store it. The reds had bled into the whites in the wash, but I didn't notice it until recently!)
I had a lot of other projects going on, so I let a few ideas roll around in my mind for a bit while I worked on other things. One night I realized that I had quite a few HSTs left over from another quilt (which I haven't finished yet, but I'll share as soon as it's done!).
Within an hour or so I had the HSTs sewn into this top!

Beautiful Disaster Quilt

It's a lot of fun to play with color value! The other quilt I'm working on has a different look to it, but I couldn't resist the simple, stunning effect of this layout.
With the top done, I set it aside to think about how to quilt it. I think I set it aside for a bit too long, because suddenly I realized that I had a week to finish the quilt and ship it to Illinois. Plus there was a 3-weekend with no mail delivery!
I started out with a free motion quilt design that I found in Angela Walter's book, but I didn't feel like it flowed with the quilt top. I had less than 1/6 of the quilt done, but it still took me several hours to pick out the stitching!

Beautiful Disaster Quilt

I ultimately went with straight line quilting, which was my first instinct all along... I chose a purple variegated thread for the quilting, but with less than half of the quilt done, I ran out! At this point I just wanted to finish the quilt and send it off, so I decided to simply finish with another color thread. I had a pink variegated thread, which was the same brand and style as the purple, so I chose that.
Just when I thought I'd never finish this quilt, I ran out of thread AGAIN! By this time I was actually laughing out loud. I had yet another variegated thread in my stash (this one was green, and a different brand), so I pulled that out. I figured that by changing thread colors twice, it would look more intentional. Right?
In this picture you can kind of see that there are different colors of thread.

Beautiful Disaster Quilt

Here's another shot showing the different threads:

Beautiful Disaster Quilt

I was able to finish the quilting without running out of green thread (victory!). For the back of the quilt I chose an ikat print by Amy Butler and a blue print from my stash (sorry, I have no clue of the designer!). The blue print worked out really well for binding, too. I'm really happy with how well these two prints play with the Kaffe Fassett prints!

Beautiful Disaster Quilt

Here's a close up of the two backing prints:

Beautiful Disaster Quilt

How fabulous is this ikat? I love it!

Beautiful Disaster Quilt

I'm happy to report that the quilt did make it to Illinois in time for the benefit. I'm not sure how much money the quilt itself raised, but I do know that the benefit raised a bit of money to help a friend of a friend with her cancer treatments. It was quite a rush to finish this project, especially with all of the other sewing I had going on, but I'm so glad I could be involved in this event!

Beautiful Disaster Quilt

Finished size is 36" x 41"
Prints are mostly Kaffe Fassett with a few Brandon Mably prints.
Backing is an ikat print by Amy Butler and an unknown print from my stash.
Straight line quilting in several thread colors. ;) Purple and pink are Signature threads, the green is Wonderfil.

Wednesday, October 17, 2012

Pattern Giveaway!

The lovely Felicity over at Felicty Quilts was nice enough to endure the torture of testing my tote pattern. Check out how fabulous she is:

me and my tote

Here's a close-up of her bag:

Market Tote

And a great shot of the lining and interior zip pocket:

Market Tote inside

Now head on over to Felicity's blog, she's giving away two PDF copies of the tote pattern!

Thanks, Felicity!

Monday, October 15, 2012

Market Square Tote Pattern!

Market Square Tote!

Last summer I sewed up this tote bag, which I still use every day!

Echino tote

My blog post about the bag brought in a ton of positive feedback, and even a custom bag order:

Custom Diaper Bag

With a little more free time now that Addy is in school, and lots of support from some great friends, I finally have the pattern ready for purchase!  You can find it here, in my Etsy shop.

Yellow Tote NY Tote

The pattern includes:
Tips for sewing with laminates
Detailed instructions with color photos for every step, including an interior zip pocket and a sew-in magnetic snap closure
No pattern pieces! All pieces can be cut with a rotary cutter, ruler and mat!

Striped tote FMF Tote

The bag includes a large exterior split pocket, which is a great place to showcase a fun fabric.
The 28" straps are long enough to easily carry the tote on your shoulder.
The accent panels along the bottom of the bag not only add personality, but also durability. Laminate fabric is a great choice for easy clean-up!
Inside, the tote has a large zip pocket. It is so easy to install, and a great detail in a bag.

Market Square Tote

Have fun creating your own Market Square Tote, and be sure to add your pictures to the flickr group! As always, feel free to email me or post on flickr with any questions. I can't wait to see what you create!

Market Square Tote

A huge thanks to everyone who has helped me finish my first pattern! Later this week I'll share some pictures of the bags made by my fabulous pattern testers.

In the mean time, you can purchase a copy of the pattern here!

Market Square Tote

Monday, October 8, 2012

Baby Whales

This silly little baby quilt sure has done some traveling lately! I sent it off to a friend in Seattle, but had a small error in the address. The quilt was sent back to me, at which point I corrected the address and sent it off again! The first time I sent it out would have been great timing, as it would have arrived the day before my friend had her baby. But a surprise package after the first few sleepless nights can be just as fun!
Baby Whales Quilt - front
I found this adorable whale print at JoAnn Fabrics and just had to have some! From the very first time I saw this print, it made me think of a friend in Seattle who was expecting a baby boy. When I got home I realized that I had lots of great coordinating prints in my stash, so I cut some strips and had a quilt top in no time flat! (Finished size is approximately 32" x 44")
Baby Whales Quilt - details
During the same trip to JoAnn's when I found the whale fabric, I also picked up a copy of Angela Walters' AMAZING book, Free Motion Quilting With Angela Walters. I love all of the designs that she shares, and I chose the modern clamshells for this quilt. Knowing that I wouldn't be able to keep the clamshells all the same size, I went a bit wonky with it. I really love how it turned out, and I can't wait to use this quilting style again!
Baby Whales Quilt - details 
For the back I pieced some yardage from my stash. The binding is a light grey stripe from Sweetwater's Sunkissed line.
Baby Whales Quilt - back
The main print on the back is from Mini Mikes:
Baby Whales Quilt - label This turned out to be one of my favorite quilts - from the simple strips to the colors and the fun quilting! And my friend sent me a message as soon as she received the quilt to say that she loves it!

If it feels a bit quiet around here, it's because I'm crazy busy with some sewing for my sister's wedding. I'm just about done with 2 flowergirl dresses, and then I move onto her wedding quilt! Unfortunately I won't be able to share any pics of it for a bit, because my sister reads my blog. ;) I should have a few wedding un-related things to share along the way, I hope!

Tuesday, October 2, 2012

Purple and Grey Goodness!

Last year I made this mini quilt for my coffee table. We've been using it ever since then, and I really like it. It adds a bit of color to the room and it's a great coaster/table mat! Unfortunately that means that it will get dirty...and get dirty it did. I tossed the mini quilt into the wash a few weeks ago and was quite disappointed to see that it shrunk up about 1" in both directions! It still "worked", but I was unhappy that a once perfected-fitted mini was now an odd-ball size. (The center of our coffee table/ottoman has a wooden table area with a lip around it, as seen below. I made the mini to fit exactly within this area...until recently!)
9-Patch Mini
So I made a new mini! This time I made it about 1" larger in either direction and washed it as soon as I was finished binding it. It's a tiny bit big in the width, but I'm happy with it!
Purple and Grey Goodness!
I used big chunks of some of my favorite prints, and each log is quilted in a different style from Angela Walter's book. It was a fun way to play around with different quilting styles, and I just love how it turned out!
Purple and Grey Goodness!
On the back I used a large piece of a print from Anna Maria Horner's Innocent Crush line and a bit of bikes by Erin McMorris (this is one of my all time favorite prints!).
Purple and Grey Goodness - back
Although there isn't a ton of the orangey-coral color in the mini, I had to use the peach bikes for binding. I love that it's such a soft color and just flows with the rest of the mini quilt!
Here's a shot of the shrunken mini stacked on top of the new mini. That's quite a bit of shrinkage for such a small quilt! (Finished size of Purple and Grey Goodness is approximately 14.75" x 20.75".)
9-Patch Mini
And here's the Purple and Grey Goodness being put to use!
Purple and Grey Goodness!
I'm digging the change from the brightly colored 9-patch mini to the more subtle hues of this mini (plus it goes swimmingly with our lavender couch!). Although I will find a home for my 9-patch mini somewhere else, I'm sure!
You know it's a win when you want to just sit and stare at your finished project! I just wish I had yardage of all of these prints to make a larger quilt now!