Monday, December 31, 2012

The one where I realize that 2012 *was* a productive year!

I love seeing my friends' year-end blog review posts. I also stumbled upon a few new-to-me blogs today, and was instantly drawn in by the fabulous year's end wrap-up photos! Feeling as if I haven't put my best quilting foot forward this year, I was going to forgo writing my own post, but a quick trip through my flickr photostream snapped me out of my funk rather quickly! While I do have the goal to work more on my quilting projects in 2013, I am pretty proud of everything that I accomplished in 2012.

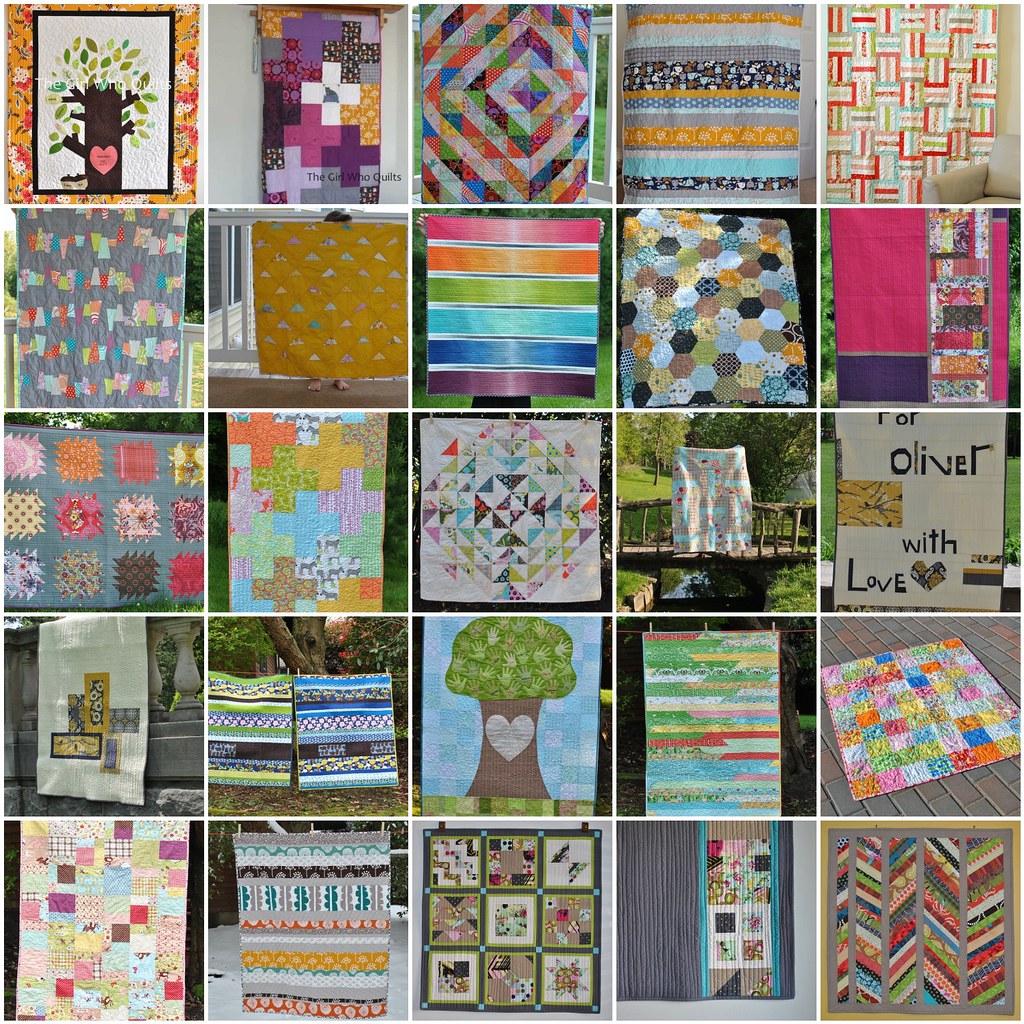
Let's start with my quilt finishes! 23 finishes, and some of these quilts include a "bonus" quilt on the back. ;) I'm proud to say that most of these are my own design! This doesn't include at least 2 quilts that I can think of, which I hope to share soon (including another pattern!).
2012 year in review

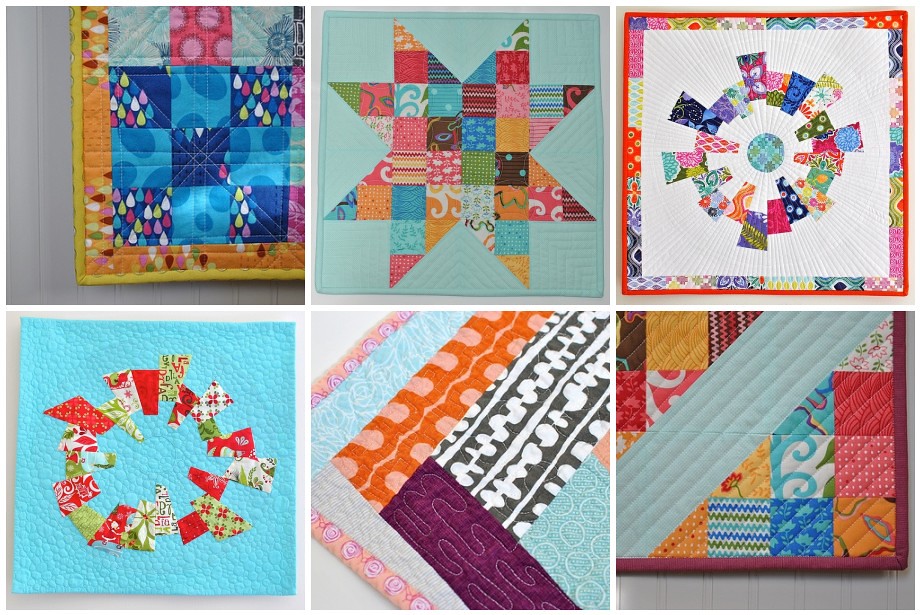
I also created 6 mini quilts!
2012 year in review

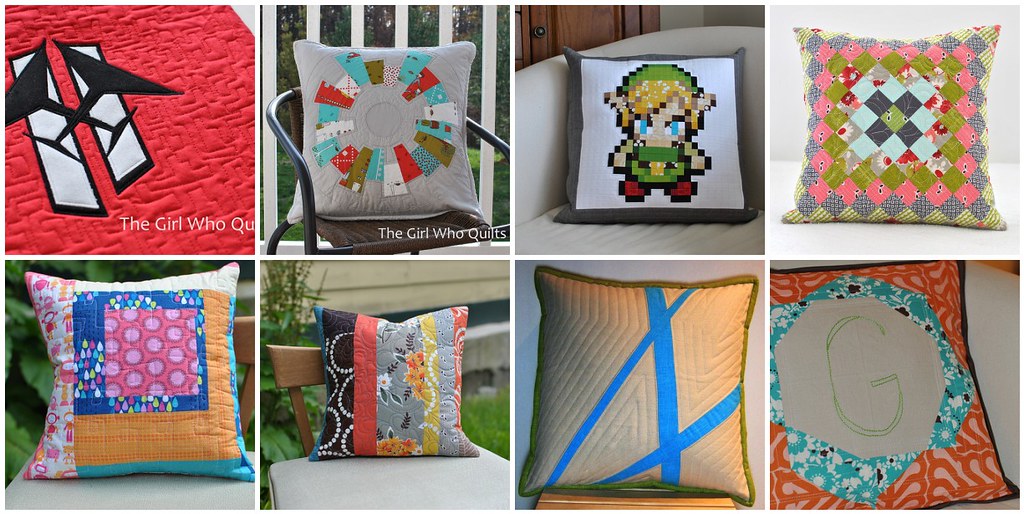
And 6 quilted pillows!
2012 year in review

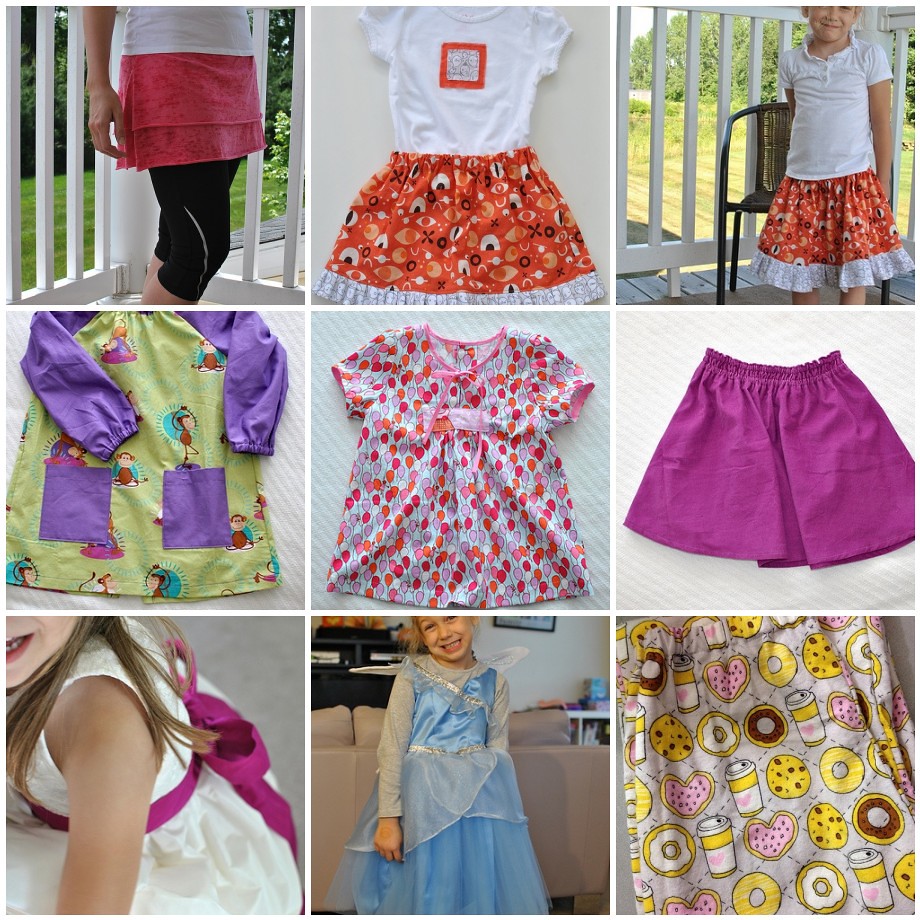
I tend to forget about my garment sewing...I found these projects in my flickr, which doesn't include a Tova dress that I made myself and my first Tova attempt which turned out so tiny that it fits Addy! There are also several pairs of pj pants somewhere around the house, not that those are too exciting!
2012 year in review

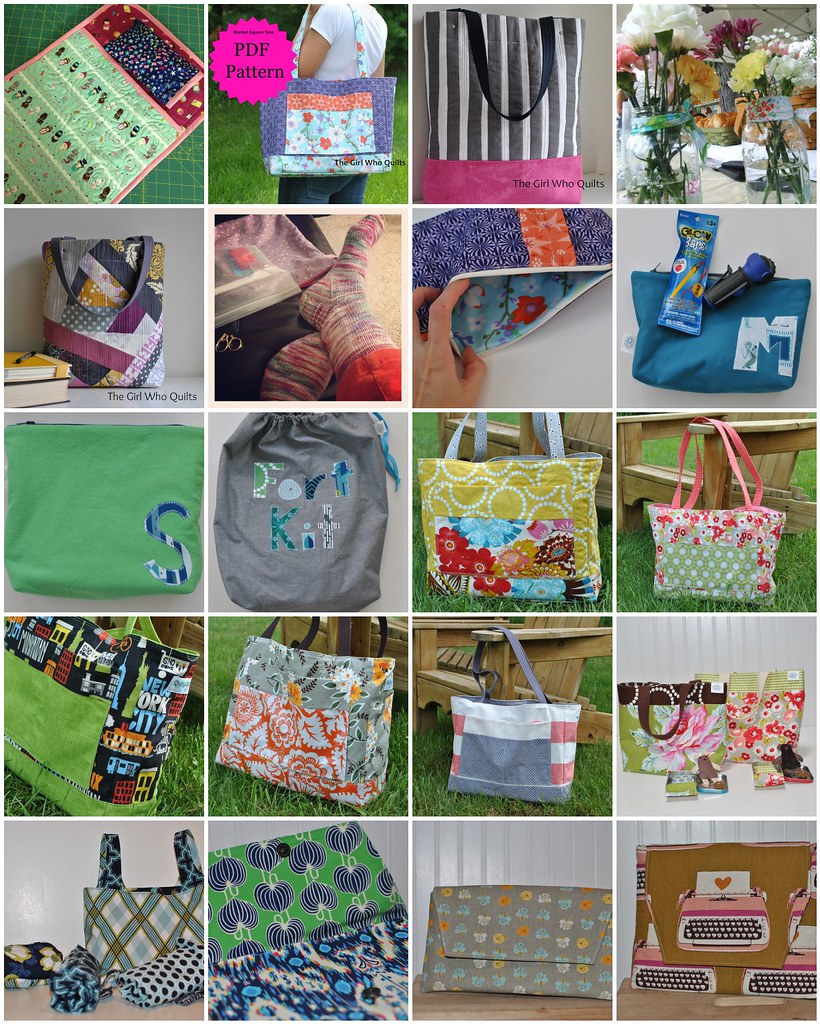
And then there are those random sewing/knitting/decorating projects that I've completed!
2012 year in review

Seeing all that I accomplished this year has really motivated me to work even harder next year. A huge thank you to everyone who blogged about their 2012 and pushed me to do that same. And thank you to all of YOU! Constructive criticism (and, of course, a bit of quilty praise) really encourages me!
I can't wait to see what 2013 has in store!

Sunday, December 30, 2012

Christmas Sewing!

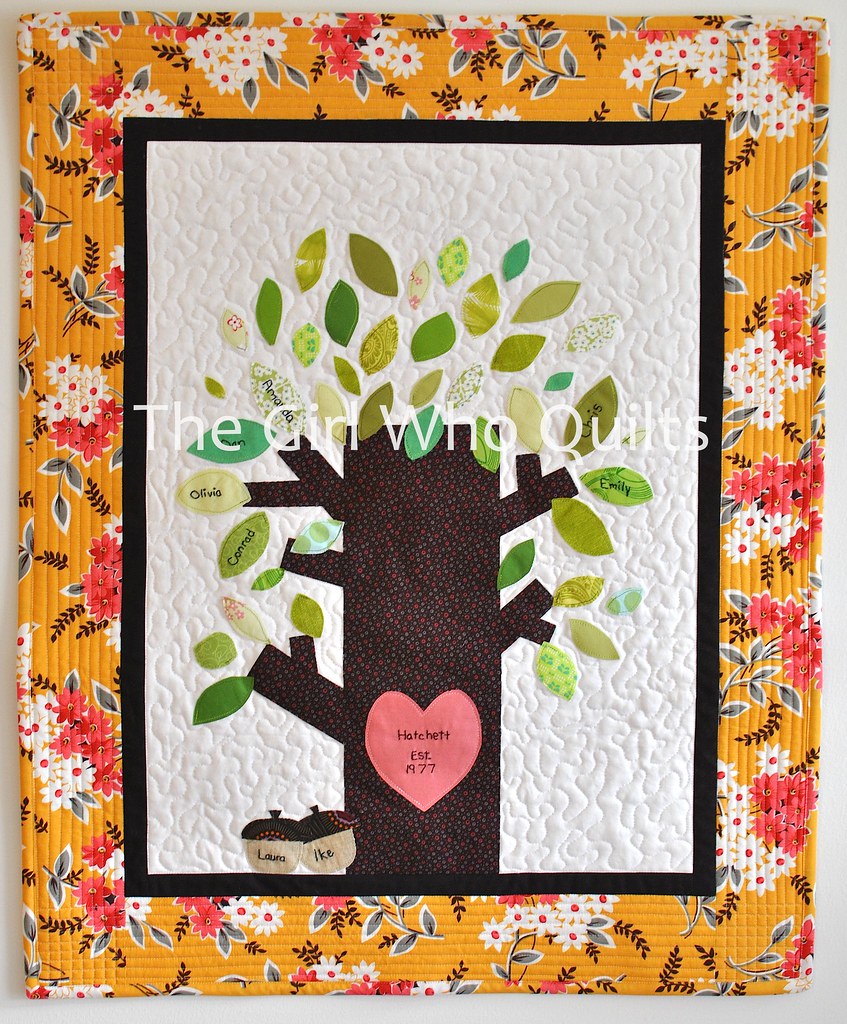
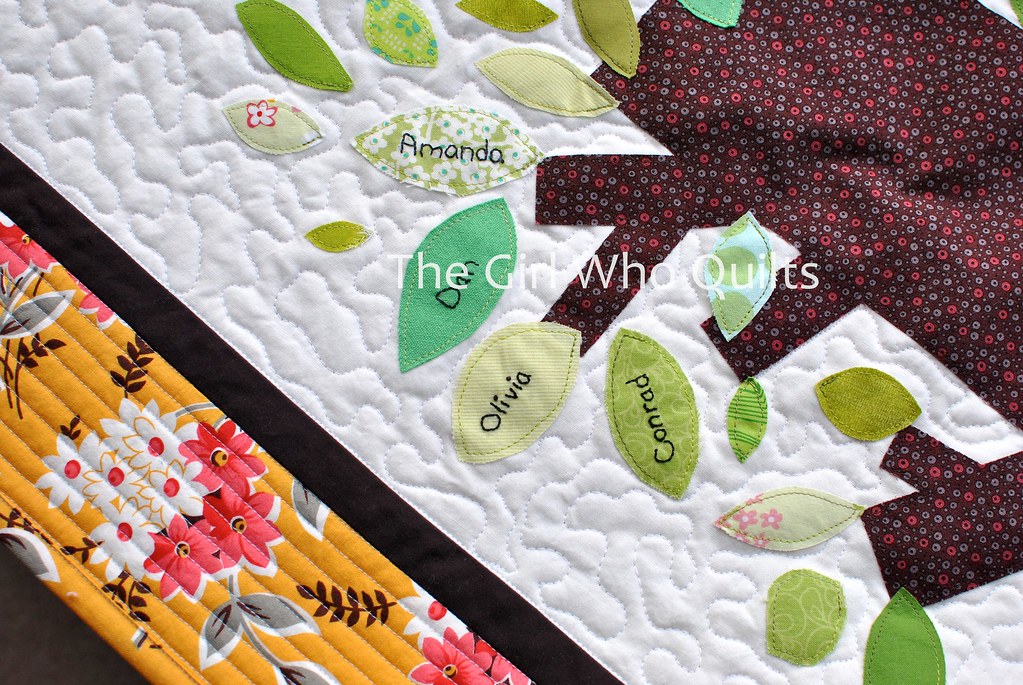
I have a few handmade Christmas gifts to share, but I'm going to start with some custom work! A few years ago I created these family tree quilts, and a friend of mine really loved them. This year she asked me to make a similar family tree for her Mom.

Family Tree Quilt

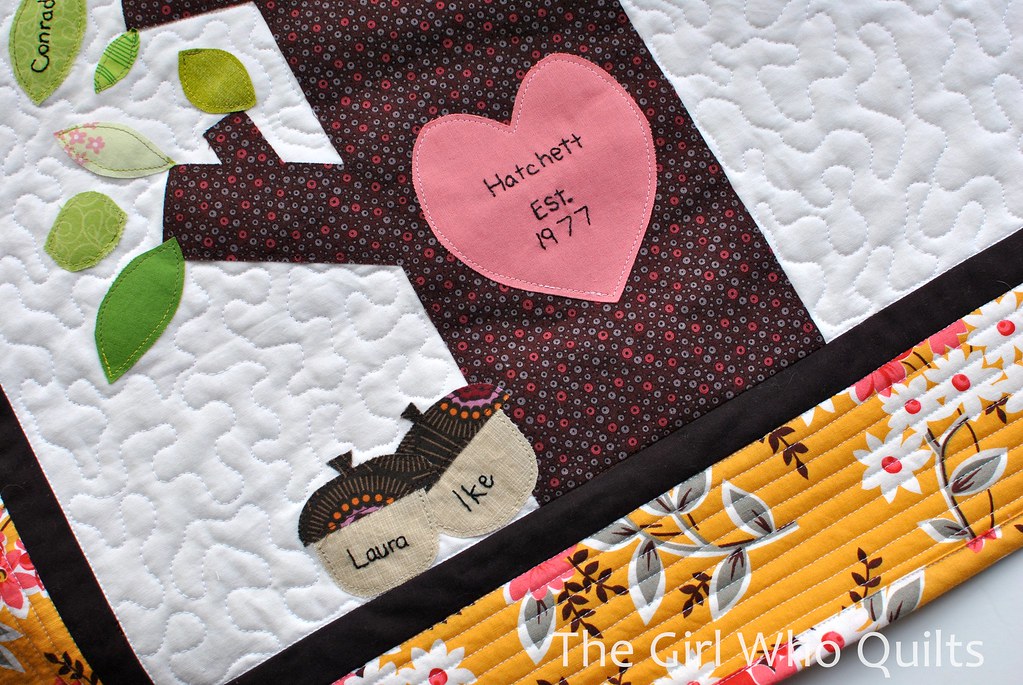
Here are a few close ups of the hand-embroidered details:

Family Tree Quilt

Family Tree Quilt

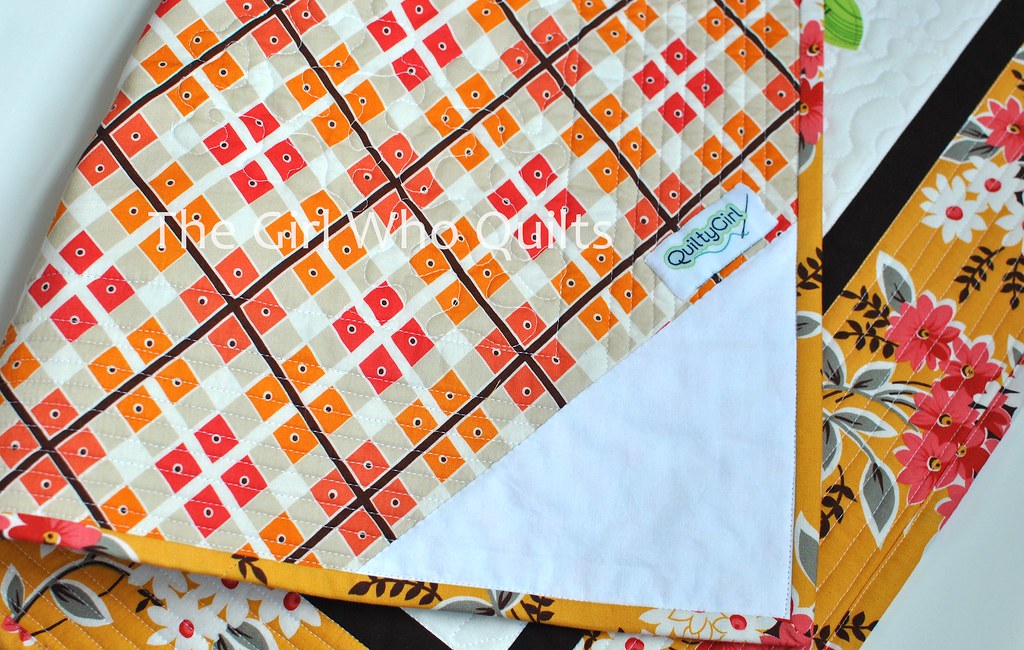
On the back I included a blank label, which my friend personalized for her Mom:

Family Tree Quilt - Back

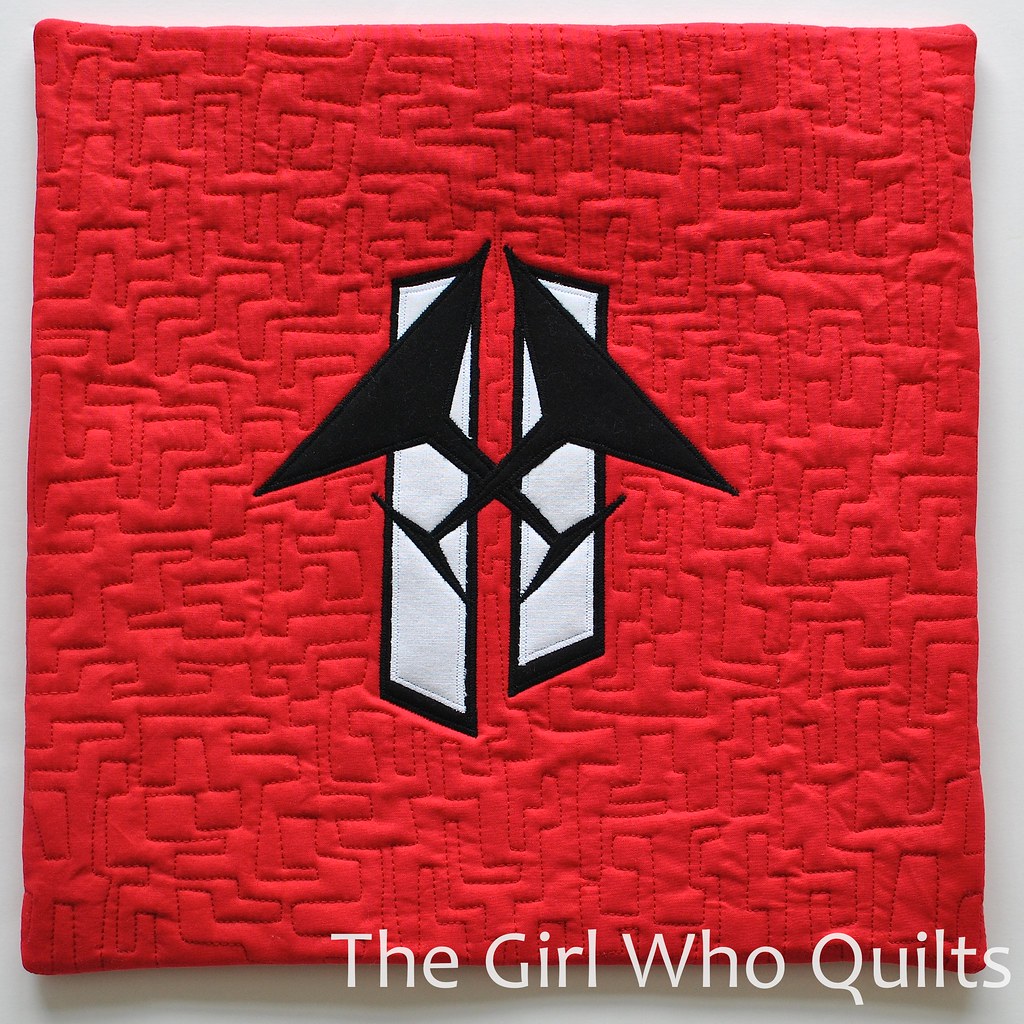
This second custom was a request by my college roomie. She and her fiance are very involved in Barfleet, so she asked me to create a pillow containing their logo. I'm really happy with how it turned out, and she let me know that he loved it too! (The pictures are of the pillow cover. It was much cheaper to send her the cover, which she then stuffed with a 16" pillow form.)

Barfleet Pillow

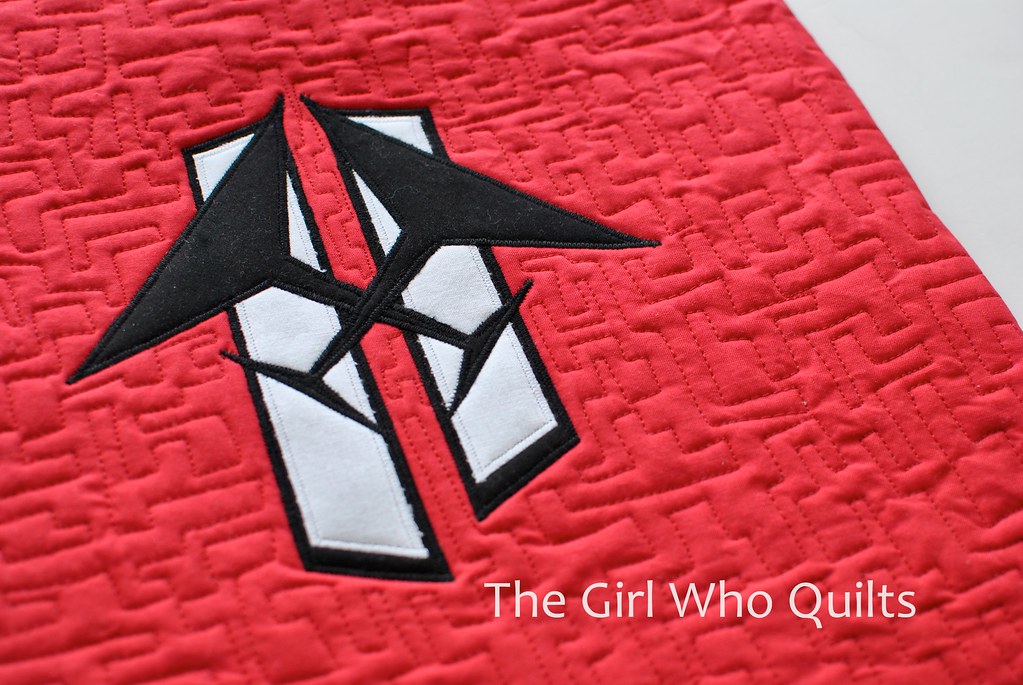
I appliqued the logo with a narrow satin stitch (red is SO hard to photograph, and we had several cloudy days in a row-not a great combo for photos!):

Barfleet Pillow

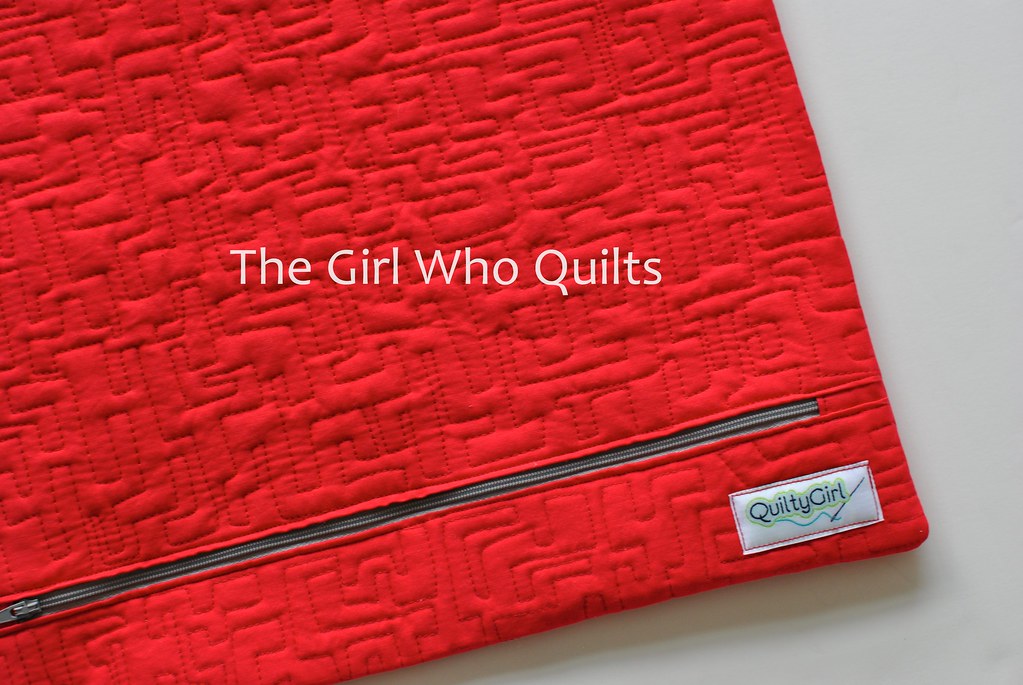
The pillow back is all red with a grey zipper. After I took these pictures I added a white label to the pillow back, which my friend personalized for her fiance!

Barfleet Pillow - Back

On another quilting note, this was a really excited week for me. I found out that my Funky Dresden Pillow tutorial was the winner in the Home Decor category of Handmade with Love over at Pink Chalk Studio!
To top off the week, both of the quilts that I submitted to QuiltCon were selected! I can't wait to see them hanging in Austin!

One of my personal goals for 2013 is to decide which direction I would like to take my quilting. This little bit of good news will definitely help to motivate me!

I will be back in the next few days to share the gifts that I made for my family. Until then, have a Happy New Year!

Sunday, December 16, 2012

A holiday "cheer-me-up"!

I hope everyone is enjoying the bustle before the holidays! I've been working away on gifts, a little further behind than usual this year. I'm hoping to have packages shipped out in time, but I'm not going to stress over it this time!

Yesterday we took a trip into NYC to meet up with my brother and his girlfriend, who were visiting from Chicago. We brought my brother in law along, who was also visiting! It was a really fun day, and the city is so amazing when it's all decked out for the holidays. It was just the festive pick-me-up that we all needed after the tragedy in Connecticut on Friday. (Though I must admit, I was hovering over Addy like a hawk!)

The day was made even more bright when I received Pink Chalk's email newsletter and saw that my "Funky Dresden Pillow" tutorial made it into the top 20 for the Handmade With Love contest!

Modern Dresden Plate Tutorial

Here is the link to the original post, complete with 130 entries! So many great ideas in there, if you are so inclined to add another project to your holiday list!

And here is the post with the 20 finalists. There are 4 categories with 5 entries per category. You can vote for 1 project in each category!

There are lots of great projects in the running, and lots of amazing bloggers behind those projects. I really don't expect to win, but it's a pretty great feeling to be in the top 20!

I'll be back in a day or two with a quilt to share - assuming we get a bit of sunshine for some photos!

Friday, December 7, 2012

SMS Giveaway winner!

And the winner is comment #28:

Blogger jruminski said...
I usually make jewelry, table runners or placemats.

I love that fabric and I really love camping!!

The winner has been notified via email.

Thanks to everyone to participated!

Monday, December 3, 2012

Sew Mama Sew Giveaway Day! - CLOSED


Welcome! It's Giveaway Day over at Sew Mama Sew today! Hop on over to their blog to see all of the goodies that are up for grabs!

And if you're visiting for the first time, I hope you stick around for awhile!

I'm giving away one yard of this out-of-print Heather Ross camper van fabric in pink and a PDF copy of my Market Square Tote Pattern!

Heather Ross Camper Van Fabric in pink - Giveaway!!

The yard of fabric is enough to use for the exterior or the lining of the bag. Or do what I do, and stash this print away for a rainy day!

toteetsy2

To enter the giveaway, leave me a comment with your favorite handmade gift idea(s).
I love to make my gifts, but sometimes I am lacking new ideas!

Giveaway is open to everyone, I will ship international!
The giveaway ends on December 7th at 5pm PST. I will contact the winner by email on or before December 9th.

Please make sure that I have a way to contact you! If I can't contact you, I will draw another winner. Not sure if you're a "No Reply" commenter? Here is how to check!

(Some of you frequently comment on my blog-if you've never received an email response from me, it is likely because you are a "No Reply" commenter.)

This giveaway has closed. Thanks to all who participated!

Saturday, December 1, 2012

And then, this one time....

I blogged!
Wow, November just flew by in a flash! Here's what I've been up to:
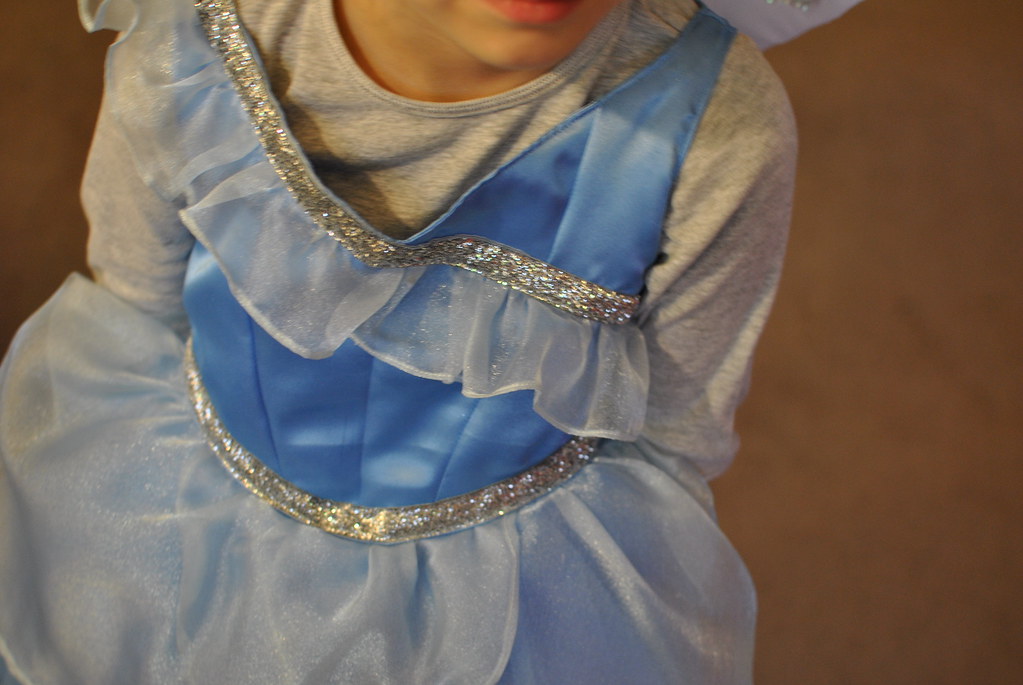
For Halloween, I made a "Blue Fairy" costume for Addy:
Blue Fairy Costume
Bodice detail:
Blue Fairy Costume
I like to take the extra time to create well-crafted Halloween costumes, because in our house they are used for dress up for YEARS! The extra few minutes spent serging the seams provide hours of fun later.
Ok, that was October. Let's move on to November.
Early in the month we drove (yes, drove) from upstate *eastern* New York to Chicago for my sister's wedding. The wedding was SO fun, and well worth all of the hard work (and the drive!).
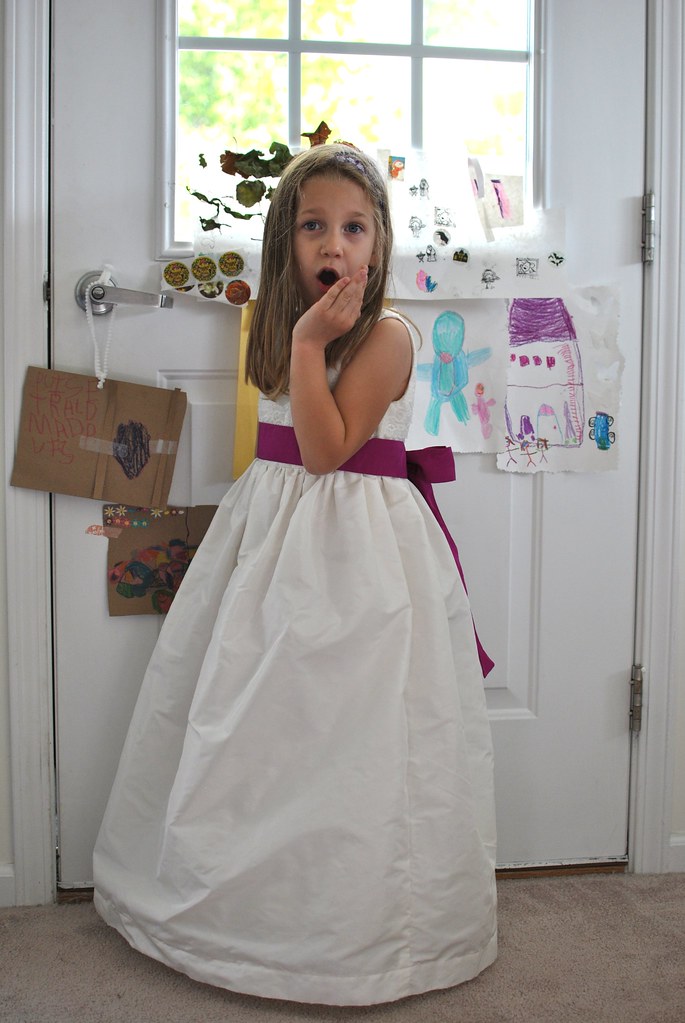
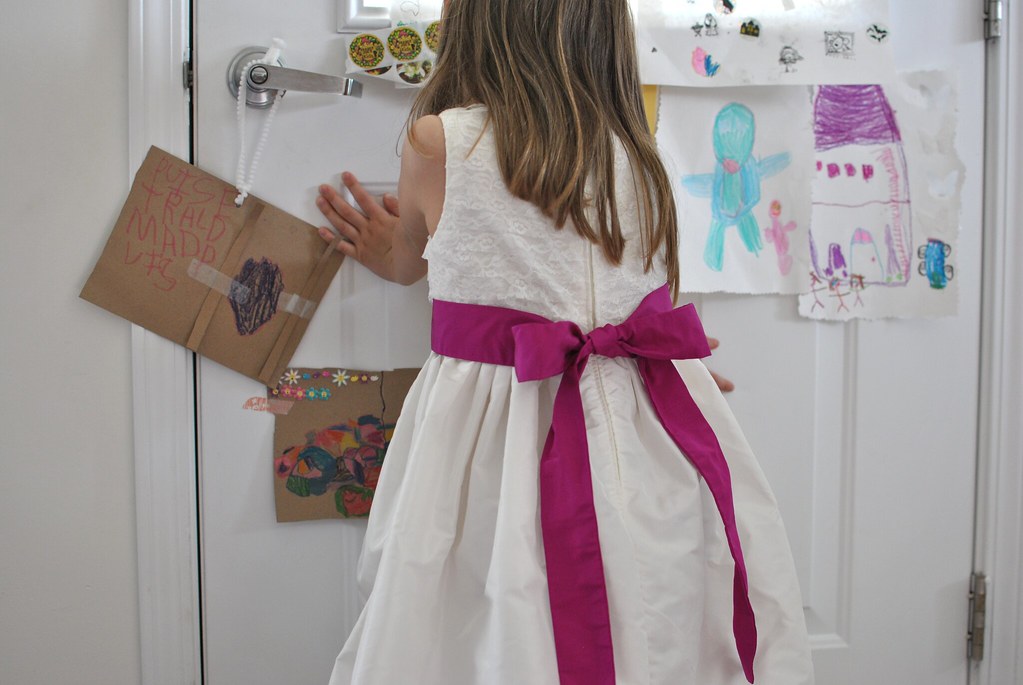
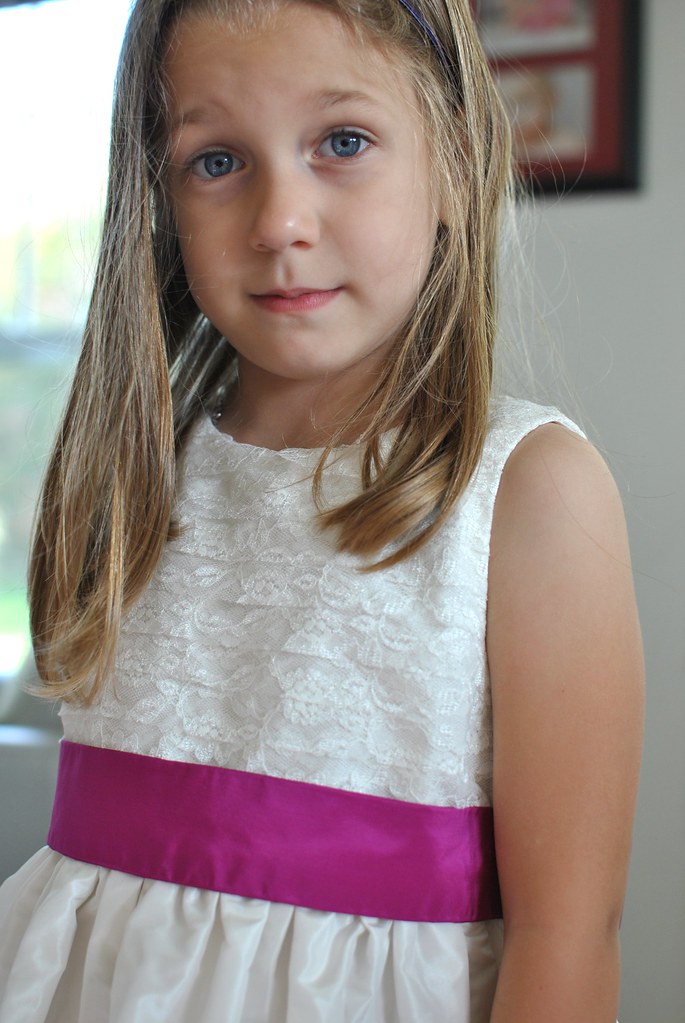
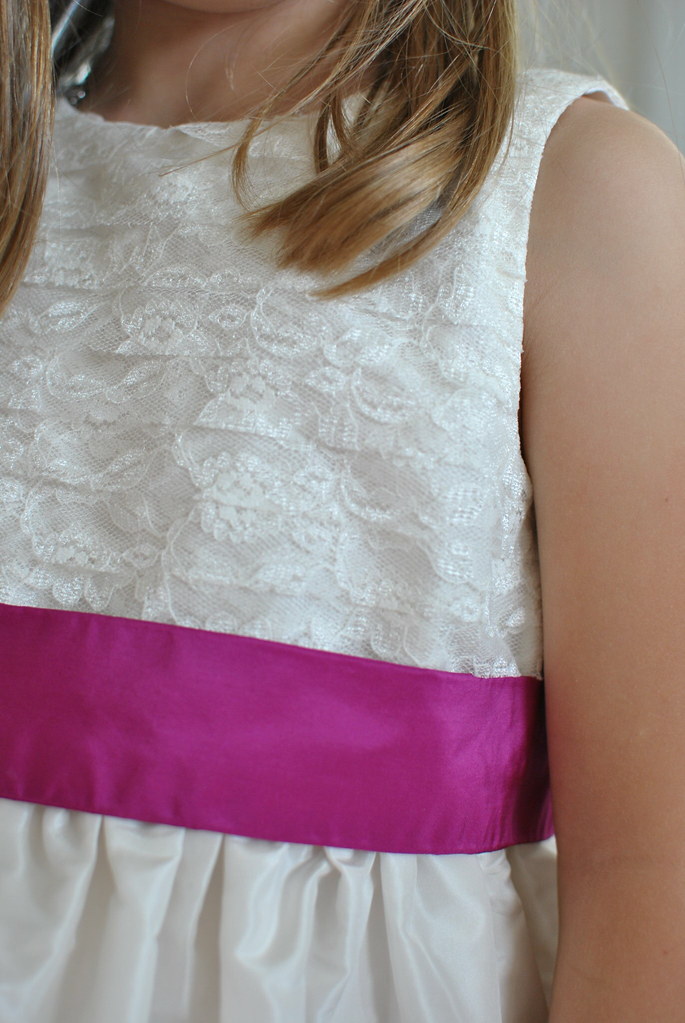
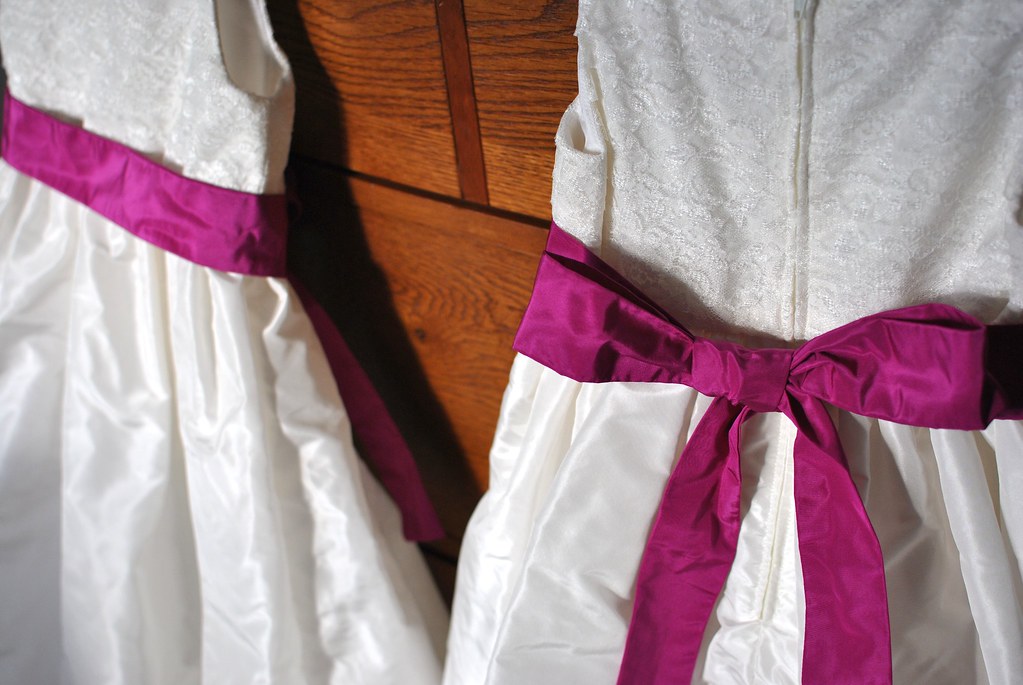
As I've mentioned a few times, I made the flower girl dresses. My sister's dress was made up of tulle and lace layers - not poofy princess layers, but soft, subtle layers. We both love that look, so my sister asked me to make the girls' dresses in a simple shape with a similar layered lace bodice. They were really simple to construct, but time consuming!
Main fabric is silk taffeta from Mood. Sash in silk taffeta from J. Crew in "Bright Dahlia". Lace is a polyester lace from Mood. Lining is china silk and many yards of tulle.
(These poses are all her. She's such a character!)
Flower Girl Dresses

Flower Girl Dresses

Flower Girl Dresses


Flower Girl Dresses

Flower Girl Dresses

Flower Girl Dresses
The girls looked adorable in the dresses, and they both partied hard all night!

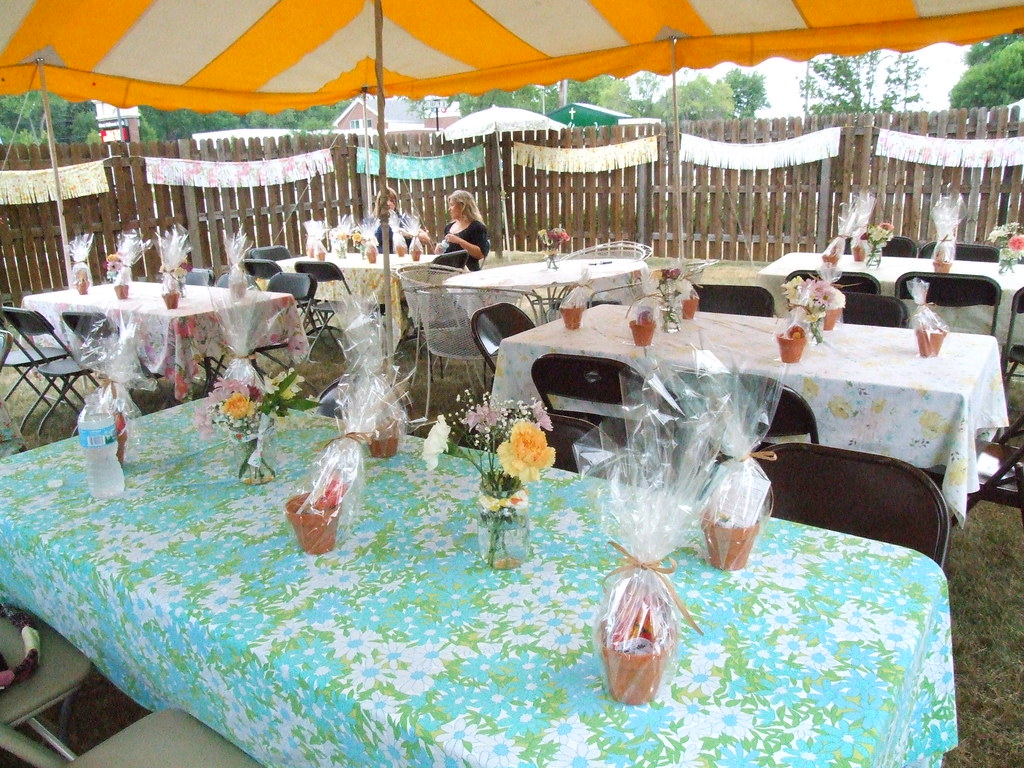
I also have a few pictures of my sister's bridal shower. We had the shower back in July, in my mom's back yard. Come jump in my time machine with me!
I used vintage bedsheets as table clothes and hung fringed linens along the fence (seen in the background):
Wedding Shower!
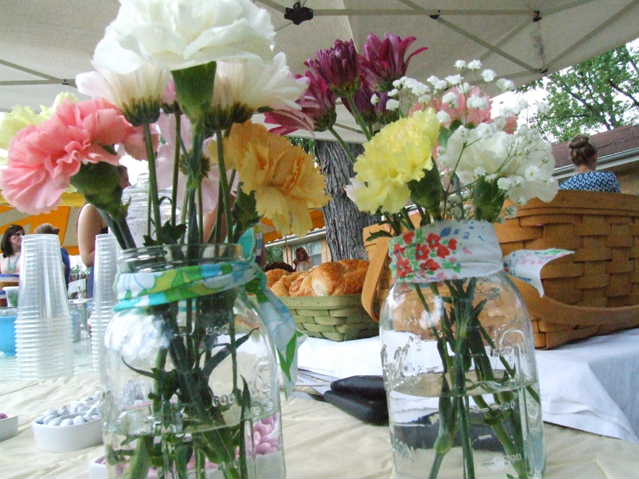
And mason jars filled with grocery-store flowers:
Wedding Shower!
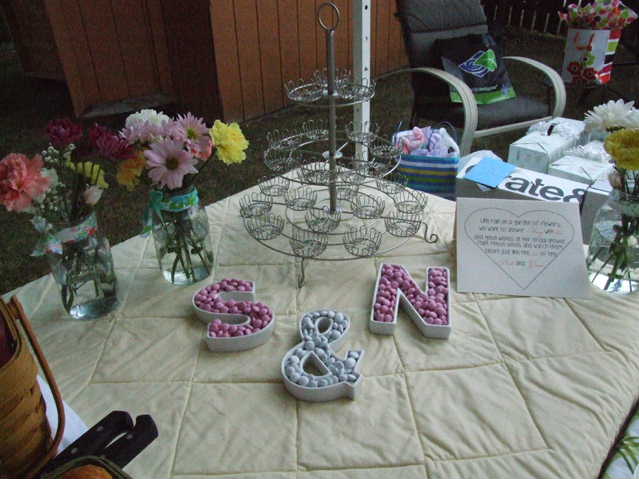
The other bridesmaids helped set up the dessert table and bellini bar:
Wedding Shower!

OK, let's travel back to November now...
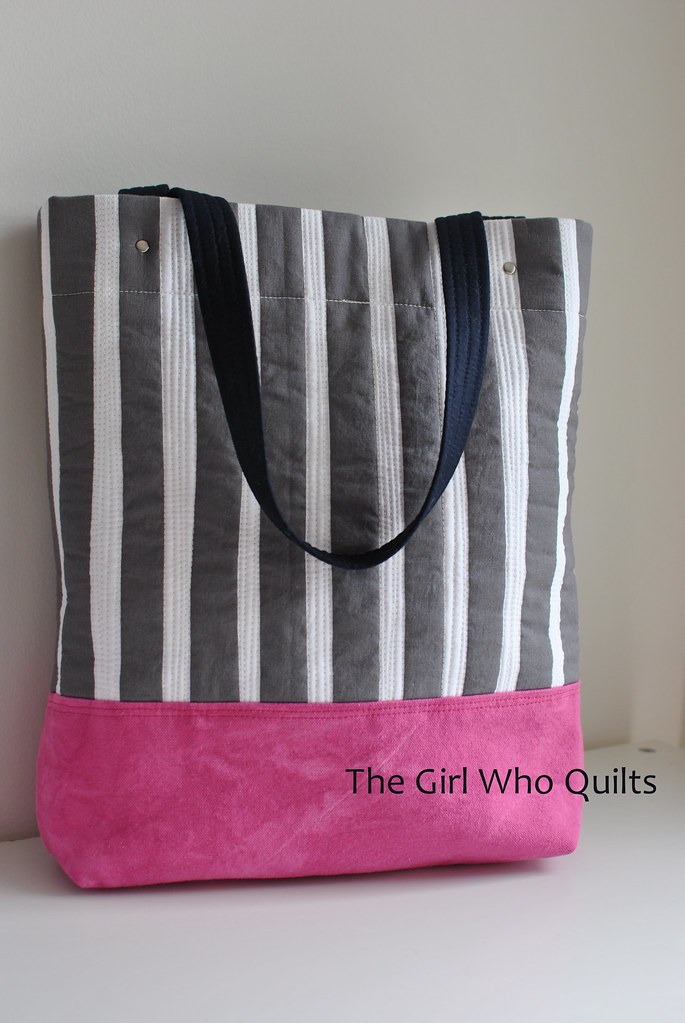
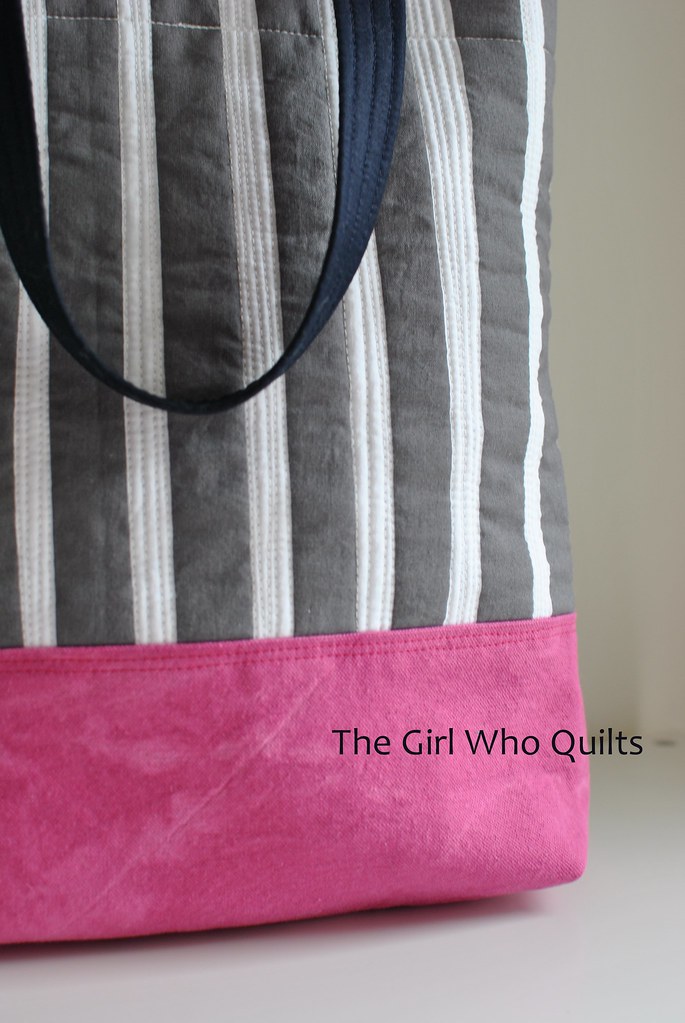
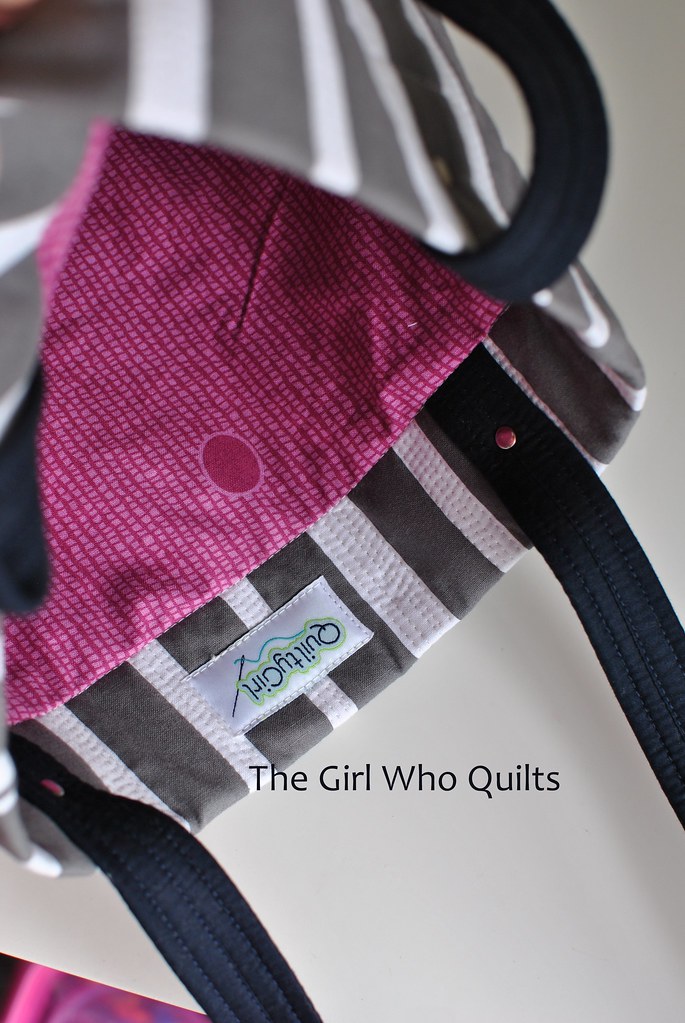
I created a few other things for the wedding as well. I made my sister this tote as a birthday gift (she got married on her birthday), but in her wedding colors, so that she could use it on the big day:
Stacey's Tote
I hand dyed the canvas used for the bag bottom. It was so fun, too! I started with a neutral colored duck canvas and used magenta Rit dye. This color isn't nearly as saturated as the wedding color, but I love it anyway! I also love the mottled look, although that was unintentional.
The main fabric on the bag exterior is the stripe from Bella, by Lotta Jansdotter. I densely quilted the white stripes with organic lines.
Stacey's Tote
The handles are 1" cotton webbing covered with Michael Miller Cotton Couture in Indigo (I love these solids! They are soft as silk!). The lining is my favorite print from Chickopee by Denyse Schmidt.
Stacey's Tote
The style and construction of this tote is identical to the Modern Quilted Tote. I used hair canvas and a layer of batting as a foundation and metal snaps to help support the handles.
Stacey loved the tote, and I think she will use it a lot on her commute to work.

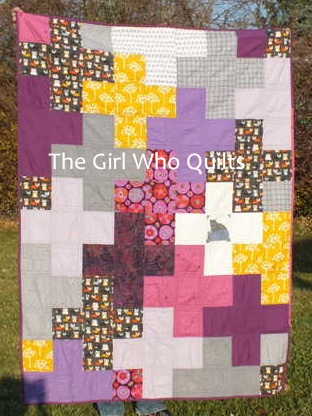
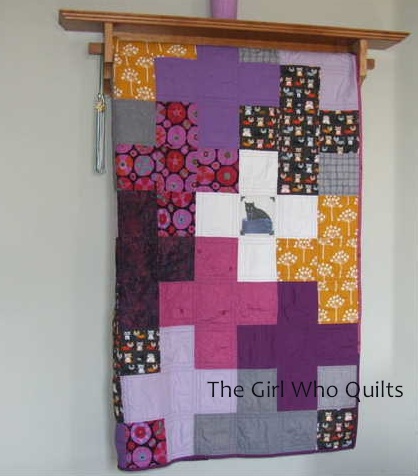
I have one more project to share right now! My aunt requested a custom plus sign quilt including cats, so I hustled through my sewing to finish it in time to hand deliver it in Chicago. The recipient loves cats, and my aunt wanted to include a picture of the recipient's cat on the quilt. I used a cat print from Happy Drawings Too as my starting point and added prints in greys, gold, and purples. (These pics are a bit small. I forgot to take pictures before our trip, so these are smaller files that my aunt emailed over.)
Cat Quilt
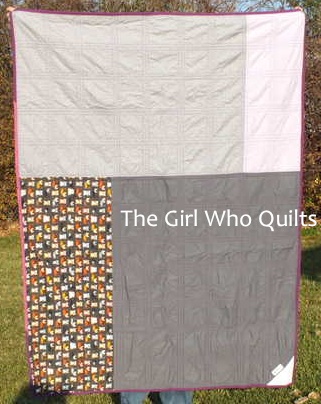
The back:
Cat Quilt
My aunt had the quilt for a few days before she gifted it, so she hung it on her quilt rack to admire it!
Cat Quilt
She loved having the quilt hang in her house so much that she now wants her own quilt!

After our trip to Chicago we celebrated Thanksgiving at home and I started to work on a quilt idea for Quilt Con. The day after thanksgiving I traveled to Seattle to run the marathon again, which went GREAT! I took 25 minutes off of my time from last year, and had a blast! After the race I spent a day catching up with friends and then hurried back home.
This week I worked my butt off to finish up TWO quilts just in time to submit in the Quilt Con show. I'm really happy with how they both turned out, but I didn't get very good pictures of one of them. My camera battery died just as daylight was fading away, so I tried taking my pictures inside. They aren't the best, but hopefully I was able to edit them well enough. Fingers crossed!
As soon as I have better pics, I will blog about the quilts!
That's all I have for now, thanks for bearing with me!

Sunday, October 28, 2012

Modern Dresden Plate Tutorial

A few weeks ago when I blogged about my Mod Christmas wallhanging, I had a request for a tutorial. It's taken me some time to put this together, but better late than never, right? This is the process that I used to create both the Mod Christmas and my mini quilt from the Dresden Challenge. It will be apparent in a bit just how I created the two separate looks.

Supplies to create 1 Modern Dresden Plate block:
20 - 5" charm squares
1 yard background fabric
Dresden Plate wedge template* - I used the EZ Dresden Ruler
Paper Pattern Pieces for the background (see below - let me know if you have any questions or troubles downloading the files)
Edited to add: Paper Pattern Pieces can also be found here.
It has come to my attention that people are unable to download through Scribd without paying for a membership. You can now find the needed templates here in my craftsy shop. The files are FREE to download! Please do not share the downloads, but rather direct others to my Craftsy shop and/or my blog. Thanks!!


*Using the EZ Dresden Ruler, my Dresden Plates each contain 20 wedges. The template that you use will dictate how many wedges you will need per plate. See the instructions included with your template.

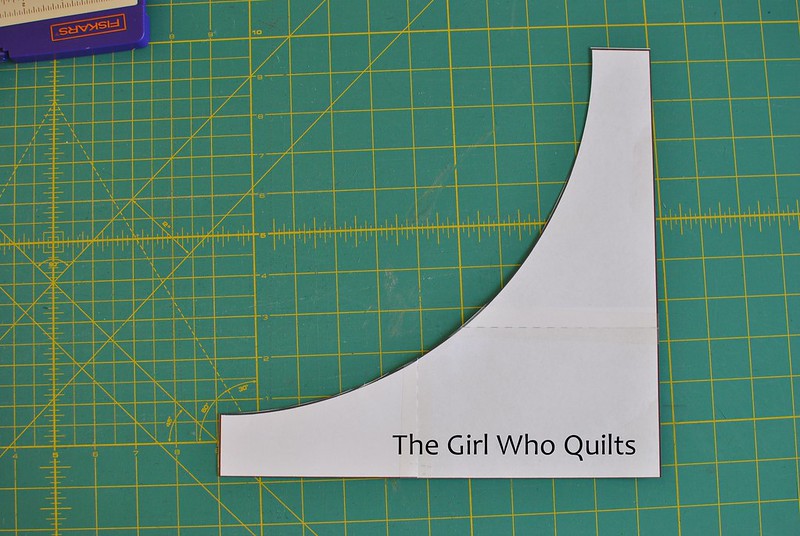
To create the paper pattern piece for the background, download the 3 PDF files from Craftsy, print each piece at 100%, and piece the templates together along the dashed lines. (More details below.) I can not guarantee that this template will fit your dresden plate unless you use the EZ Dresden Ruler that I used.

I am using a charm pack of Little Apples and Kona in Ash for my Modern Dresden Plate.

Modern Dresden Plate Tutorial

I chose 20 charms from my charm pack - because I was using a light grey background, I left out the grey charms. I like the look of this design when there is contrast between the prints and the background.


From your background fabric, cut 40 3"x5" pieces. If you want the wonky look of the Mod Christmas mini, you will need to cut these pieces larger; 5" square should be large enough.

Modern Dresden Plate Tutorial

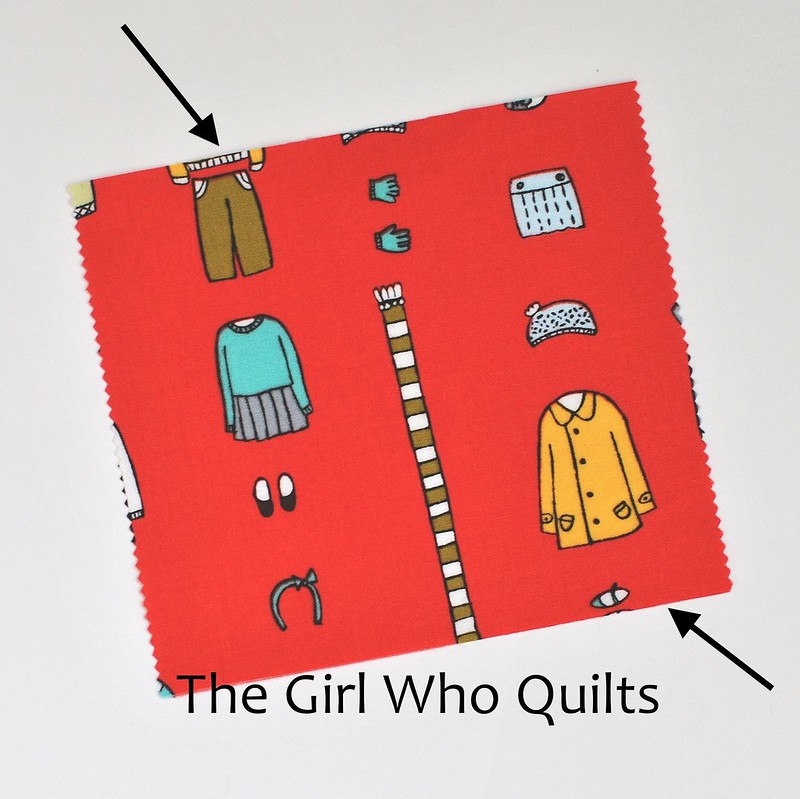
Now trim your charm squares by cutting 2 parallel edges of each charm (the width of the charms should remain uncut at 5"). Cut the charms to several different sizes - variety creates visual interest! Don't cut any charms smaller than 2.5"x5", though.
* For the Mod Christmas quilt, I cut the edges at odd angles. I didn't measure anything, I just laid down my ruler however I liked and cut a clean edge with my rotary cutter.
* For the mini quilt that I entered in the Dresden Challenge, I cut my charm squares so that the 2 cut edges were parallel.
How you cut these edges will dictate how your finished Modern Dresden Plate looks!
The arrows in the picture below indicate the 2 parallel edges that I cut.
Modern Dresden Plate Tutorial

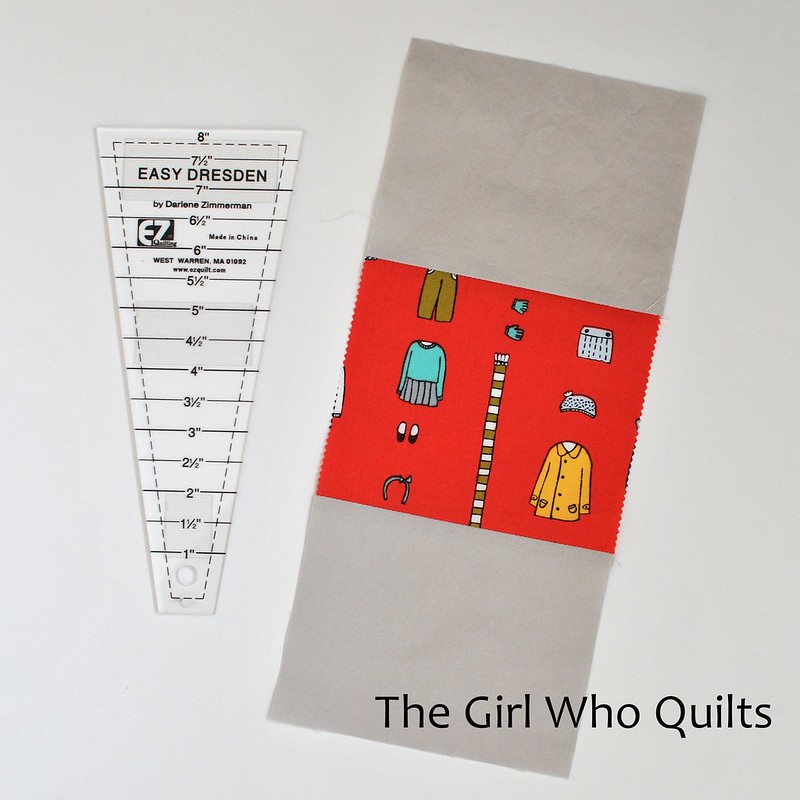
Now piece a 3"x5" rectangle to either end of each charm, along the edges that you just trimmed. Press your seams; I like to press my seams open.
Modern Dresden Plate Tutorial

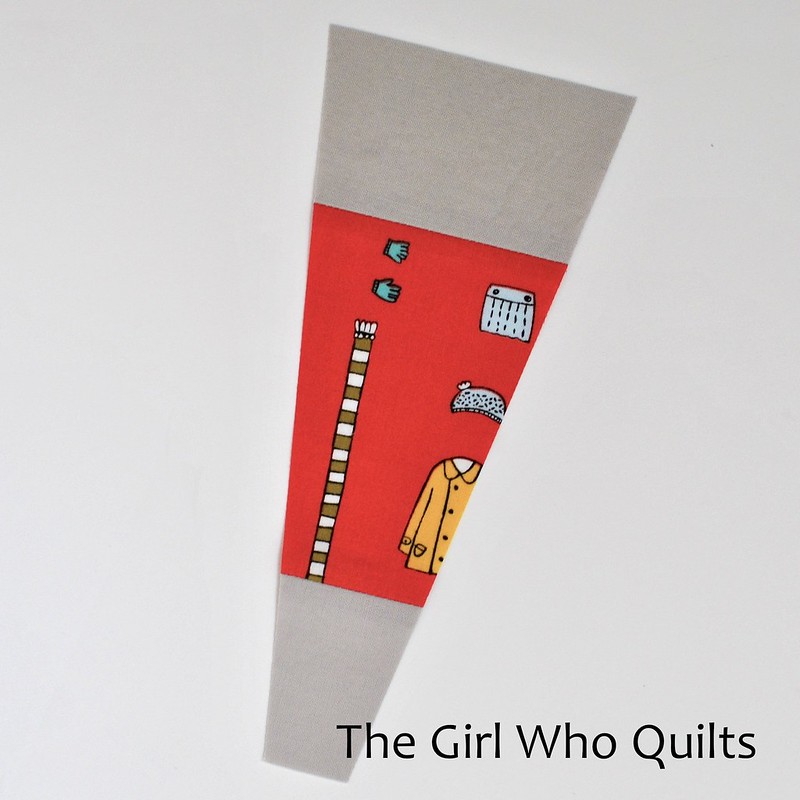
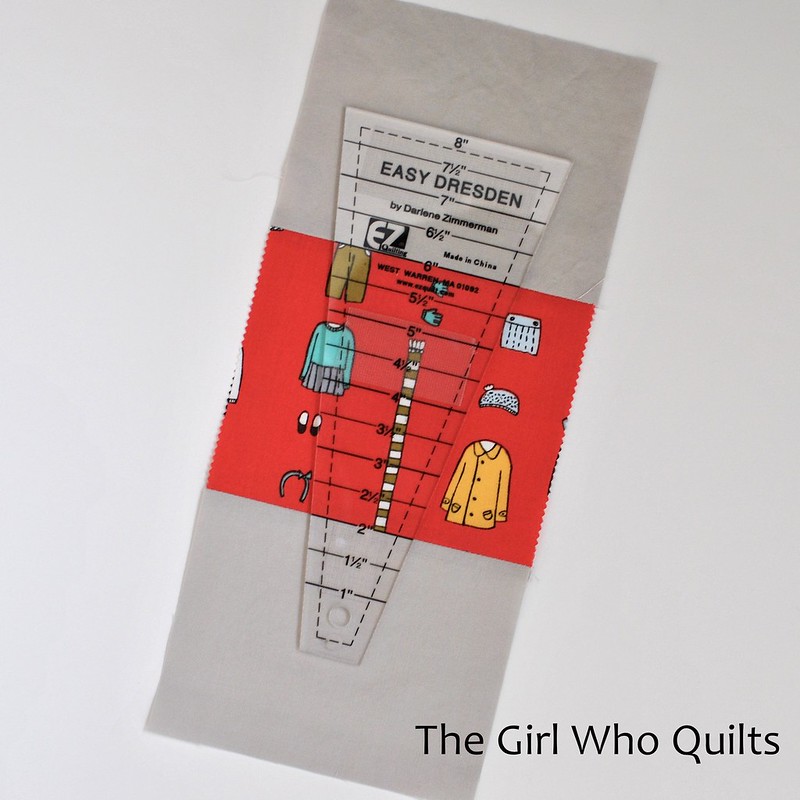
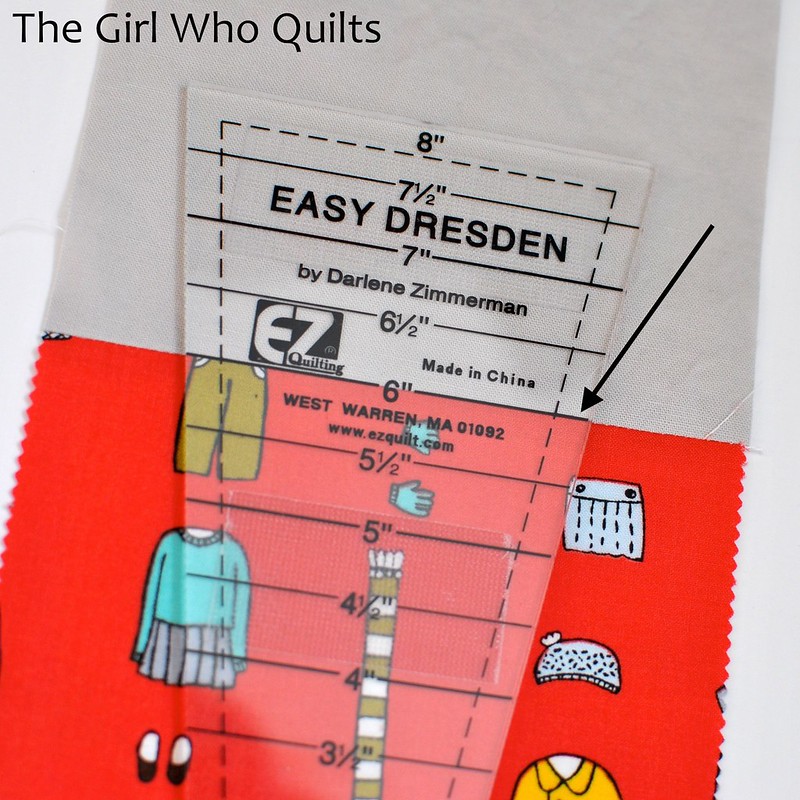
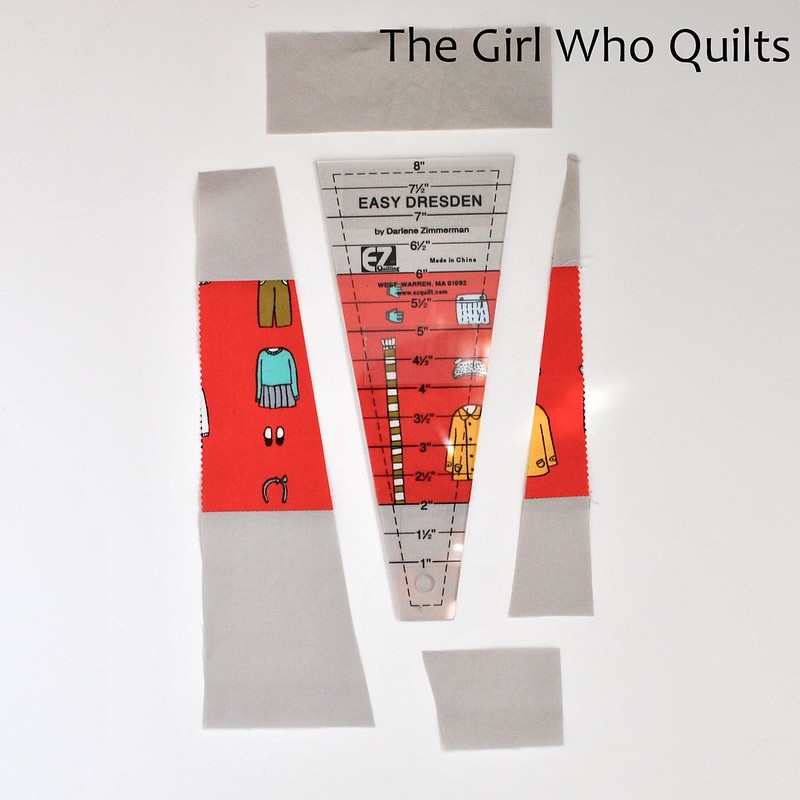
Now cut your wedges! If you chose to cut your charms wonky, there will be no seams to line up. If you cut your charms straight, use the lines on your wedge ruler to ensure that you cut the wedges straight. Try not to cut every wedge the same way - again, variety creates visual interest!
Modern Dresden Plate Tutorial

To cut this wedge, I aligned the 6" mark on my ruler with the top seam of my piecing. See the arrow below:
Modern Dresden Plate Tutorial

Modern Dresden Plate Tutorial

Modern Dresden Plate Tutorial

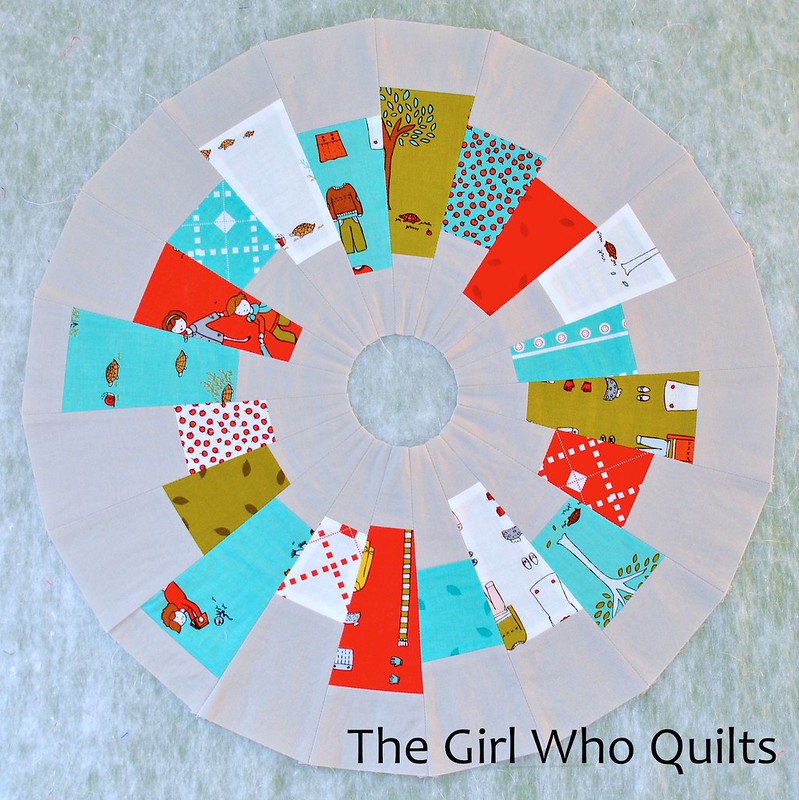
When all of your wedges are cut, piece them into a ring.
Modern Dresden Plate Tutorial

Now we will need to create the paper template for the background. If you're not comfortable sewing a curve, you could applique the dresden plate onto a piece of background fabric. Below I've included instructions for piecing the dresden plate.

Print the 3 pieces for your template. Be sure to print them through Adobe Acrobat, and print at 100%. I can't ensure that the pieces will be the correct size if they are printed another way.
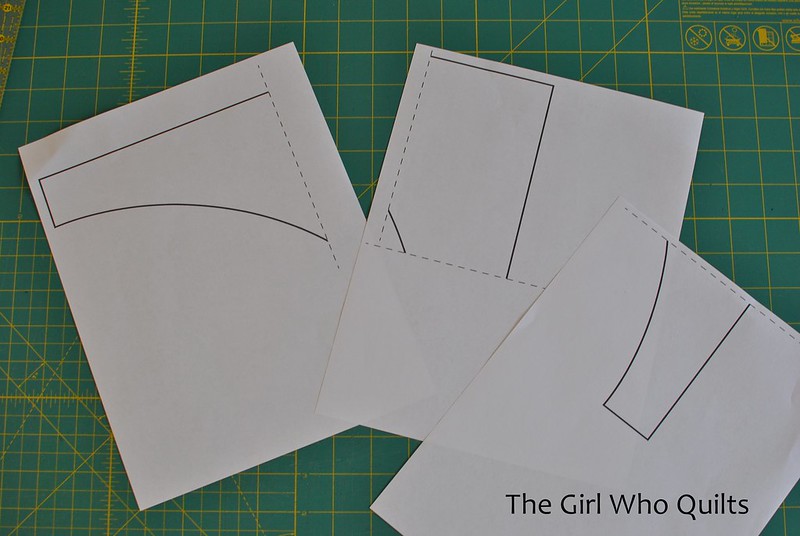
Modern Dresden Plate TutorialNow, piece the template together along the dashed lines. At this point, the long edges of the template should measure approximately 10 1/2" - 10 5/8". If your template is a different size, check your printer settings.

Modern Dresden Plate Tutorial

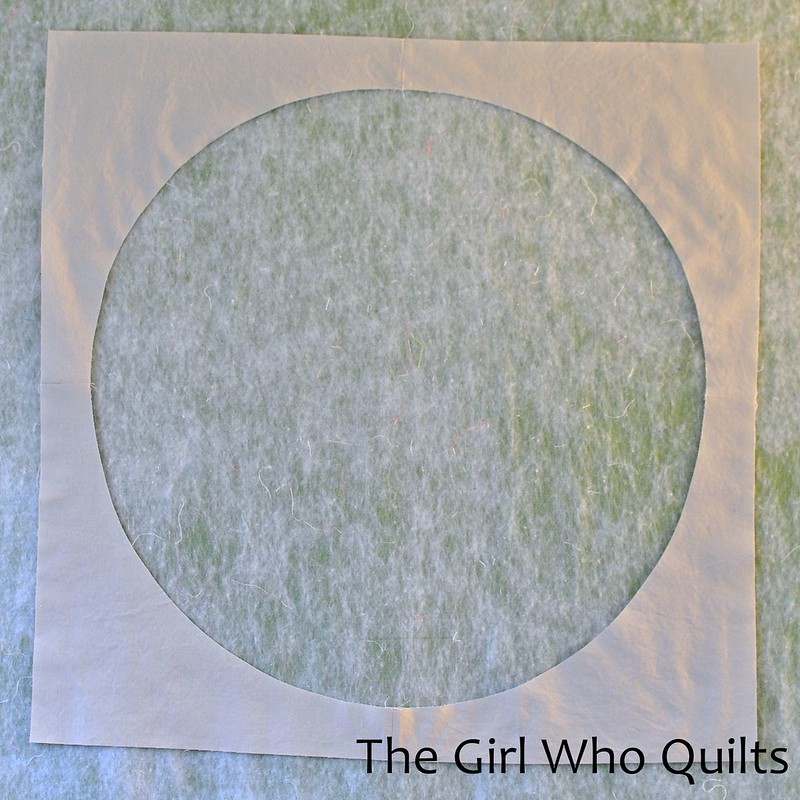
Cut 4 pieces of background fabric using your paper template. Piece these 4 pieces together along the short ends.
Modern Dresden Plate Tutorial

Here's where we will piece the circle. It's not hard to do, but it is very helpful to pin A LOT and sew slowly!

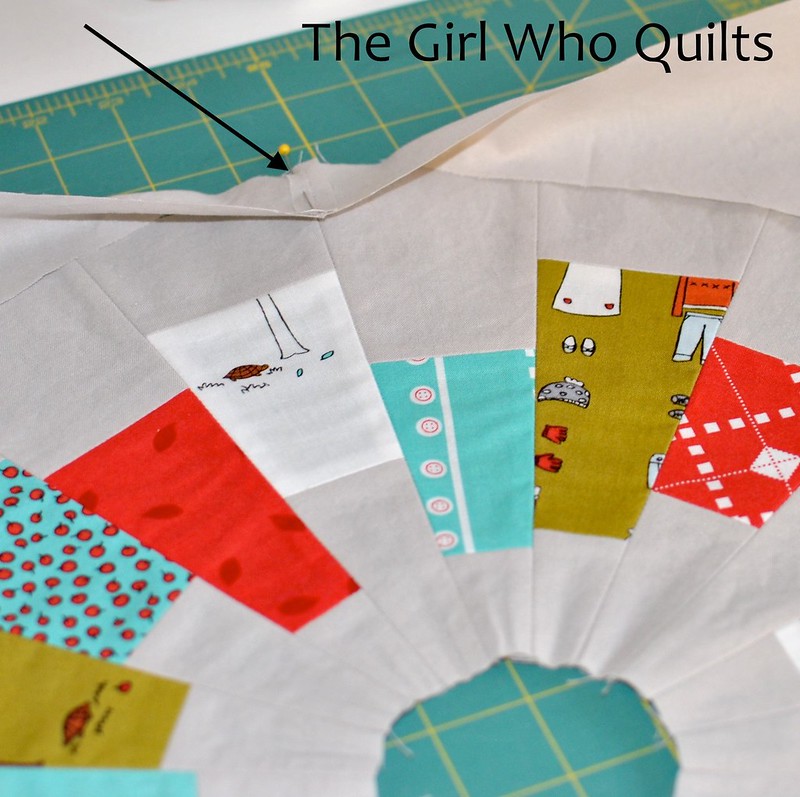
Lay the dresden plate down on a flat surface, right side up. Lay the background piece, also right side up, on top of the dresden plate. Align the 4 seams of the background piece with 4 seams on the dresden plate.
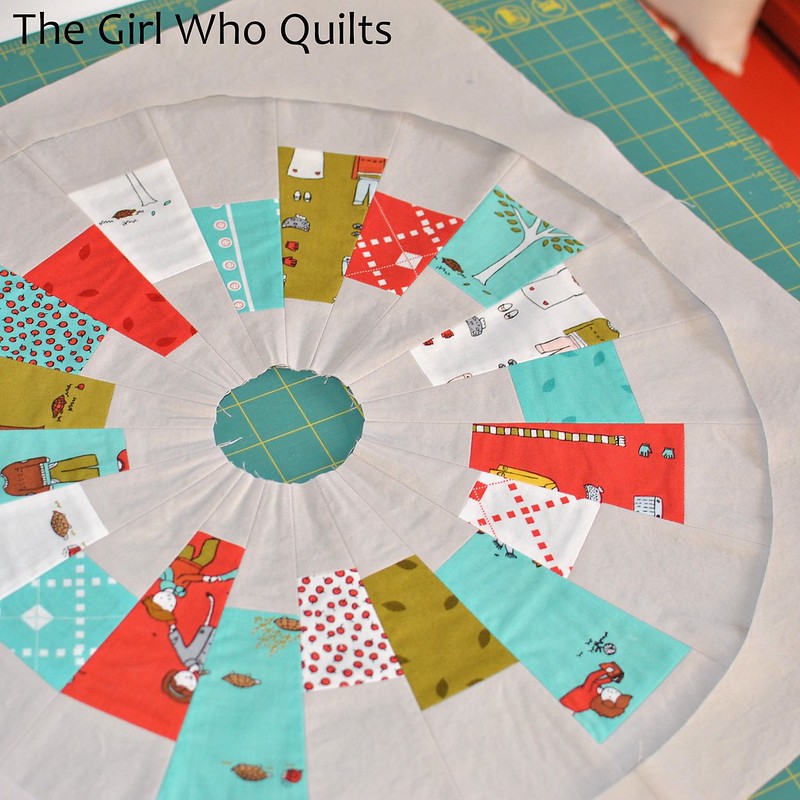
Modern Dresden Plate Tutorial

The arrow in the following picture indicates where I aligned the seam on my background piece with a seam on the dresden plate.
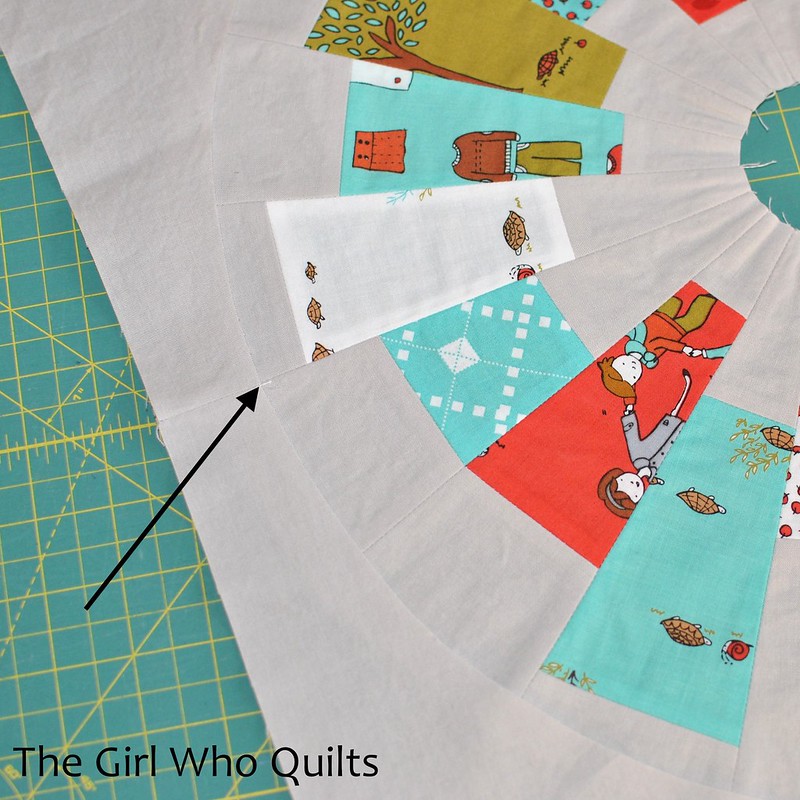
Modern Dresden Plate Tutorial

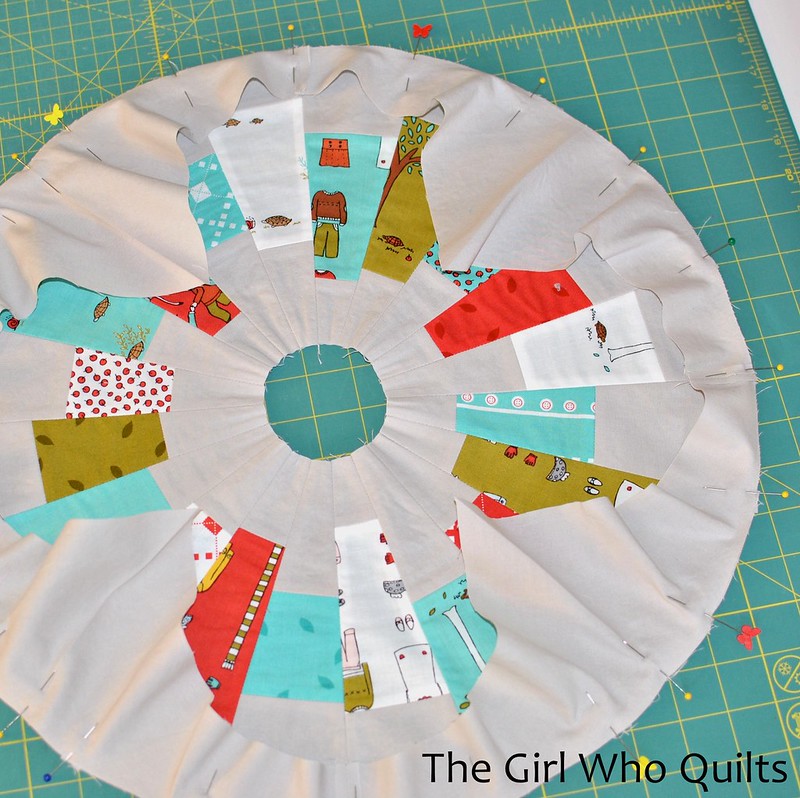
Now turn the edge of the background piece so that the ridge side is facing the dresden plate and pin in place. Begin by pinning at the 4 seams, and then ease the rest of the circle into place. I like to pin at all 20 seams along the dresden plate.
Modern Dresden Plate Tutorial

Here is my piece after I pinned all of the way around the plate:
Modern Dresden Plate Tutorial

To sew the curve, begin at one of the pins. Slowly sew using a 1/4" seam from one pin to the next, keeping the raw edges of the dresden plate and the background fabric even. I like to use the "needle down" function on my machine. You are essentially sewing 20 straight lines, which will result in a full circle!

Press this seam to the background fabric.

To finish the inner edge of the dresden plate, I like to use applique. For this tutorial (and on the Mod Christmas mini), I used a piece of background fabric. You could also use a charm square for this.
Cut a piece of my background at 5" square, or use a left over charm square.
Press the raw edge of the inner edge of the dresden plate under by 1/4".
Place the 5" square, right side up, under the dresden plate and pin around the turned edge.

Modern Dresden Plate Tutorial

Sew a straight stitch close to the turned edge.
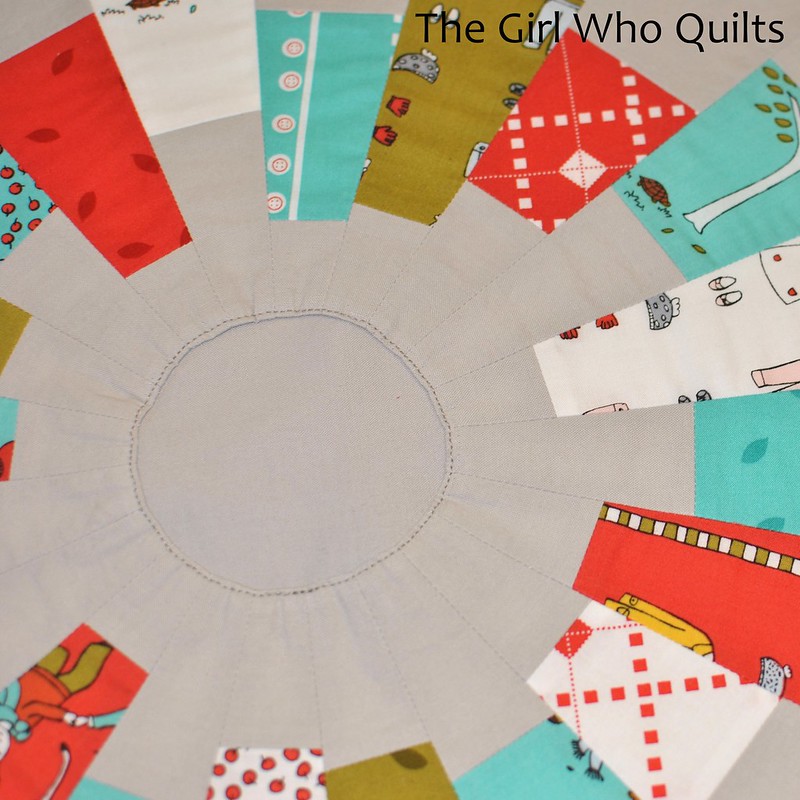
Modern Dresden Plate Tutorial

You've completed your first Modern Dresden Plate! Piece several of these blocks together to create a larger quilt, or baste and quilt a single block to create a mini quilt. If you use this tutorial, I hope you'll share your creations! Feel free to add pictures to the flickr group.

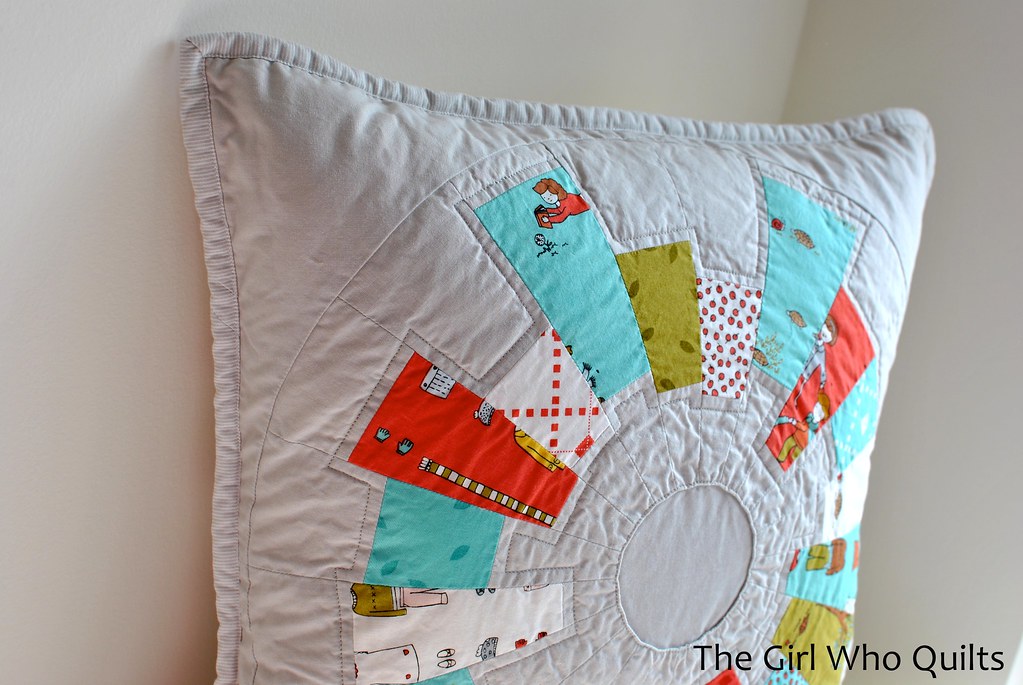
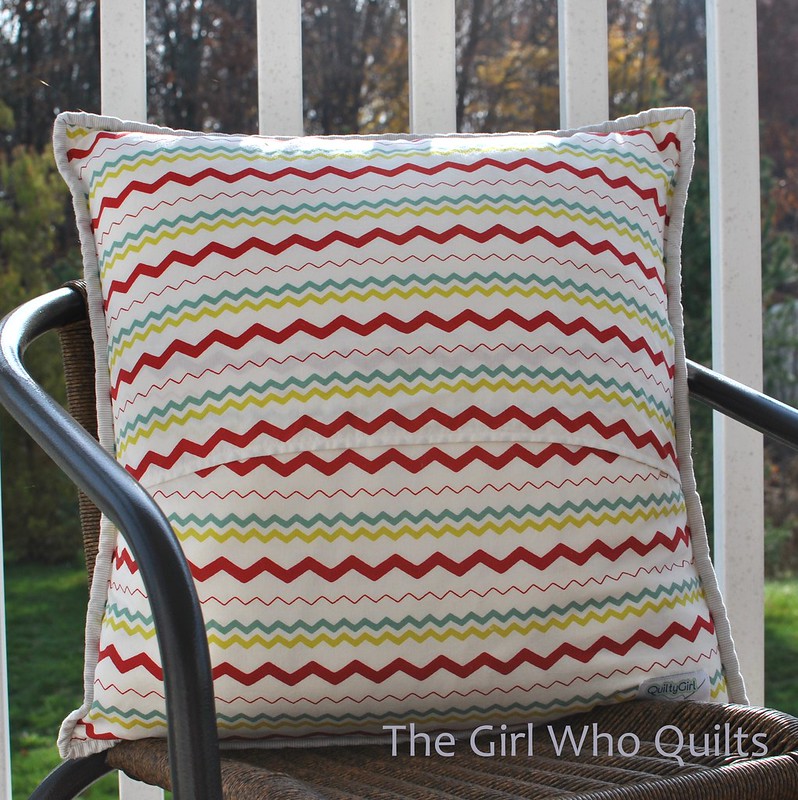
I finished this block with some outline quilting and added an envelope closure and some binding to create a 20" pillow. I think this pillow would be a great addition to a child's reading nook!

Modern Dresden Plate Tutorial

Modern Dresden Plate Tutorial

Modern Dresden Plate Tutorial

I've added this pillow to the shop.

Feel free to contact me with any questions!

And also, a huge thanks to my sister for creating the PDF templates for me, just 2 weeks before her wedding! :)