Thursday, December 29, 2011

9-Patch Puzzle


Wow, it's been quiet around here! I have lots of fun Christmas gifts to share now that they are safely with their respective owners! To start off, I'm going to share one of my favorites.
DSC_0034
I'm sooo excited to finally share this quilt! One of my most bestest friends has had a very rough year, and I wanted to do something special for her and her two kids for Christmas. I decided to make each of the kids a quilt, and this is what I came up with for her daughter!
I started off with a layer cake of Sherbet Pips, which I was holding on to for a very special project. I was planning to make a Disappearing 9-Patch using the 10" layer cake slices as a base, but decided that I wanted to cut the prints into smaller chunks. That's when I got the idea to create my own sort of "disappearing" 9-patch, which I'm now calling the 9-Patch Puzzle!
DSC_0020
I began by making 40 blocks using a method similar to the Crazy Nine-Patch at Oh Fransson!. (In the photo above, the pink solid border surrounds 1 9-patch puzzle block.) Then, to keep with the theme of "9's", I grouped the 9-patch puzzle blocks into 9 units that fit together much like a puzzle. I wanted to highlight those 9 different units, so I added a thin solid border around each unit. Not paying close attention to my design, I ended up with a few gaps between the units. I used the scarf print from Sherbet Pips to fill those gaps, which I love!
A 2x1 layout with grey solid border:
DSC_0021
A 3x3 layout with a light pink border and a 1x3 layout with a red border:
DSC_0052
Assembling the units and "filler" pieces required some patience and lots of y-seams, but I actually enjoyed the puzzle aspect of this project. Plus, sewing y-seams is really easy and looks so striking!
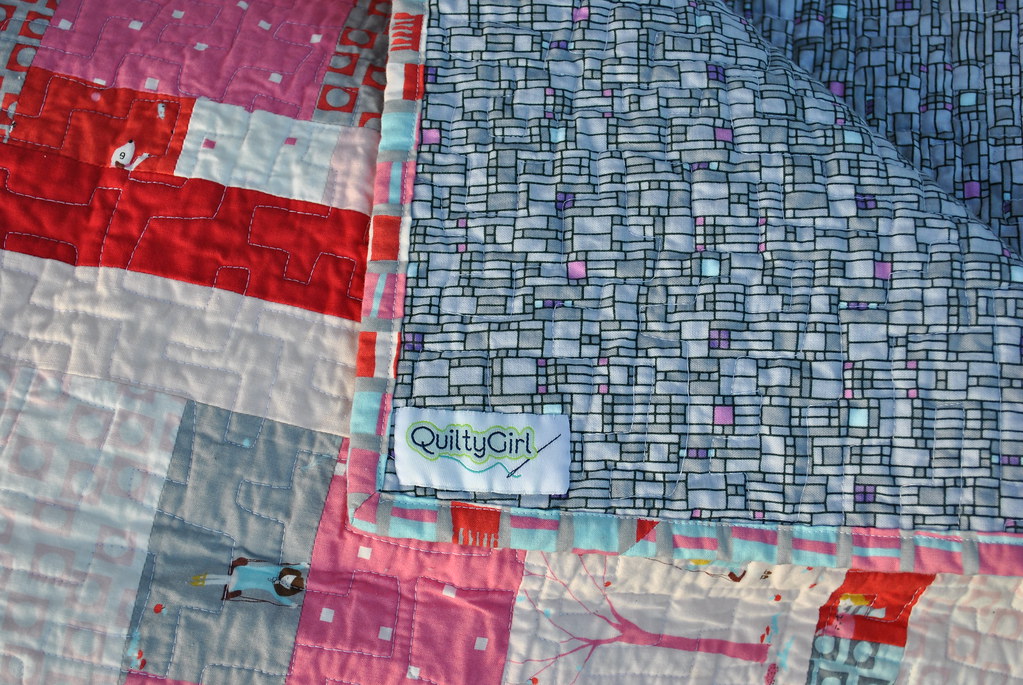
I knew pretty much from the beginning that I wanted to quilt this piece using square meandering. It is very time consuming, but I LOVE the effect that it has. Plus I think that it plays up the puzzle theme really well!
DSC_0036
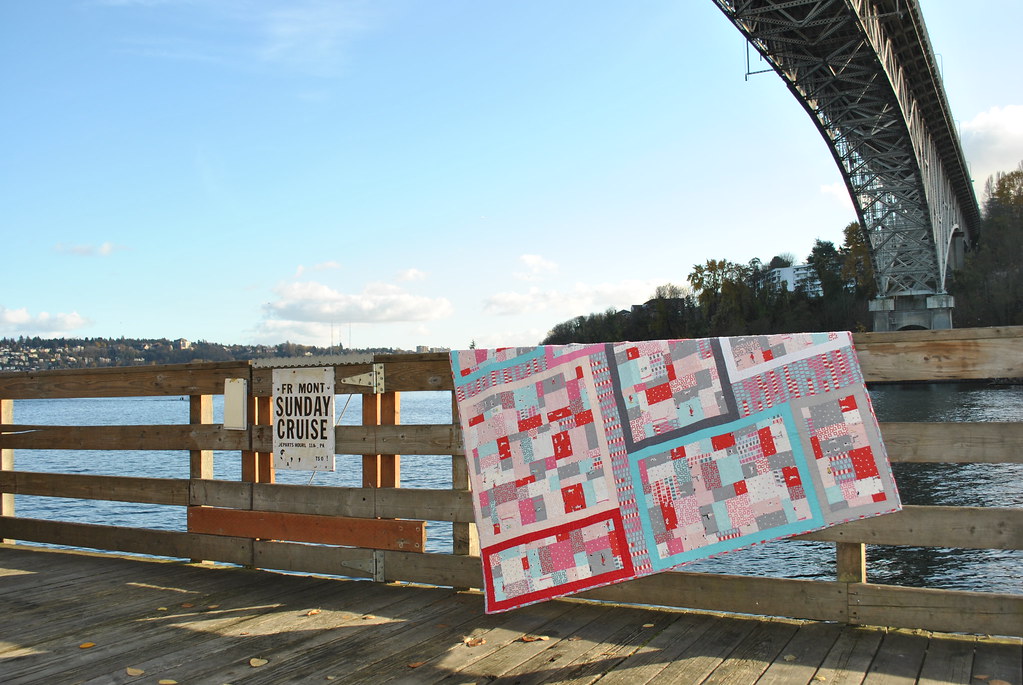
9-Patch Puzzle!
DSC_0018
I really love this quilt, but I was also very excited to give it away. I know it will be well loved by a sweet little girl, and that's the very best compliment a quilter could ever ask for!
DSC_0042

Tuesday, November 29, 2011

Versatile Blogger Award!

A few weeks back not one, but TWO lovely ladies gave me the Versatile Blogger Award!
A huge thank you to Chelsea at pins & bobbins,
and Jenny at Sew Kind Of Wonderful!

Make sure to check out their blogs, they are both WONDERFUL! Chelsea has ordered a long arm, and I'm anxiously waiting to see what she creates with it. Jenny also has a long arm, and her quilts are amazing.

Now, let's see, I'm supposed to share 7 things about myself:

1. I ran my first marathon Sunday, November 27. Yes, 2 days ago. Not too sore, thanks to the torturous post-run ice bath...
2. I applied for graduate school on Monday, November 28. As in yesterday.
3. Within 5 minutes of submitting my application to grad school, I realized that I had messed up part of it. (No redo's. Whoops.)
4. I didn't fall madly in love with Seattle the way that I thought I would. I like it here, but it's quite different from the midwest. Chicago will always be "home".
5. I never, ever crave popcorn. In fact, I will tell people that I don't like popcorn. But if Matt makes some and I have a little bit, I can't stop eating it.
6. I am totally and completely addicted to Red Mango fro-yo. I eat it almost once a week. (At some point it would probably be cheaper for me to just buy an industrial fro-yo machine!)
7. My biggest pet peeve is when people talk politics and get angry, blaming everything on the other side (whichever side that is). I'm not sure why they think that angry will change people's minds, but as a middle-of-the-road thinker such as myself, it's just a giant turn off. (Lather, rinse, repeat when it comes to religion.)

Wow, I think I hit on all of the hot topics in this post, who would've thunk it?? :)

And now, I'd like to award the following with the Versatile Blogger Award:

1. Michelle at CityHouseStudio
2. Sarah at BlueSusan Makes
3. Linh Vu at Elvy Crafts
4. Felicity at Felicity Quilts
6. Kirsten at Gemini Stitches
8. Val at PinkPlease!
9. Heather at Crafting...
10. Gail at Probably Actually

Make sure to check out all of their wonderful blogs! And thanks again to Chelsea and Jenny!

Thursday, November 10, 2011

A Mendocino Bedroom!

I finally have a few images of Addy's big girl room to share!
First up, her big bed with coordinating pillows:
 Another shot (this is from the doorway):
 The fun wave mirrors we found at IKEA on clearance! (The white door leads to the bathroom, the stained door leads to the kitchen. Confusing, I know.)
 If you're standing where I was when I shot the above photo, the closet door is to your left. And next to the closet door is this awesome toy box. My mom's friend hand painted it as a gift before I was born. LOVE IT.
And there you have it! A small room with a giant bed for a cute little girl. :)

Monday, November 7, 2011

Potholders and pillow cases!

A few weeks ago I was wandering through a fabric store when I found one of those Alexander Henry prints. If you've seen then, you know what I'm talking about: the prints featuring shirtless men. Yeah, *those* prints.
There happened to be a print with firemen on it, which made me think of my mother in law. No, she's not a man, nor is she a fire fighter. But, my father in law is the mechanic for their fire department, and a few years back he was part of the yearly calendar. For the entire month of May, many calendars were open to a pic of my father in law, shirtless, posing with his toolbox, fire engine in the background. Having three boys, I don't think my father in law will ever live that down. But my sweet mother in law insisted on having the calendar set to May for the entire year. (It may still be up at their house, I haven't checked recently!)
So anyway, I decided that my mother in law needed a pillow case made from this fireman fabric. And being the equal opportunity shop that it was, I was able to find an equally awkward print suitable for my father in law.
Who wouldn't want to receive these awesome pillow cases from their daughter in law? Well, a lot of people, I guess. Luck for me, my in laws have a great sense of humor and they seem to appreciate my quirky gifts!
Now you're probably wondering how this could possibly relate to potholders. Or maybe you've already forgotten the title of this post. Well, in truth the two have little to do with each other. See, I included a Halloween picture from Addy in with the pillow cases. We had another picture to send to my parents, and I wanted to include something hand made. I haven't made potholders in a looong time, so I thought I'd use some of the fun fruit fabric that popped up at the quilt shops recently!
The strawberry potholder is a square in a square in a square. The orange potholder is my first try at a wonky star!
 A fun batik on the back, quilted with organic lines.
 Random straight line quilting, another of my favs! (The back of this one is the lime green print used in the border.)
I used insul-brite for batting in these potholders.
Finished size 9" square.
So there you have it, 1 blog post encompassing innocent potholders and scandalous pillow cases. I'm happy to report that the gifts were loved by all. Do I know my audience, or what? :)

Thursday, November 3, 2011

An Aviary Mini

I had some Aviary 2 scraps left over from this quilt, and I wasn't sure what to do with them. Then I had an impromptu sew-in at a friend's where I was admiring all of the mini quilts she has made. So the next time I was staring down the pile of Aviary 2 scraps, I knew just what to do!
 I tried to go with the flow and do some improv piecing. I also went with an organic straight line quilting style, which I LOVE! It was so easy and fun to do, and I think it goes great with the piecing in this quilt.
 For the back I used a large chunk of the only print that I had left, along with some solids.
Finished size is 20"x20"
Fabrics are Aviary 2 and Free Spirit solids

I think there are lots more minis in my future! In fact, I have a fabulous idea to incorporate some mini quilts into the photo wall that I'm creating in our dining room.
Oh, speaking of mini quilts, I was thinking of setting up a swap. Would anyone be interested in that? We can wait until after the rush of the holidays, if that works best. Leave me a comment if you'd be interested!

Monday, October 31, 2011

Another Update!

I have a habit of writing up blog posts and scheduling them to post later, sometimes weeks later! So by the time my last FWQAL and LBS update posted, I had more to share! Here is what I have done now:
12 New Blocks
 The whole group! 30 so far!
The group is at week 22, so that's 44 blocks. I'm behind by 14, yikes! Unfortunately I think this project may just continue to lag behind, because it's going to take a back seat to my holiday sewing. Hopefully I can get a few done along the way. We'll see how that goes!

I'm all caught up with this group! 2 blocks to go, I'm hoping to finish the quilt up before Christmas!

Saturday, October 29, 2011

Prince Charming for a Princess

It's time for Blogger's Quilt Festival again! This is my second round participating, and I have a really special quilt to share. I made this quilt recently for one of my closest friends.

Amy'sCreativeSide

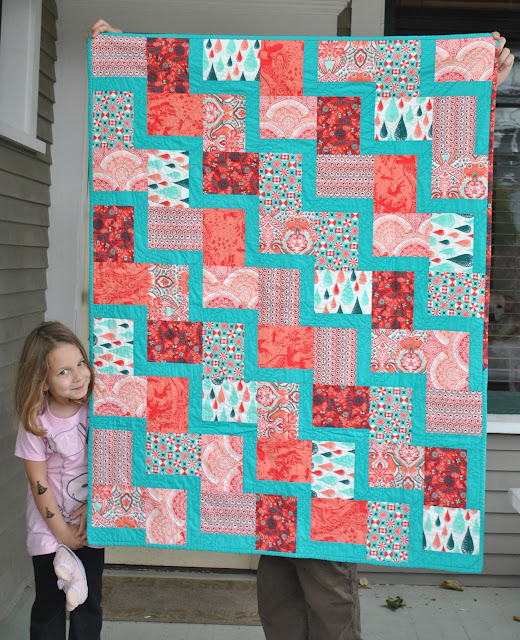
This quilt is for Stephanie, one of my best friends, who is expecting her third baby and her first girl! I had a rough time starting this project because I wanted it to be perfect. I have been itching to create a zig zag quilt for awhile, so I decided to start there. The directional prints in the Prince Charming line were a challenge, but I love how this quilt turned out!
I have had this zig zag quilt pinned on my pinterest board, and I love how the white zig zags are narrower than the colored zig zags. I found a really great Pat Bravo teal solid that matched the Prince Charming line, and decided to use the solid for the narrower zig zag. As I pieced the quilt together, I decided that I didn't like keeping the prints organized in the zig zags, though. The directionality of the prints was a lot more distracting in that layout, so I mixed up the prints and kept the solid zig zags consistent.
Once the top was pieced, I struggled with the quilting. The perle cotton hand quilting craze inspired me, but the perle cotton that I bought was too heavy. I tried to hand quilt a few zig zags, and it was just impossible to pull the thread through the quilt layers without straining my hands a ton! I started bouncing some ideas off of my running/quilting/chatting/drinking friend, and she suggested quilting diagonal lines contrary to the diagonal pattern of the zig zags. I chose to quilt the lines sparingly, because Stephanie recently told me that she liked the softness that is lost in dense quilting.
So, here's the quilt!
 Do you see the binding in the upper righthand corner? I was short by 1 binding strip, and the shop was sold out of the teal solid when I went back. I decided to use one of the darker prints from the top, even though it wasn't my favorite. I think the dark print was a great choice, though, because it seems to blend in well!
For the backing I used part of a thrifted bed sheet. It was so nice to not have to piece together a backing!
 A pumpkin and a quilt. Can you spot the garden gnome?
I sent this quilt off with some cute little girlie summer clothes (for next year) and a pair of newborn longies. After 5 years of dinosaurs and firetrucks, I'm sure this package was just the beginning of the pink!
As soon as the package arrive Steph let me know that she loves the quilt and her boys had a great time digging through the baby things and admiring the tiny girl clothes. I can't wait to see them love on their baby sister!

Thursday, October 27, 2011

A cheerful little runner

Right now our dining room table and kitchen island are sporting festive Halloween runners, I blogged about them here and here last year. So, while we are currently all decked out for the autumn holidays, I decided to sew up a bright, cheerful runner for our kitchen island. I figure we will need something pretty to look at as the dreary winter sets in. ;)
I started with a Dream On charm pack, and sewed the charms into rows. To offset the rows, I cut 2 charms in half and sewed the halves to alternating ends of the long rows of charms. I quilted the runner in a loop pattern that I've been seeing a lot lately. I changed my loops slightly by alternating their size, and I opted for light quilting, with just 1 loop in each charm. It was really easy to create these loops, and I can't wait to try this on a bigger quilt! To finish off the runner, I used kona in bahama blue for binding, with a tiny piece of kona in bone when I ran out of blue. ;)
If you look closely at this pic, you can see the loop quilting:
 It really brightens up the kitchen!
 For the backing I used a piece from a vintage sheet:
This was a fun, quick project. I have a few more charm packs that would coordinate well with the colors we already have in the kitchen, so next time I need a fast finish I may make a few more of these! (Besides, I will need a few to rotate through between laundry days!)

Monday, October 24, 2011

Ballet Bag

A few weeks after school started, Addy also started ballet classes! She loves the classes, and her only complaint is that she only has class once a week.
The first day was a bit hectic with getting her ready, finding the building, parking, and rushing her inside. On my way out the door, I grabbed my purse, tote bag and a book to read when she was in class. I think I had more "stuff" with me than the mom with 4 kids trailing behind her!
So, in an effort to streamline our ballet class rush, I decided to make Addy a little bag for her things. It's so much easier to remind her to grab her coat and ballet bag!
I used the lunch bag tutorial from Pink Penguin and a Japanese print that I picked up a few months ago at a local shop. This bag is the perfect size for Addy's ballet shoes and a few other small things. During the week I'm trying to remember to store her clean leotard and tights in there with her shoes, and during class I stuff her yoga pants in the bag.
Here is the back of the bag:
 A detail shot of the drawstring closure:
I love the size and shape of this bag, plus the drawstring top is so convenient. It also sewed up really fast-I picked out the fabric, cut, and sewed the whole bag in less than 2 hours! I worked on it one morning while Addy was at school, and all I had left to do after I picked her up was to insert the drawstring cord. I highly recommend this tutorial, it was a really quick project with great instructions. I'd really like to make one of these for myself as a project bag!

Thursday, October 20, 2011

A raincoat for Addy

Now that we live in land of drizzly rain, I decided that Addy should have a raincoat! I pulled out my go-to coat pattern (used here for a winter coat and here for a lighter weight coat) and asked Addy to pick out a laminate at the lqs.
Surprisingly, Addy chose a print without pink in it! And it was nearly a miracle that I had a matching fabric in my stash to use for lining! But not quite a miracle, because I forgot to cut out the sleeves. And then didn't have enough fabric for them - so I used a coordinating print! :)
Here's the coat:
Front details: 
 Velcro closure:
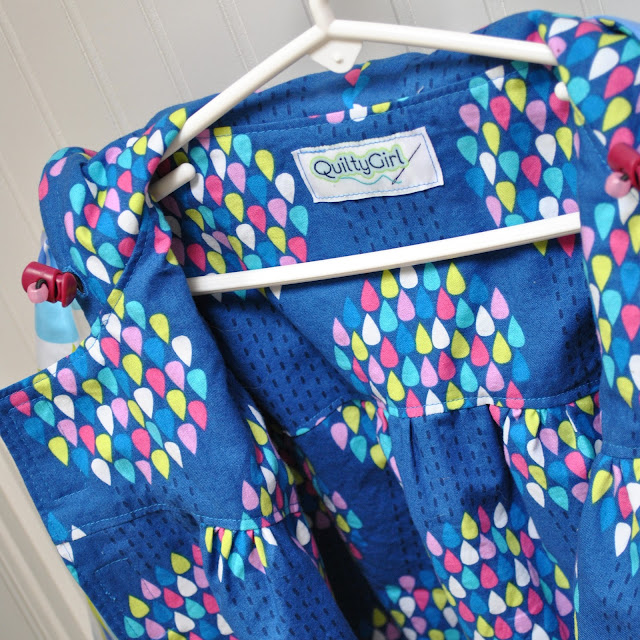
 Lining - raindrops, of course!
 Toggles on elastic cord to tighten the hood. I added this detail because last year her hood didn't stay up very well:
 This is the coordinate that I used for the sleeves:
Coat back: 
 Happy girl!
I really love how this turned out. I wish I had a good pattern for an adult rain coat, but I'm not sure if I could pull off the big flower print. Maybe a simpler print for the exterior with raindrop lining? ;)
Details:
Laminate is from Sunny Daze
I sewed this coat up in a size 5, maybe we'll get 2 years out of it!

Monday, October 17, 2011

A quick Quilt Along update

Right now I have 2 quilt alongs on my plate:
Little Birdie Stitches and
Farmer's Wife Quilt Along

I've managed to keep up with the LBS, which is a really good thing! A few times now I've gotten behind by a month or two, but I find it hard to carve out time to hand embroider. So that is really motivating me to stay on schedule!
I finished up the August and September blocks:
Only 3 months left to go! I'm excited to see the next 3 blocks, and I can't wait to finish this up because I'm going to gift this quilt!

The other quilt along has had less progress. I honestly don't even now how many blocks the group has completed at this point, but I've only finished 4 more since the last time I blogged about it!
Here are my newest 4:
 And here's a group shot! I really love all of these blocks together. I think it's looking really cohesive, which it exactly what I wanted.
Maybe in a few more weeks I'll have a few more blocks to show!

Saturday, October 15, 2011

Custom Diaper Bag in Heirloom

I was pleasantly surprised by how many people love my new Echino tote bag! So many great comments!
One person mentioned that it would make a great diaper bag, and asked if I would take a custom order. I love sewing customs, and she was such a great customer to work with.
I made two small modifications to the original bag - I added 2 bottle pockets to the inside of the bag and a detachable shoulder strap on the outside of the bag.
All of the fabric is Heirloom by Joel Dewberry. The amber colored blockprint is a laminate - we chose to use the laminate on the bag interior as well as the bottom of the exterior. Finished dimensions: 12" tall, 15" wide and 5" deep. The shoulder strap is extendable so the bag can be worn cross-body style on a tall dad or a petite mom.
Bag front:
Front detail with the divided exterior pocket:
 Side with removable shoulder strap:
 All packed up! I stuffed the bag with 2 bottles, 3 cloth diapers, 2 burp pads, 3 bibs, and a change of clothes. I could have fit nearly twice as much in the bag! And the bag held it's shape really nicely when full:
 Here is one of the bottle pockets. I used nylon for these pockets to reduce the amount of bulk:
(Not shown on the interior, I included a zip pocket just as in my Echino tote.)
 Bag back:
 My label!
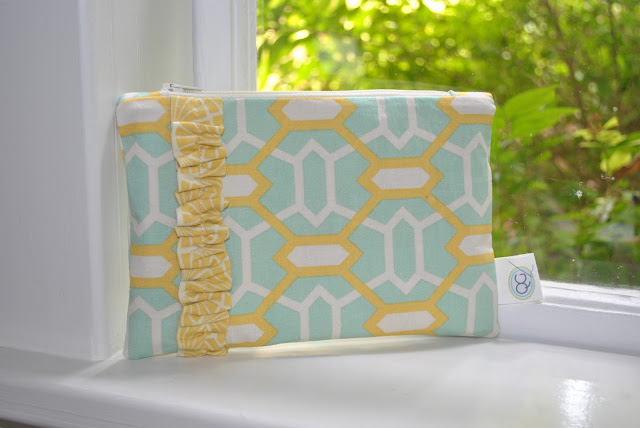
I had a bit of fabric left over, so I sewed up this little zip pouch to send off with the bag. I try to add little extras to my customs when I have the chance. In this case, I thought a small zip pouch would come in handy for storing some cash, ID, keys, and maybe a cell phone. The zip pouch measures 5" x 7". 
It was fun to make up another bag customized for someone else, and in their fabric choices! This bag is so versatile, and I hope it meets the needs of a diaper bag!